Post-back manager
To access the post-back manager section, select Post-back manager settings, em seguida selecione Ações de Bot de mensagens tela.
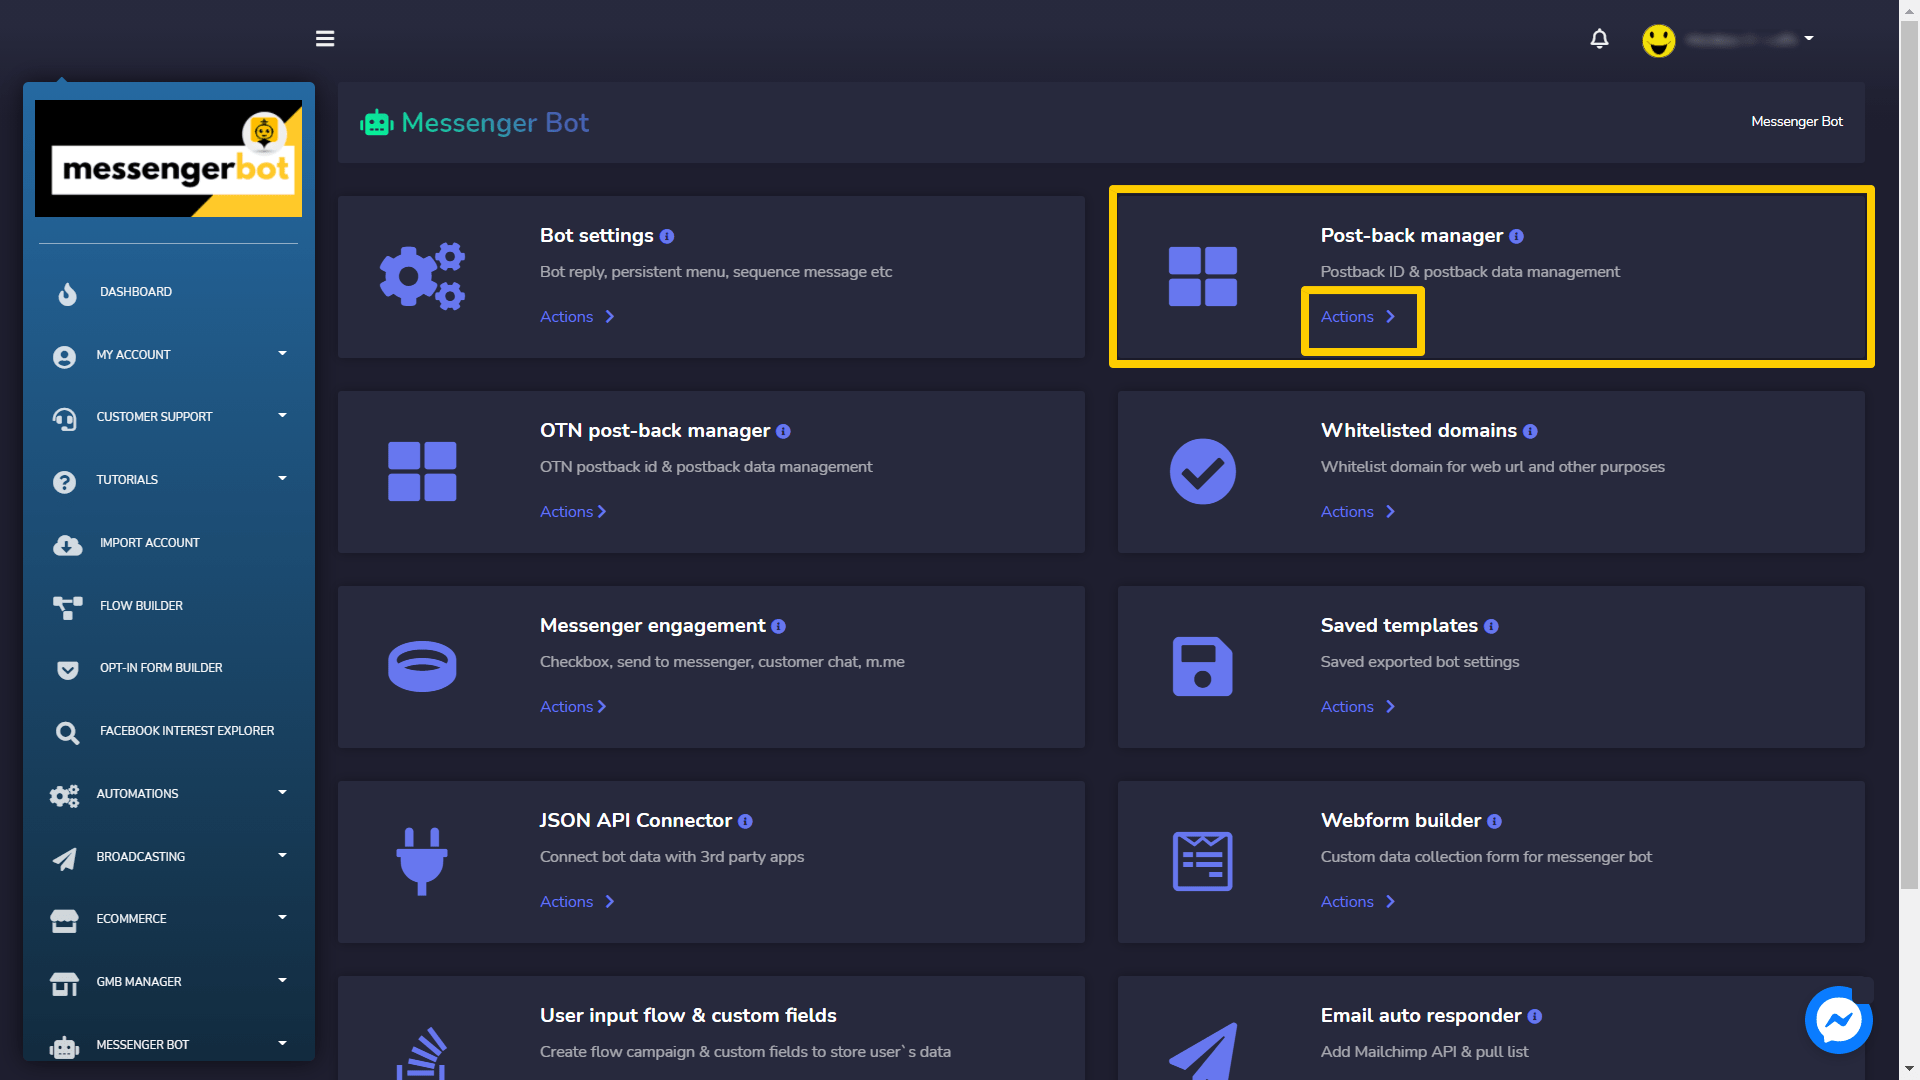
Post-back manager screen consists of a list of templates, you can search for a specific template by using the barra de pesquisa. Você pode ajustar o número of templates to be visualizadas por página. Você também pode organizar eles em qualquer um dos ascending or descending order by selecting the setas from the header.
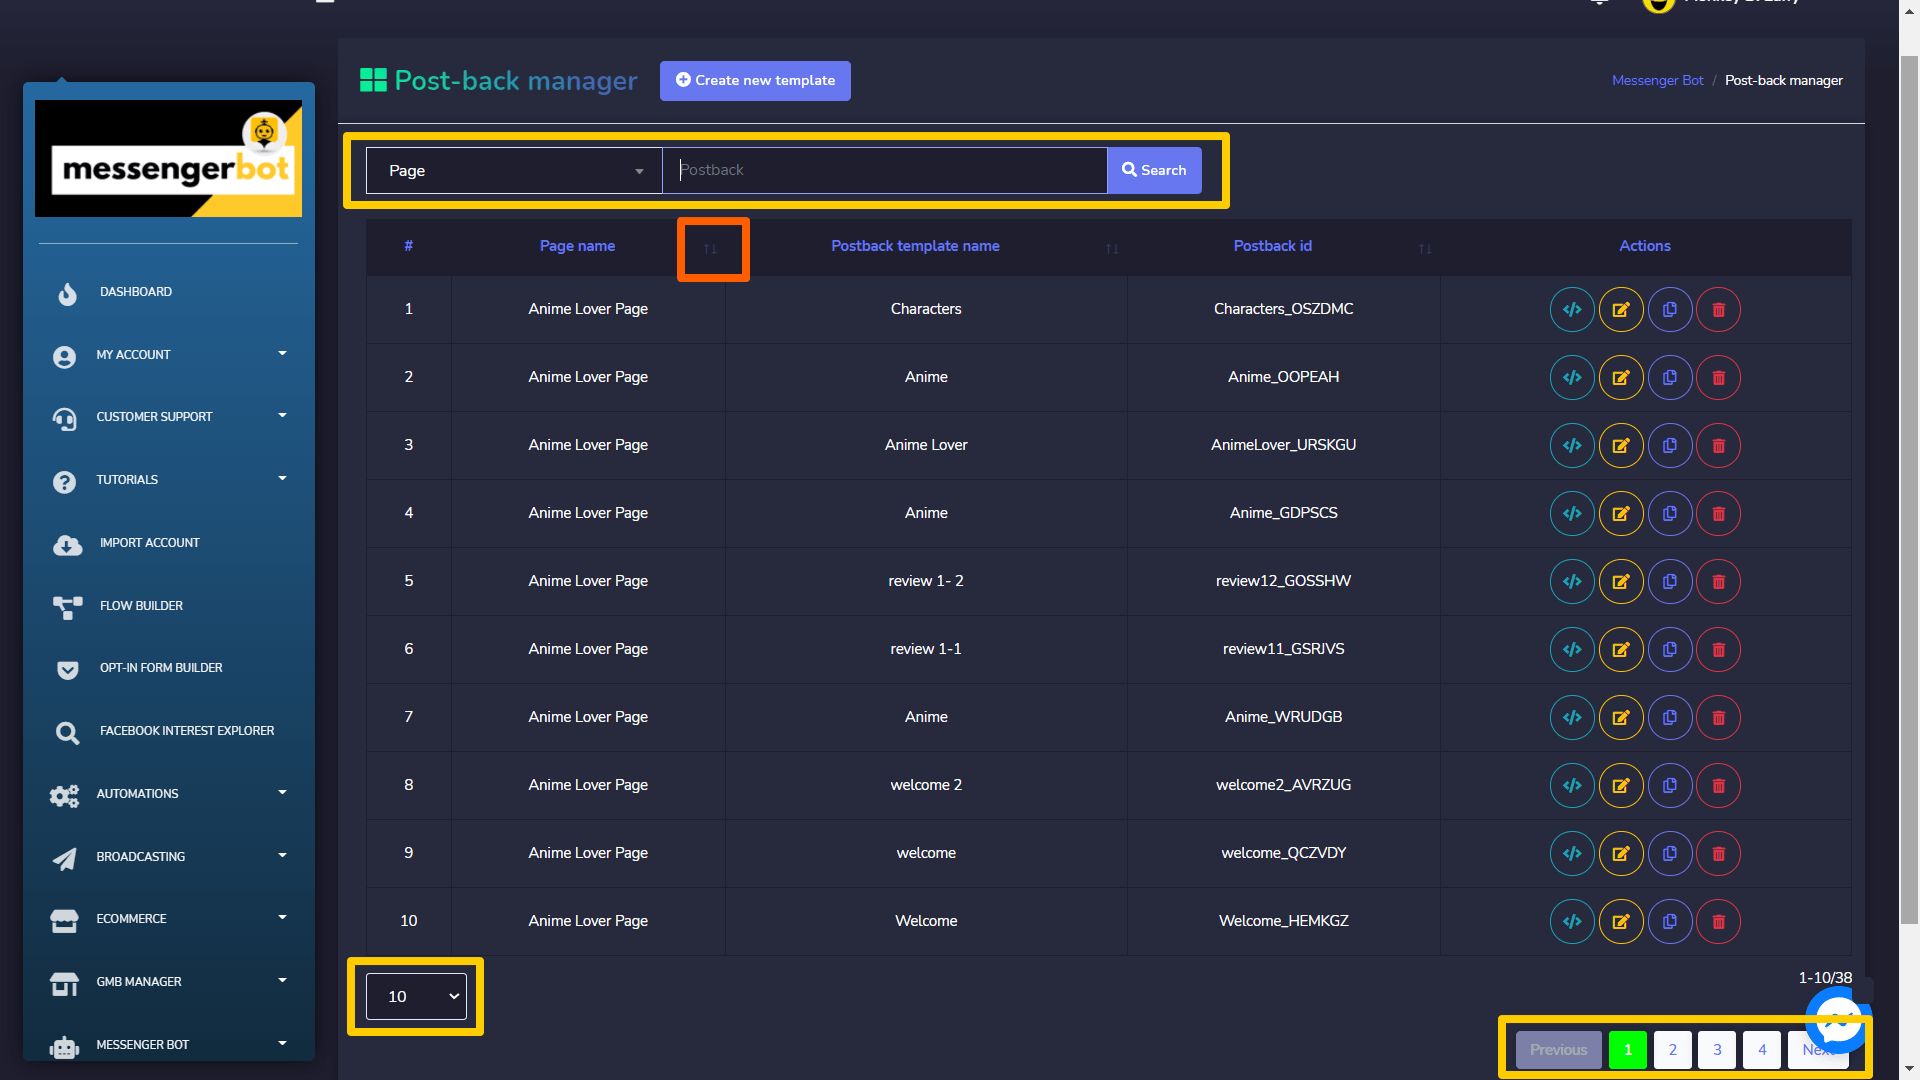
- Copy post-back template: Selecione
 to copy the JSON code which can be used in Messenger or Facebook ads.
 - Edit template: You can edit and update the template
- Clone post-back template: Selecione
 to clone the post back template. Select the template name, postback type, postback id, sequence campaign. Provide a reply and your reply mensagem, em seguida selecione Clonar.
 - Delete the template
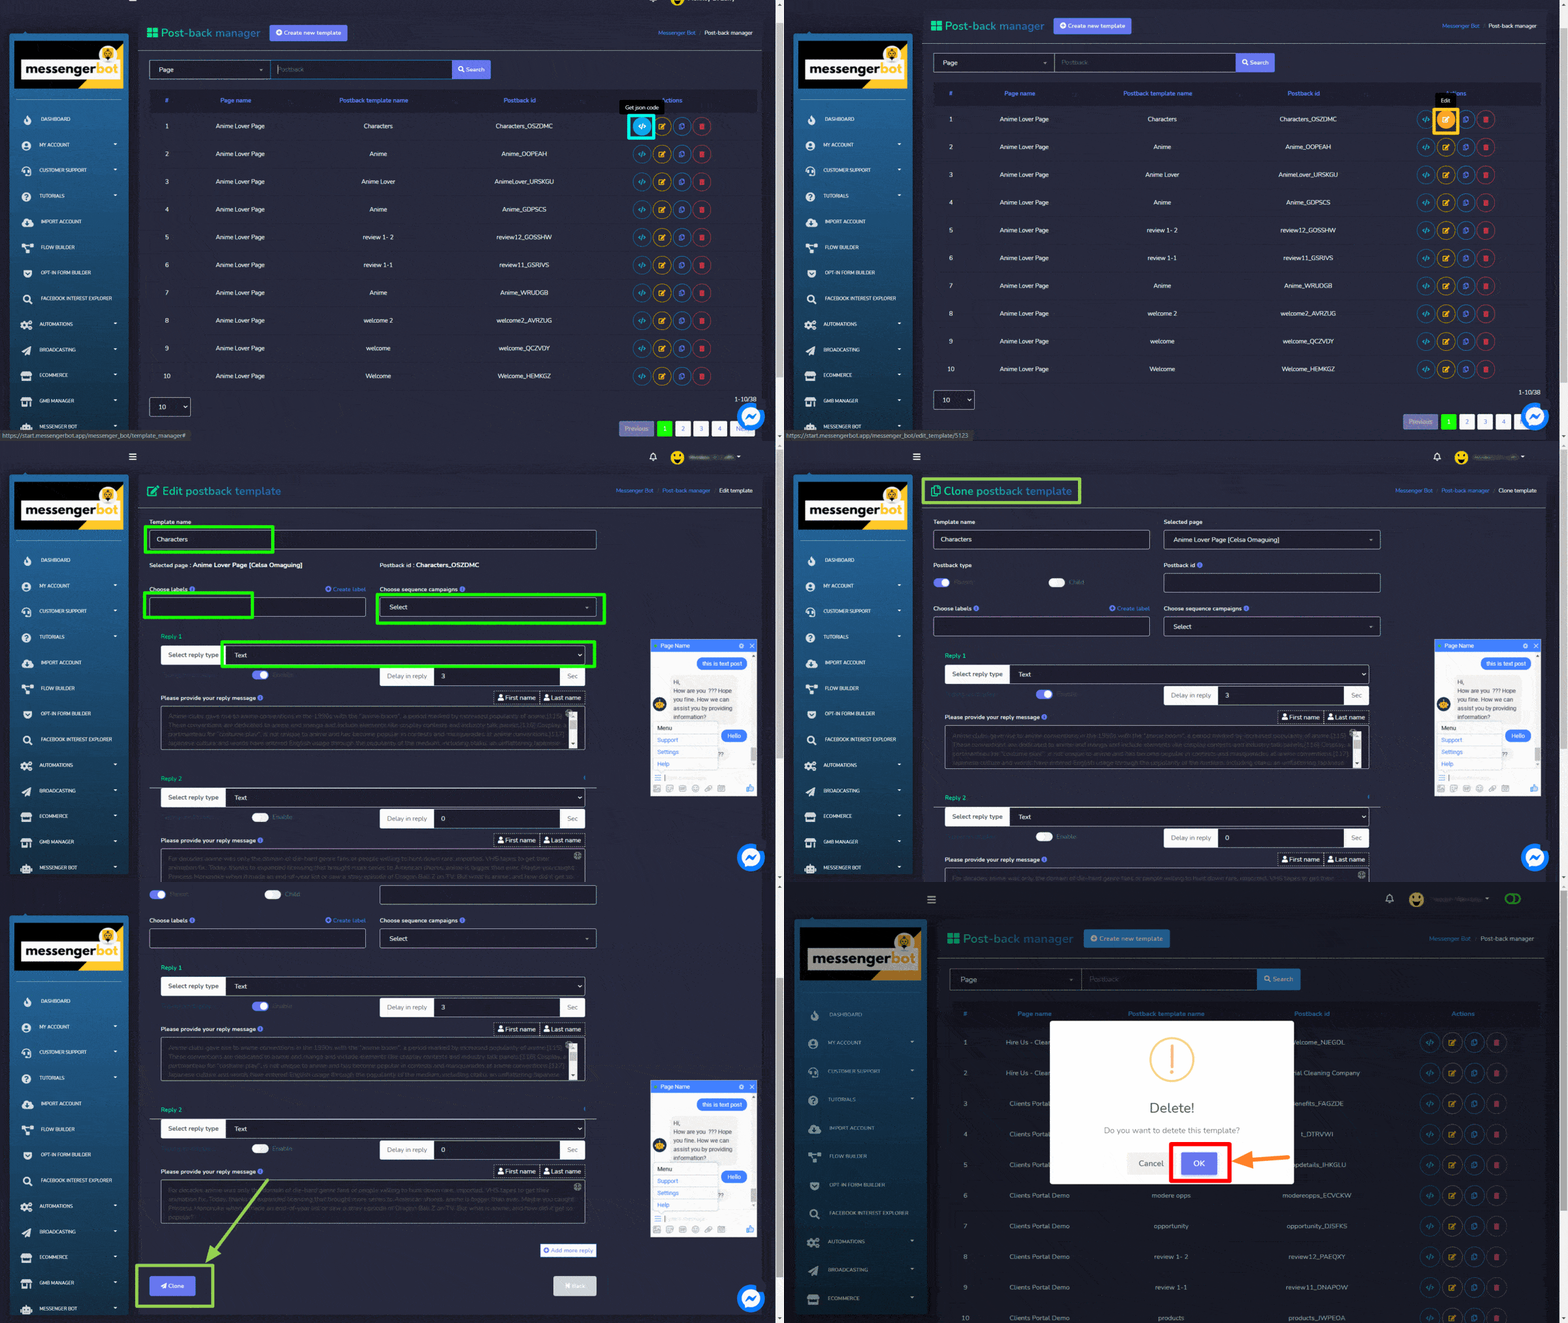
Create new template
You can create a new template by following the steps given below:
- Selecione
 do canto superior direito da tela.
 - Forneça Template name.
- Selecione um página for which you want to create a template.
- Selecione o type of postback, and turn on the toggle button for that option.
- Forneça um Postback id.
- Selecione um tipo de resposta and provide your mensagem.
- Selecione Enviar.
Domínios autorizados
To access the post-back manager settings section, select Domínios autorizados, em seguida selecione Ações de Bot de mensagens tela.
Whitelisted domain screen consists of a list of domains that are added in the white list, you can search for a specific domain by using the barra de pesquisa. Você pode ajustar o number of templates a serem visualizadas por página. Você também pode organizar eles em qualquer um dos ascending or descending order by selecting the setas from the header.
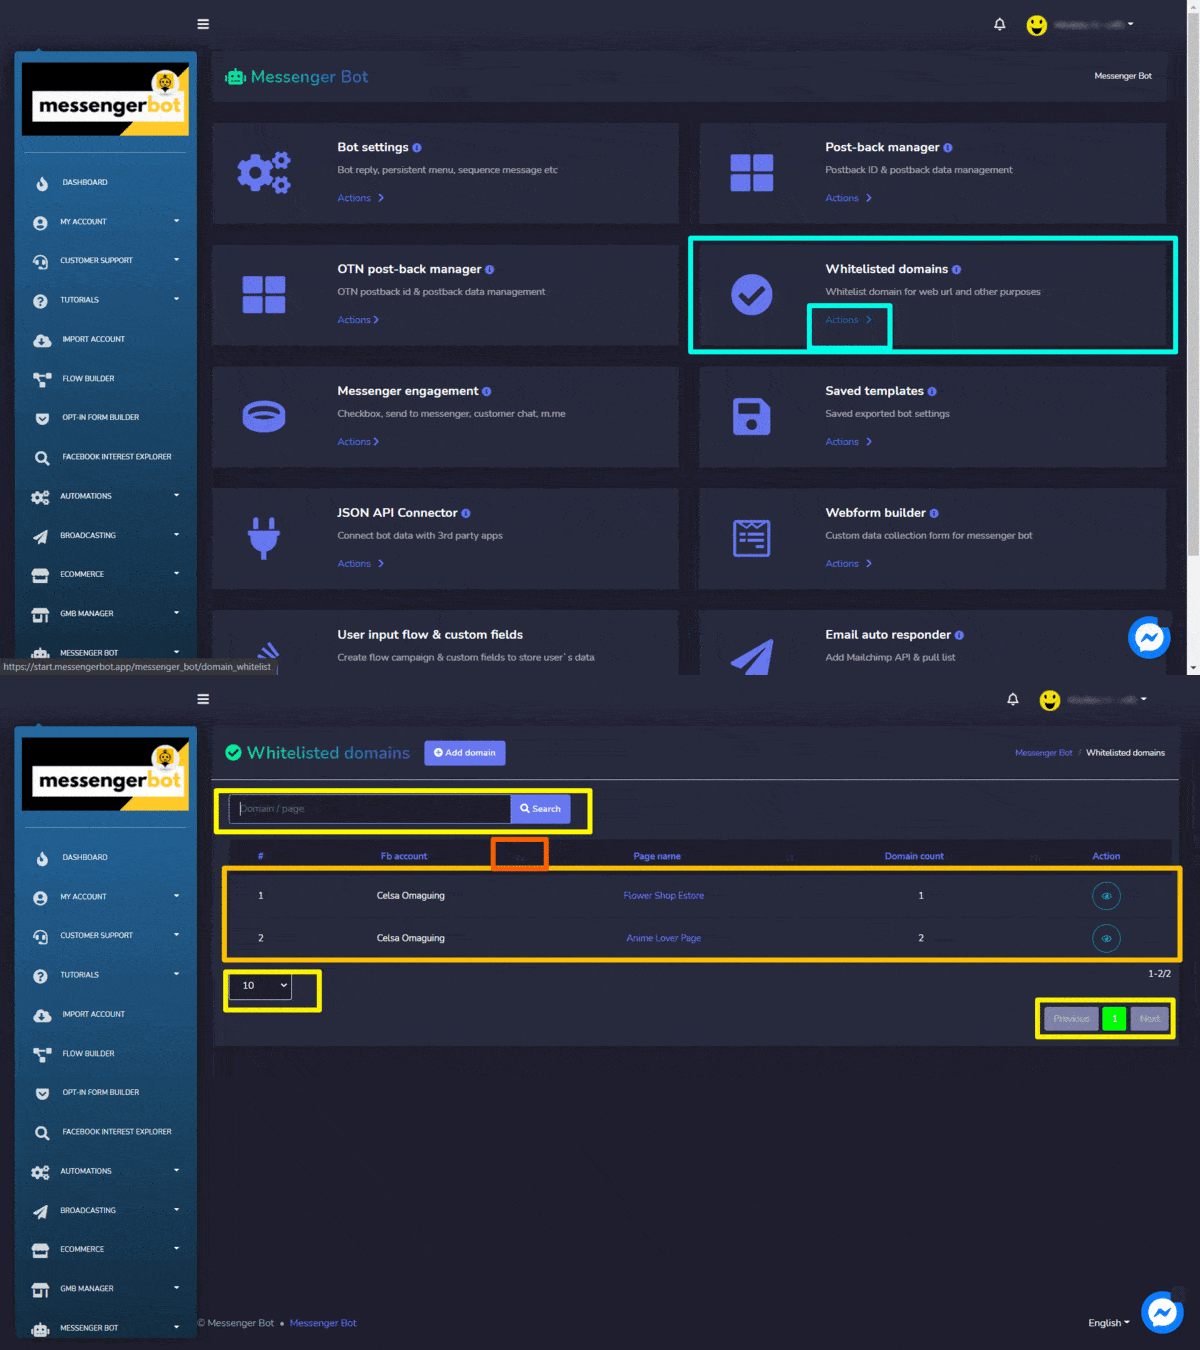
Para realizar diferentes ações nos modelos, selecione ![]() option against the domain you want to perform actions on.
option against the domain you want to perform actions on.
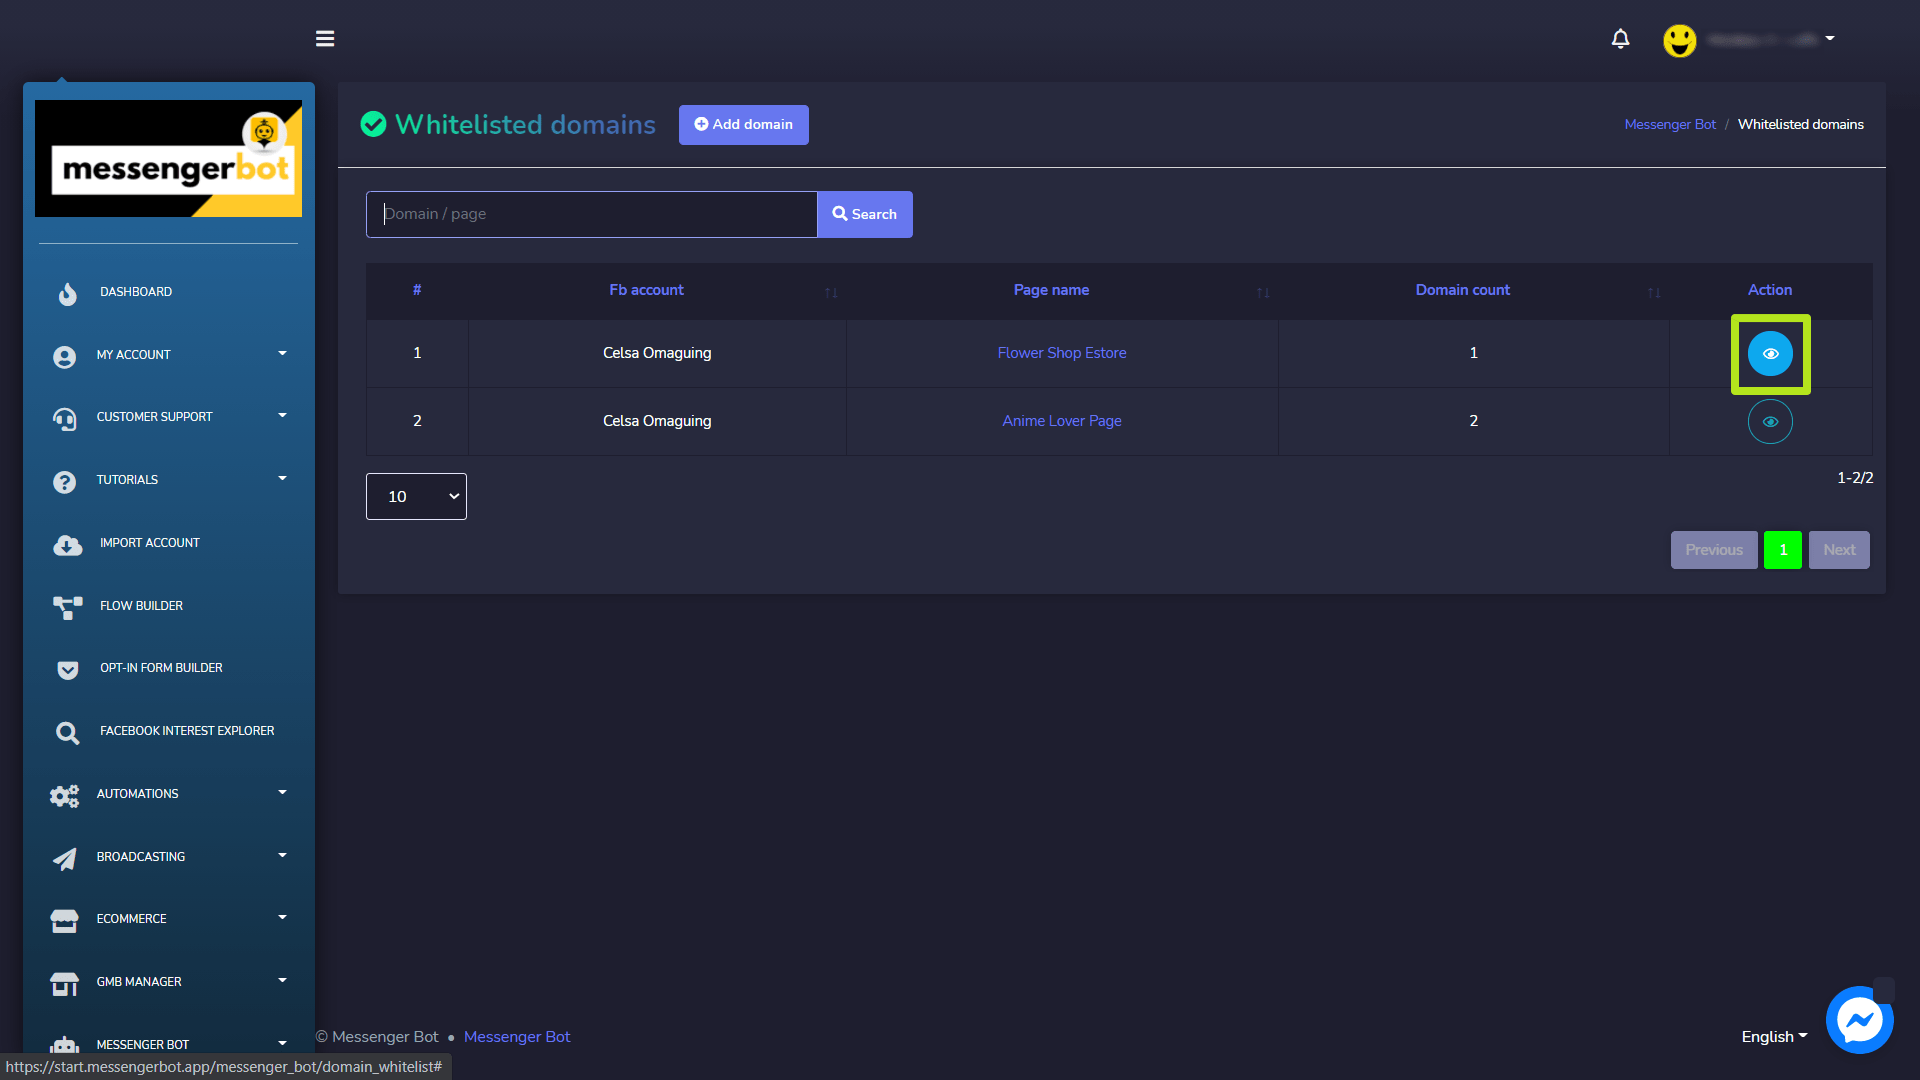
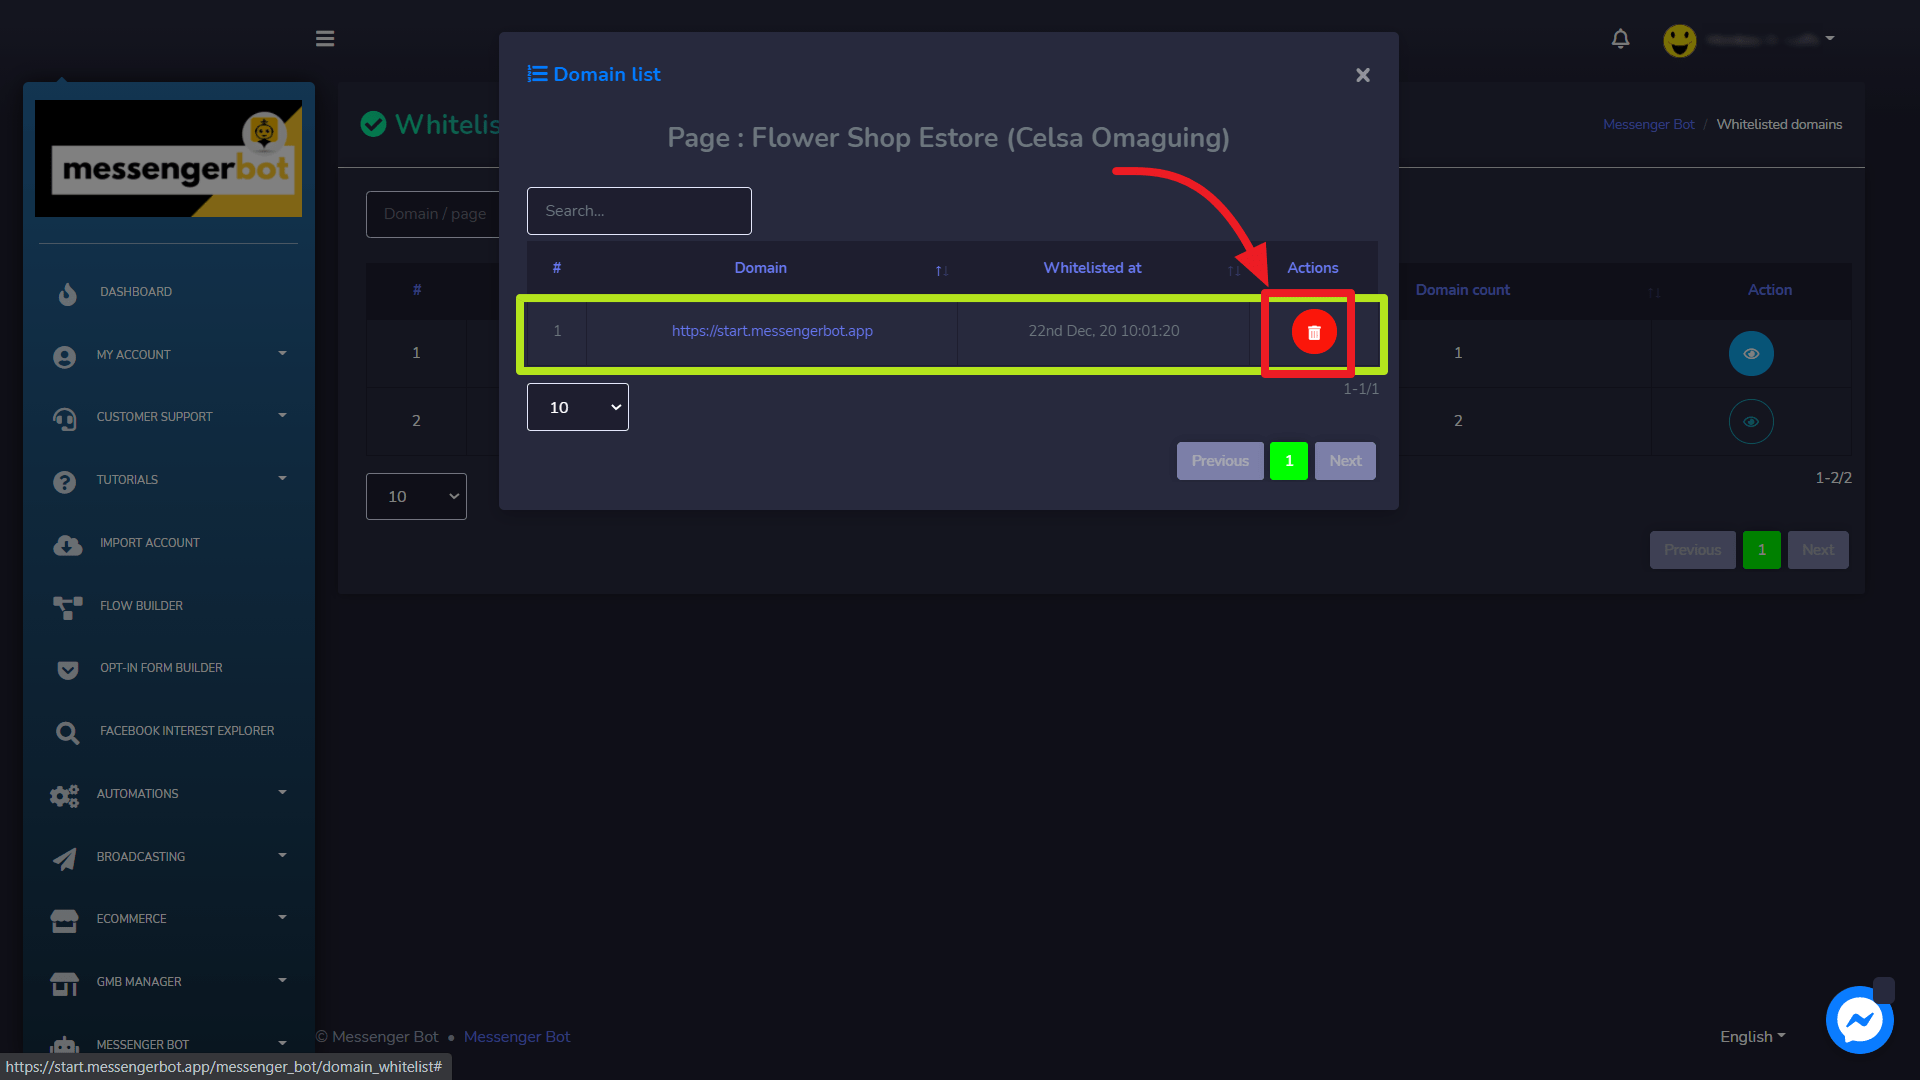
A modal will appear containing the domain list. This displays the time at which the domain was added and the domain name. You can delete the domain by selecting the ![]() ícone.
ícone.
Add domain
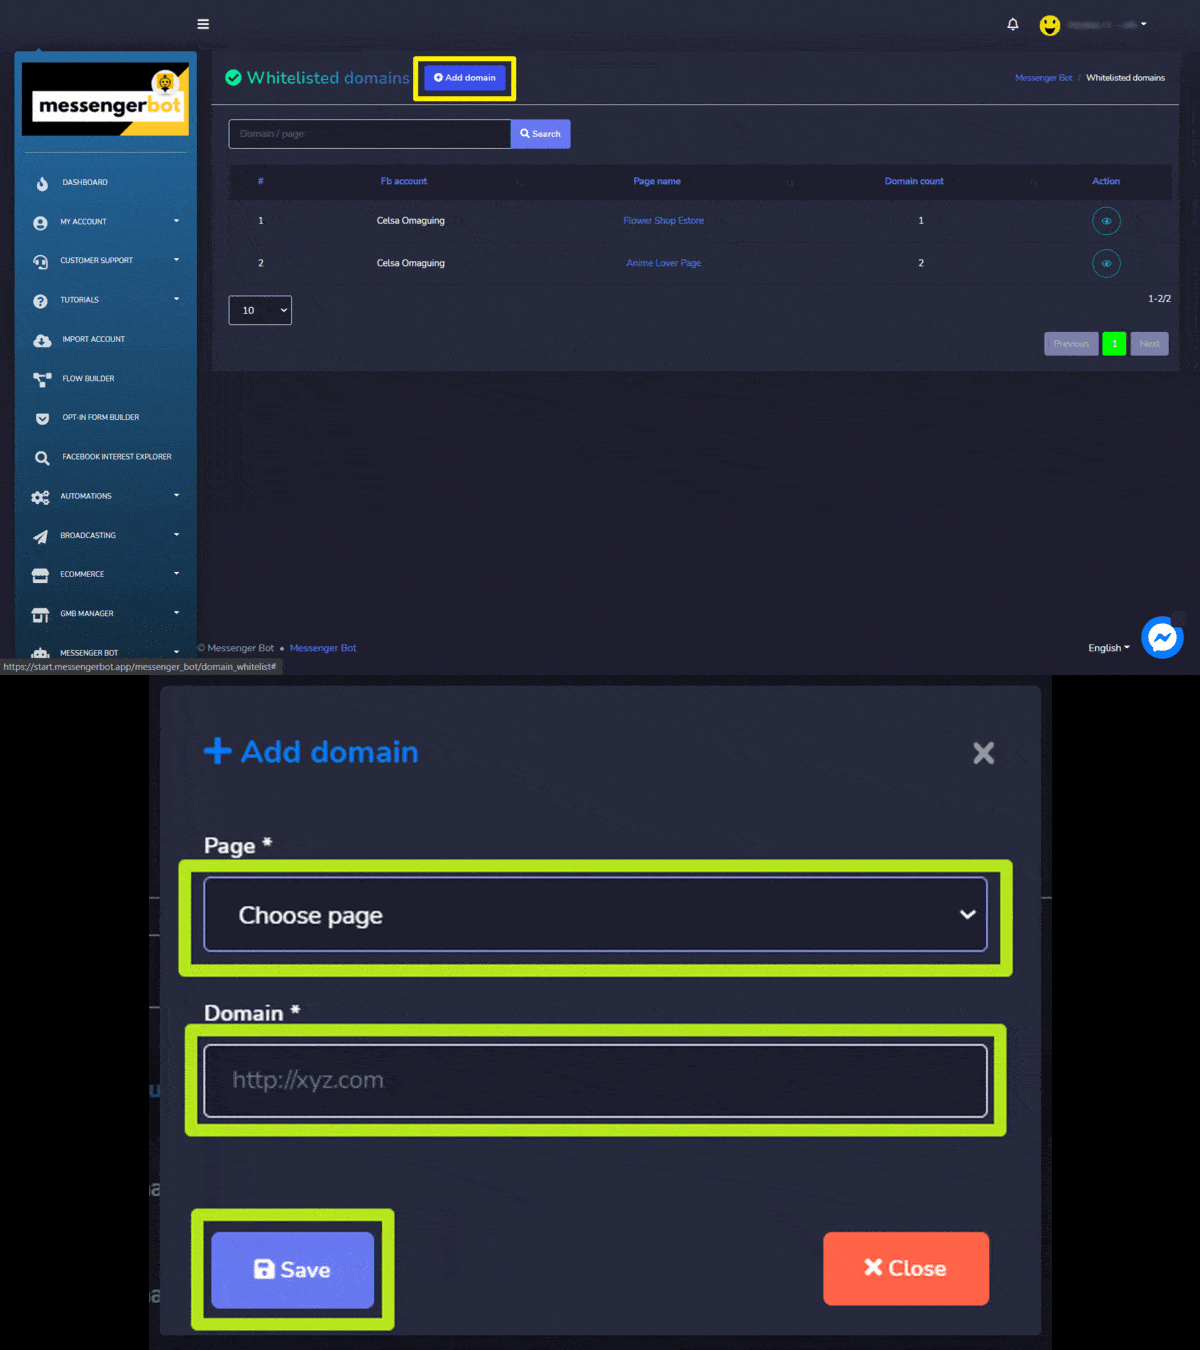
You can a new domain in your whitelisted category. Follow the steps given below:
- Selecione
 from the top of the whitelisted domain screen.
 - A modal will appear. Select the página for which you want to add a new domain.
- Forneça o domain which is to be added to the whitelisted list.
- Selecione Salvar para fazer alterações.
Engajamento no Messenger
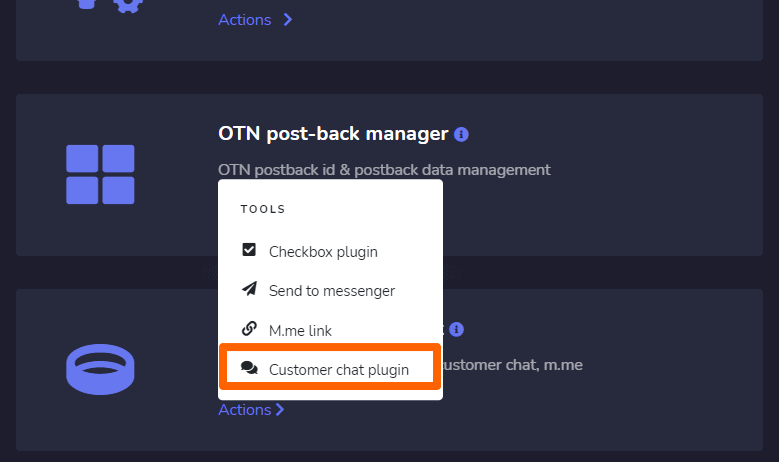
To access the messenger engagement section, select Messenger engagement, e depois selecione Ações da Bot de mensagens tela.
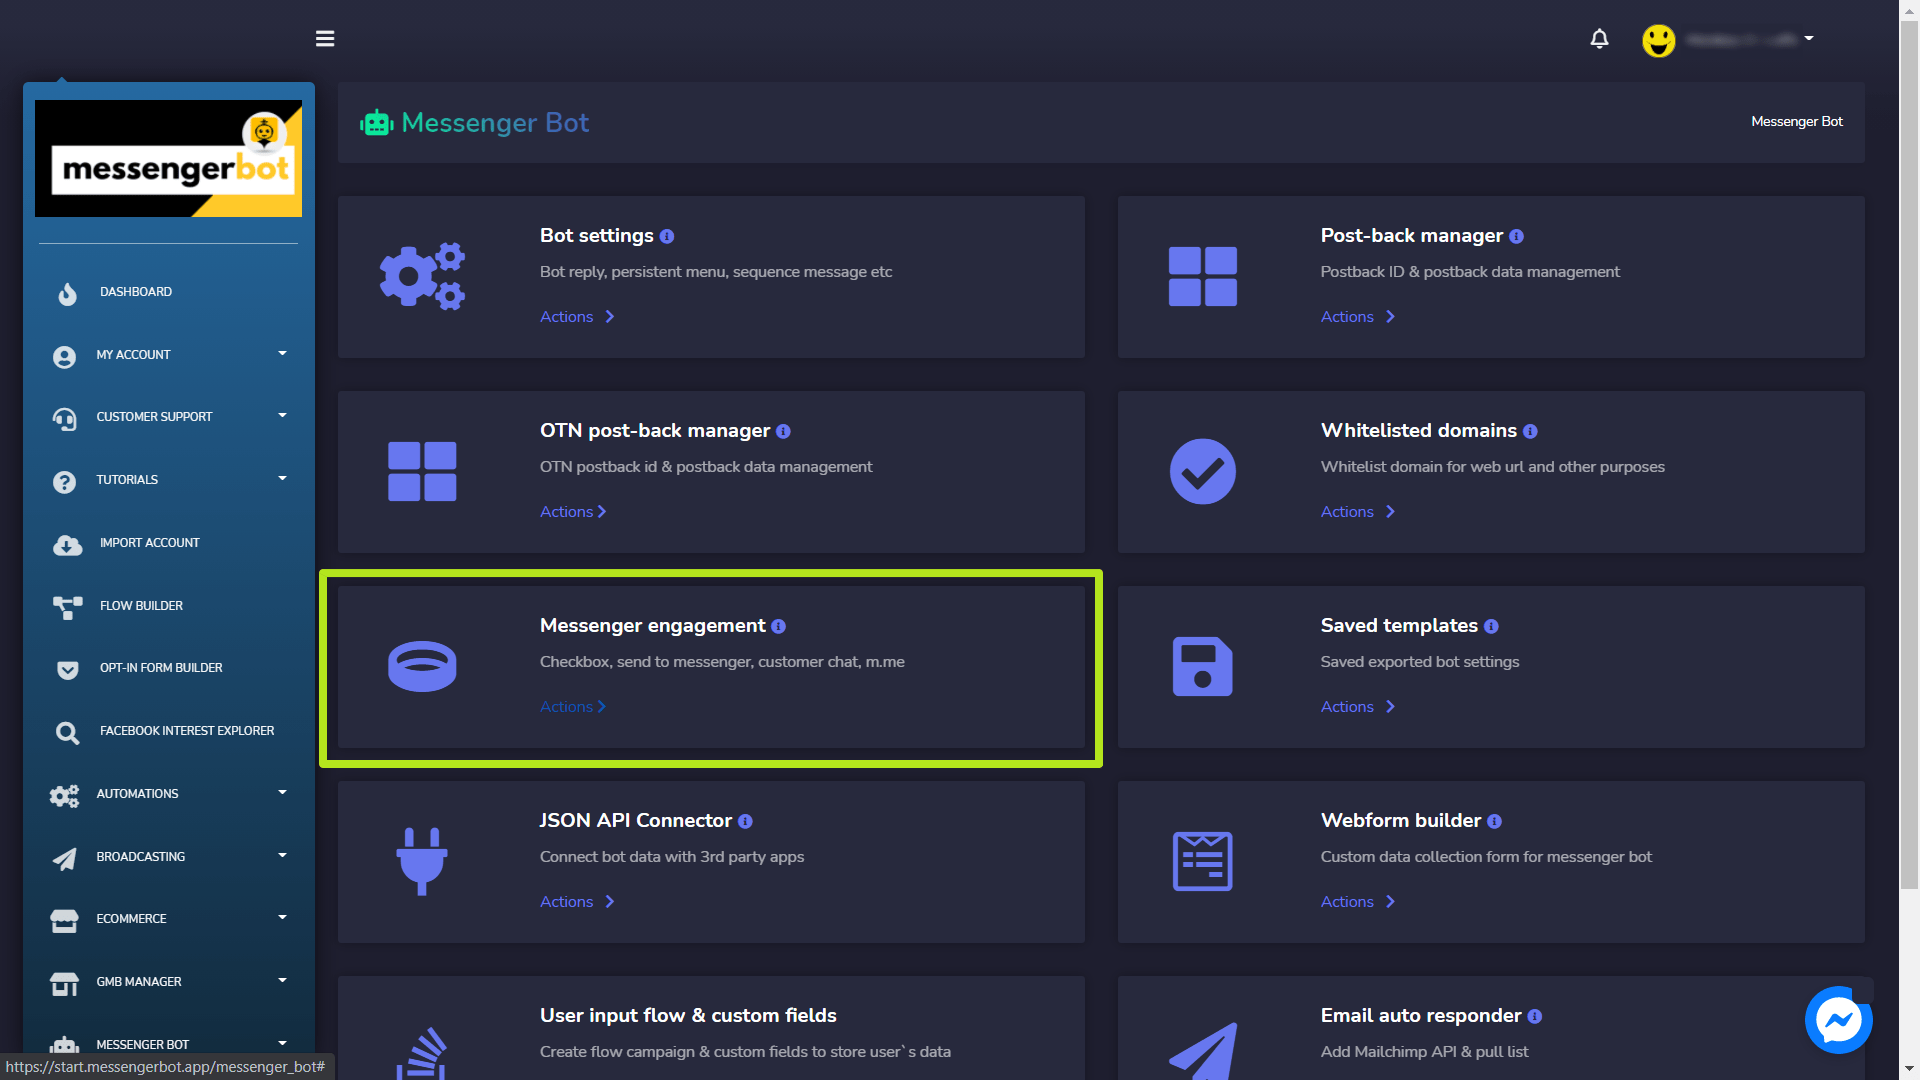
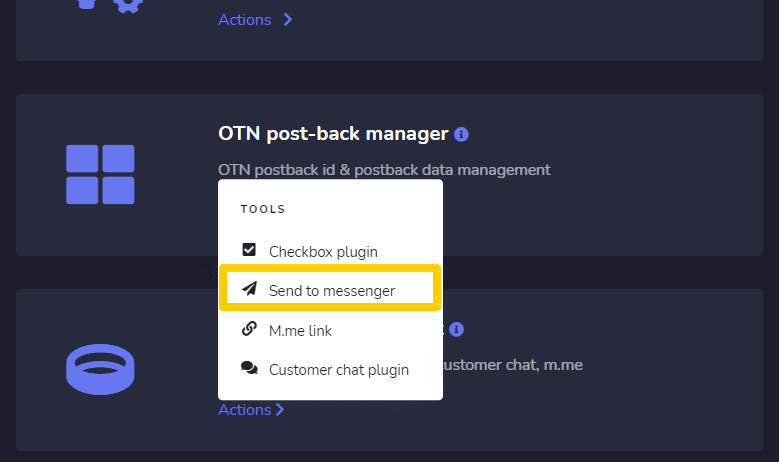
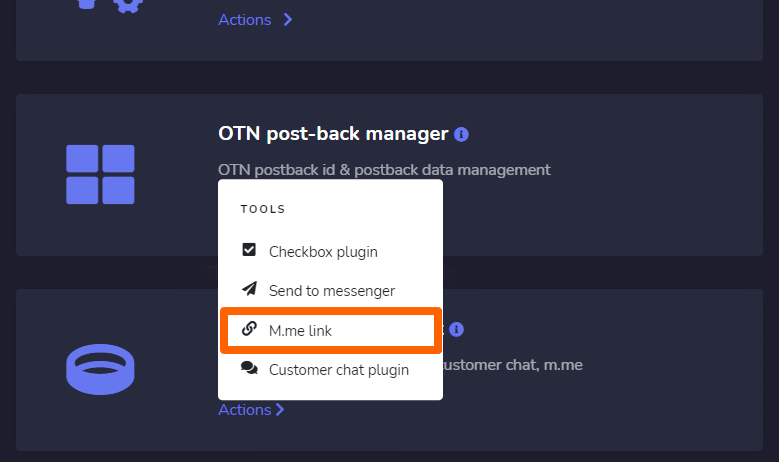
A dropdown menu containing the following options:
- Plugin de checkbox
- Send to messenger
- link me
- Plugin de chat com o cliente
Um detalhe dessas configurações pode ser encontrado nos próximos tópicos.
Plugin de checkbox
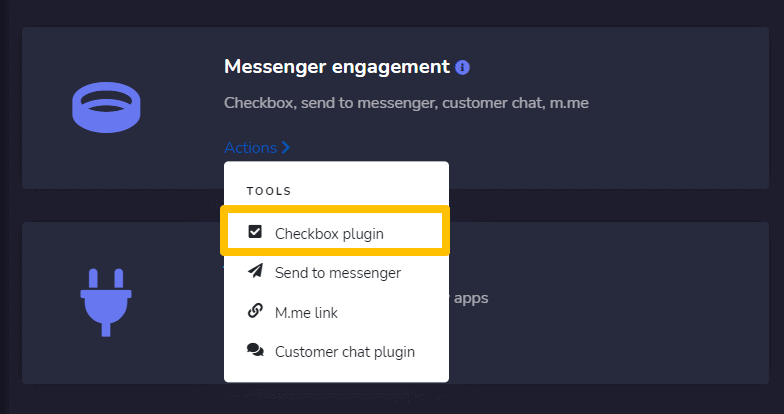
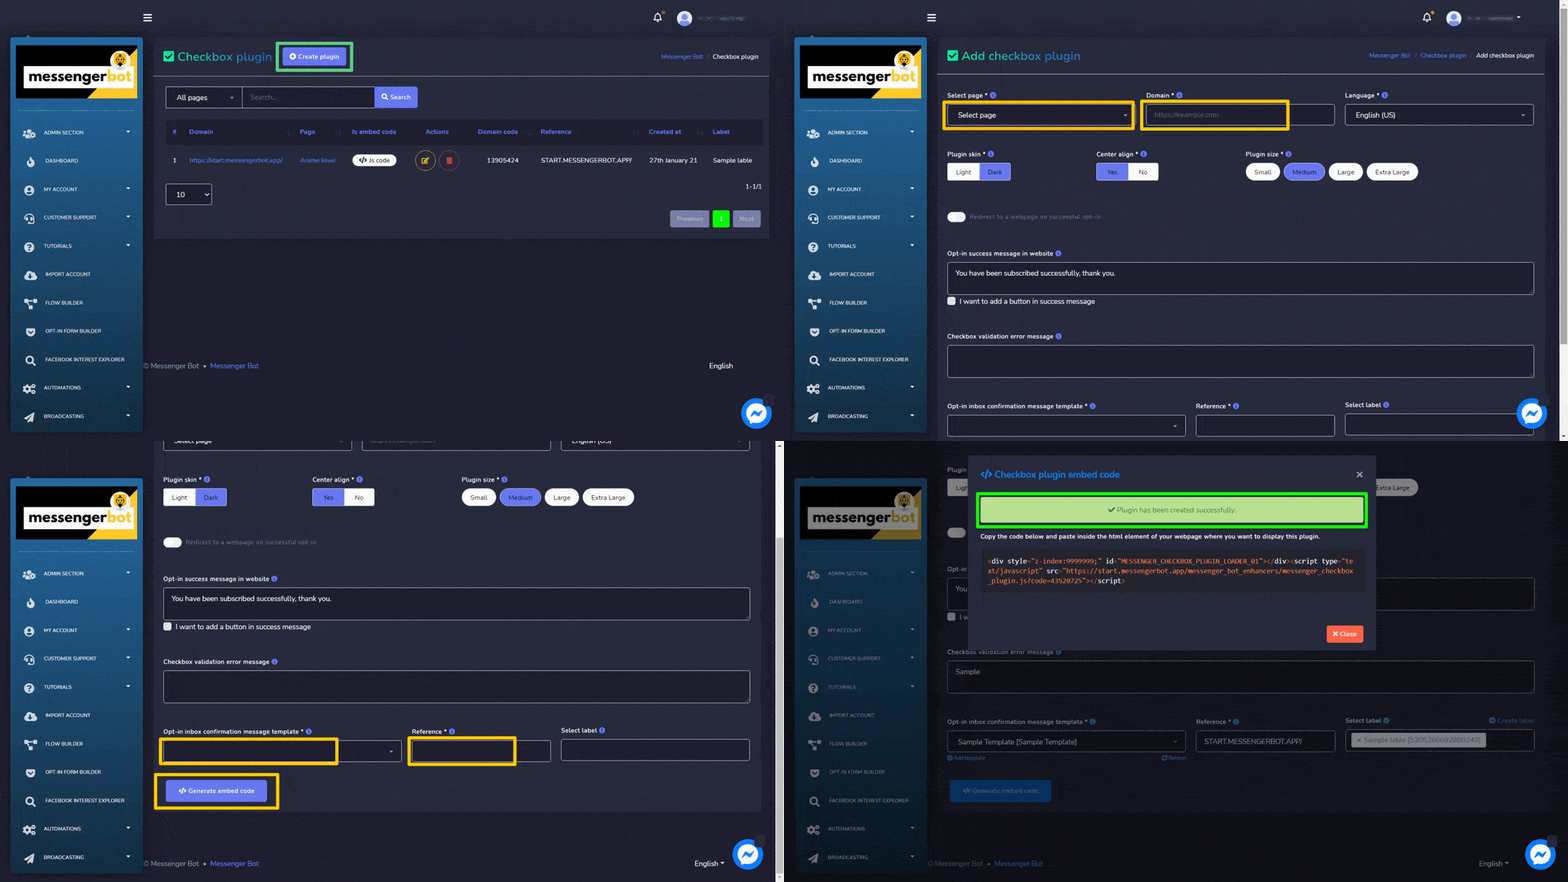
Checkbox plugin screen consists of a list of domains, you can search for a specific domain by using the barra de pesquisa. Você pode ajustar o number of domains a serem visualizadas por página. Você também pode organizar them in either ascending or descending order by selecting the setas from the header.
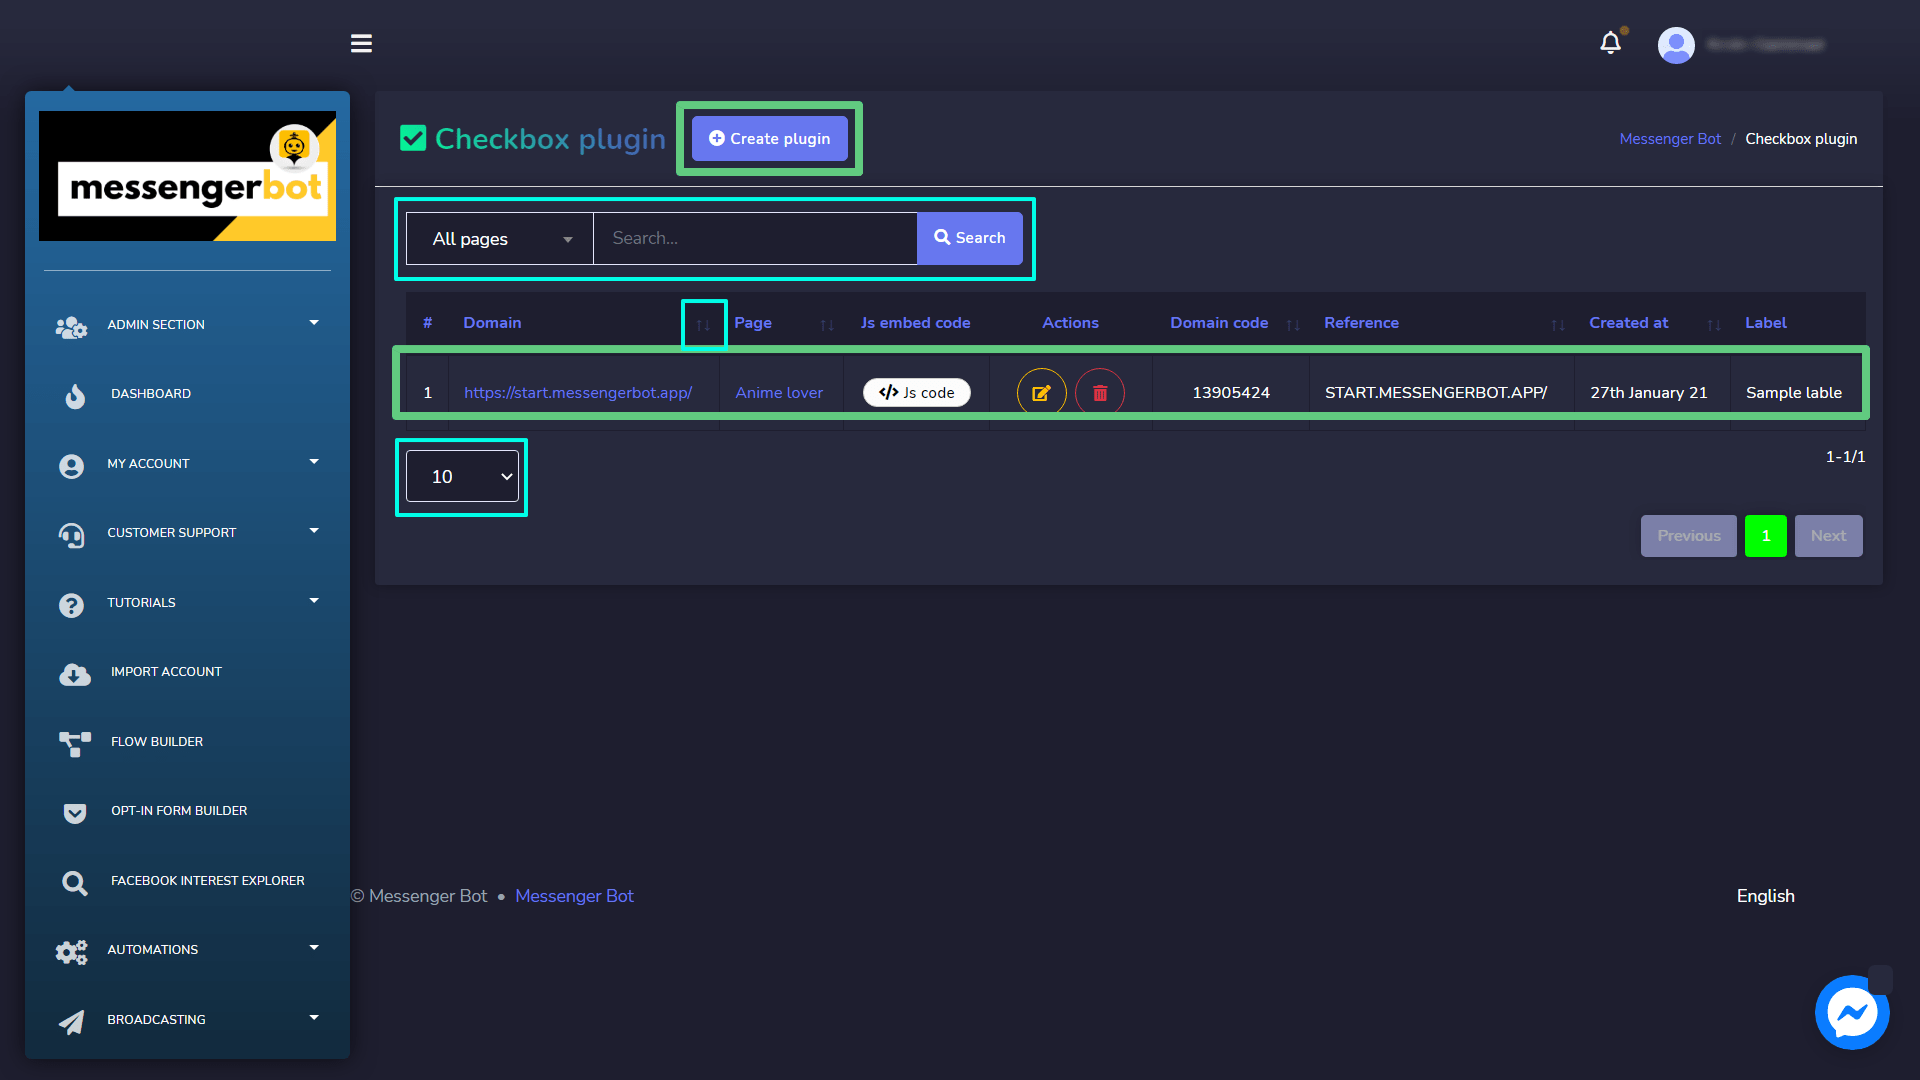
Following actions can be performed from the checkbox plugin view:
- Edit the plugin: Edit checkbox plugin and select Update plugin.
- Delete the plugin
Criar plugin
You can create a plugin by following the steps given below:
- Selecione
 do canto superior direito da tela.
 - Selecione o página para o qual você deseja adicionar o plugin.
- Forneça o domain.
- Selecione o idioma.
- Selecione o Plugin skin, turn it to either light or dark and center align option.
- Selecione o Plugin size.
- Write an Opt-in success message in website e um Checkbox validation error message.
- Selecione um opt-in inbox confirmation message template, reference, e rótulo.
- Selecione Generate embed code option to create the send to messenger plugin.
Send to messenger
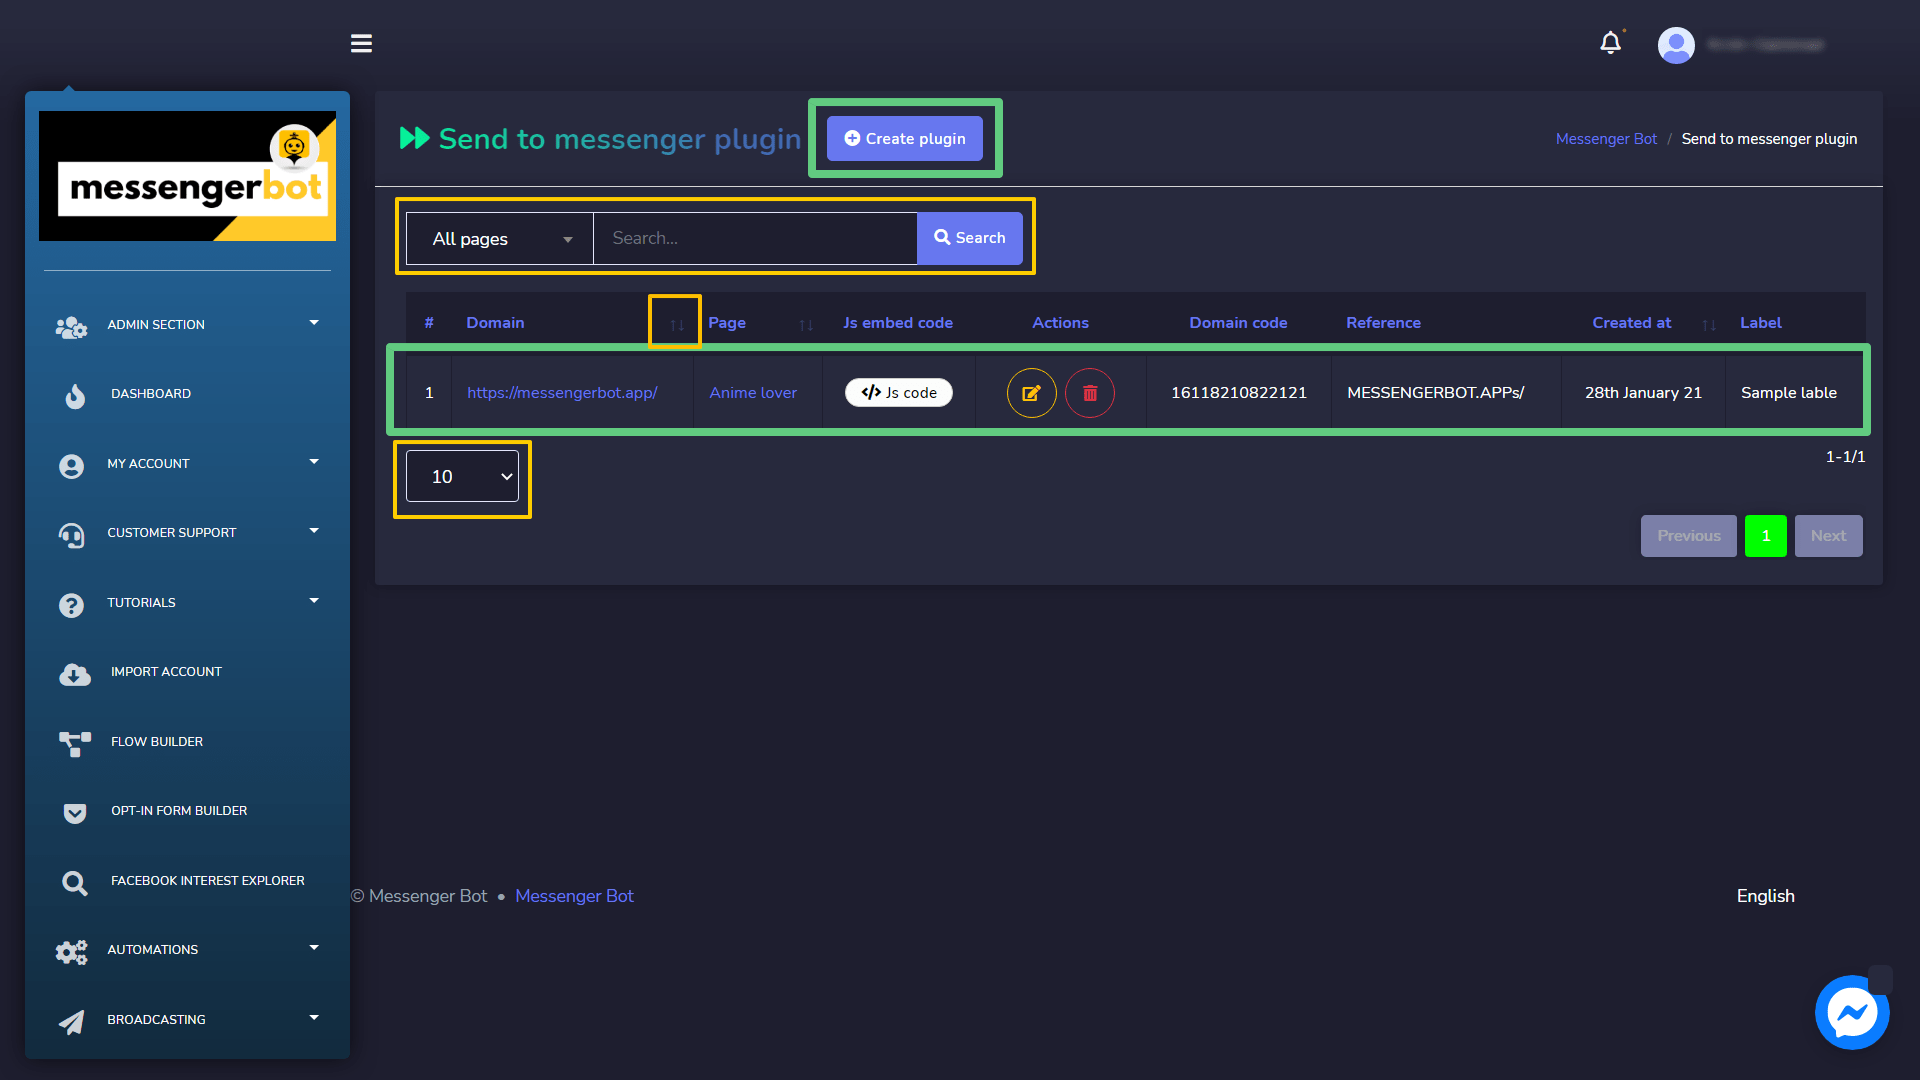
Send to messenger plugin screen consists of a list of domains, you can search for a specific domain by using the barra de pesquisa. Você pode ajustar o número of domains to be visualizadas por página. You can also arrange them in either ascending or descending order by selecting o setas from the header.
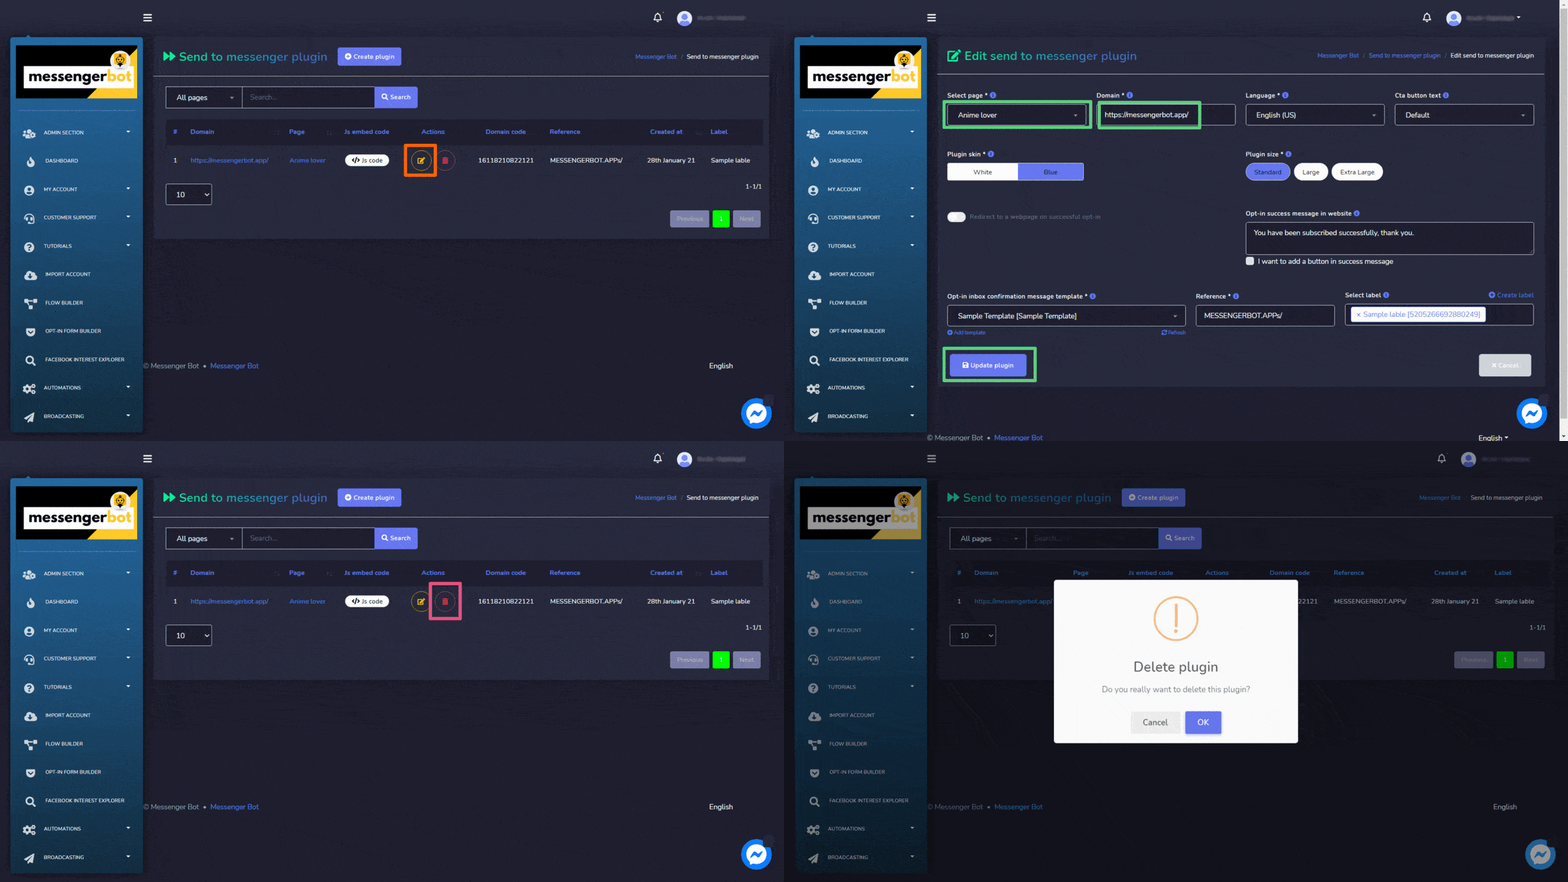
Following actions can be performed from the send to messenger plugin view:
- Edit the plugin: Edit messenger plugin and select Update plugin.
- Delete the plugin
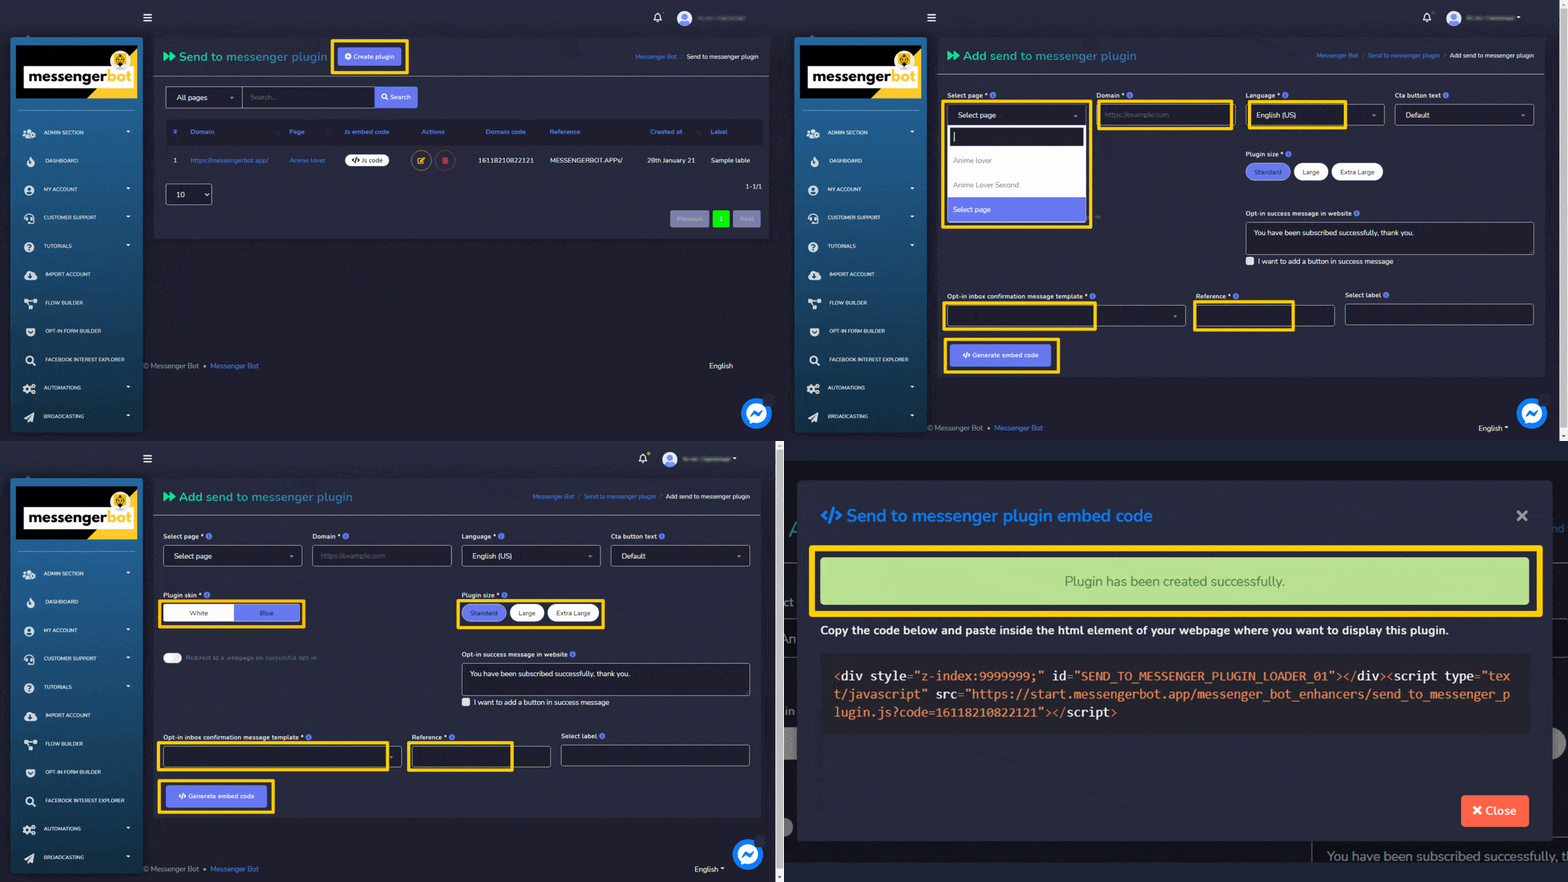
Criar plugin
You can create a plugin by following the steps given below:
- Selecione
 do canto superior direito da tela.
 - Selecione o página para o qual você deseja adicionar o plugin.
- Forneça o domain.
- Selecione o idioma e Cta button text option.
- Selecione o Plugin skin, turn it to either white or blue.
- Selecione o Plugin size.
- Selecione um opt-in inbox confirmation message template, reference, e rótulo.
- Selecione Generate embed code option to create the send to messenger plugin.
M.me link
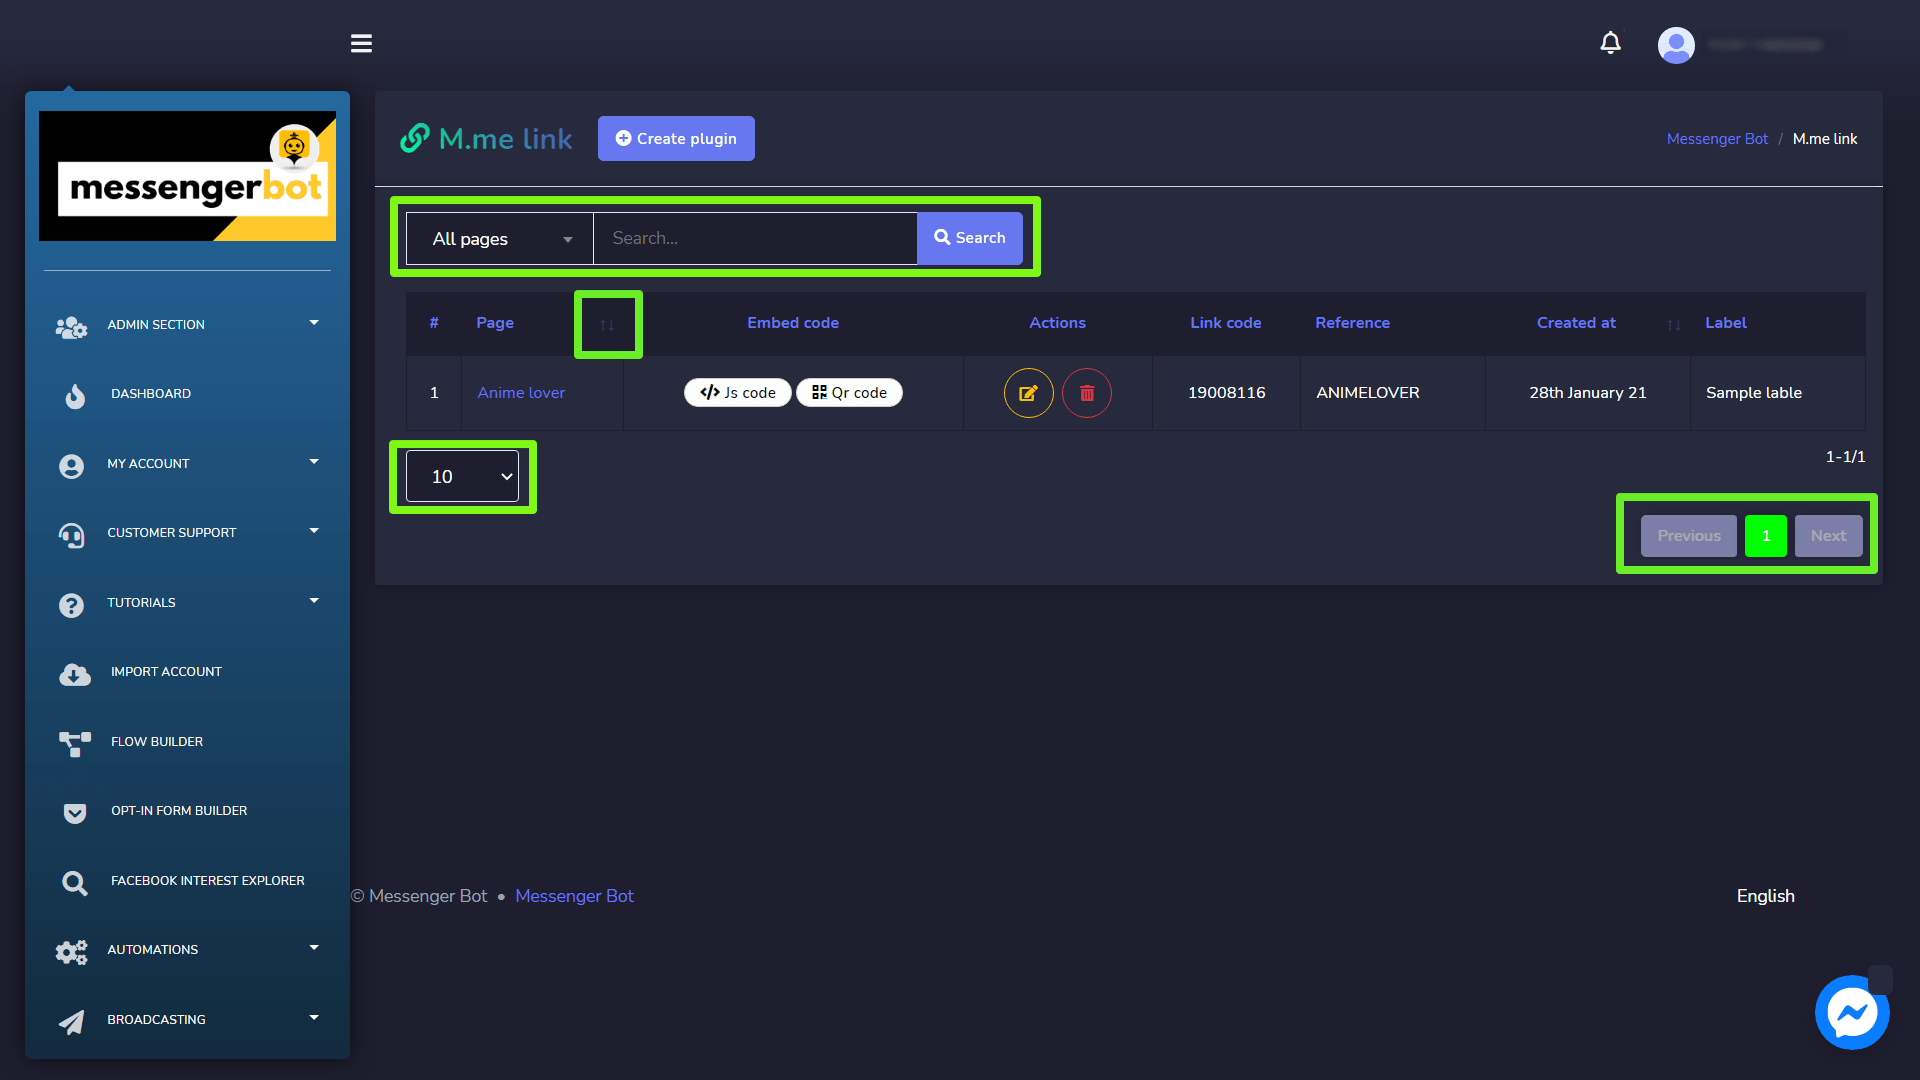
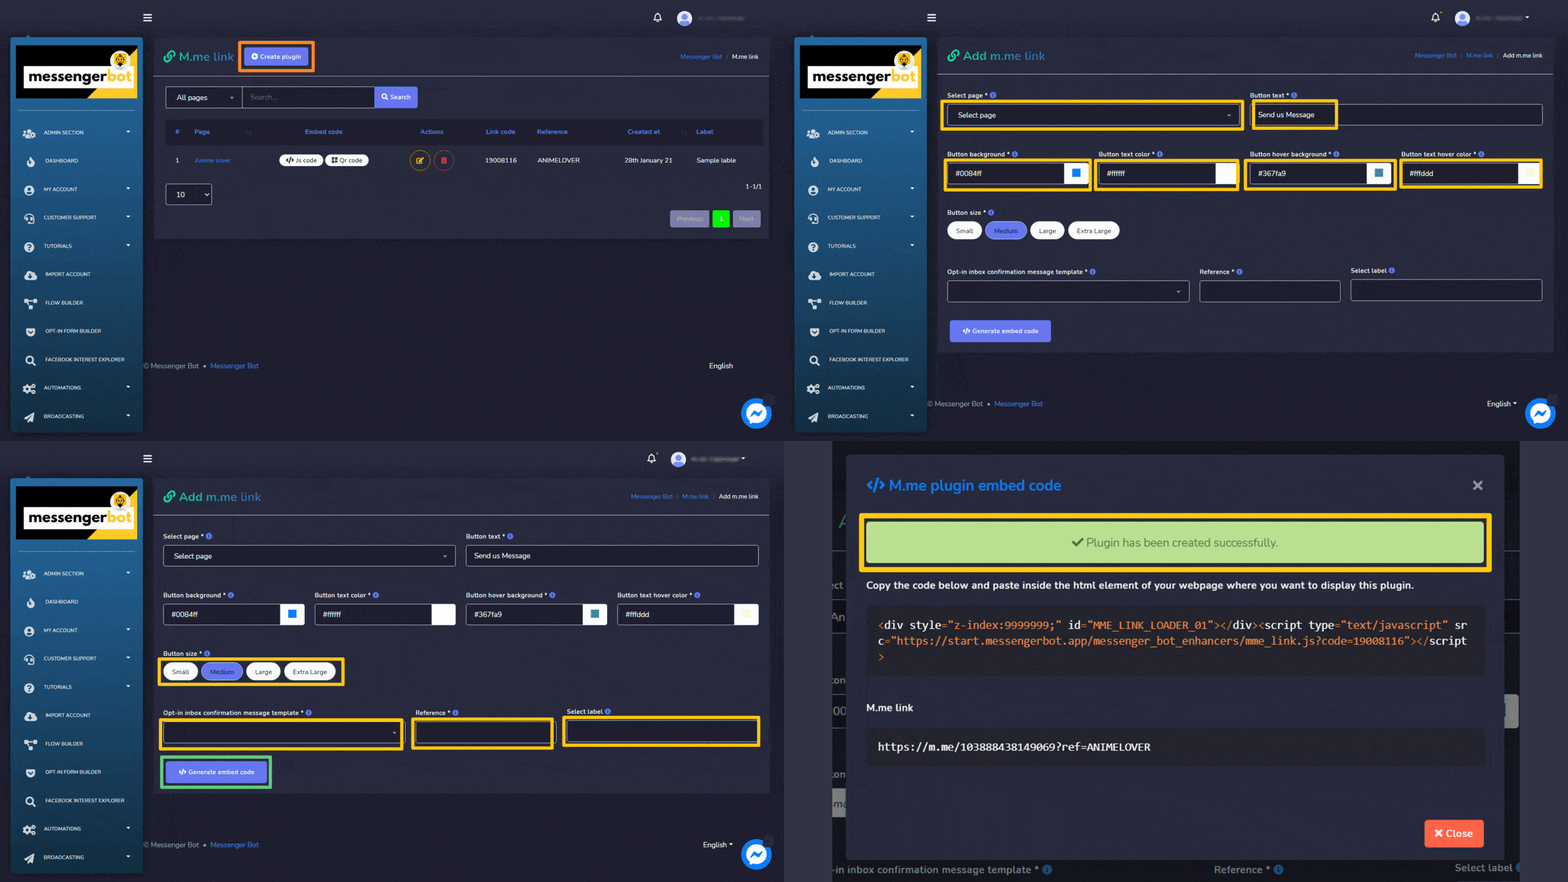
M.me link screen consists of a list of pages you can search for a specific page by using the barra de pesquisa. Você pode ajustar o number of pages a serem viewed per view. You can also arrange them in either ascending or descending order by selecting the setas from the header.
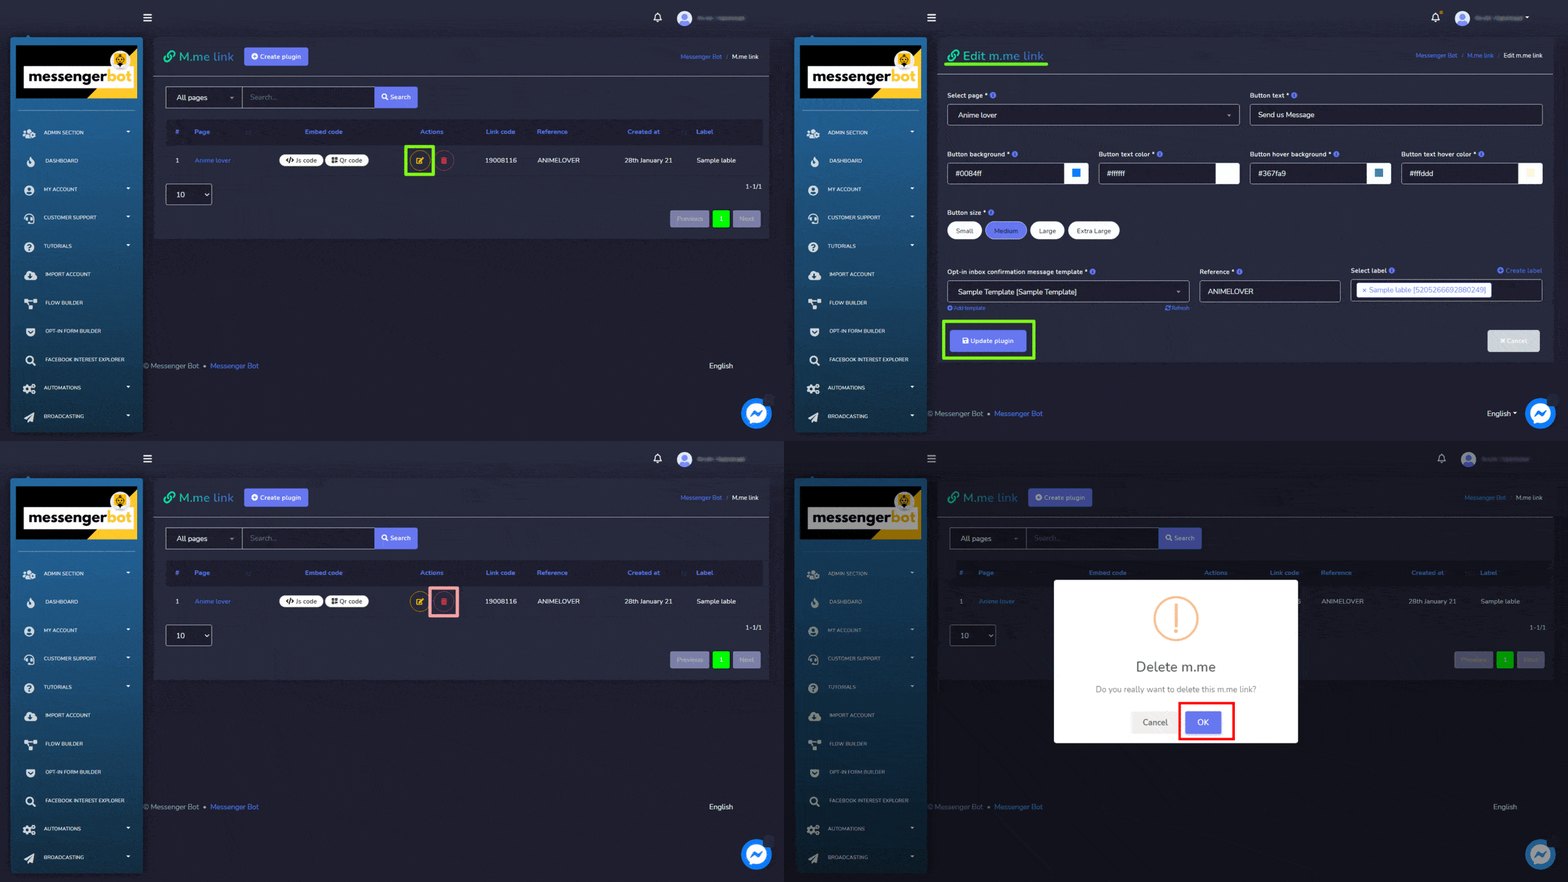
Following actions can be performed from the M.me link view:
- Edit the plugin: Edit M.me link and select Update plugin.
- Delete the plugin
Criar plugin
You can create a plugin by following the steps given below:
- Selecione
 do canto superior direito da tela.
 - Selecione o página para o qual você deseja adicionar o plugin.
- Forneça o Button text.
- Forneça o Button background, text color, hover over color.
- Selecione o Button size.
- Selecione um opt-in inbox confirmation message template, reference, e rótulo.
- Selecione Generate embed code option to create the send to messenger plugin.
Plugin de chat com o cliente
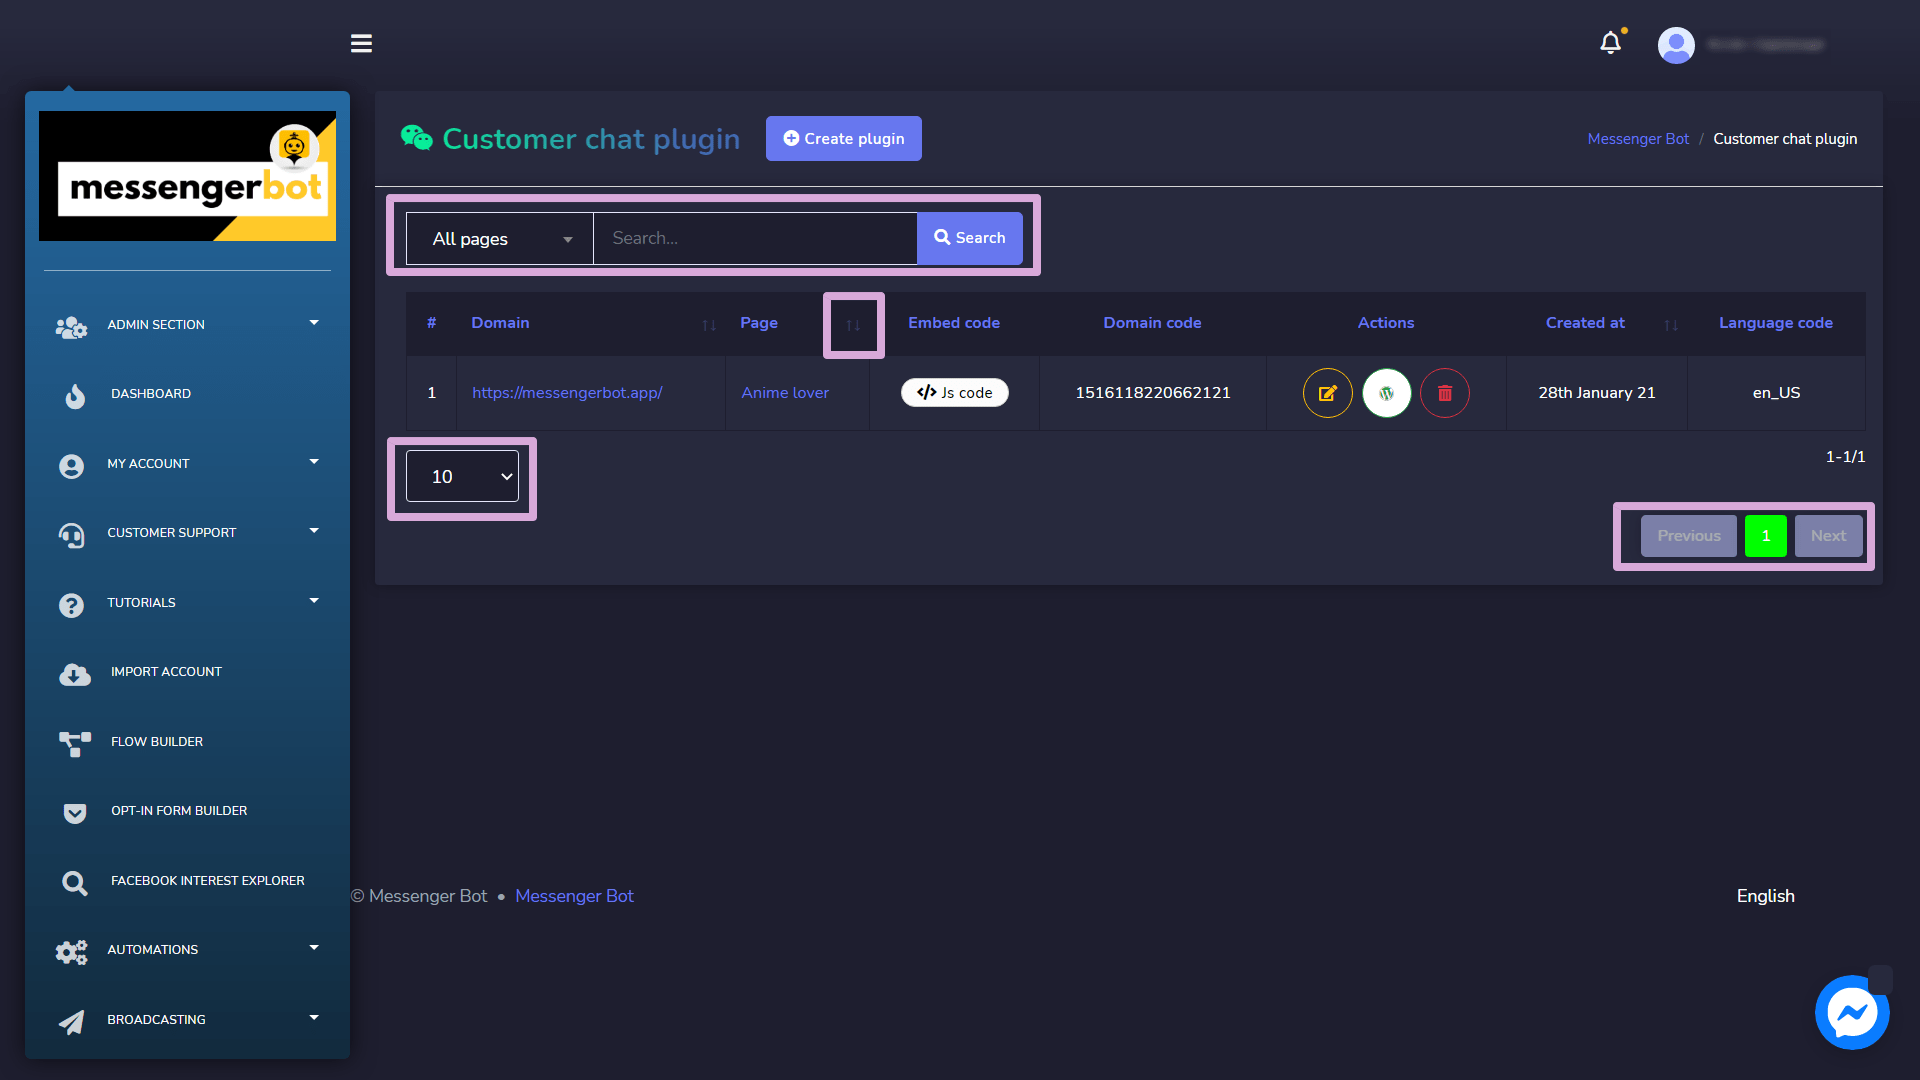
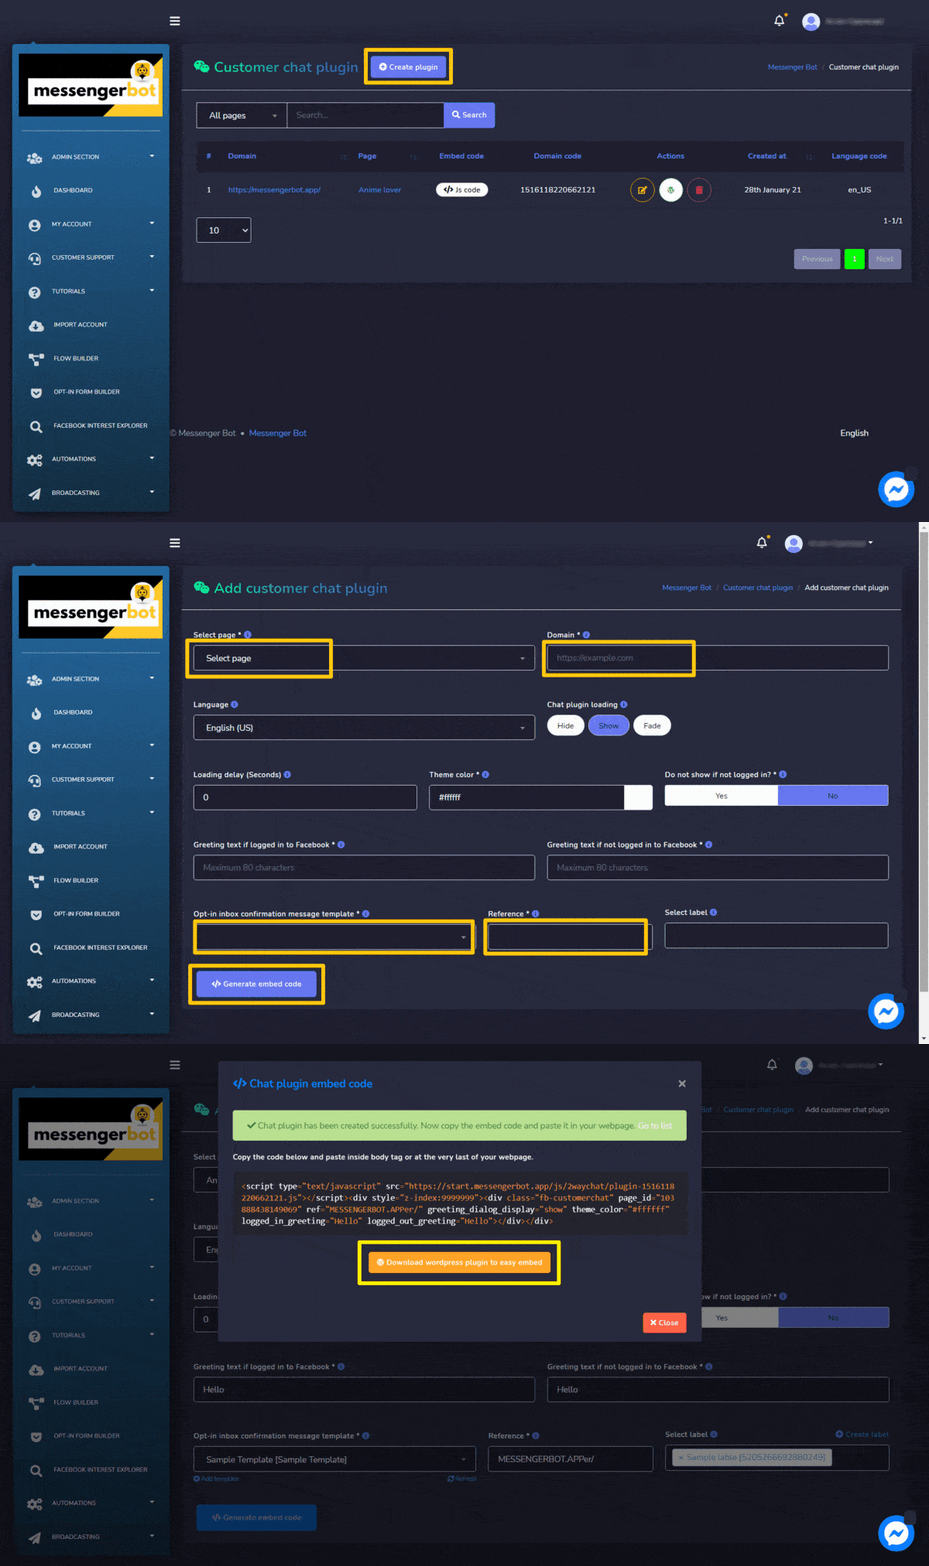
The customer chat plugin screen consists of a list of domains, you can search for a specific domain by using the barra de pesquisa. Você pode ajustar o número of domains to be viewed per page. Você também pode organizar eles em qualquer um dos crescente ou decrescente selecionando as setas from the header.
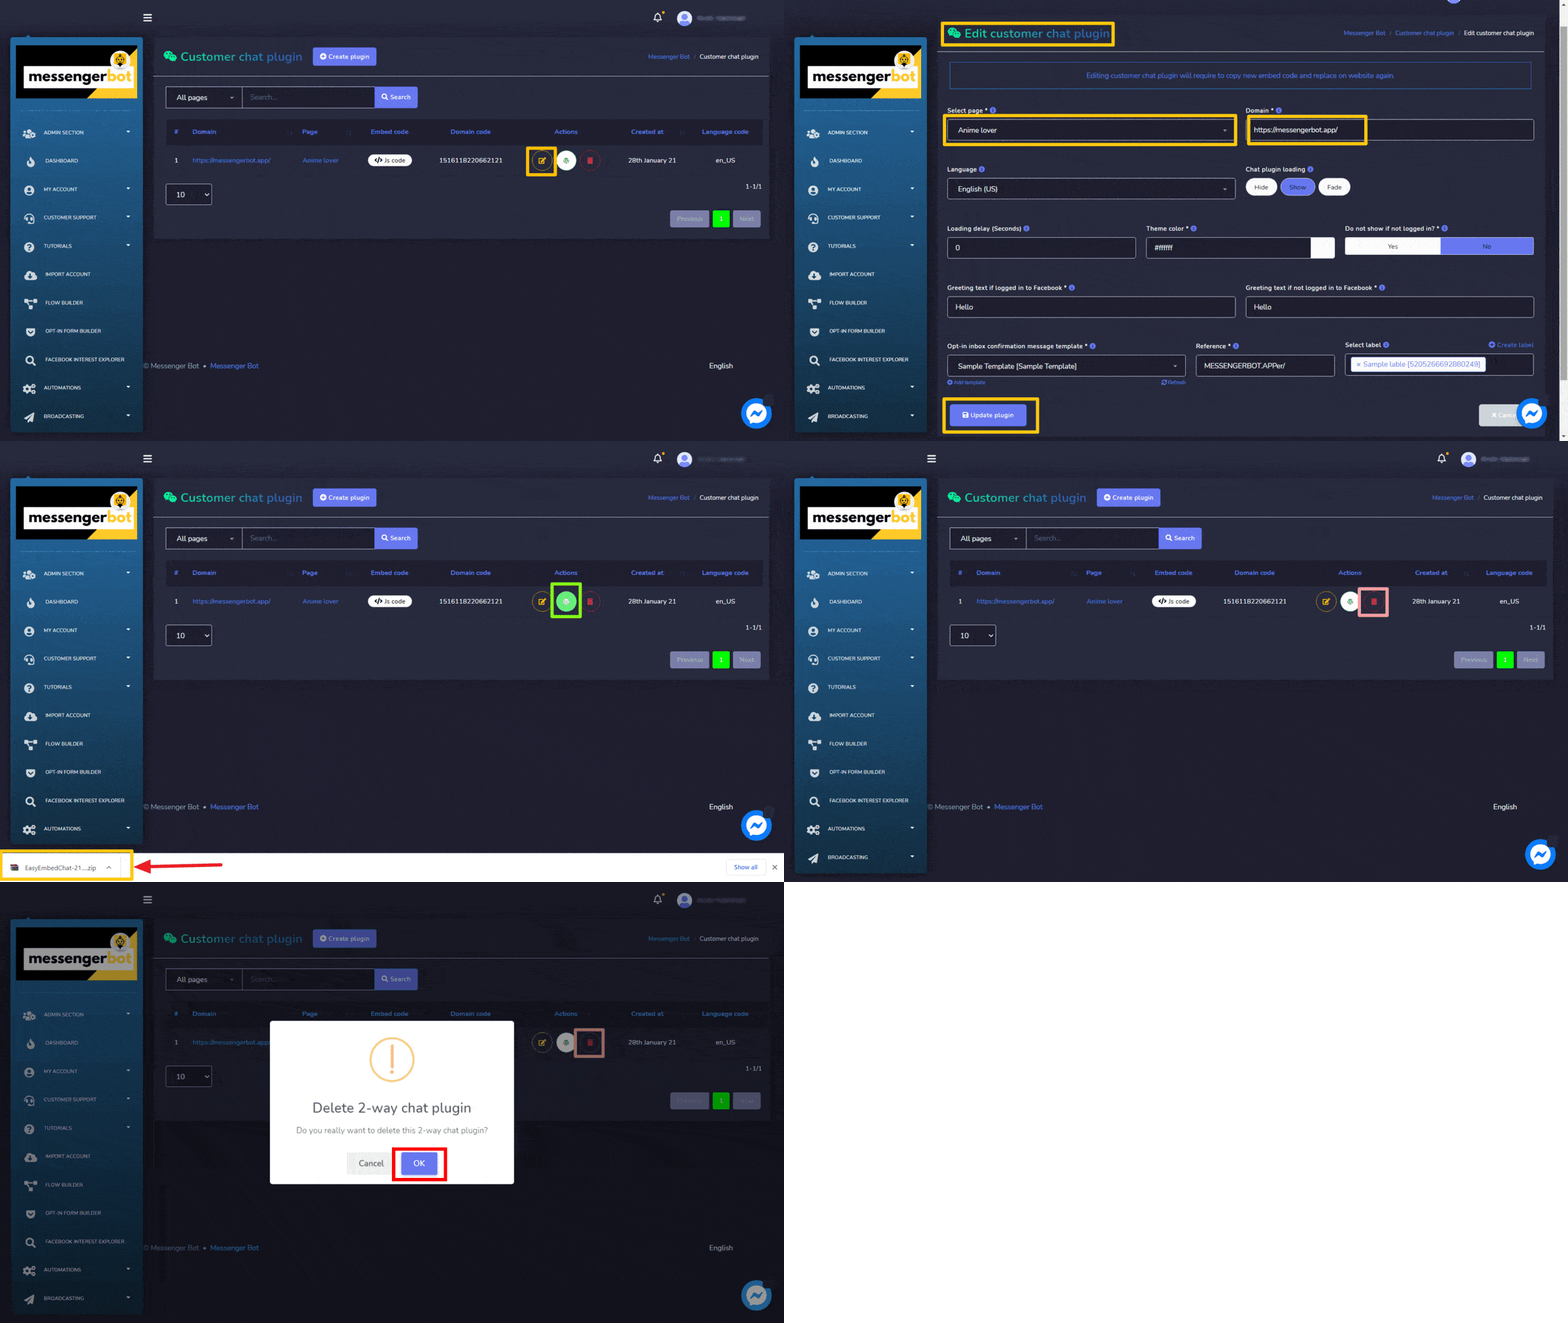
- Edit the plugin: Edit customer chat plugin and select Update plugin.
- Download WordPress plugin: Download the WordPress plugin by selecting
 .
. - Delete the plugin
Criar plugin
You can create a plugin by following the steps given below:
- Selecione
 do canto superior direito da tela.
 - Selecione o página para o qual você deseja adicionar o plugin.
- Enter the domain to be added in the domain
- Selecione o idioma e chat plugin loading
- Forneça o Delay.
- Forneça o theme color.
- Selecione um opt-in inbox confirmation message template, reference, e rótulo.
- Selecione Generate embed code option to create the customer chat plugin.
Templates salvos
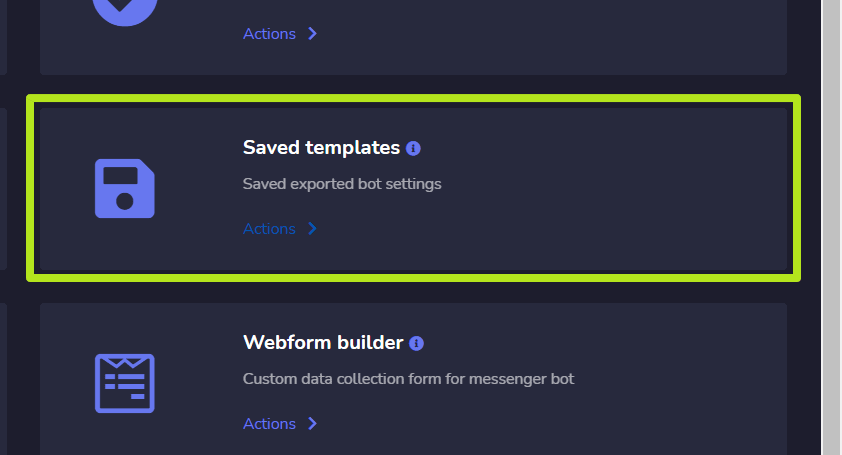
To access the post-back manager settings section, select Templates salvos, em seguida selecione Ações de Bot de mensagens tela.
The saved templates screen consists of a list of templates, you can search for a specific template by using the barra de pesquisa. Você pode ajustar o number of templates a serem visualizadas por página. Você também pode organizar eles em qualquer um dos ascending or descending order by selecting the setas from the header. Select the page filter to narrow down your search.
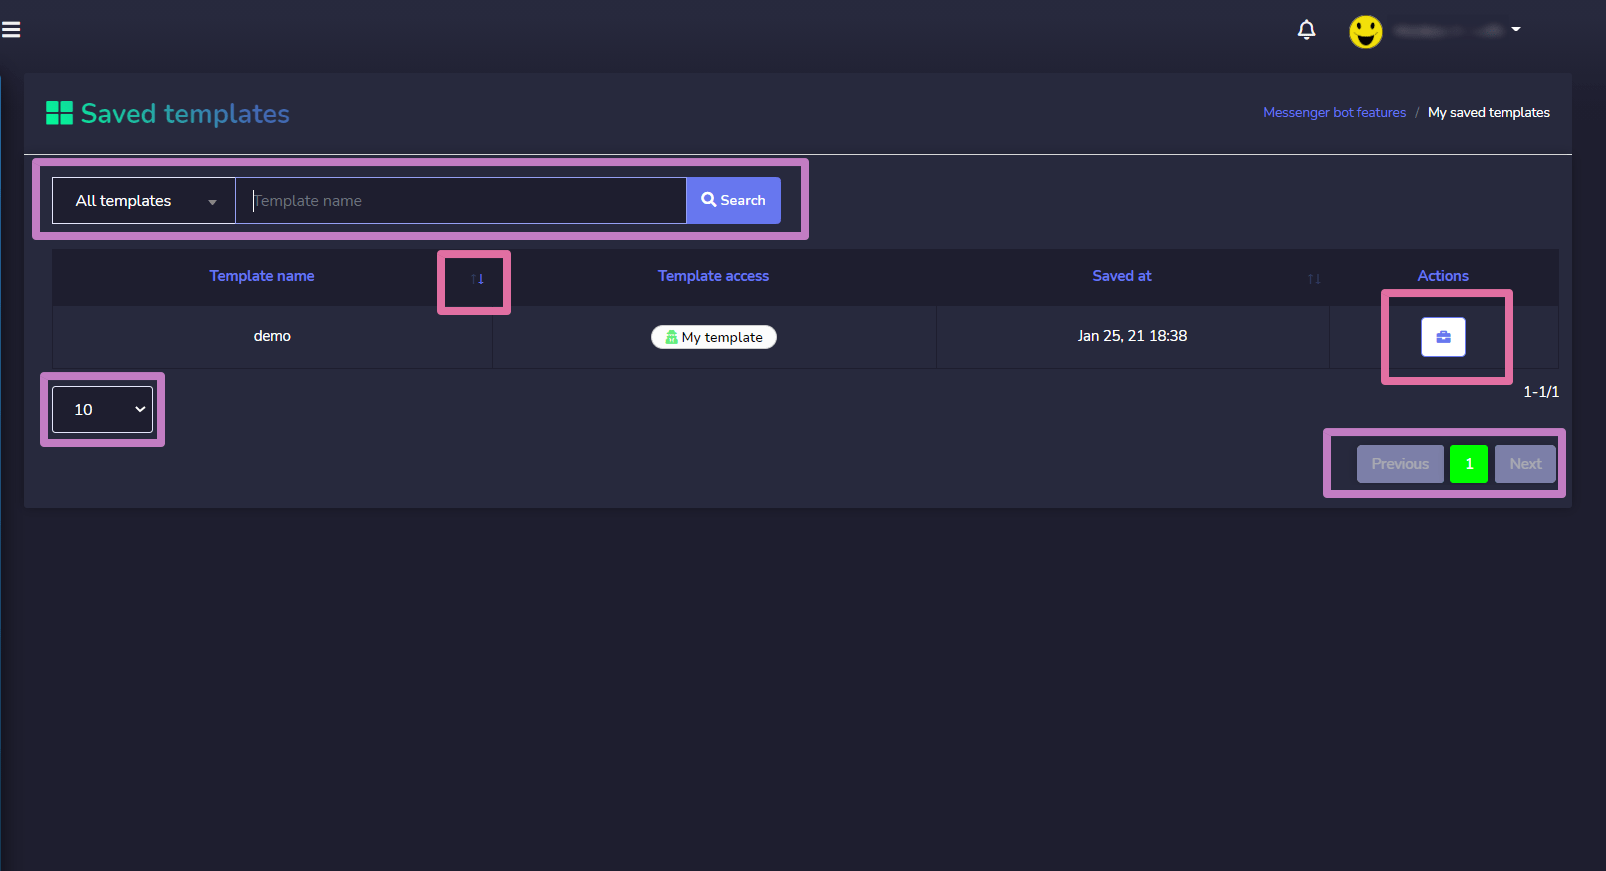
- View the template by selecting
 .
. - Download the template files selecionando
 .
. - Edit the template
- Delete the template


