Get started settings
चुनें Get started settings option from the menu then select change settings.
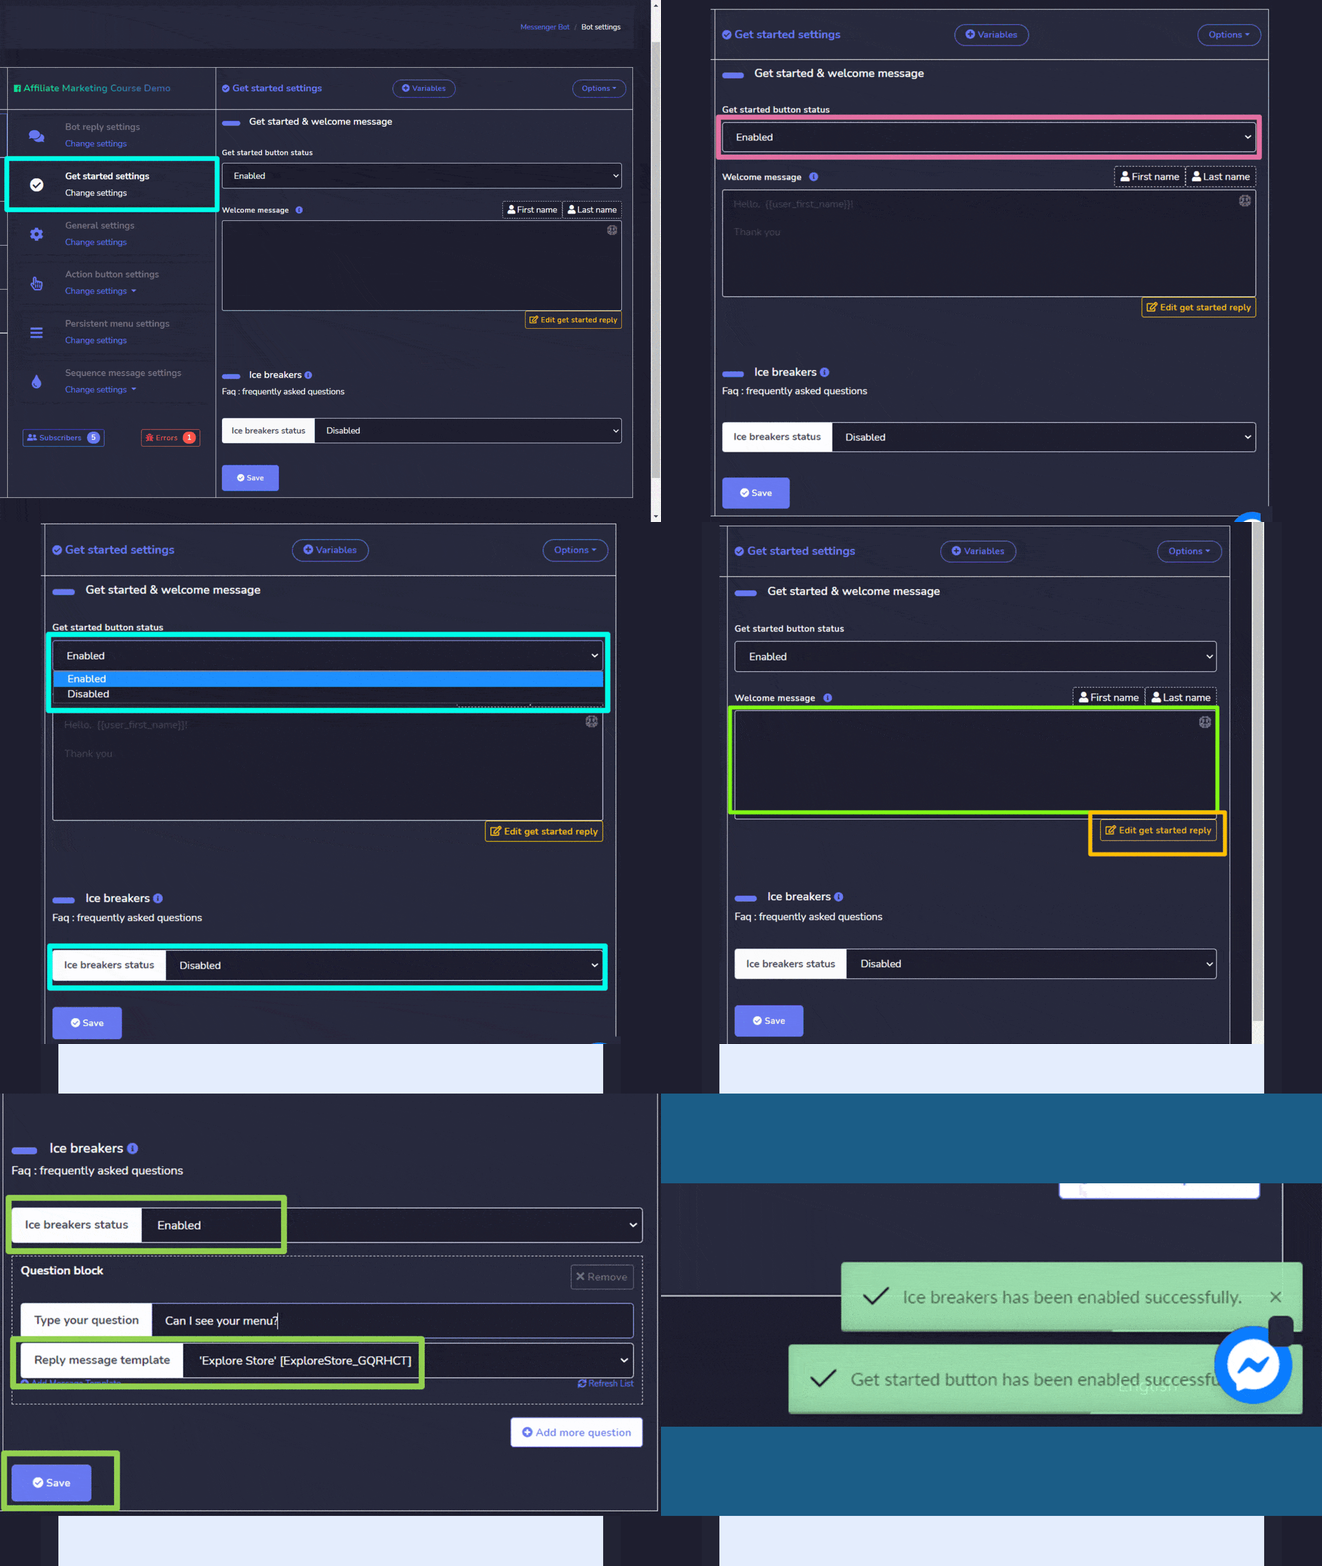
A Get started settings screen will appear, you can perform the following steps to enable your settings:
- अपना चुनें get started button status.
- प्रदान करें Welcome message. You can edit your get started message reply by selecting the Edit get started message reply button from the bottom of the message field.
- You can provide a frequently asked question as well in the Ice breakers section. At first, you change its status.
- Once enabled, type a question along with a reply in the Question block.
- चुनें सहेजें to proceed.
General settings
चुनें General settings option from the menu then select change settings.
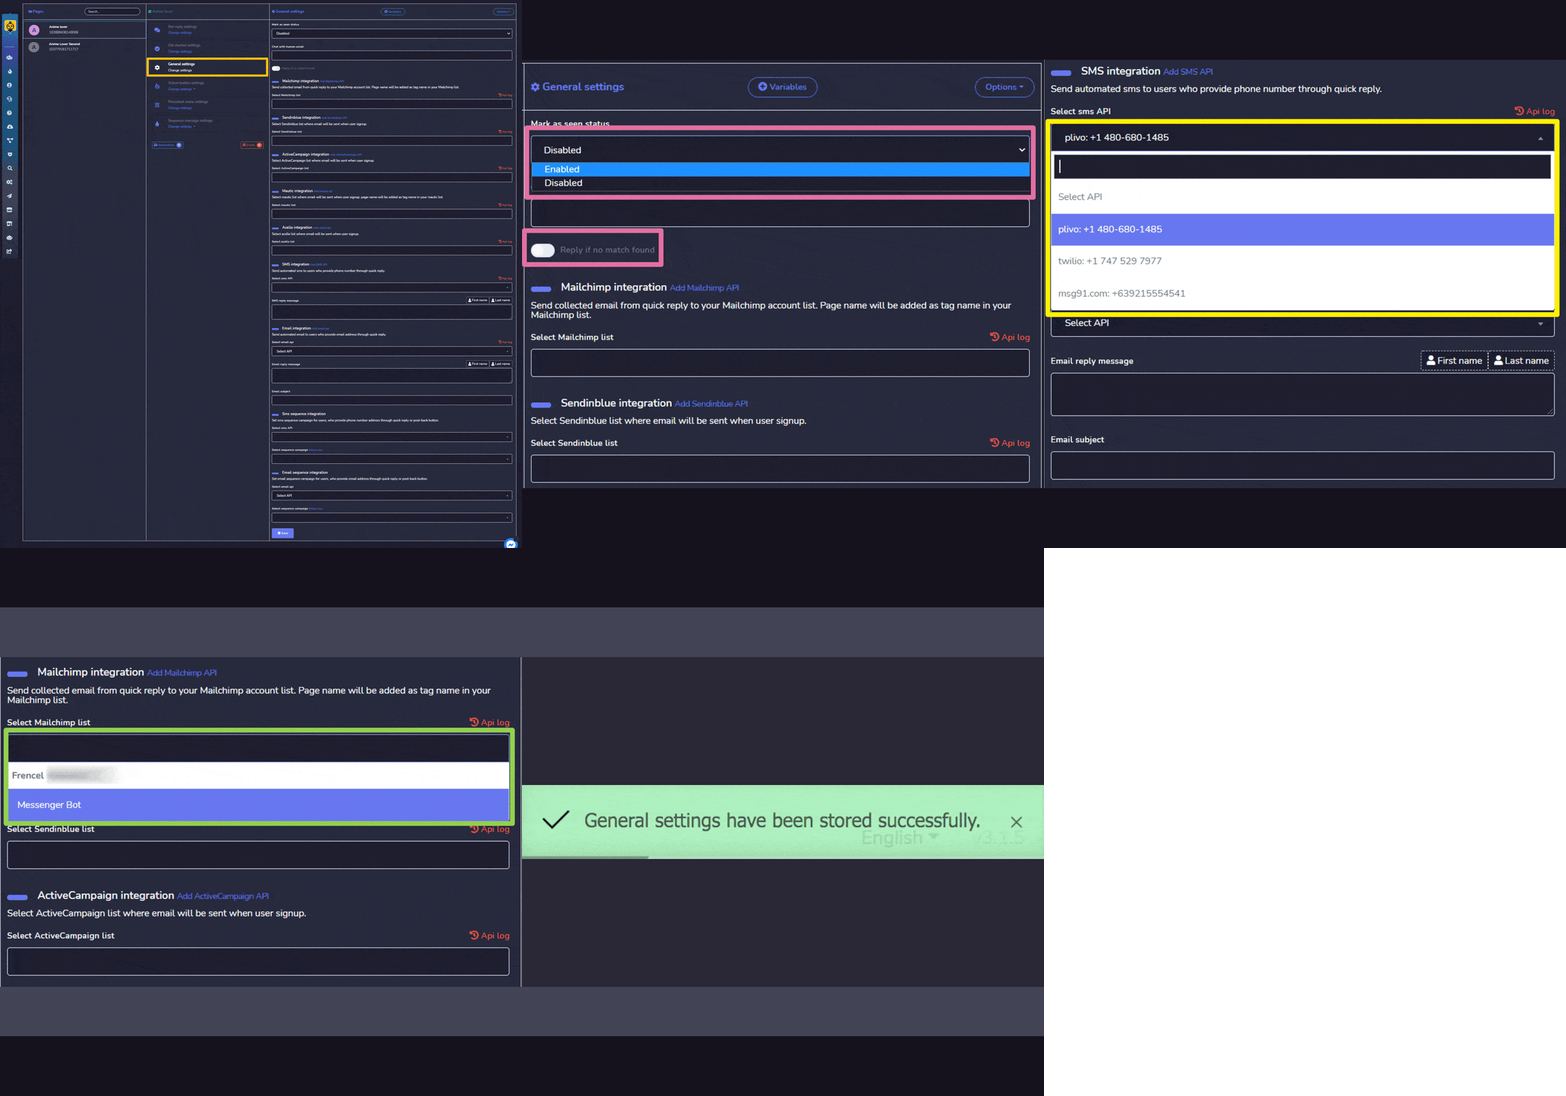
A General settings screen will appear, you can perform the following steps to enable your settings:
- Select your mark as seen status.
- चुनें respective integration based on your requirements.
- Once you select an integration e.g. SMS integration a dropdown menu will appear, select the option you want to choose.
- You can also add a new API by selecting the New API option against each integration’s settings.
- चुनें सहेजें to proceed.
Action button settings
चुनें Action button settings option from the menu then select change settings.
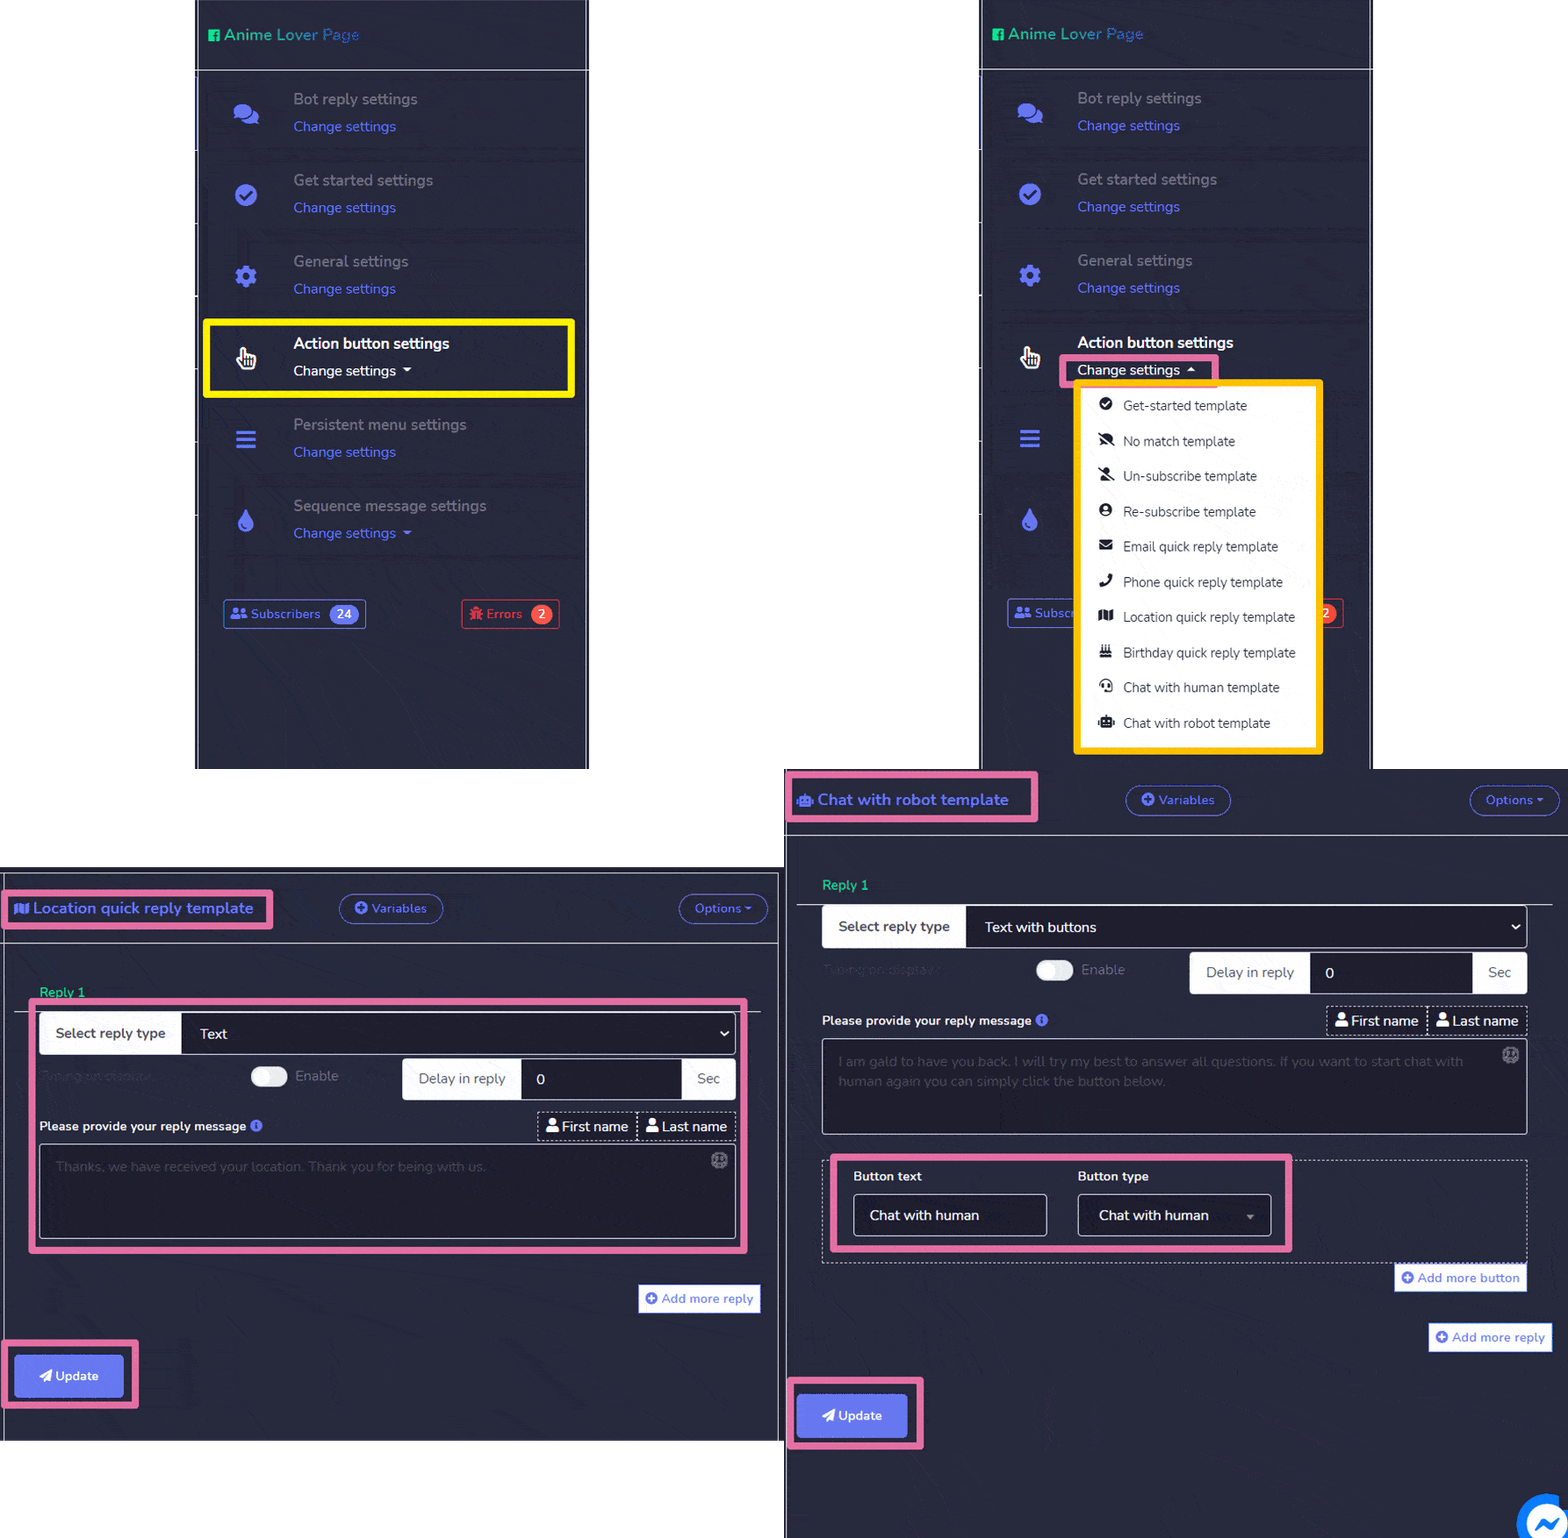
A list of different template options will appear. Select the template you want to choose then adjust its settings by providing:
- यह type of the reply.
- अपना संदेश.
- If there exists, provide a reply delay option as well.
- If there exists, a typing on display then turn it to ON or OFF based on your requirement.
- If there exists a button, then adjust its text and type as well.
Persistent menu settings
चुनें Persistent menu settings option from the menu, then select change settings.
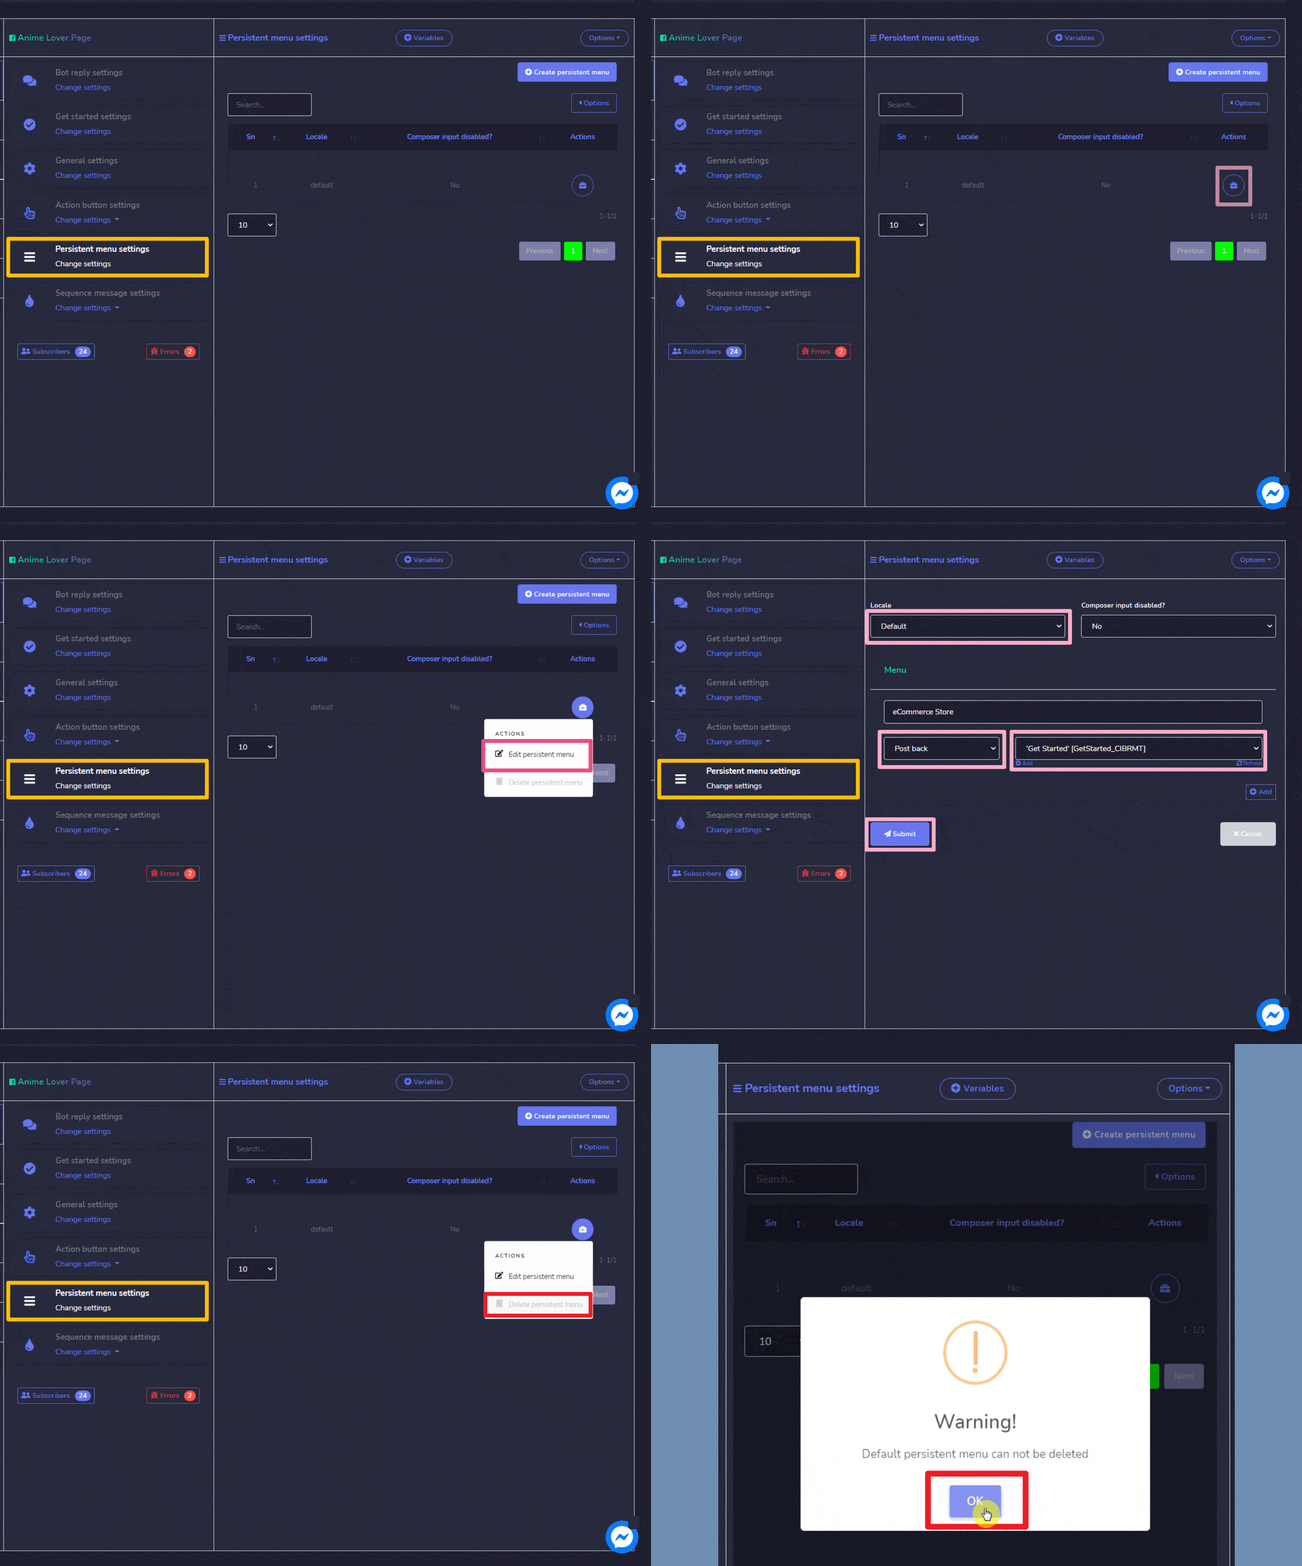
A list of locales will appear on the screen. To perform different actions on a locale, select the ![]() option against the locale you want to perform actions on.
option against the locale you want to perform actions on.
निम्नलिखित क्रियाएँ की जा सकती हैं:
- Edit persistent menu: make changes in the persistent menu settings
- Delete persistent menu
Create persistent menu
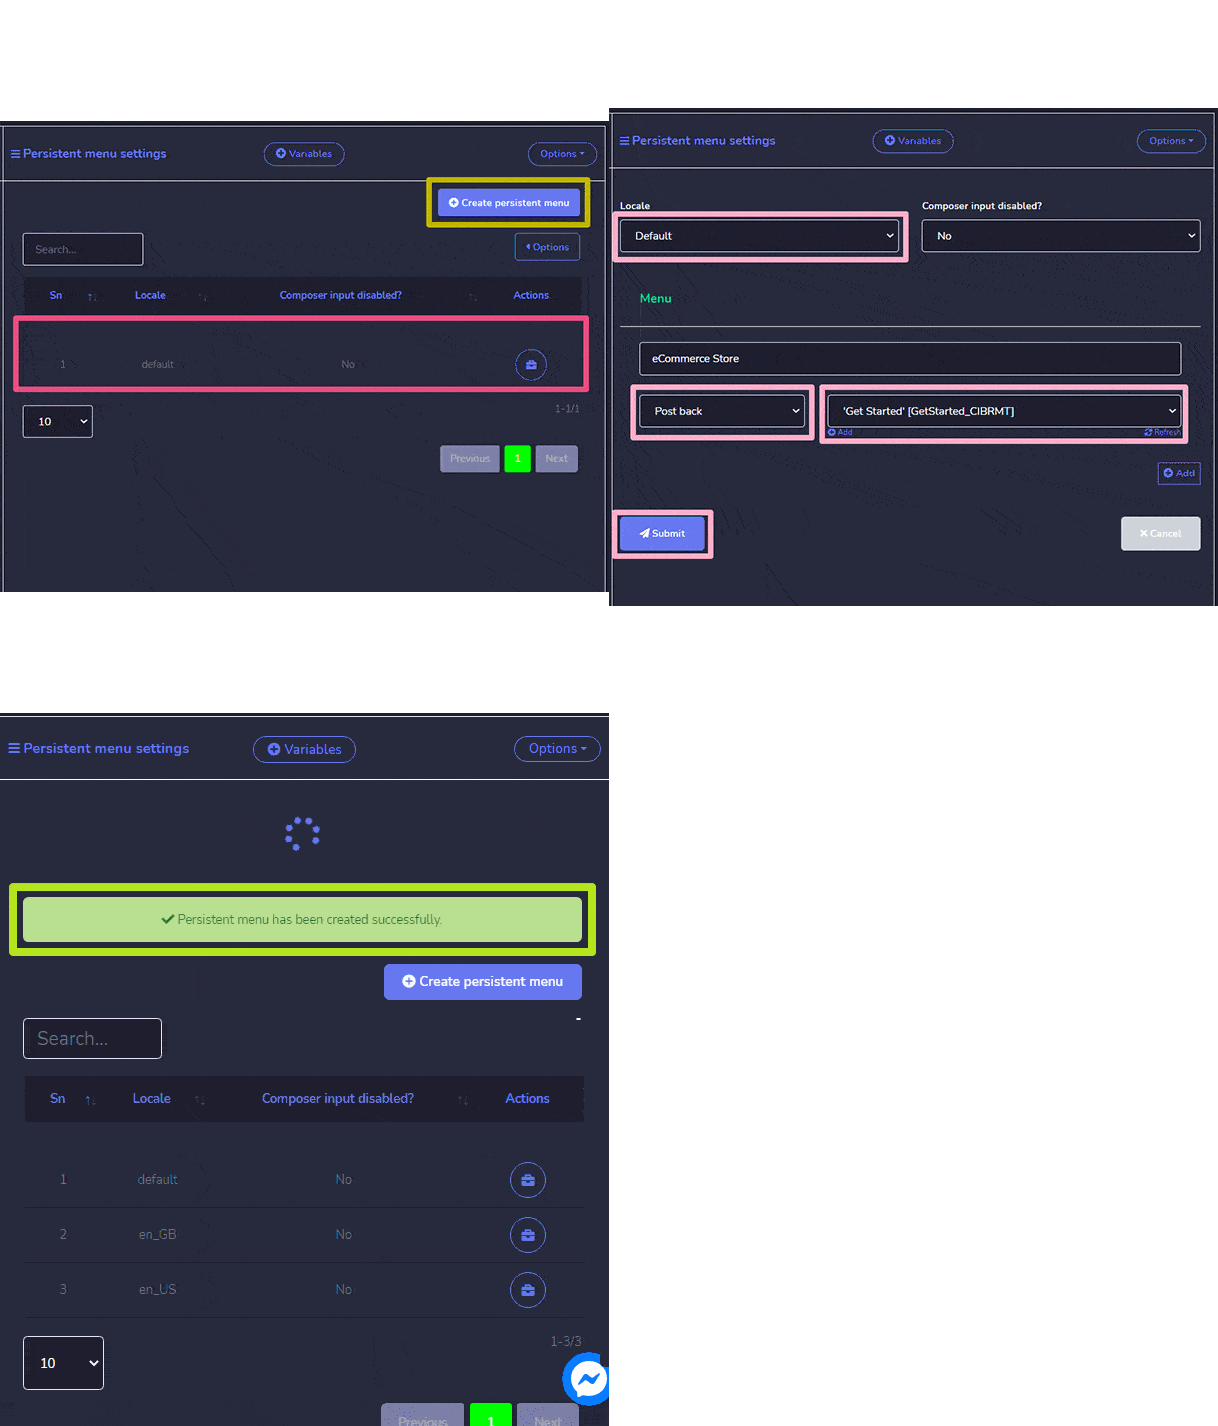
You can create a persistent menu by following the steps given below:
- चुनें
 स्क्रीन के शीर्ष दाएं से।
 - प्रदान करें Locale information.
- Provide the status of composer input.
- प्रदान करें Menu title and web URL.
- चुनें सबमिट करें to create your persistent menu.
Sequence message settings
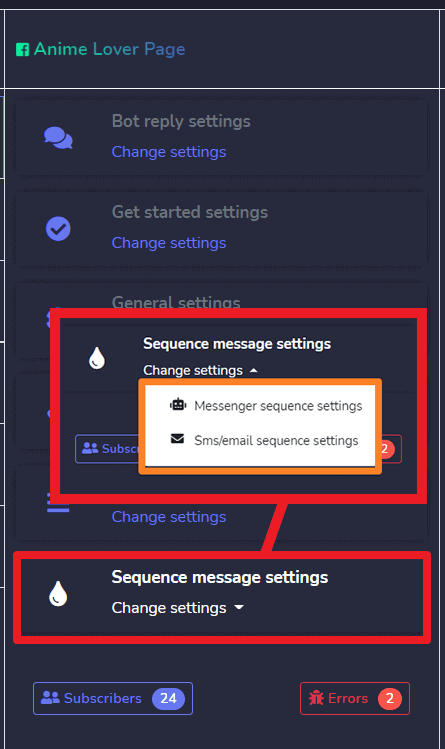
चुनें Sequence message settings option from the menu, then select change settings.
You can choose either Messenger sequence settings या SMS/email sequence settings.
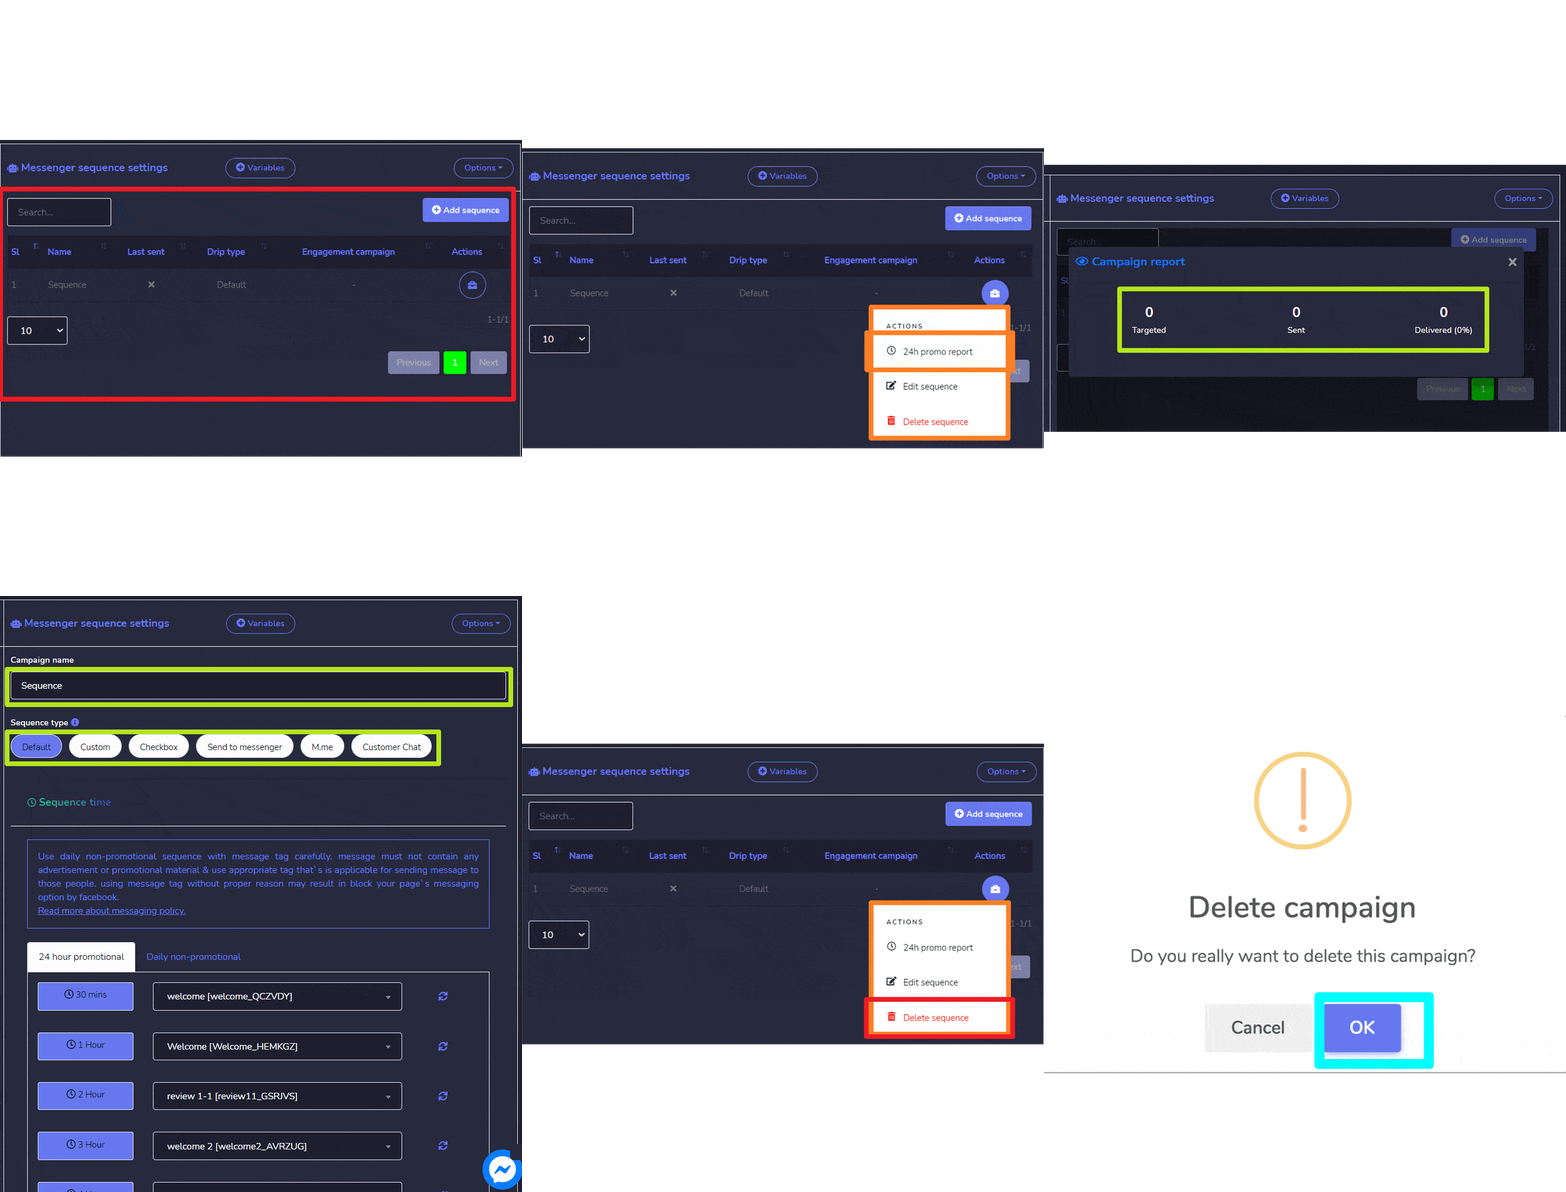
First, Messenger sequence settings. A list of sequence messages will appear on the screen. To perform different actions on them, select ![]() option against the message you want to perform actions on.
option against the message you want to perform actions on.
निम्नलिखित क्रियाएँ की जा सकती हैं:
- 24h promo report: A report on targeted, sent and delivered messages.
- Edit sequence: You can edit and update the sequence message.
- Delete sequence
Add sequence
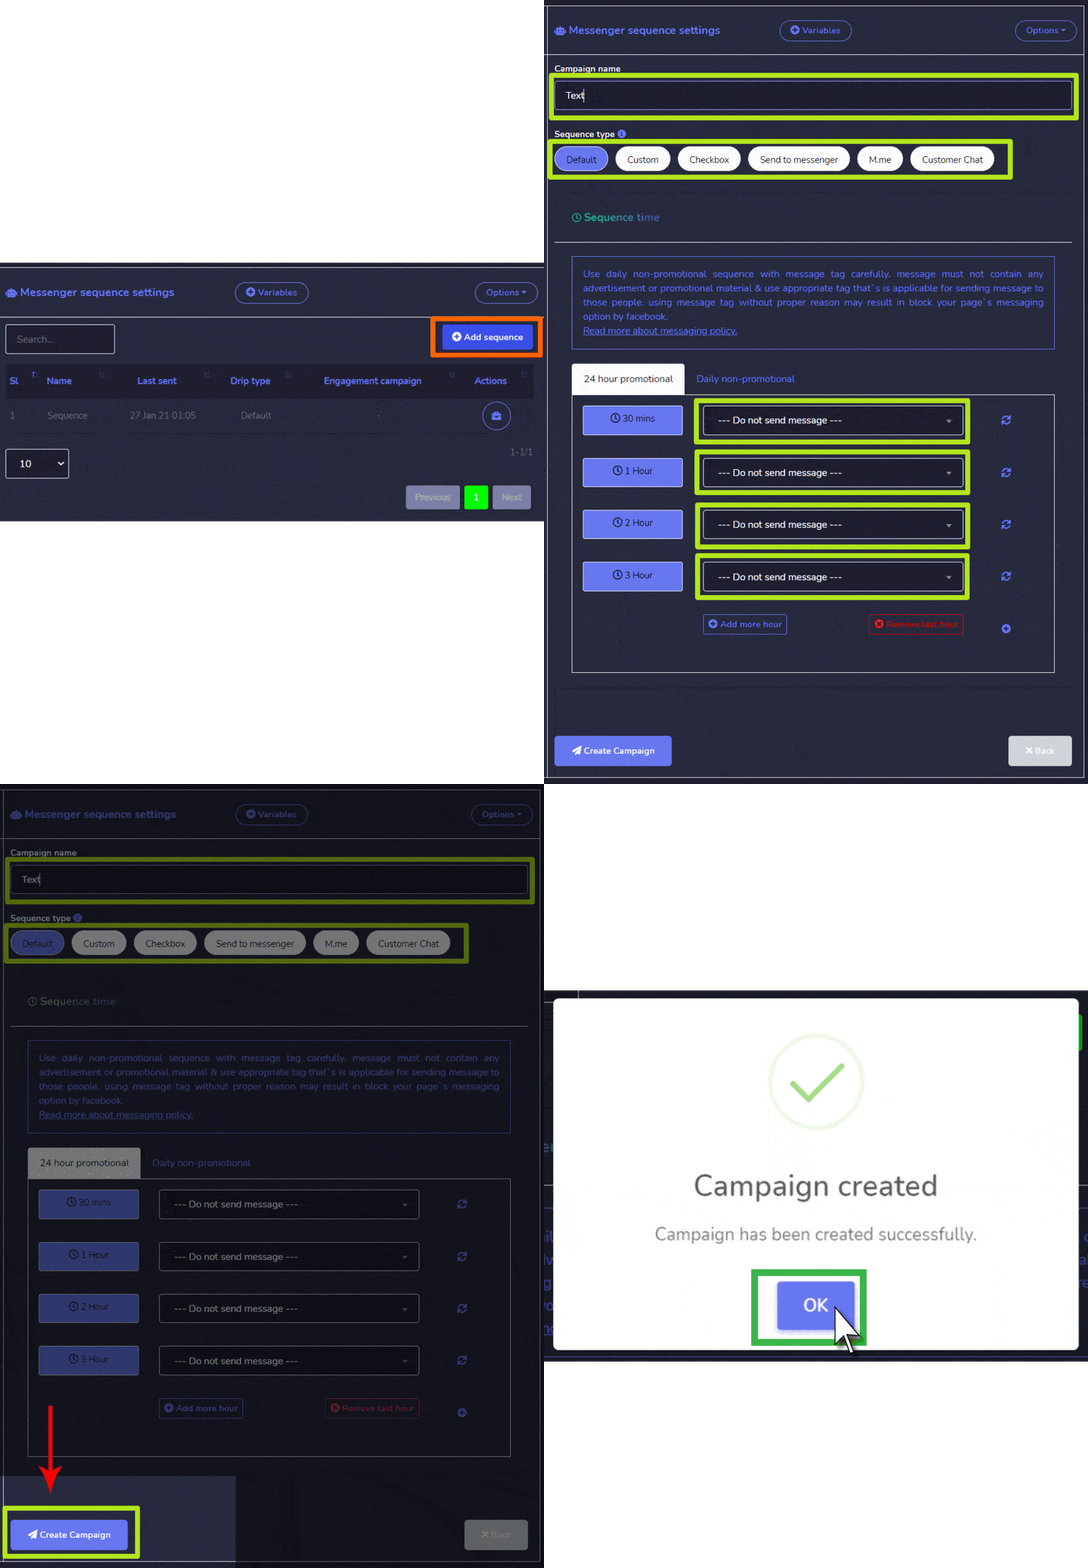
You can add sequence by following the steps given below:
- चुनें
 स्क्रीन के शीर्ष दाएं से।
 - प्रदान करें Campaign name और sequence type.
- चुनें timer settings.
- चुनें pages for which you want to apply sequence settings.
- चुनें Create campaign.
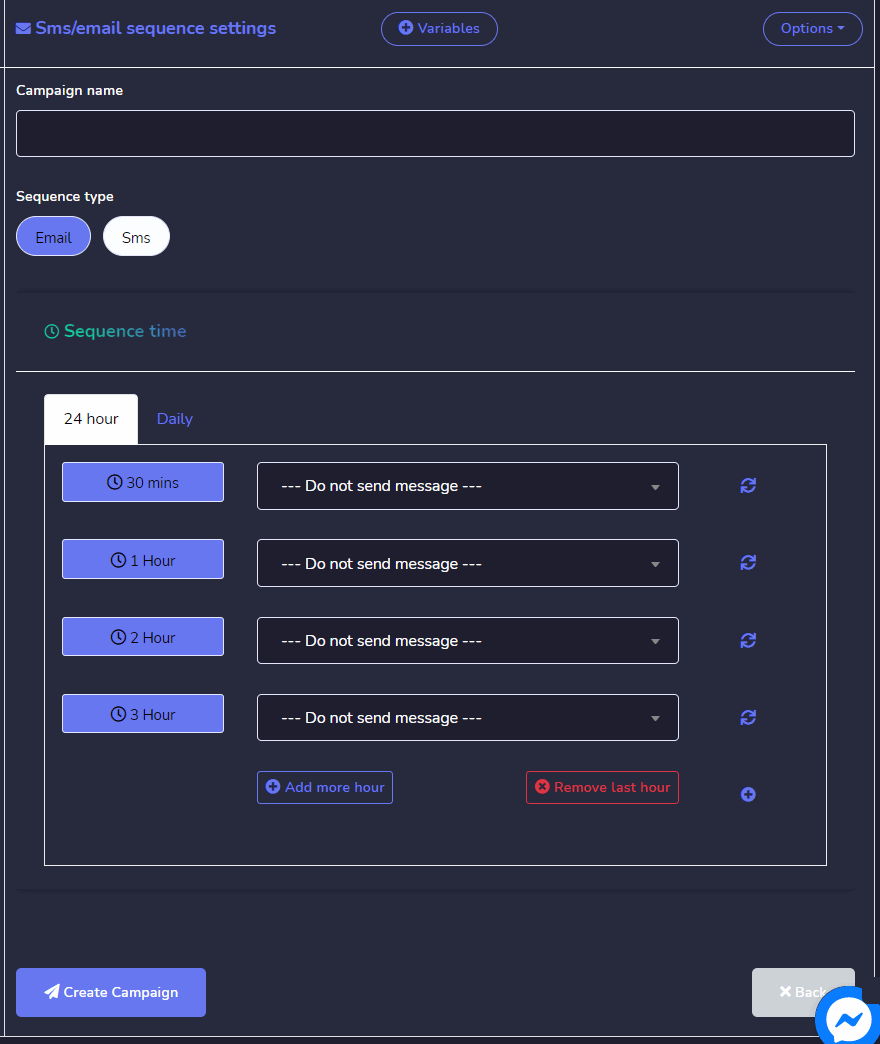
For SMS/email sequence settings, things work the same as Messenger sequence settings. This is how it differs when you create SMS/Email sequence settings.
