JSON API Connector
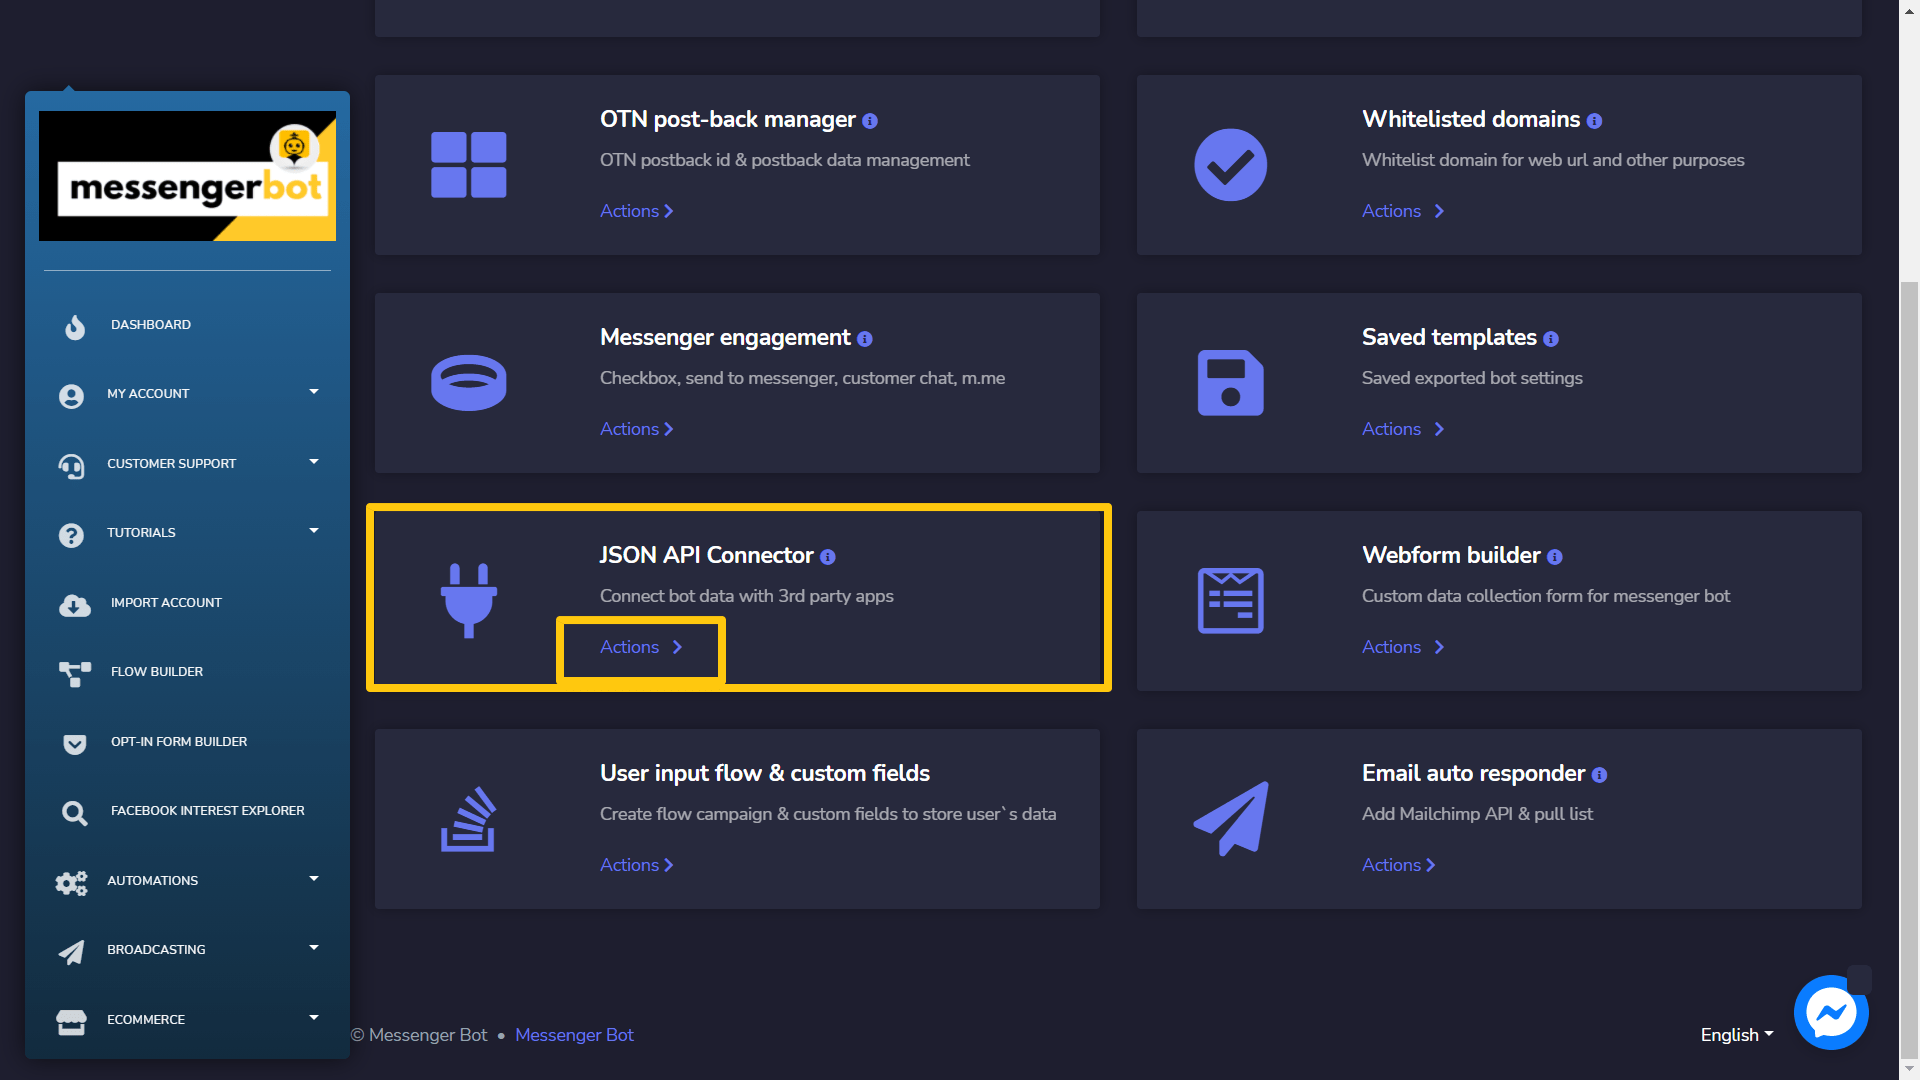
To access the JSON API Connector section, select JSON API Connector, pagkatapos ay piliin Mga Aksyon mula sa Messenger Bot screen.
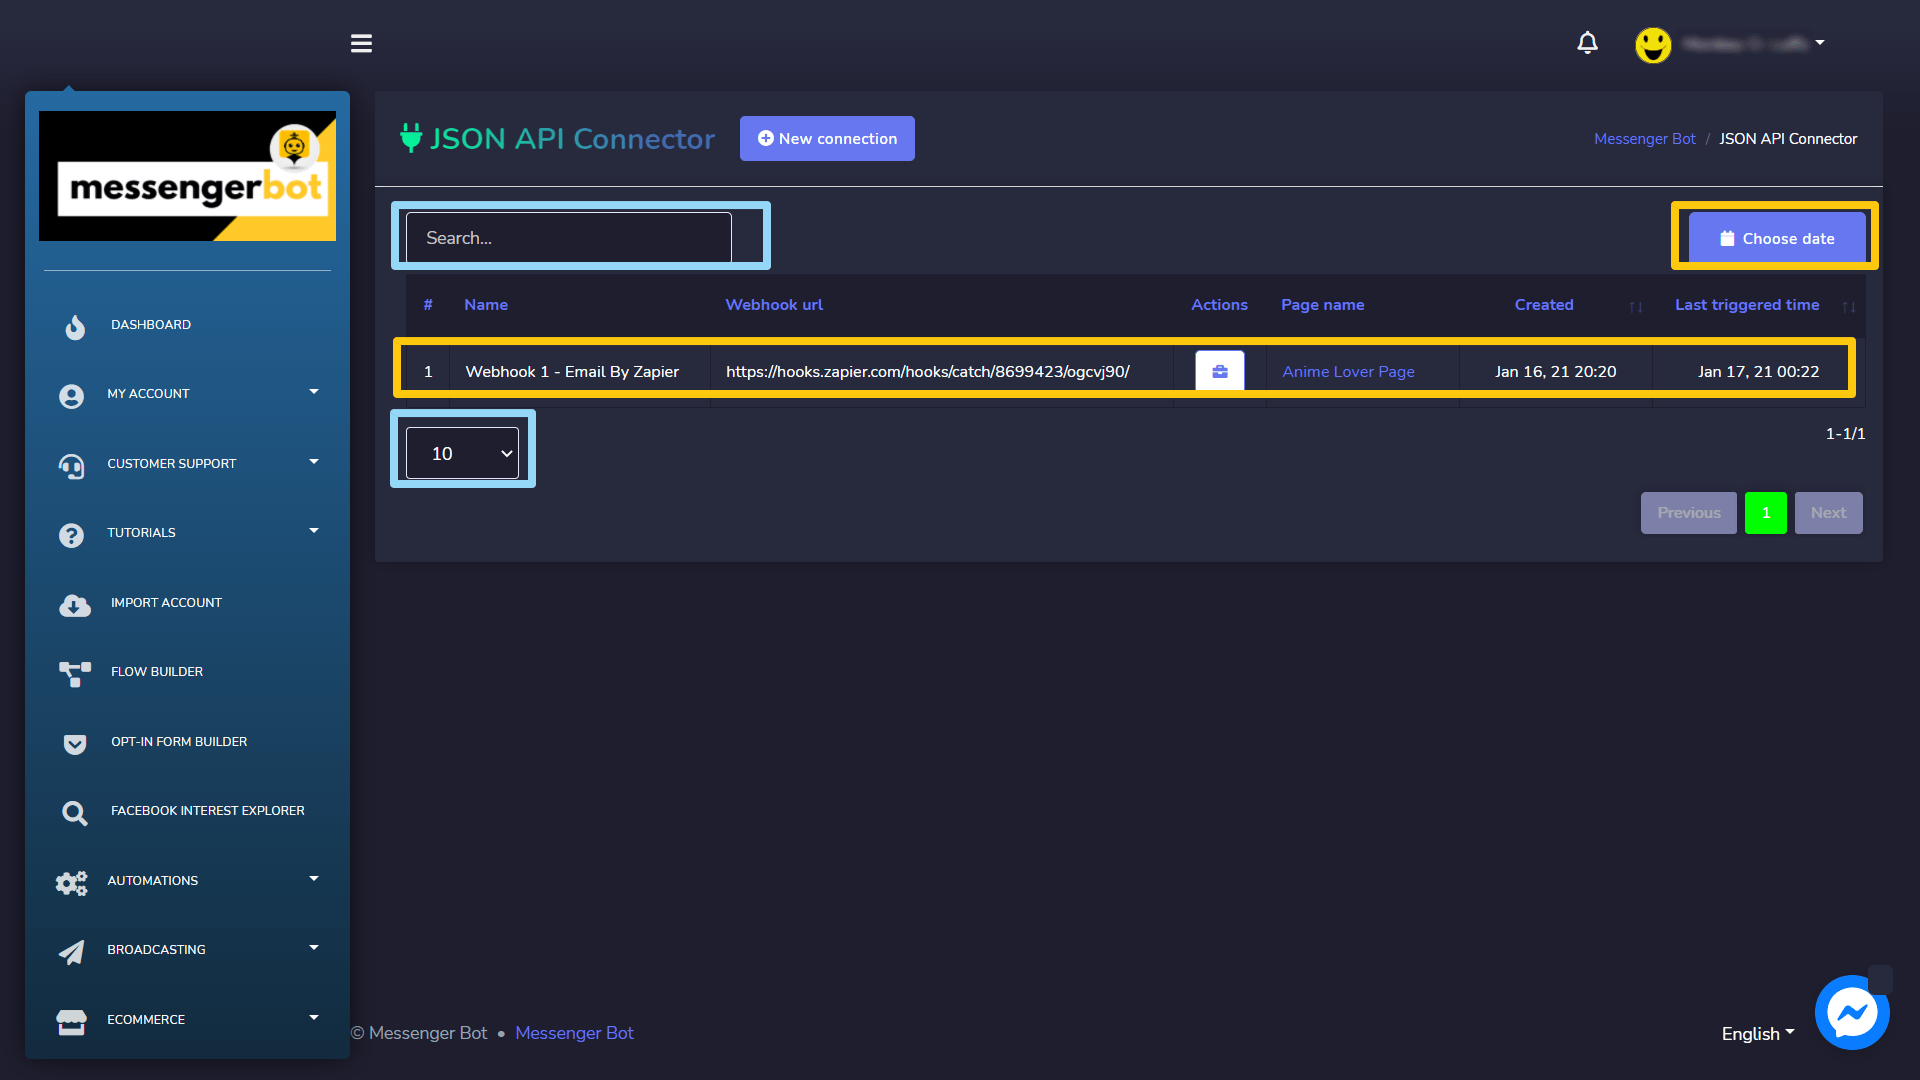
JSON API Connector screen consists of a list of webhook URLs, you can search for a specific URL by using the search bar. Maaari mong adjust the number of URLs to be tingnan bawat pahina. Maaari mo ring ayusin sila sa alinman sa pataas o pababang pagkakasunod-sunod sa pamamagitan ng pagpili ng mga arrow from the header. Select the date filter to paliitin ang iyong paghahanap.
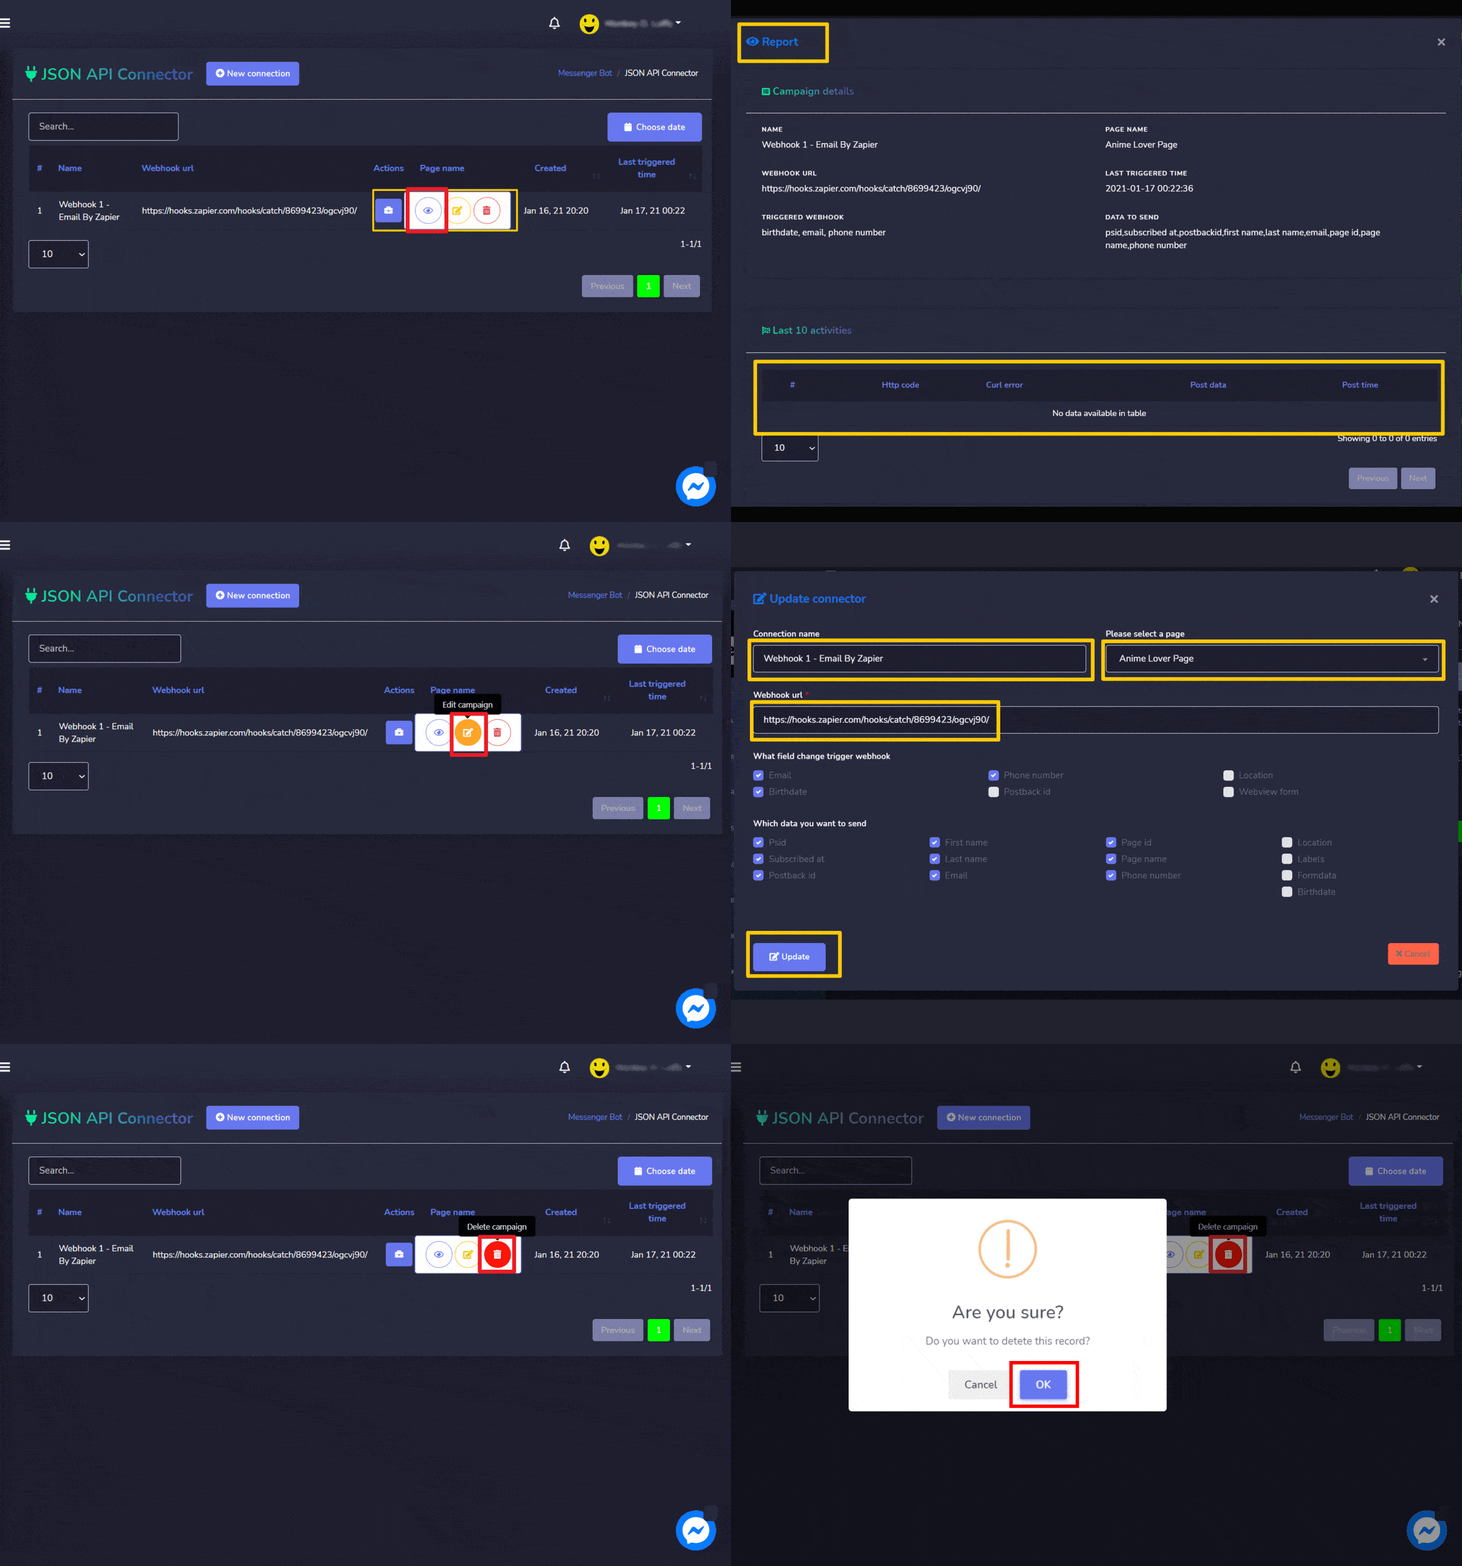
- View report sa pamamagitan ng pagpili ng
 .
. - Edit campaign
- Delete record
Create Connection
You can create a new connection by following the steps given below:
- Pumili
 mula sa kanang itaas ng screen.
 - Ibigay ang Pangalan and select the pahina for which you want to add the connection.
- Ilagay ang webhook URL in the field.
- Mark the checkboxes against the field for which you want to change trigger webhook.
- Mark the checkboxes against the field for which you want to send the data.
- Pumili I-save to make a new connection.
Webform builder
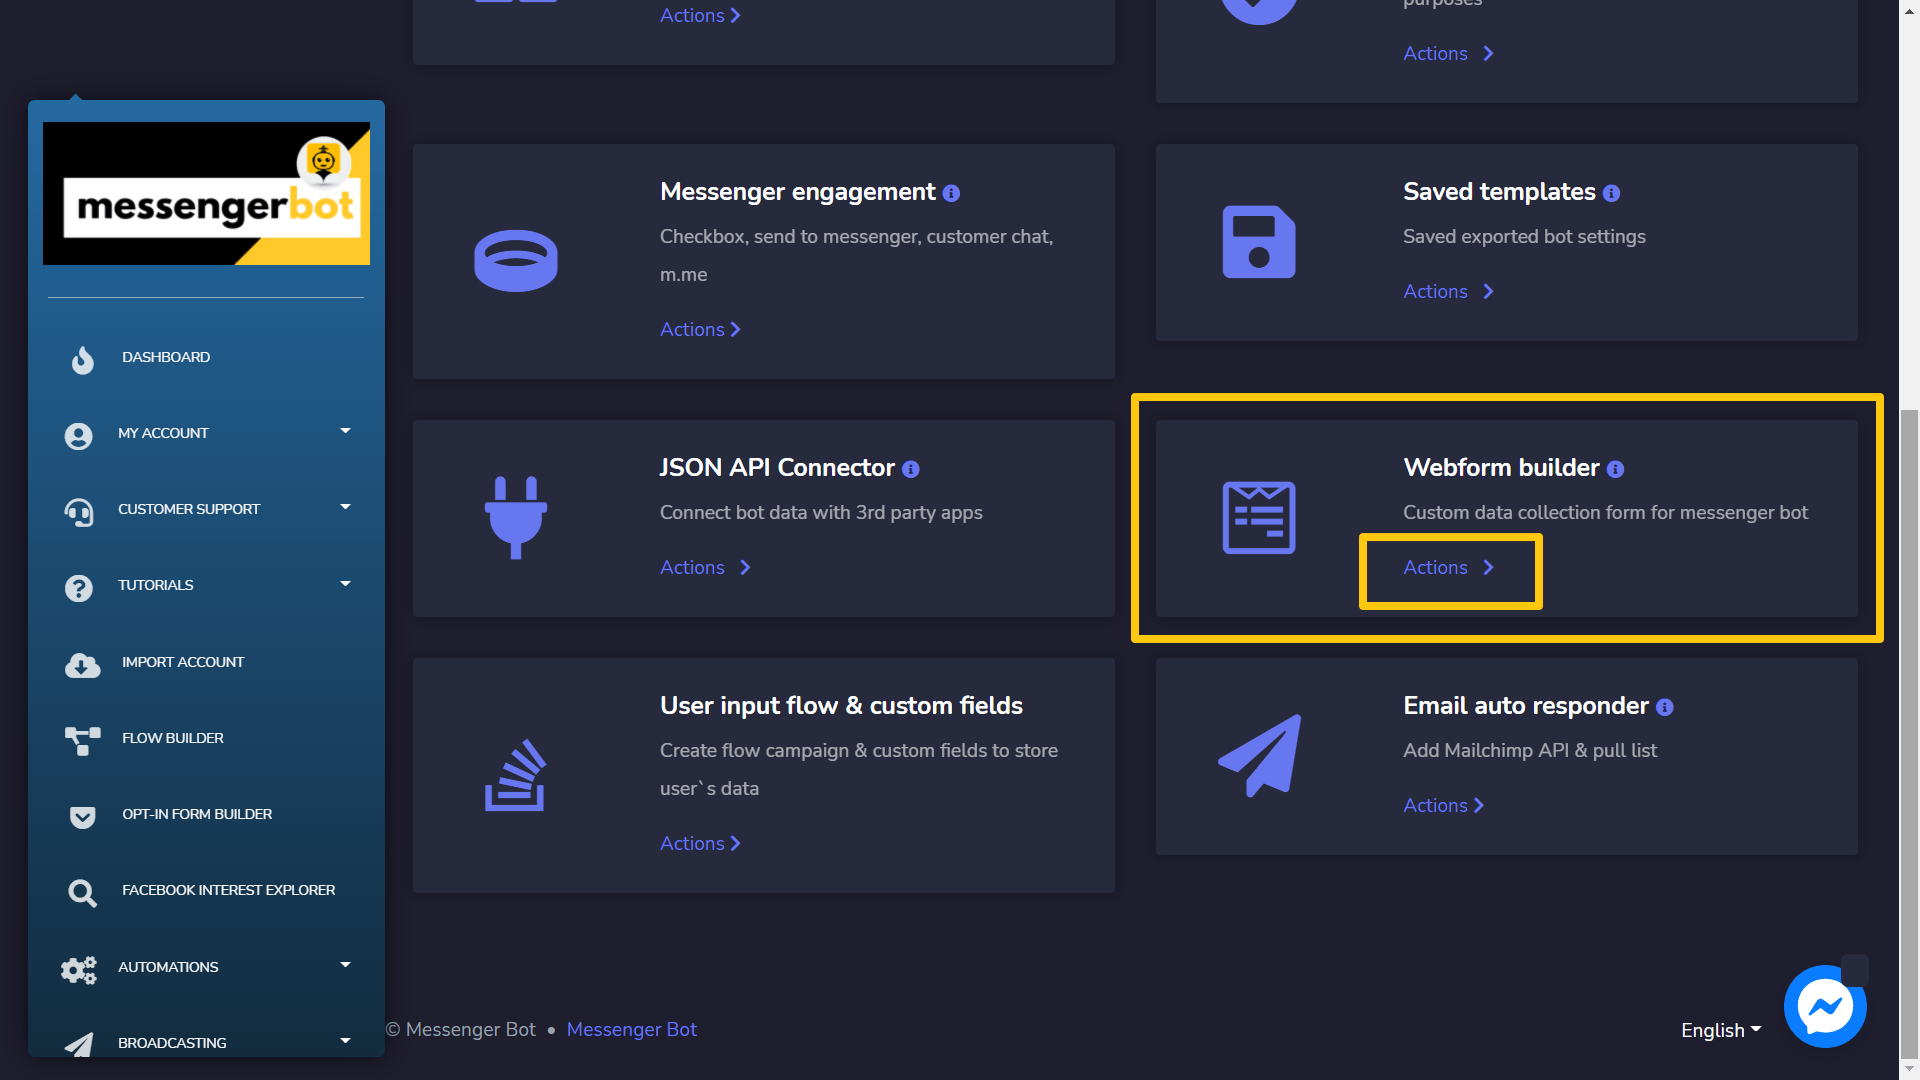
To access the webform builder section, select Webform builder, pagkatapos ay piliin Mga Aksyon mula sa Messenger Bot screen.
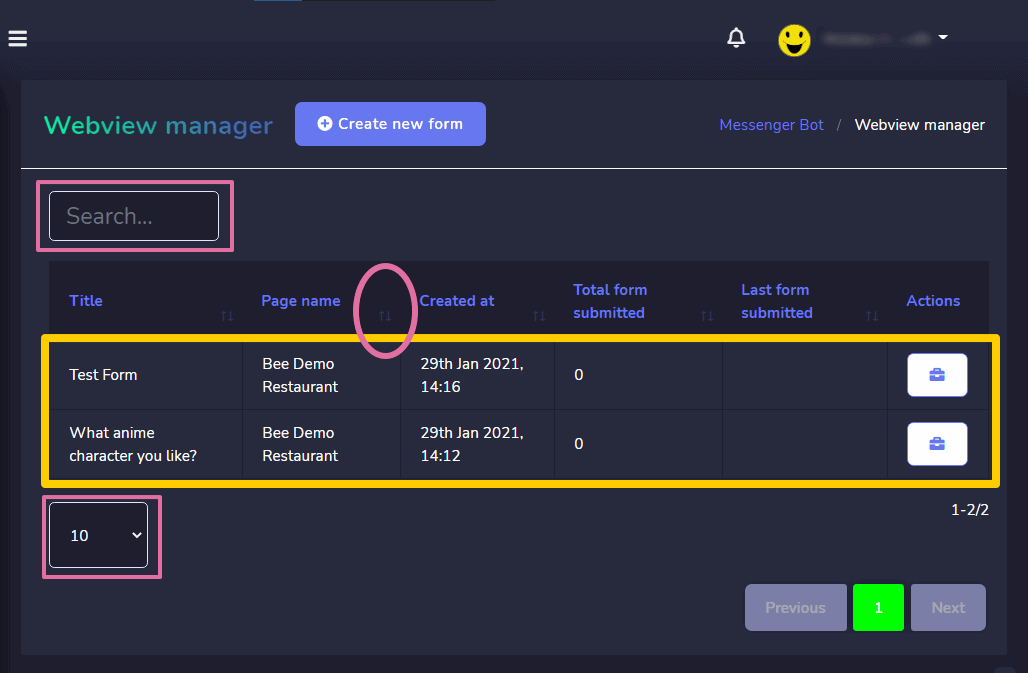
Webview manager screen consists of a list of pages, you can search for a specific page by using the search bar. Maaari mong ayusin ang bilang ng mga pahina na dapat maging tingnan bawat pahina. Maaari mo ring ayusin ang mga ito sa pataas o pababang pagkakasunod-sunod sa pamamagitan ng pagpili ng mga arrow mula sa header.
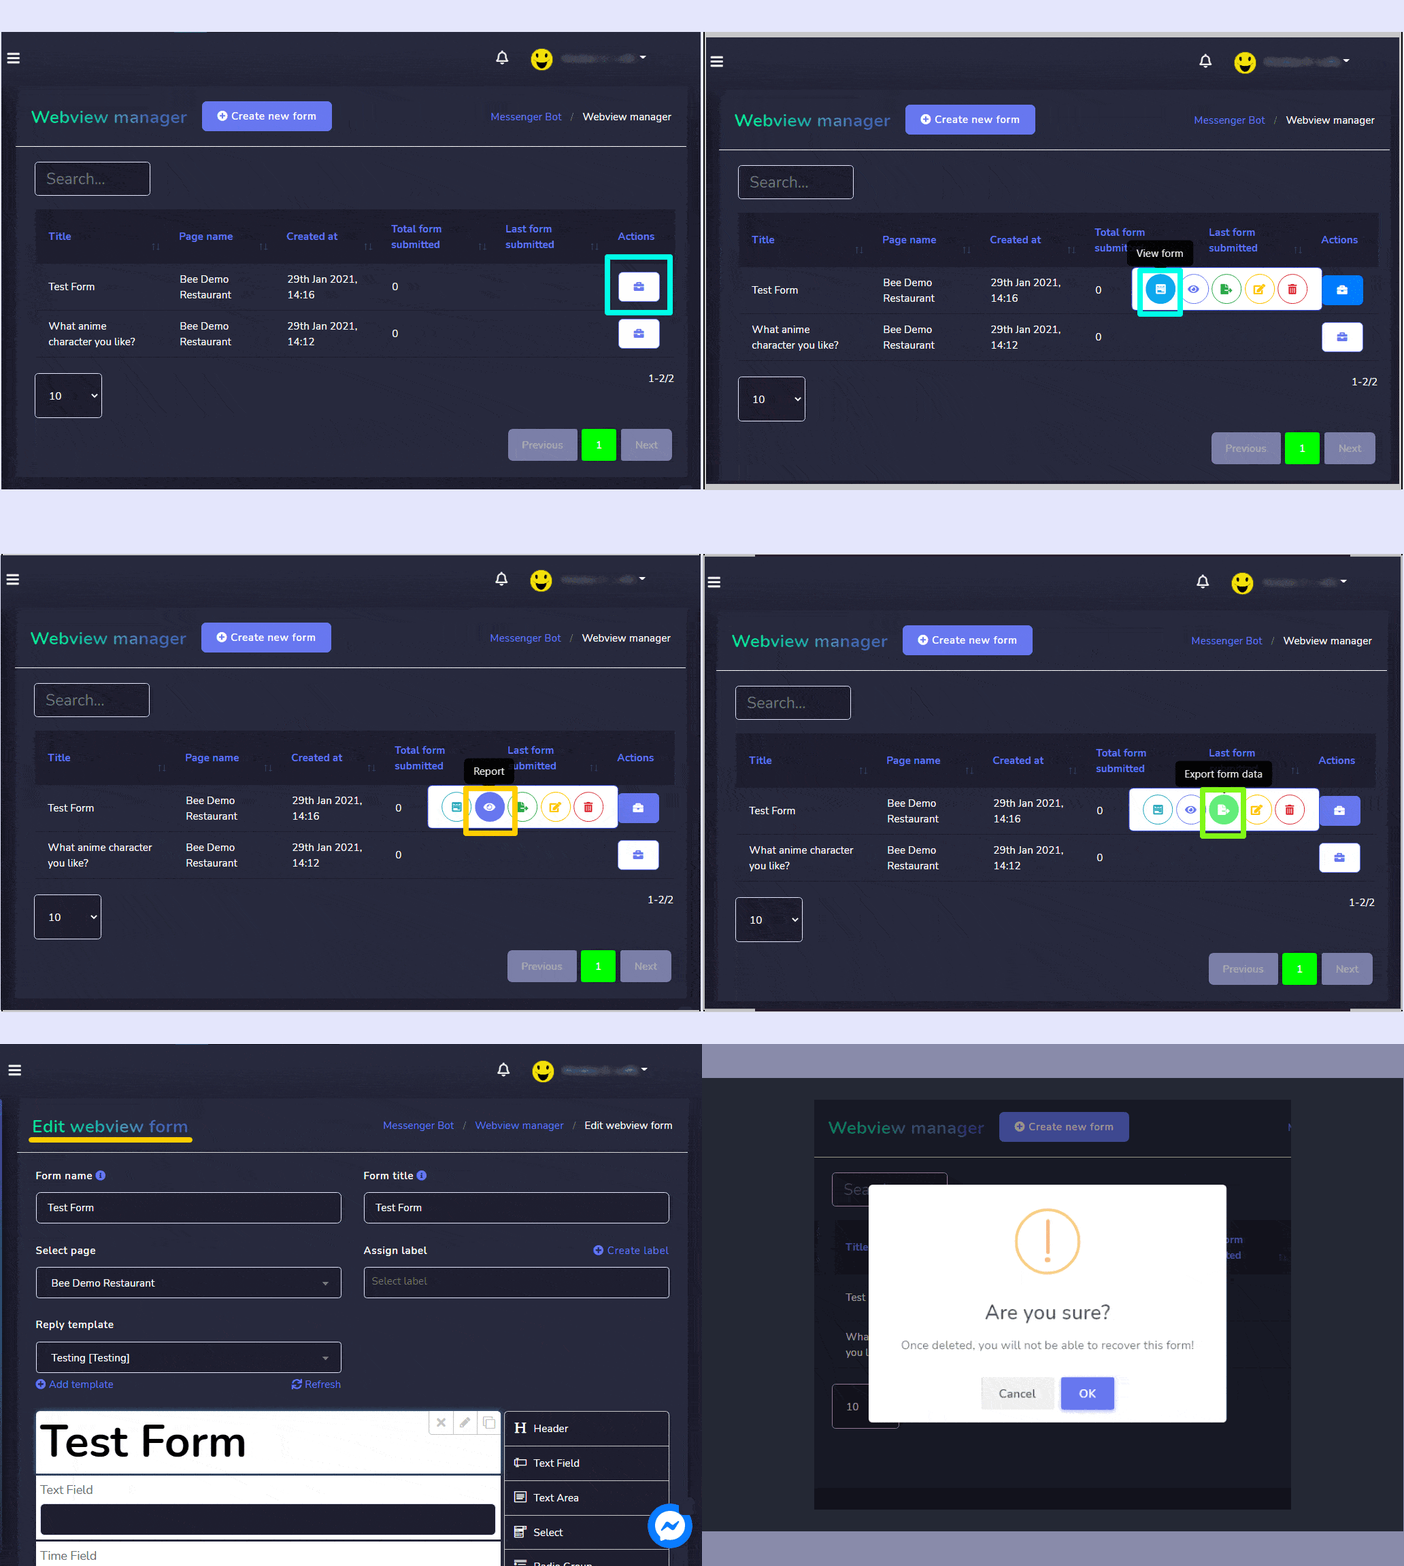
Narito ang mga aksyon na maaaring isagawa:
- View the form sa pamamagitan ng pagpili ng
 .
. - View the report sa pamamagitan ng pagpili ng
 .
. - Export the data from the form sa pamamagitan ng pagpili ng
 .
. - Edit the form
- Delete the form
Webform elements
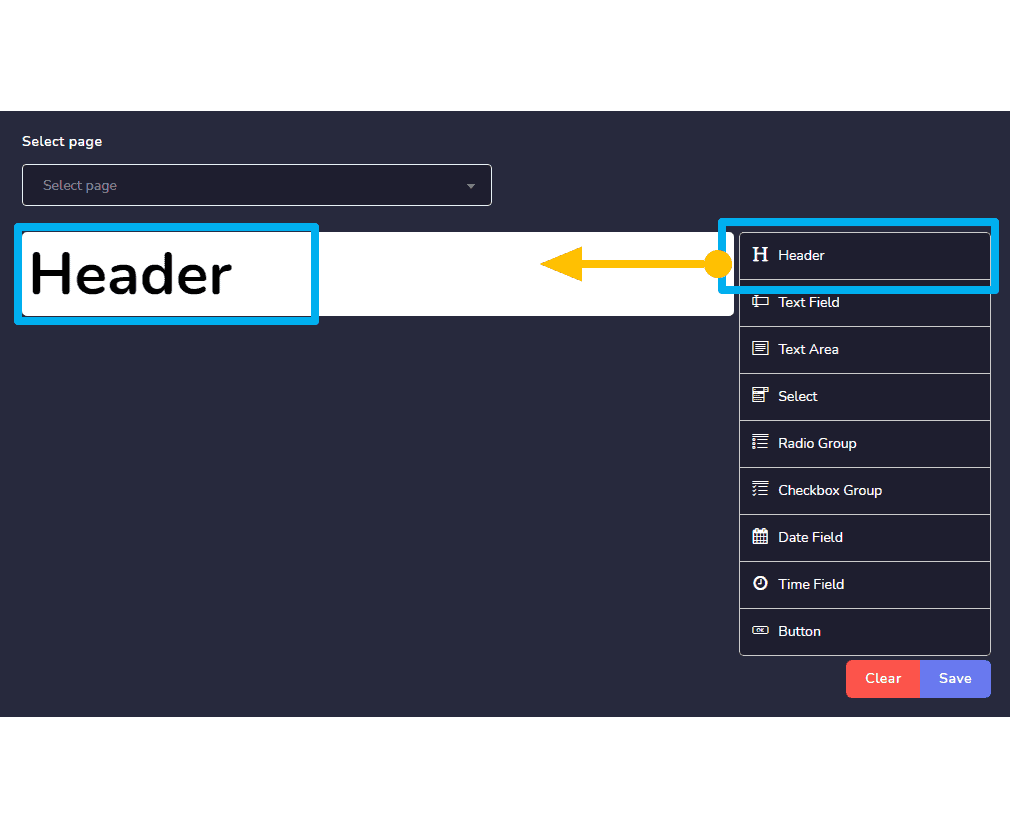
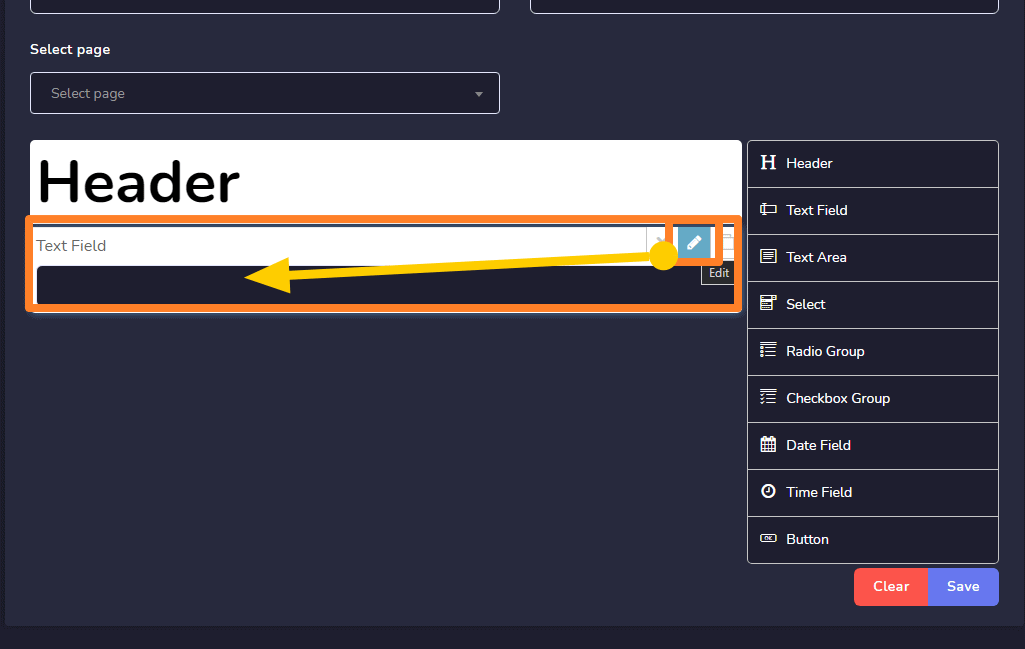
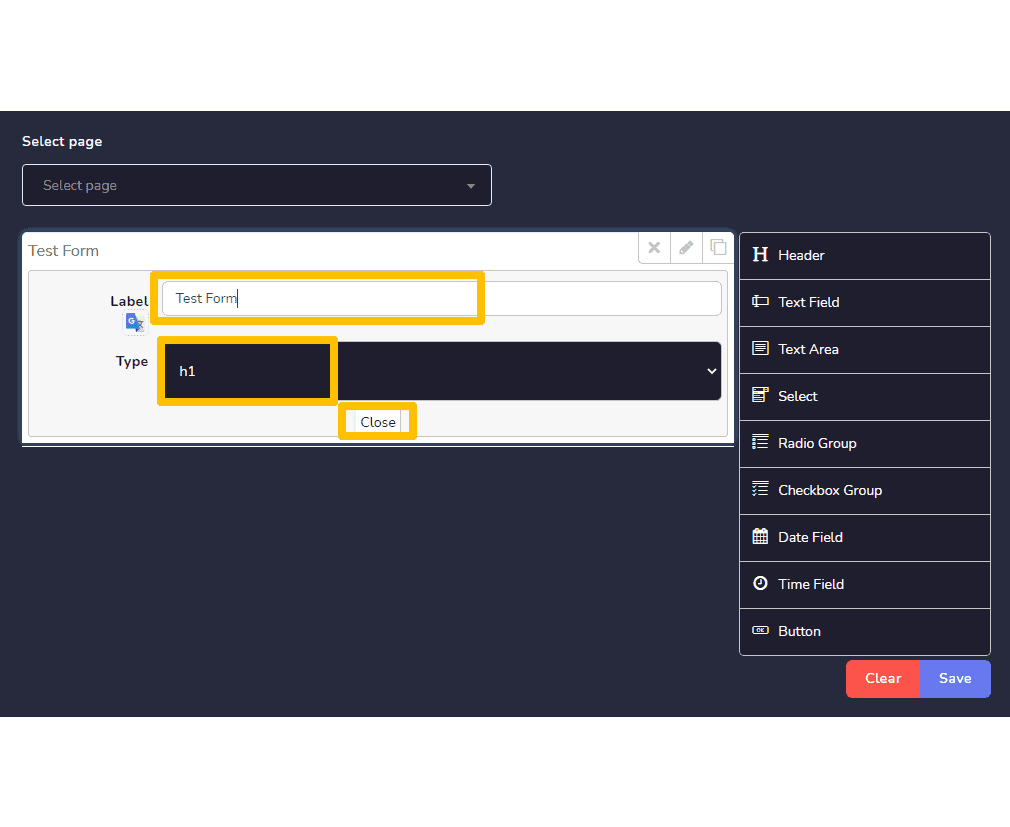
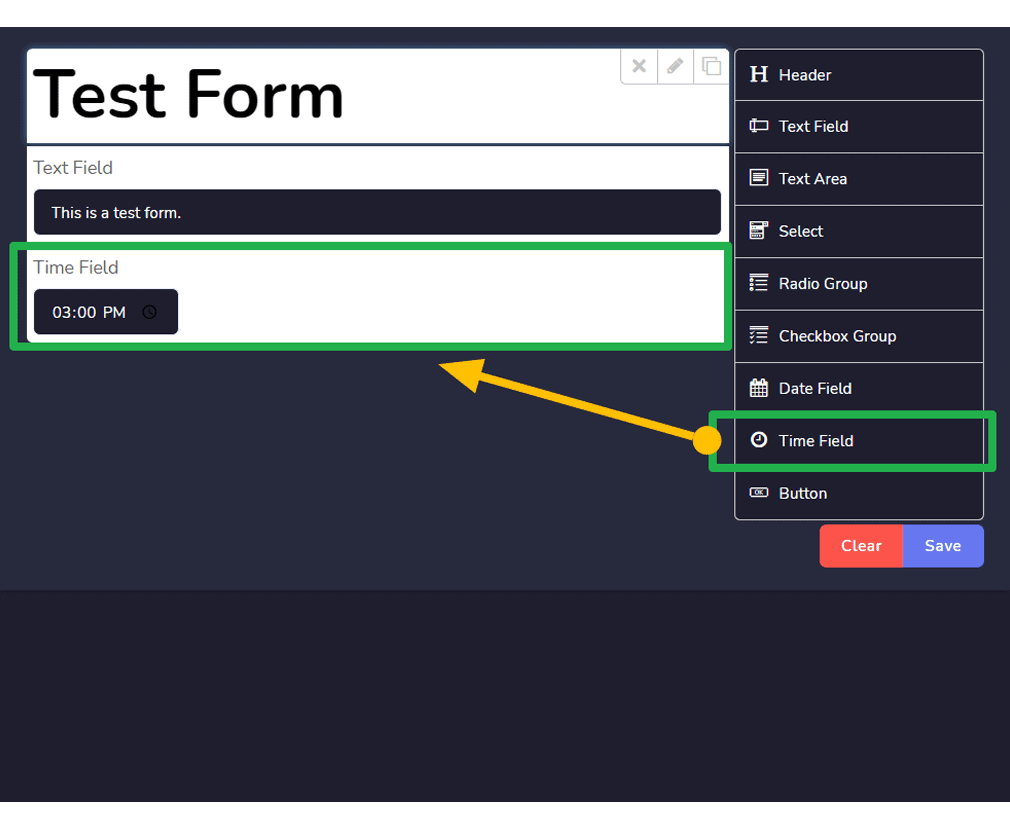
To create a webform by dragging and dropping the elements from the right side to the canvas on the left side. You can add as many components as you want in the form. You can rename these components. For this purpose, you have the following set of elements:
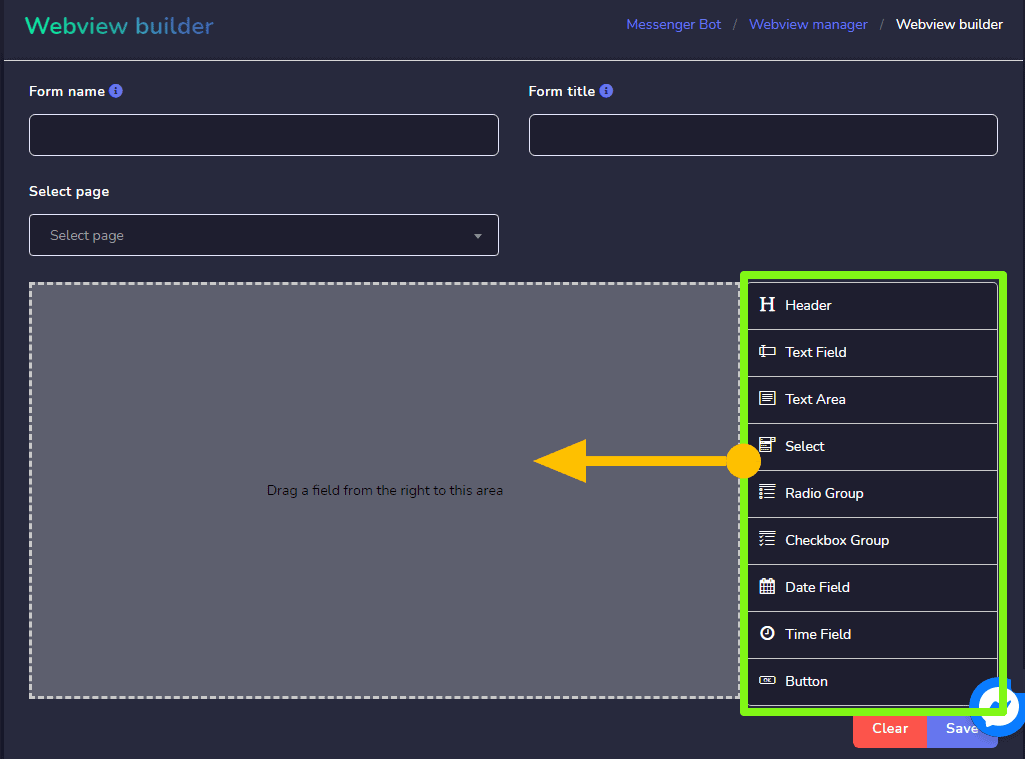
- Header: Here you can write the title/agenda of your form
- Text field: You can add and edit a text from this field.
- Text area: You can add and edit a text from this area.
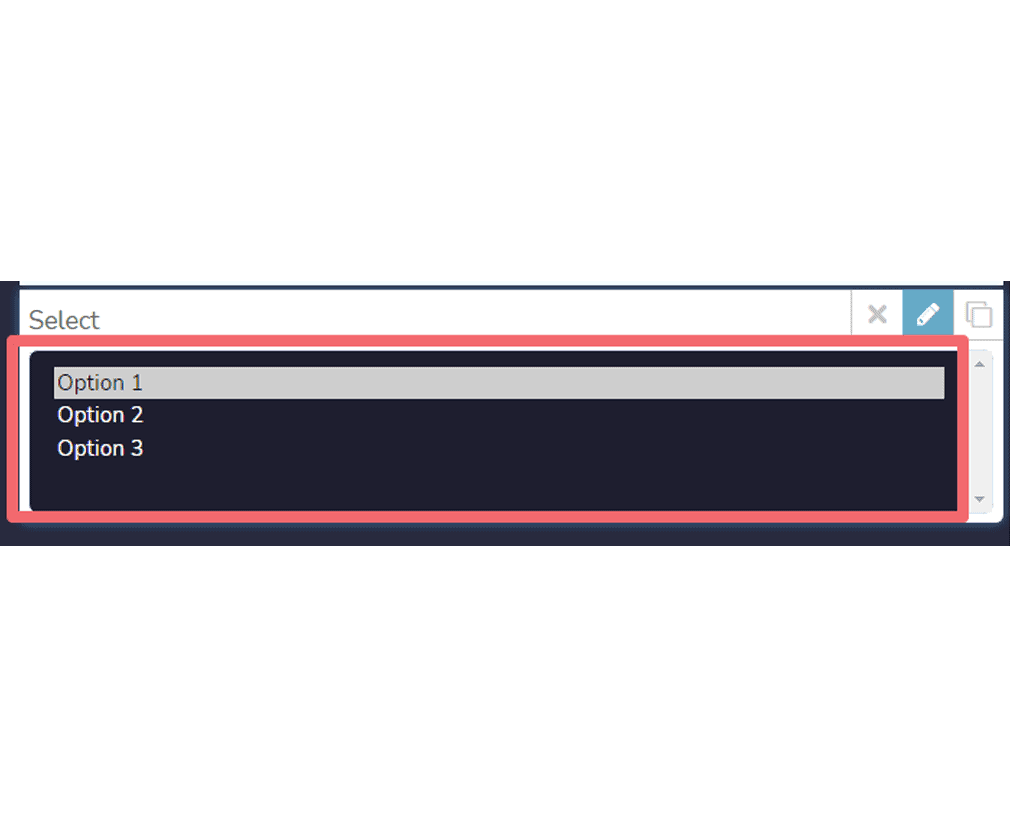
- Select: You can add a dropdown menu using this select option. It will have many options. In the form, the user can choose one option.
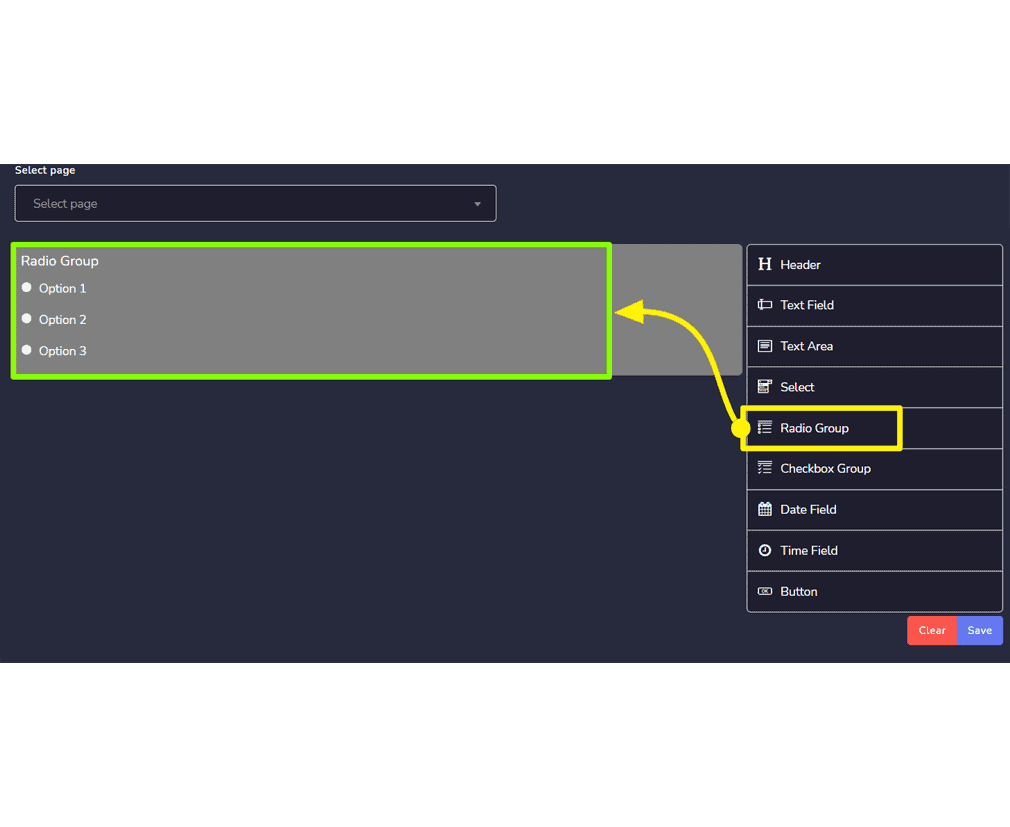
- Radio group: It will have many radio buttons, in the form user can choose one.
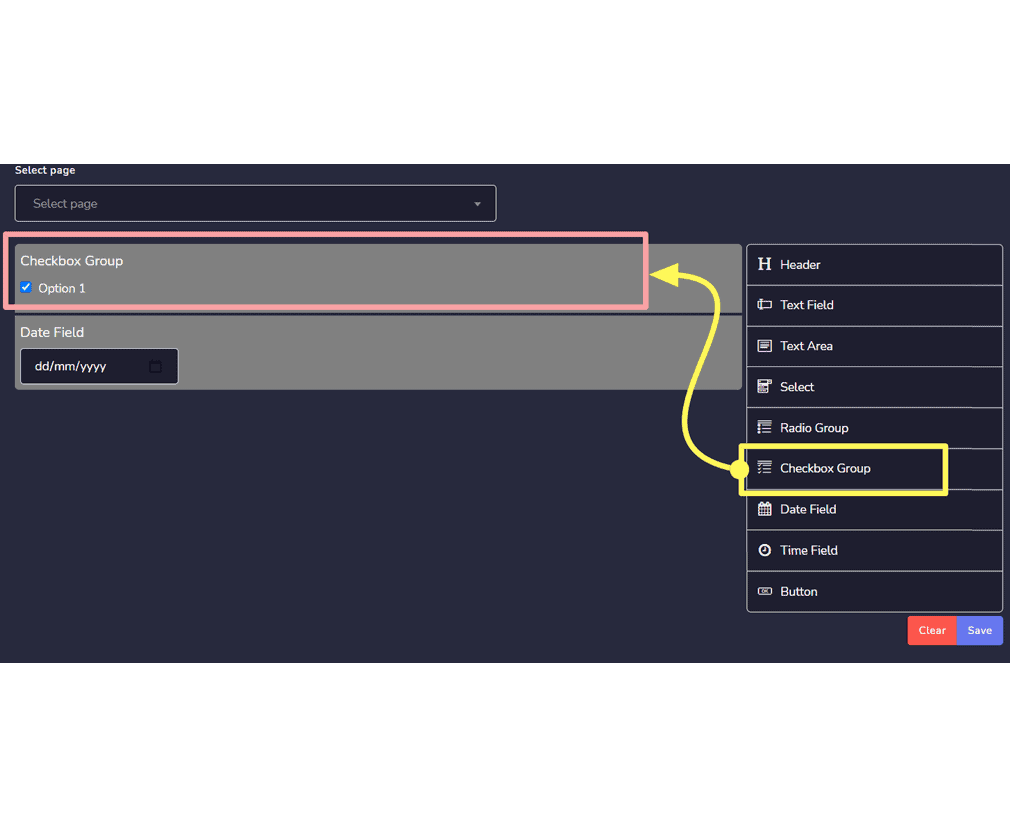
- Checkbox group: It will have many checkboxes, in the form user can choose one.
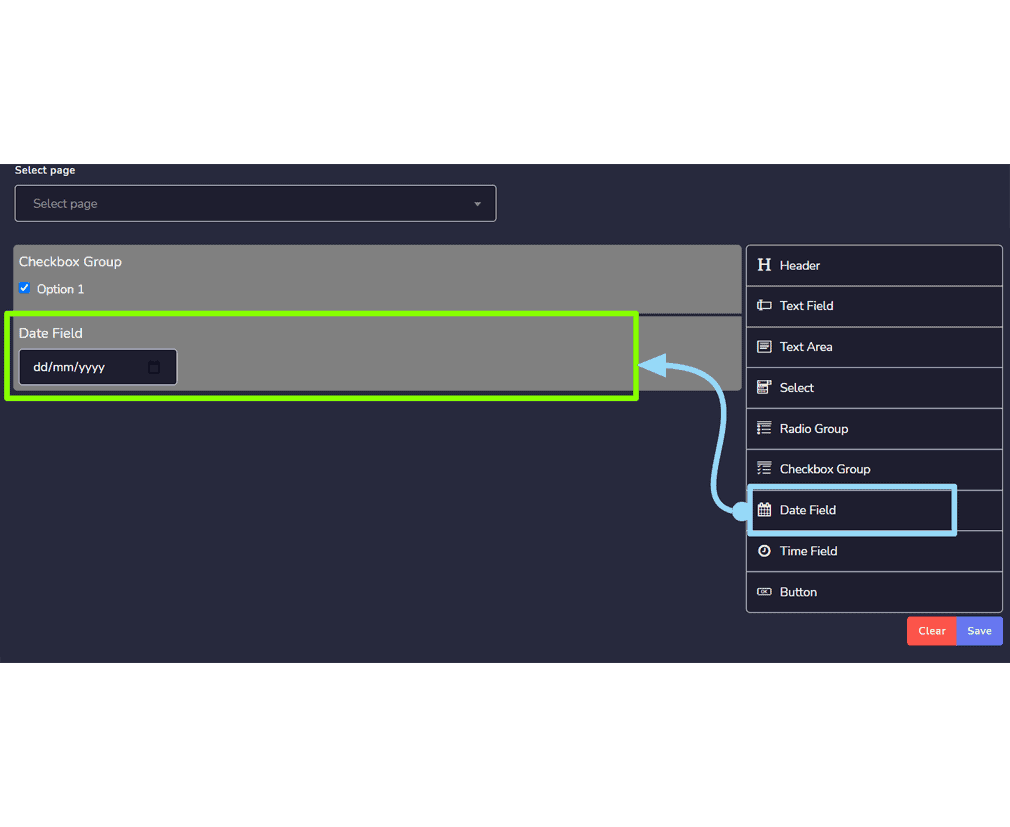
- Date field: It will have the mm/dd/yy field.
- Time field: It will have –:– — field to make the user enter the time.
- Button: It is a clickable box that works on action.
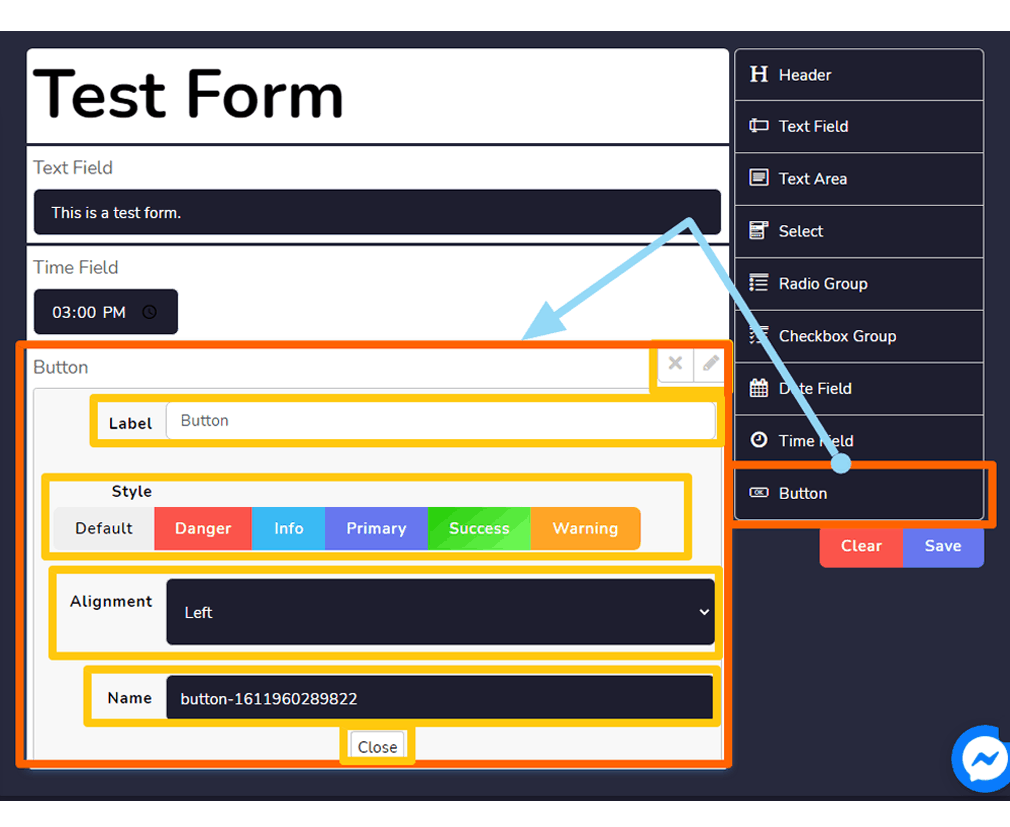
Create new form
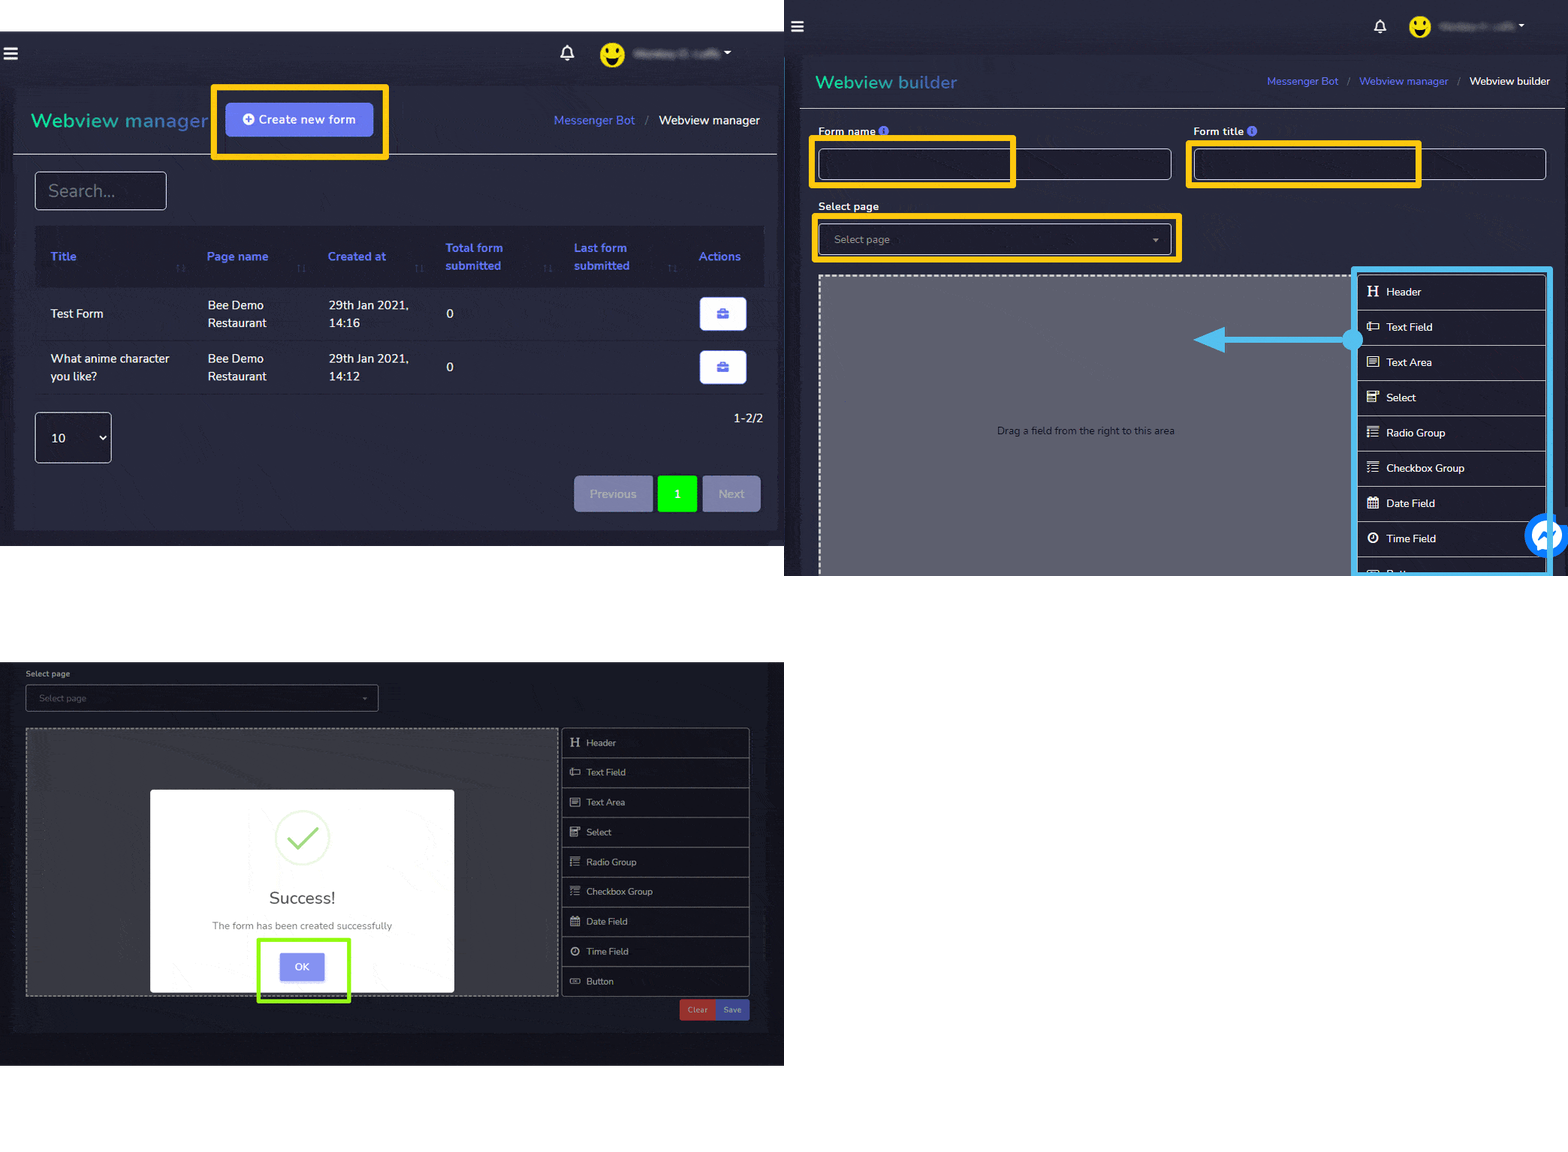
You can create a new form by following the steps given below:
- Pumili
 mula sa kanang itaas ng screen.
 - Ibigay ang Form pangalan at Form title for your new form.
- Pumili ng pahina for which you want to create your form.
- Drag and drop the fields you want to drag in the form as described in Webform elements.
- Pumili I-save to make a new form.
| Tandaan: | |
| · It is mandatory to choose the button field while creating a new form. | |
Email auto responder
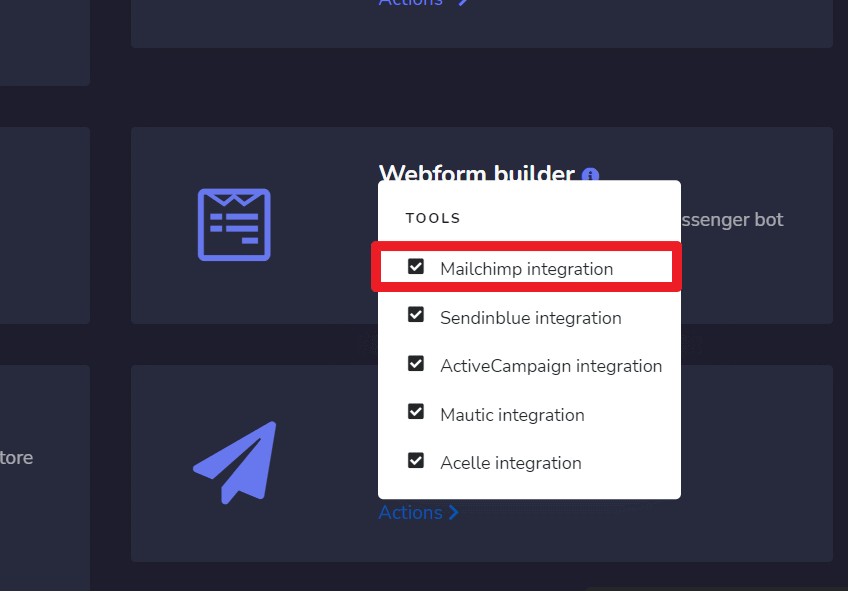
To access the email auto responder section, select Email auto responder, pagkatapos ay piliin Mga Aksyon mula sa Messenger Bot screen.
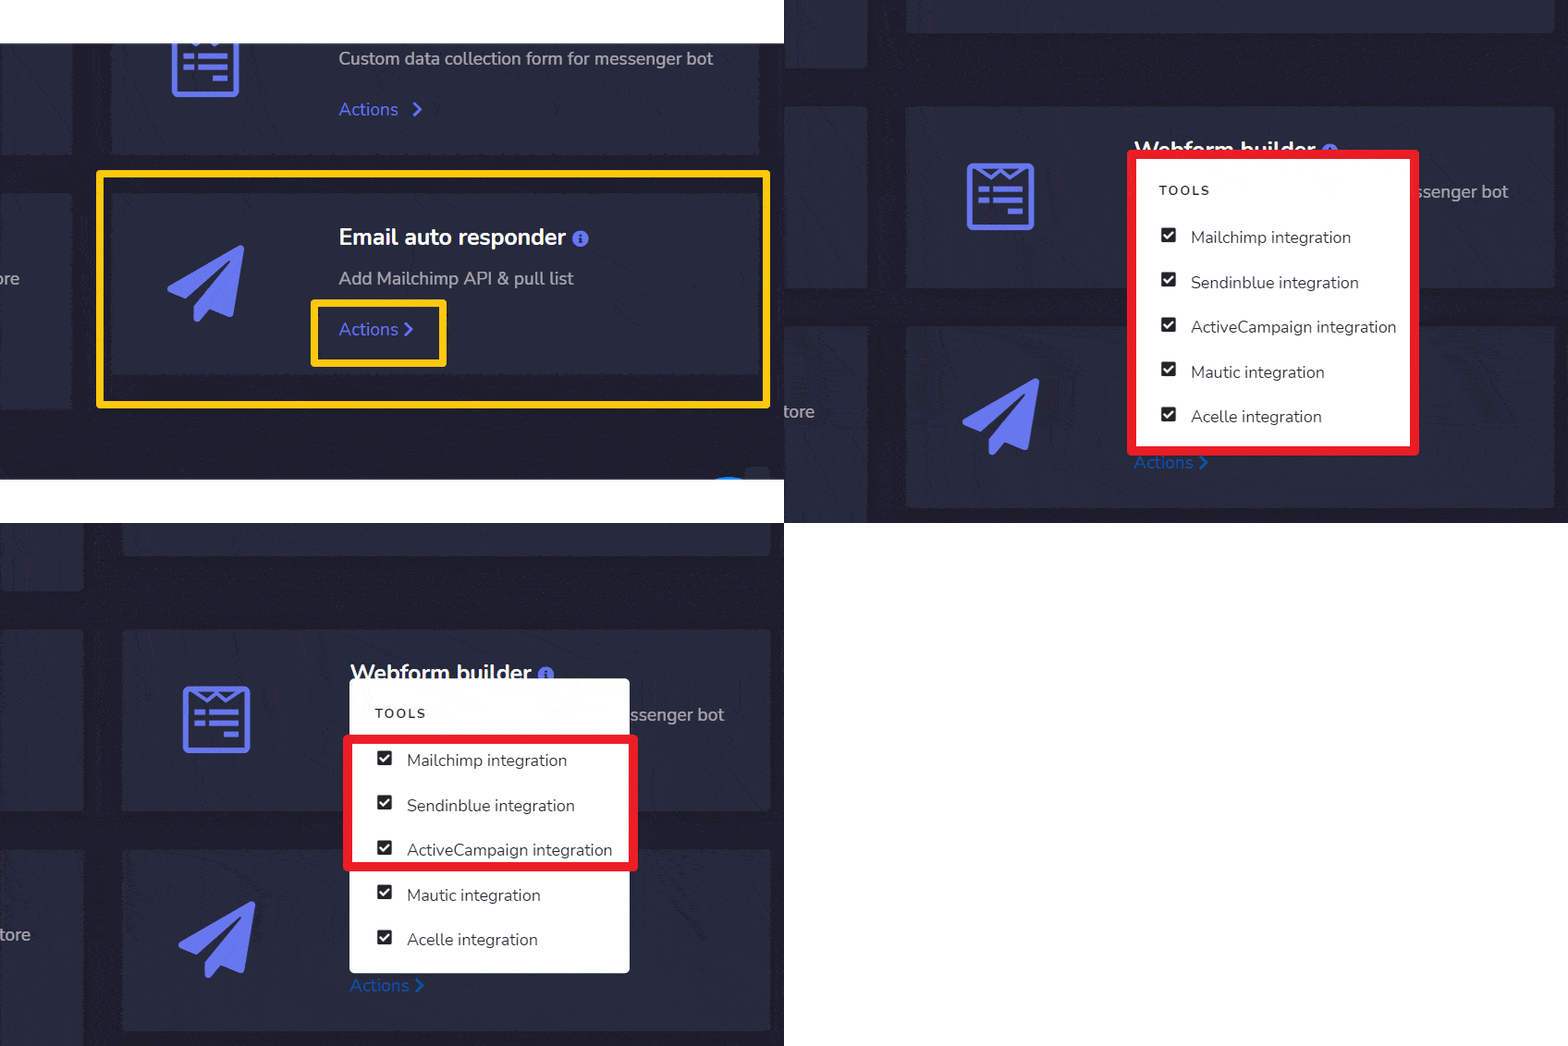
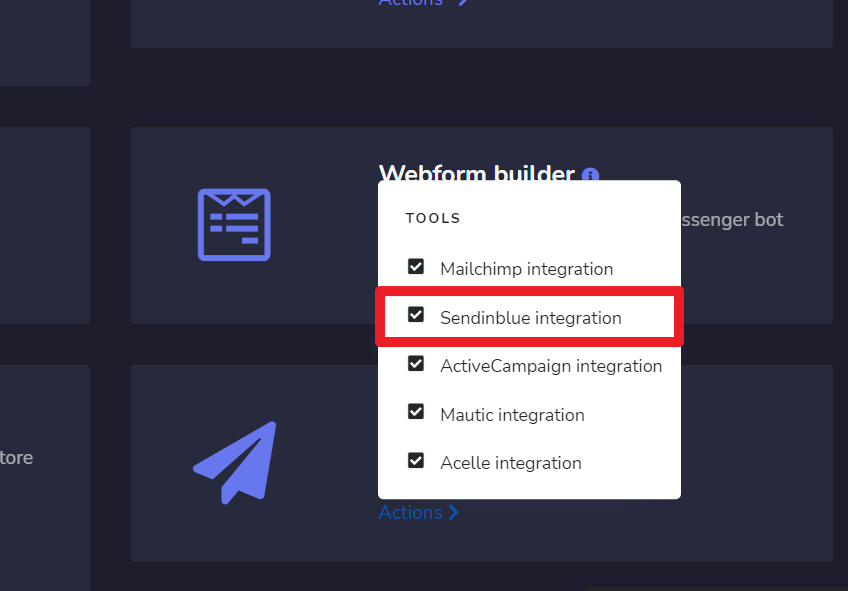
A dropdown menu containing five different options will appear on the screen:
- Mailchimp Integration
- Sendin Blue Intergration
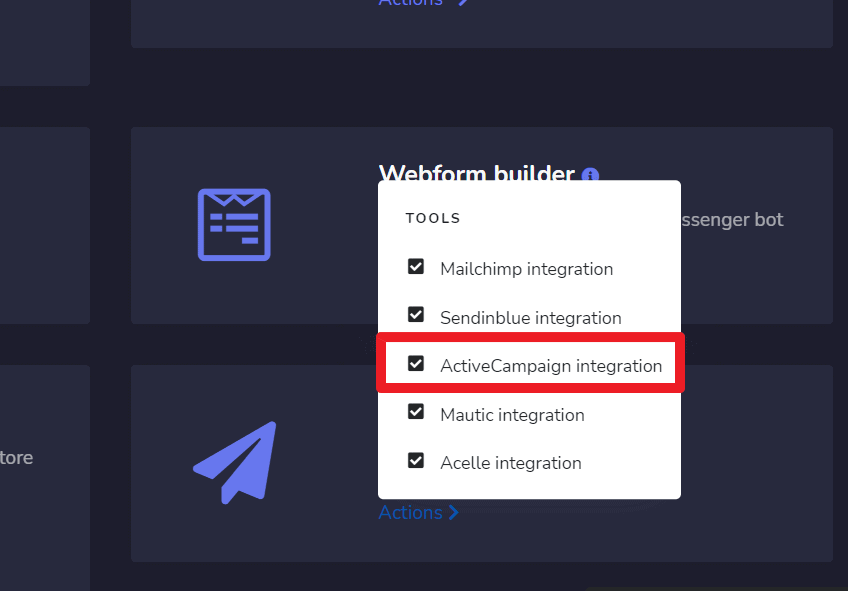
- Activecampaign Intergration
- Mautic integration
- Acelle integration
But on this page, we will show you the first 3 options.
|
Tandaan: |
|
|
· It is mandatory to have accounts in all three options to make the integration possible. |
|
Mailchimp integration
Mailchimp integration screen consists of API Keys, you can search for a specific tracking name by using the search bar. Maaari mong ayusin ang bilang of names to be tingnan bawat pahina. Maaari mo ring ayusin ang mga ito sa pataas o pababang pagkakasunod-sunod sa pamamagitan ng pagpili ng mga arrow mula sa header.
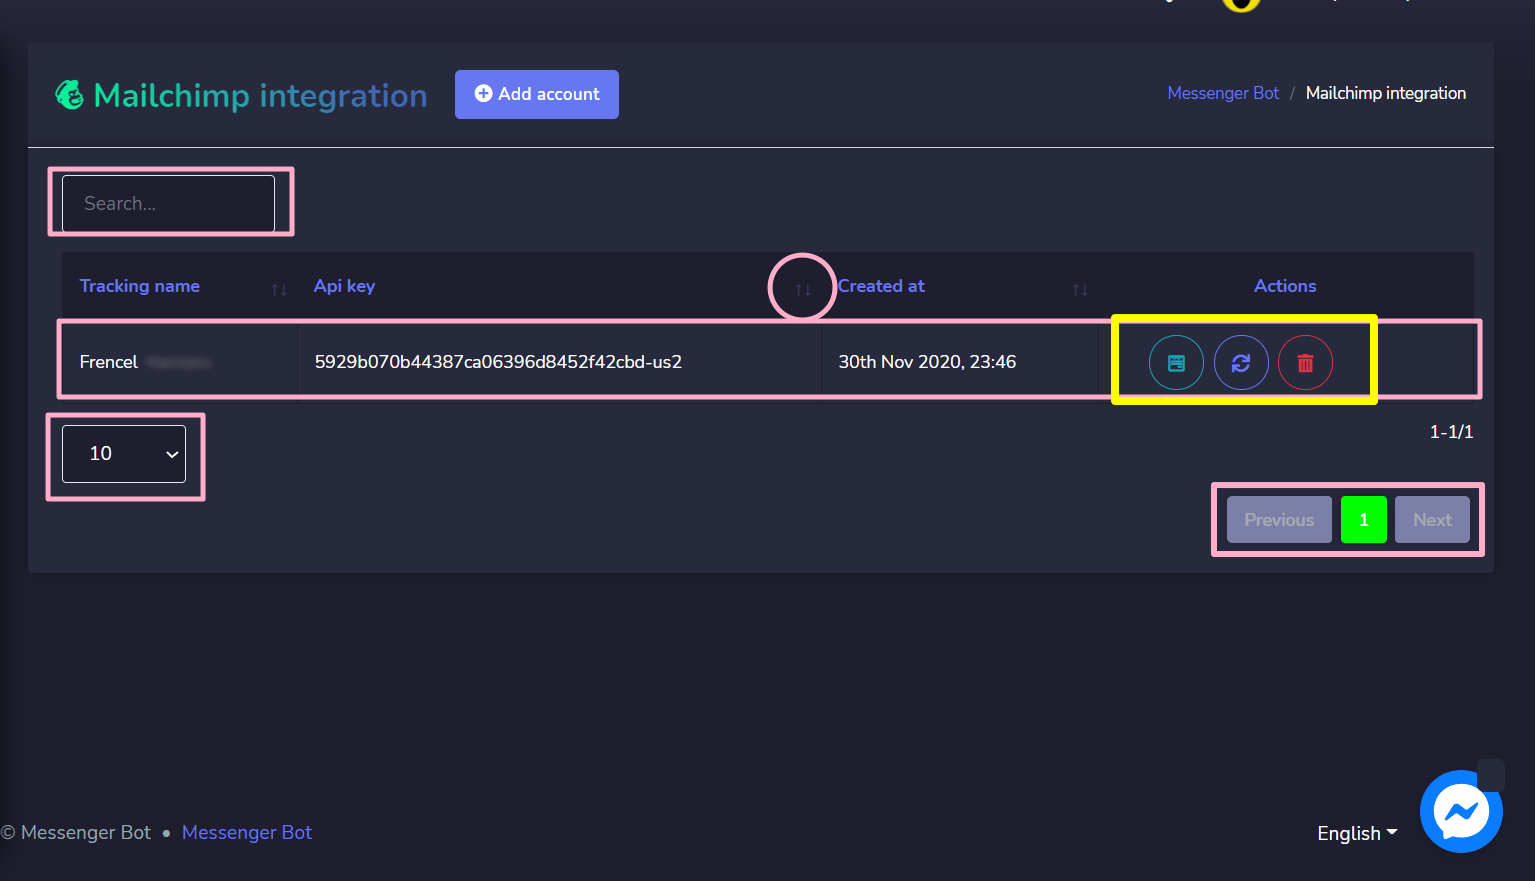
- View the list sa pamamagitan ng pagpili ng
 .
. - Refresh the list sa pamamagitan ng pagpili ng
 .
. - Delete the account
Add account
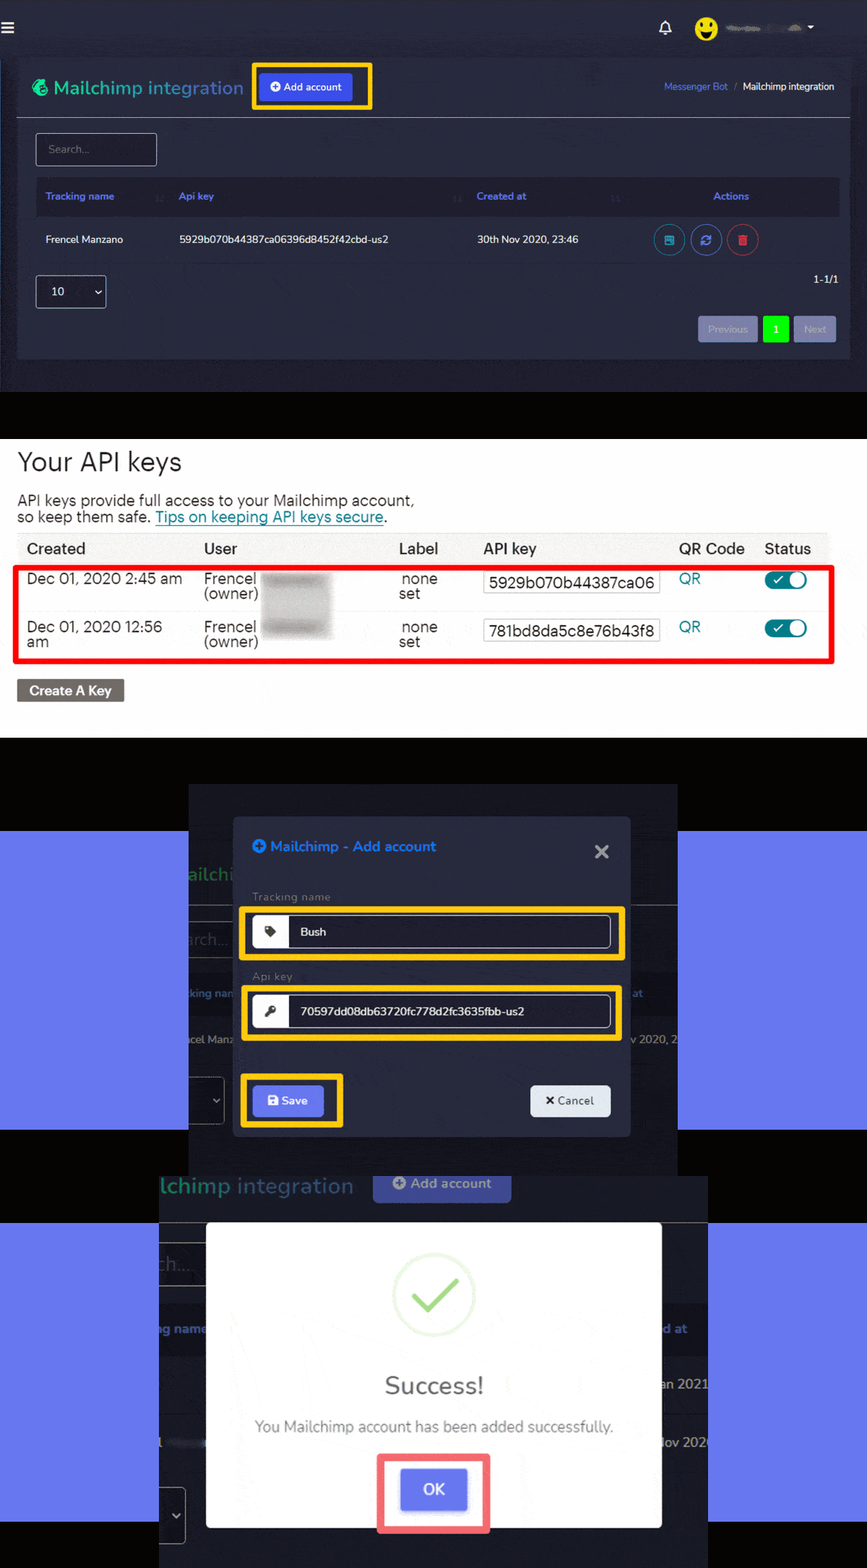
You can add an account by following the steps given below:
- Pumili
 mula sa kanang itaas ng screen.
 - Ibigay ang Tracking name for your list.
- Magbigay API key generated from Mailchimp account.
- Pumili I-save to add the new account.
Sendin Blue integration
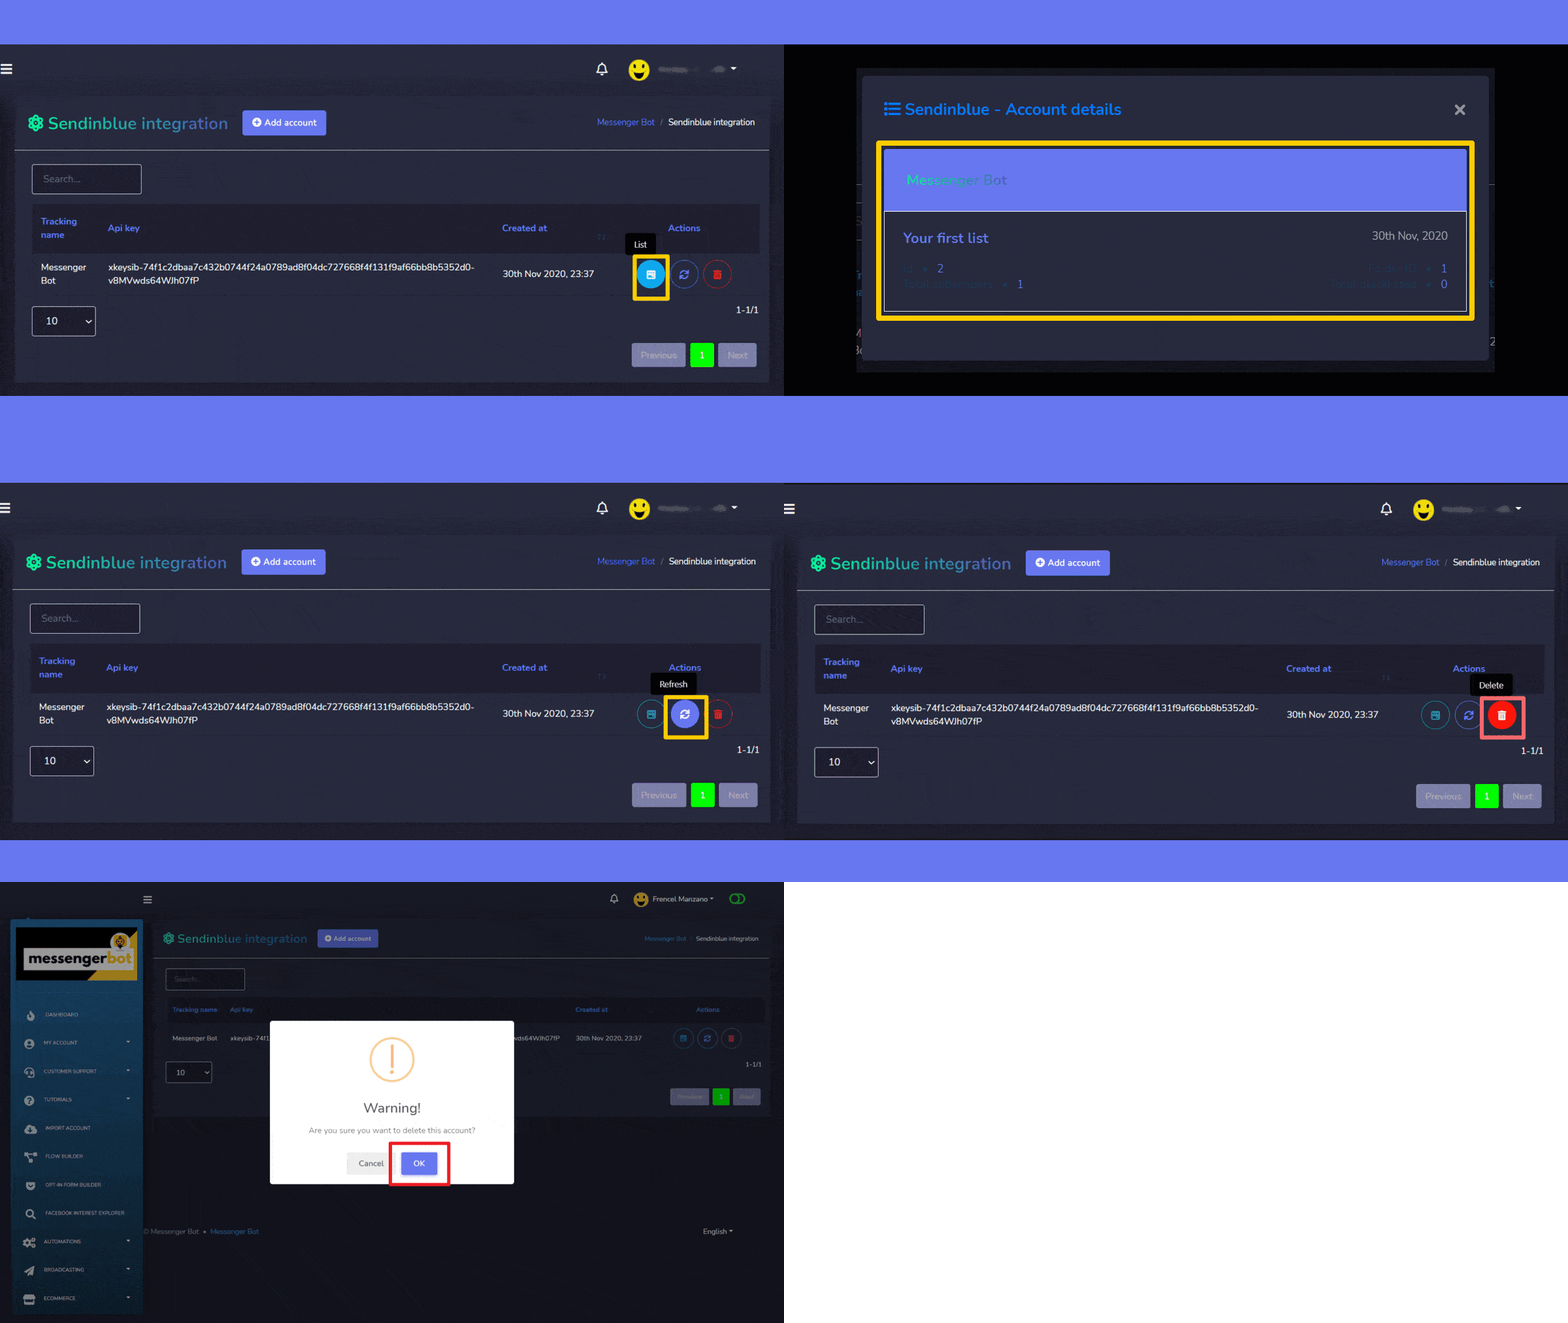
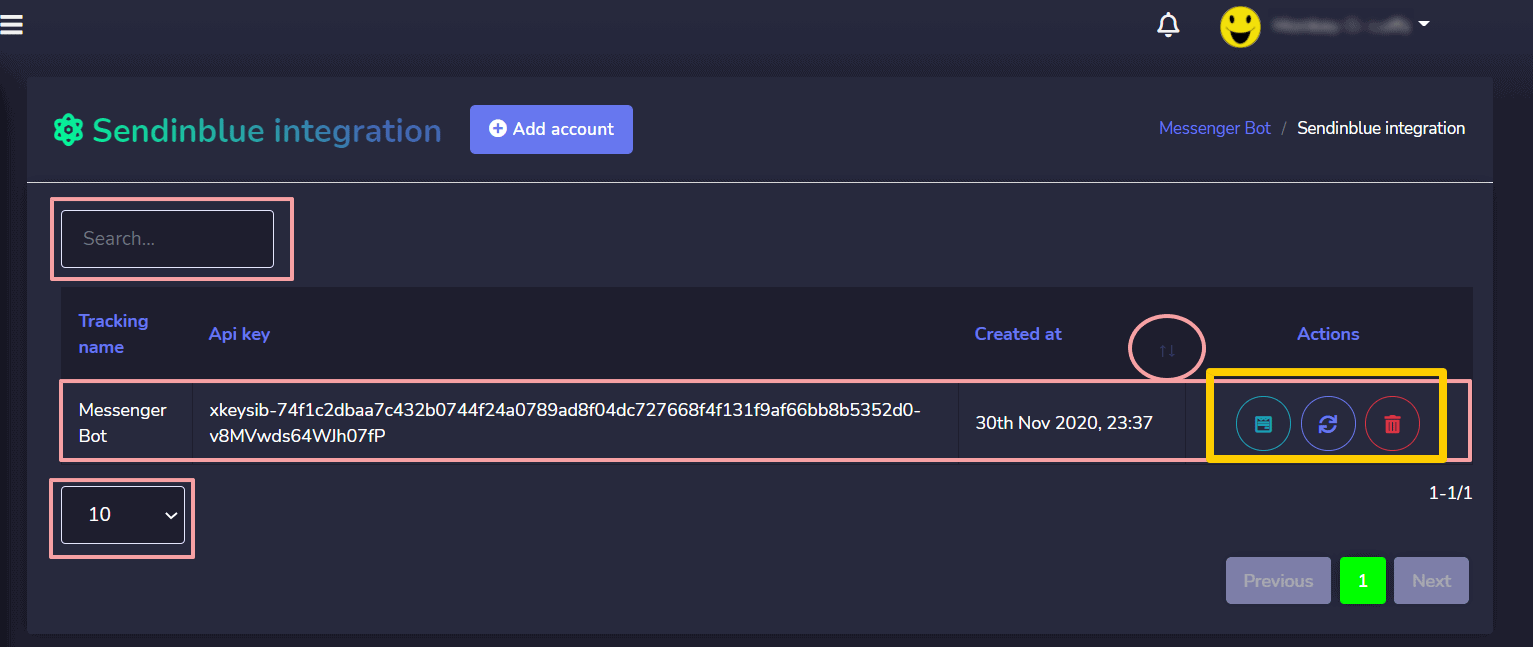
Sendinblue integration screen consists of API Keys, you can search for a specific tracking name by using the search bar. Maaari mong ayusin ang bilang of names to be tingnan bawat pahina. Maaari mo ring ayusin ang mga ito sa pataas o pababang pagkakasunod-sunod sa pamamagitan ng pagpili ng mga arrow mula sa header.
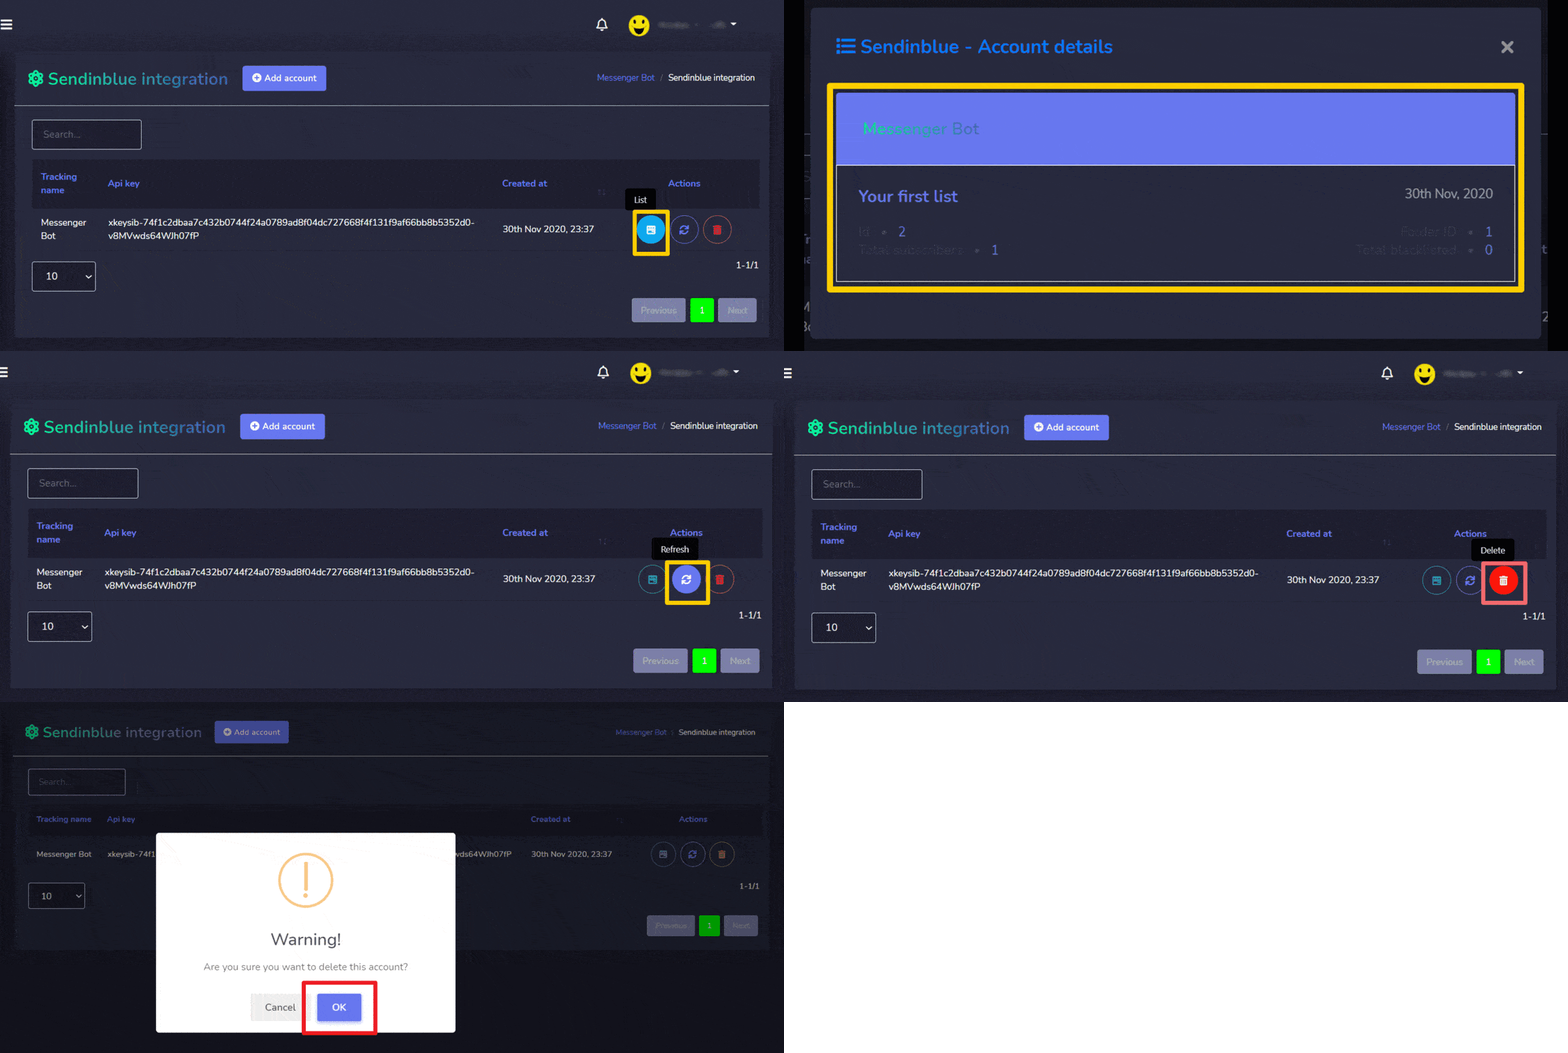
- View the list sa pamamagitan ng pagpili ng
 .
. - Refresh the list sa pamamagitan ng pagpili ng
 .
. - Delete the account
Add account
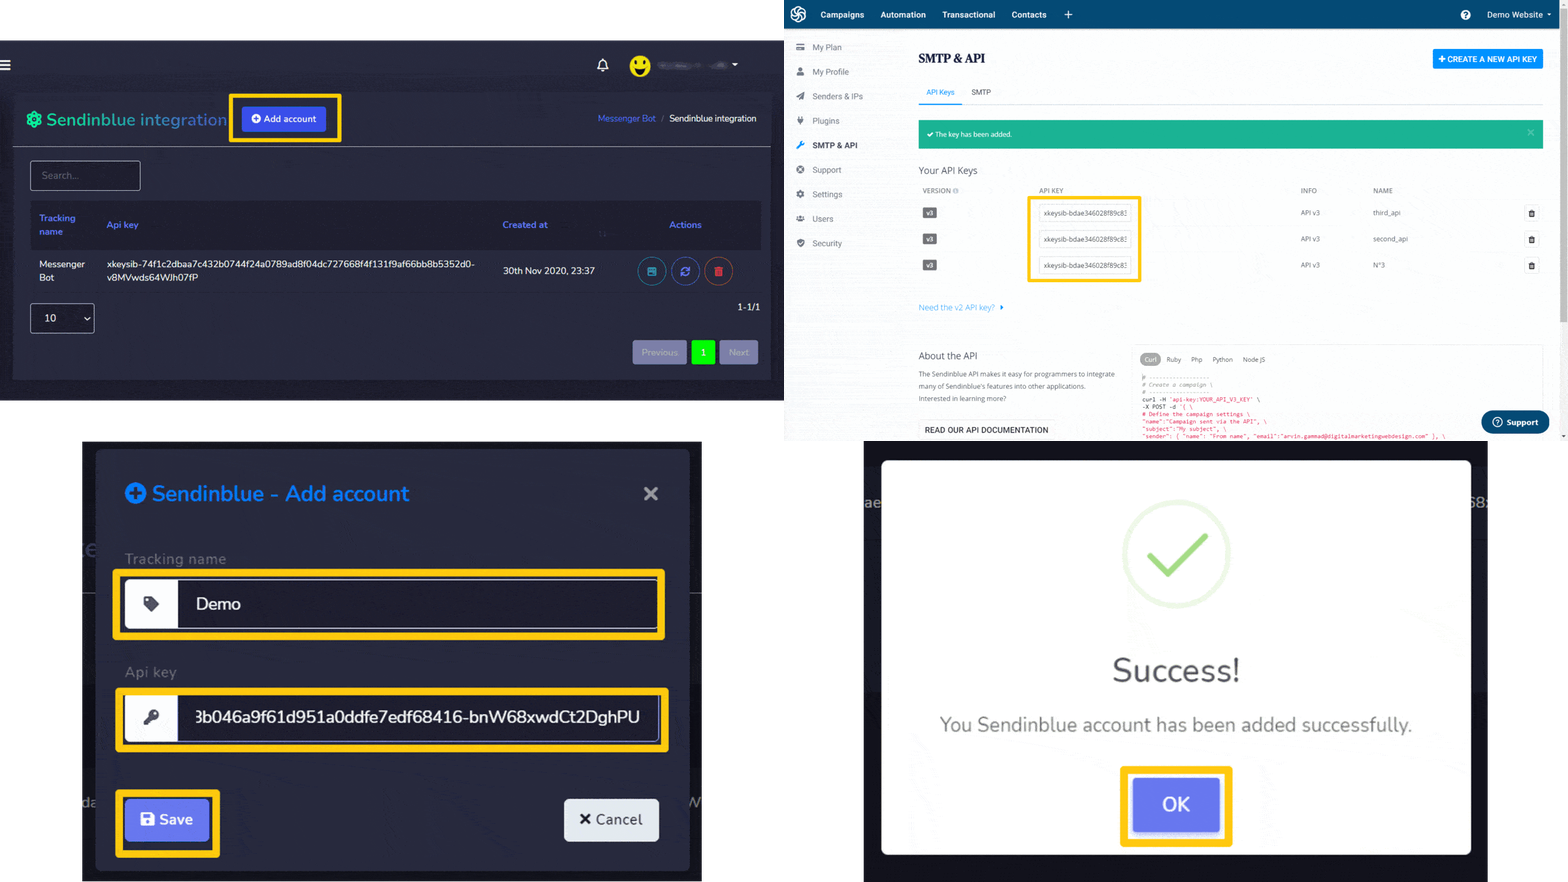
You can add an account by following the steps given below:
- Pumili
 mula sa kanang itaas ng screen.
 - Ibigay ang Tracking name for your list.
- Magbigay API key generated from Sendinblue account.
- Pumili I-save to add the new account.
Activecampaign integration
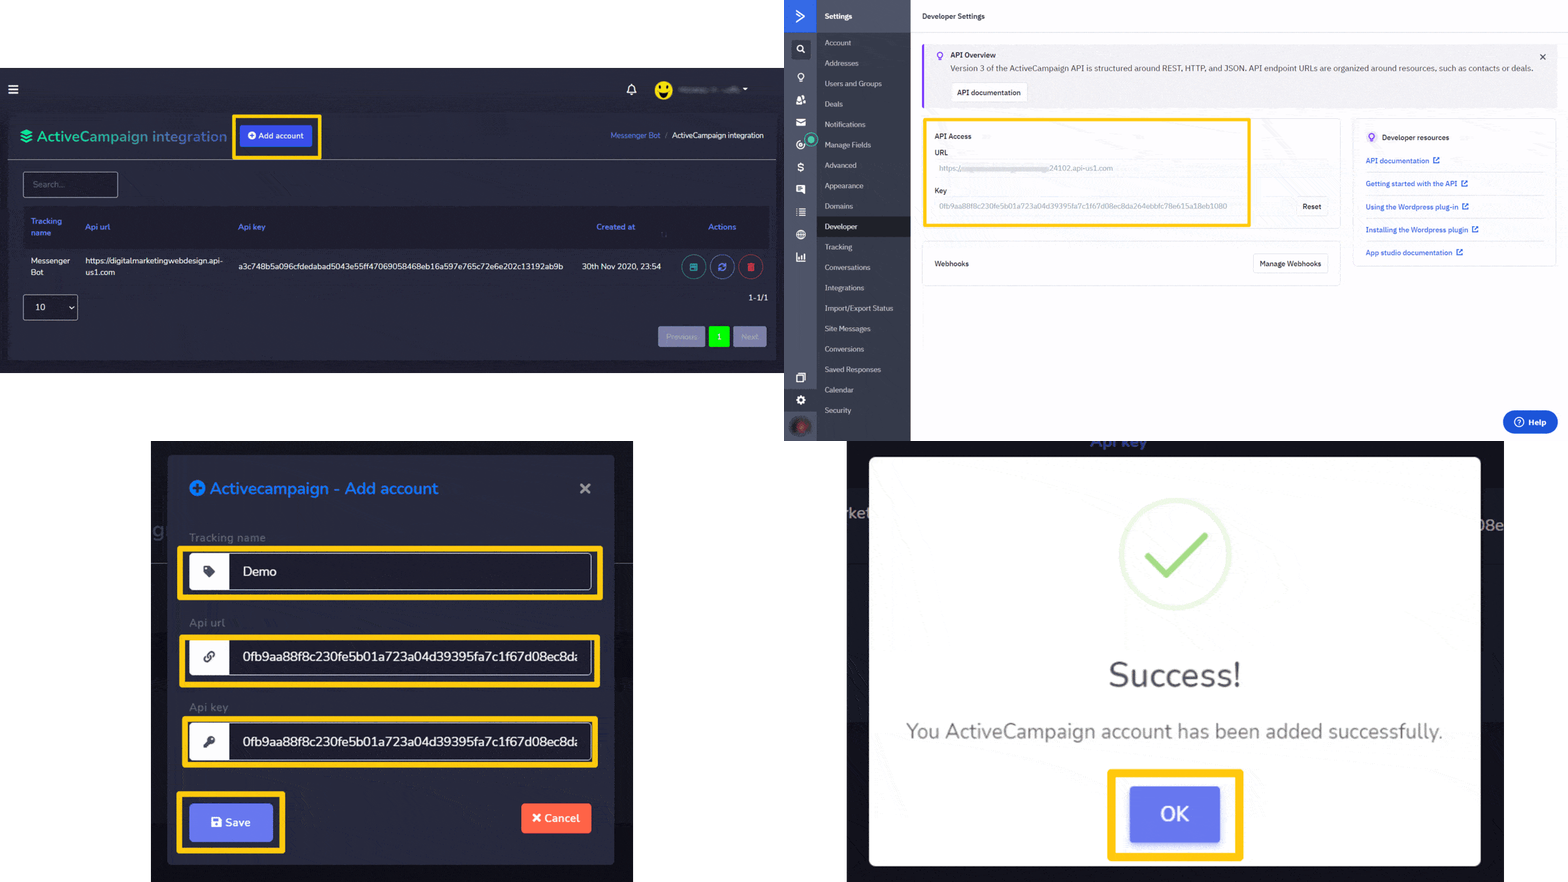
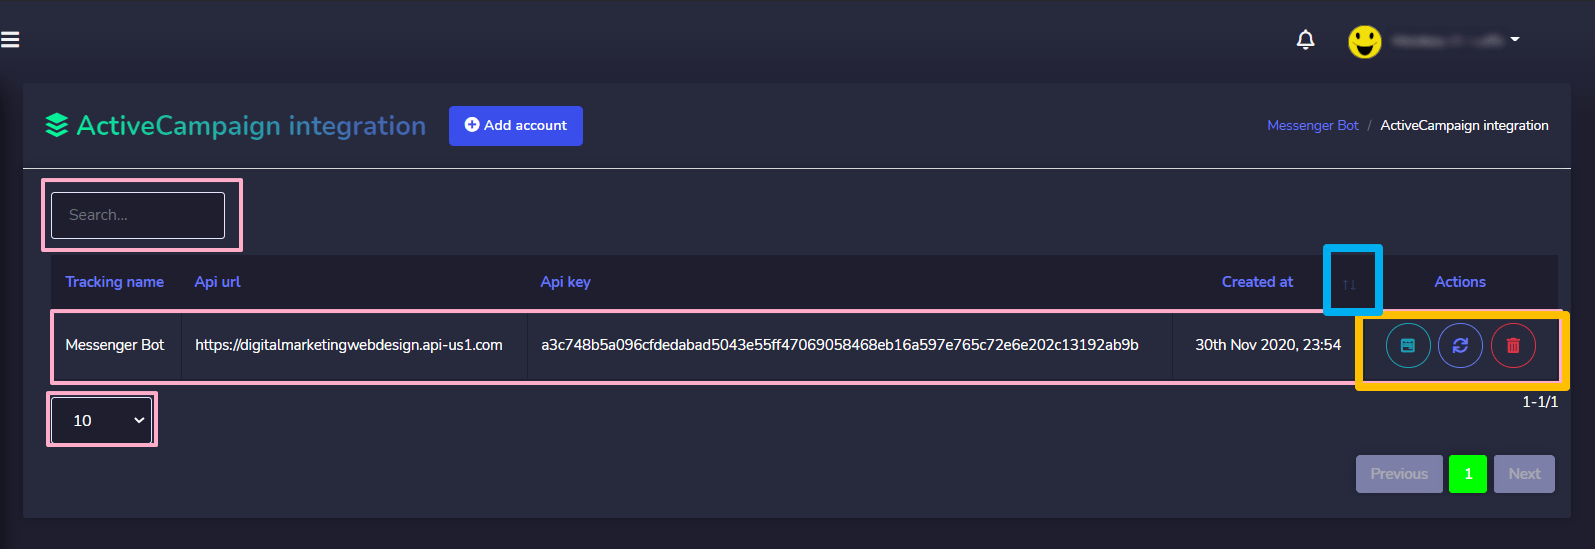
Activecampaign integration screen consists of API Keys, you can search for a specific tracking name by using the search bar. Maaari mong ayusin ang bilang of names to be tingnan bawat pahina. Maaari mo ring ayusin ang mga ito sa pataas o pababang pagkakasunod-sunod sa pamamagitan ng pagpili ng mga arrow mula sa header.
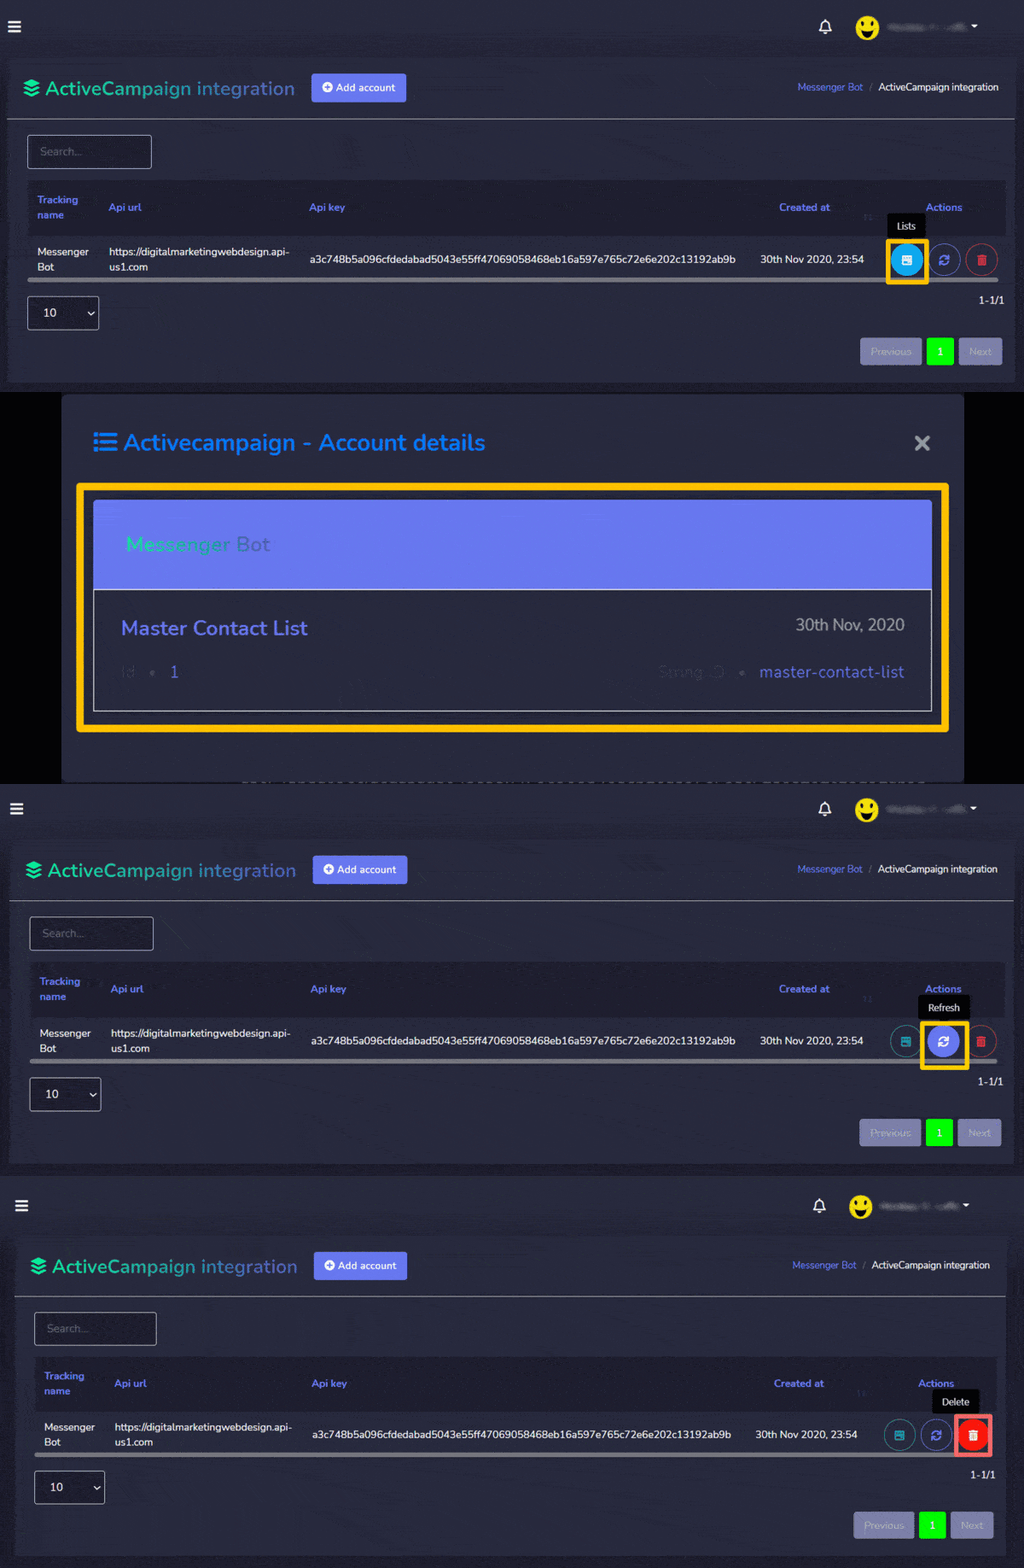
Narito ang mga aksyon na maaaring isagawa:
- View the list sa pamamagitan ng pagpili ng
 .
. - Refresh the list sa pamamagitan ng pagpili ng
 .
. - Delete the account
Add account
You can add an account by following the steps given below:
- Pumili
 mula sa kanang itaas ng screen.
 - Ibigay ang Tracking name for your list.
- Magbigay API URL generated from Activecampaign API account.
- Magbigay API key generated from Activecampaign API account.
- Pumili I-save to add the new account.
