Conector de API JSON
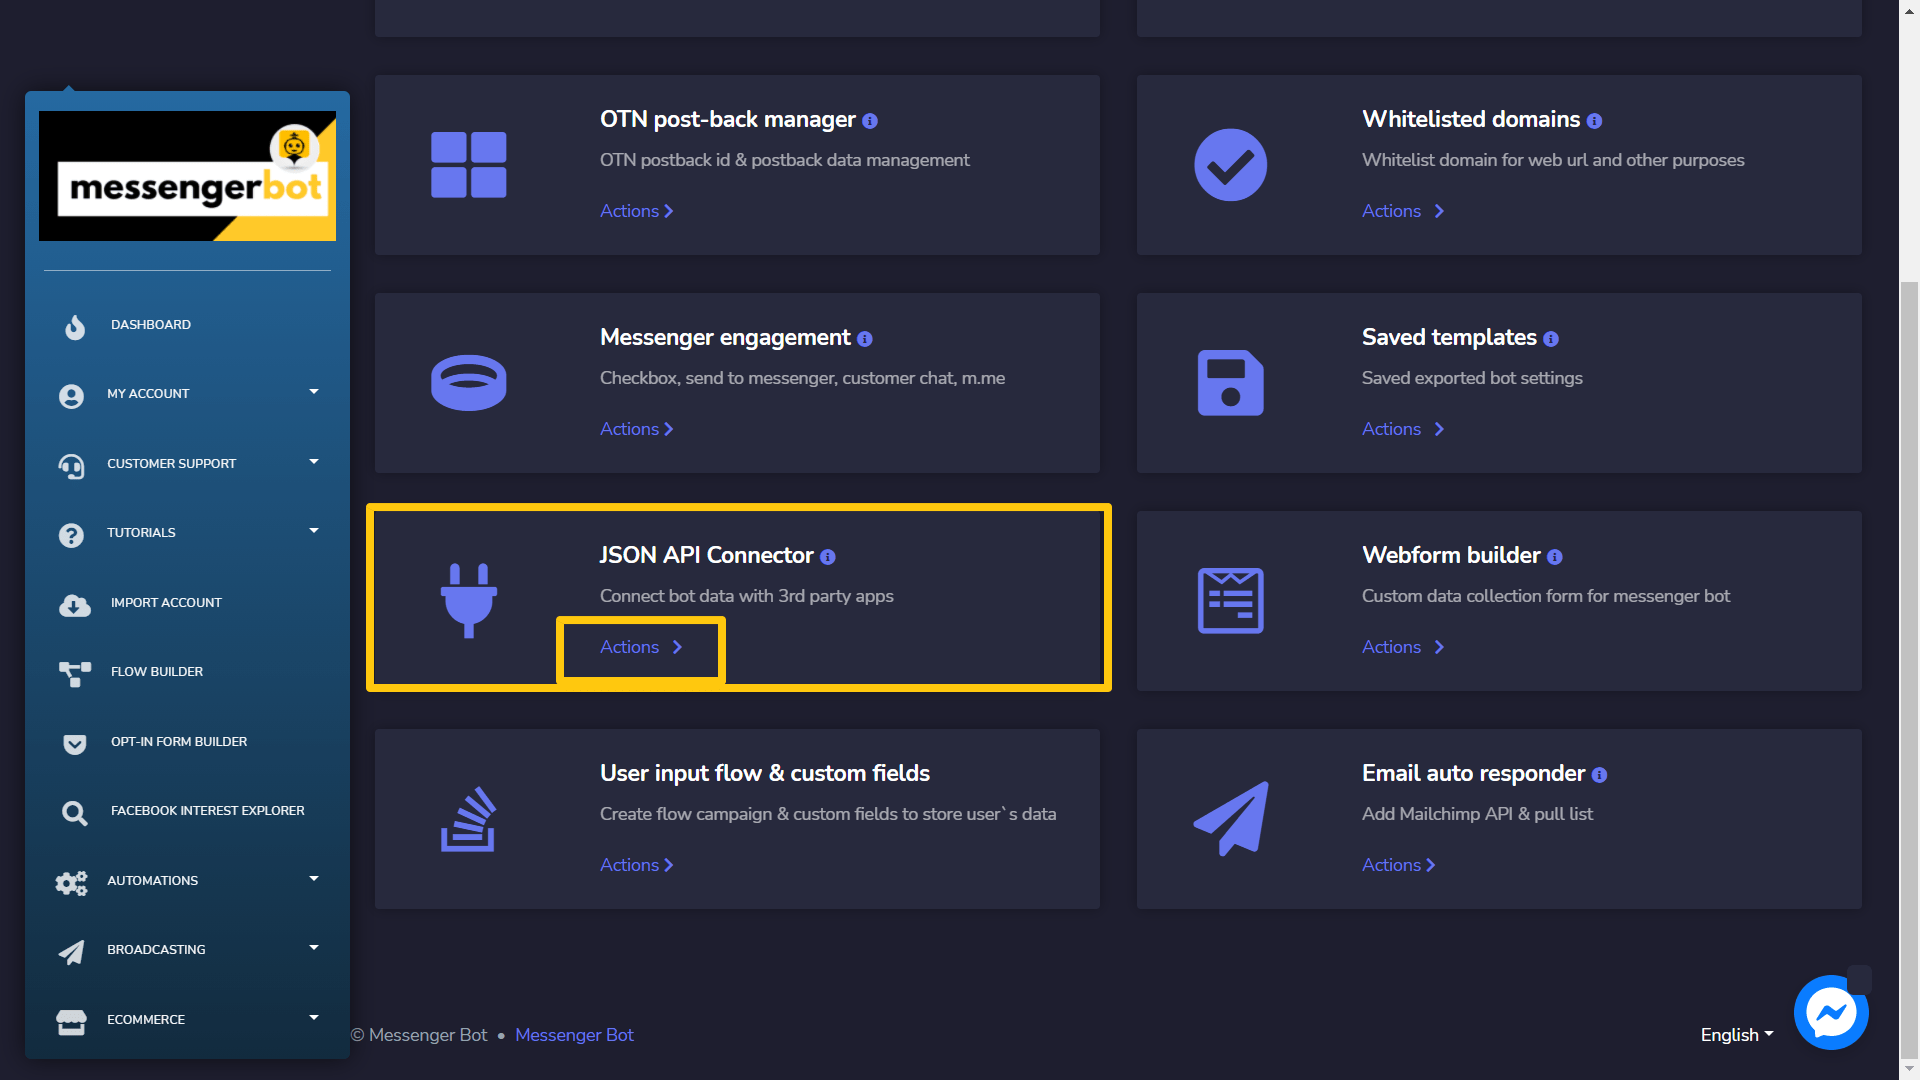
To access the JSON API Connector section, select Conector de API JSON, em seguida selecione Ações de Bot de mensagens tela.
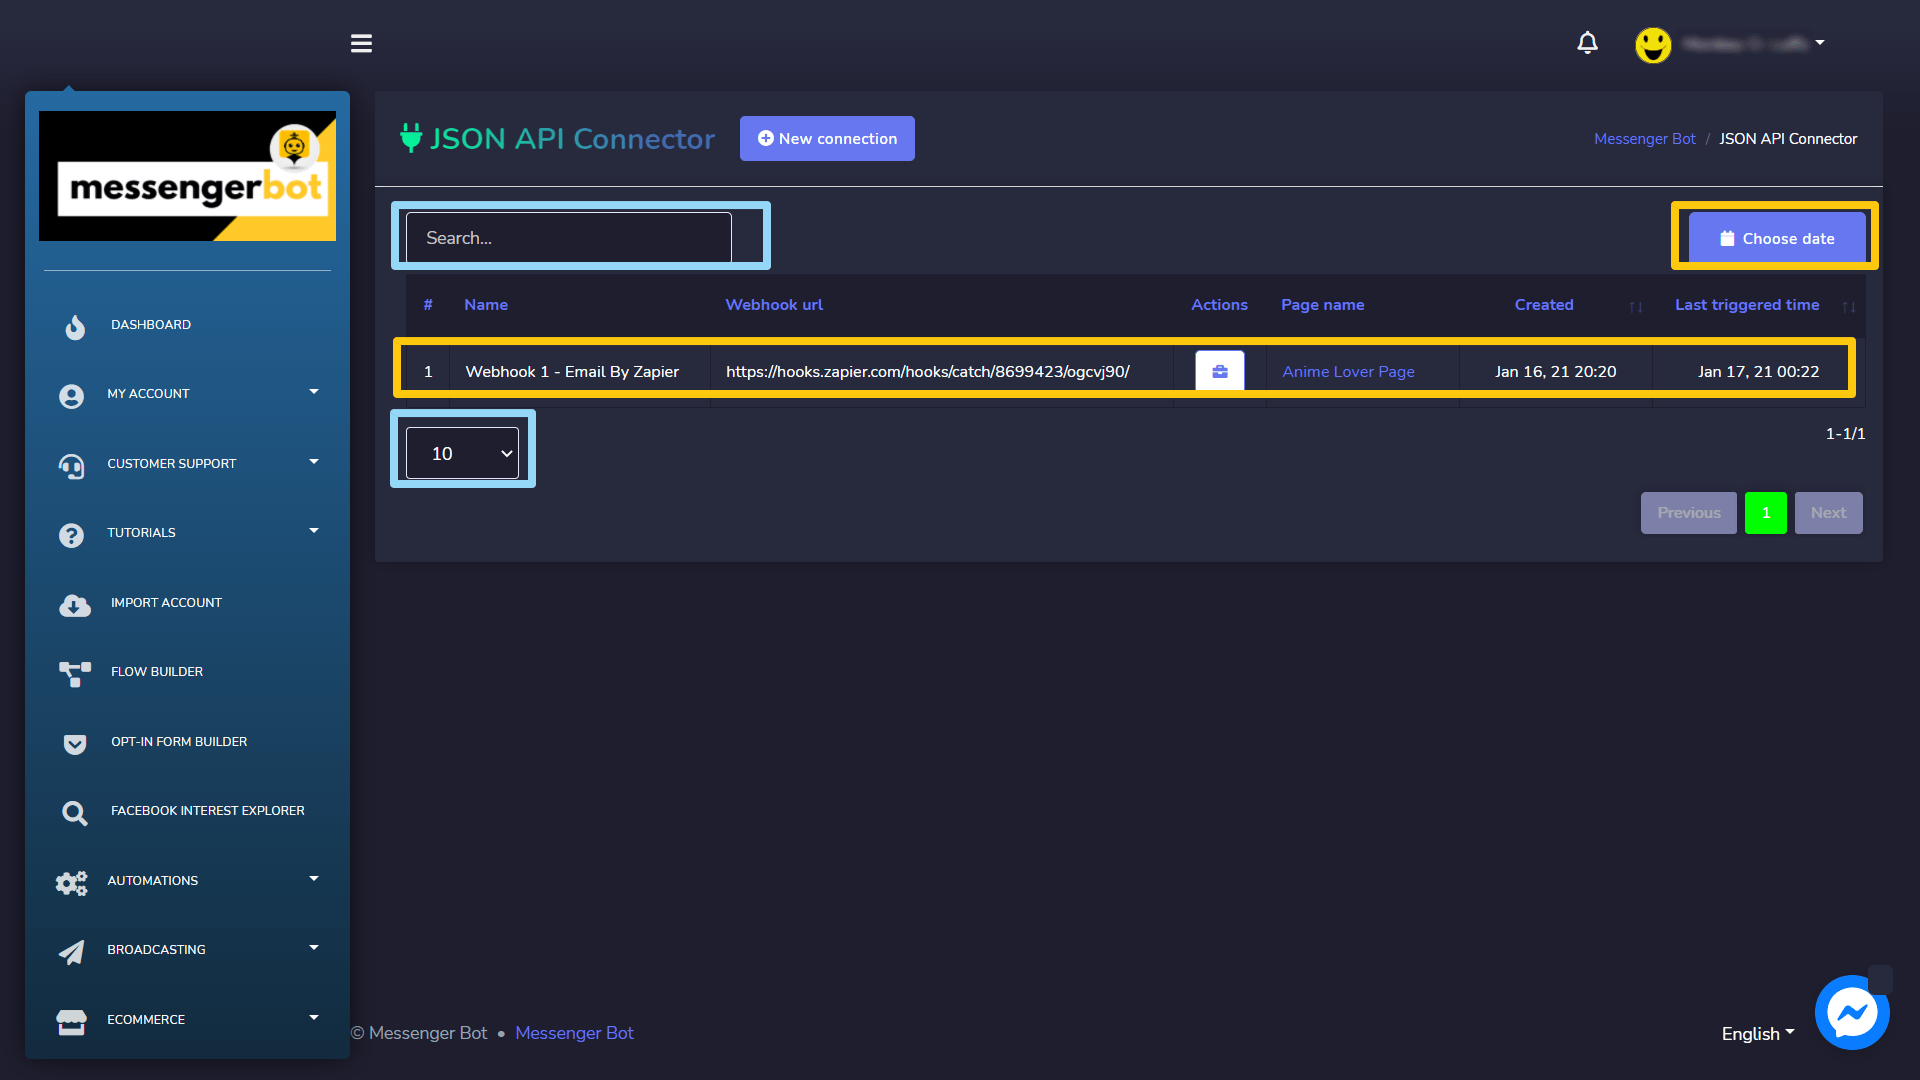
JSON API Connector screen consists of a list of webhook URLs, you can search for a specific URL by using the barra de pesquisa. Você pode adjust the number of URLs to be visualizadas por página. Você também pode organizar eles em qualquer um dos crescente ou decrescente selecionando as setas from the header. Select the por data filter to narrow down your search.
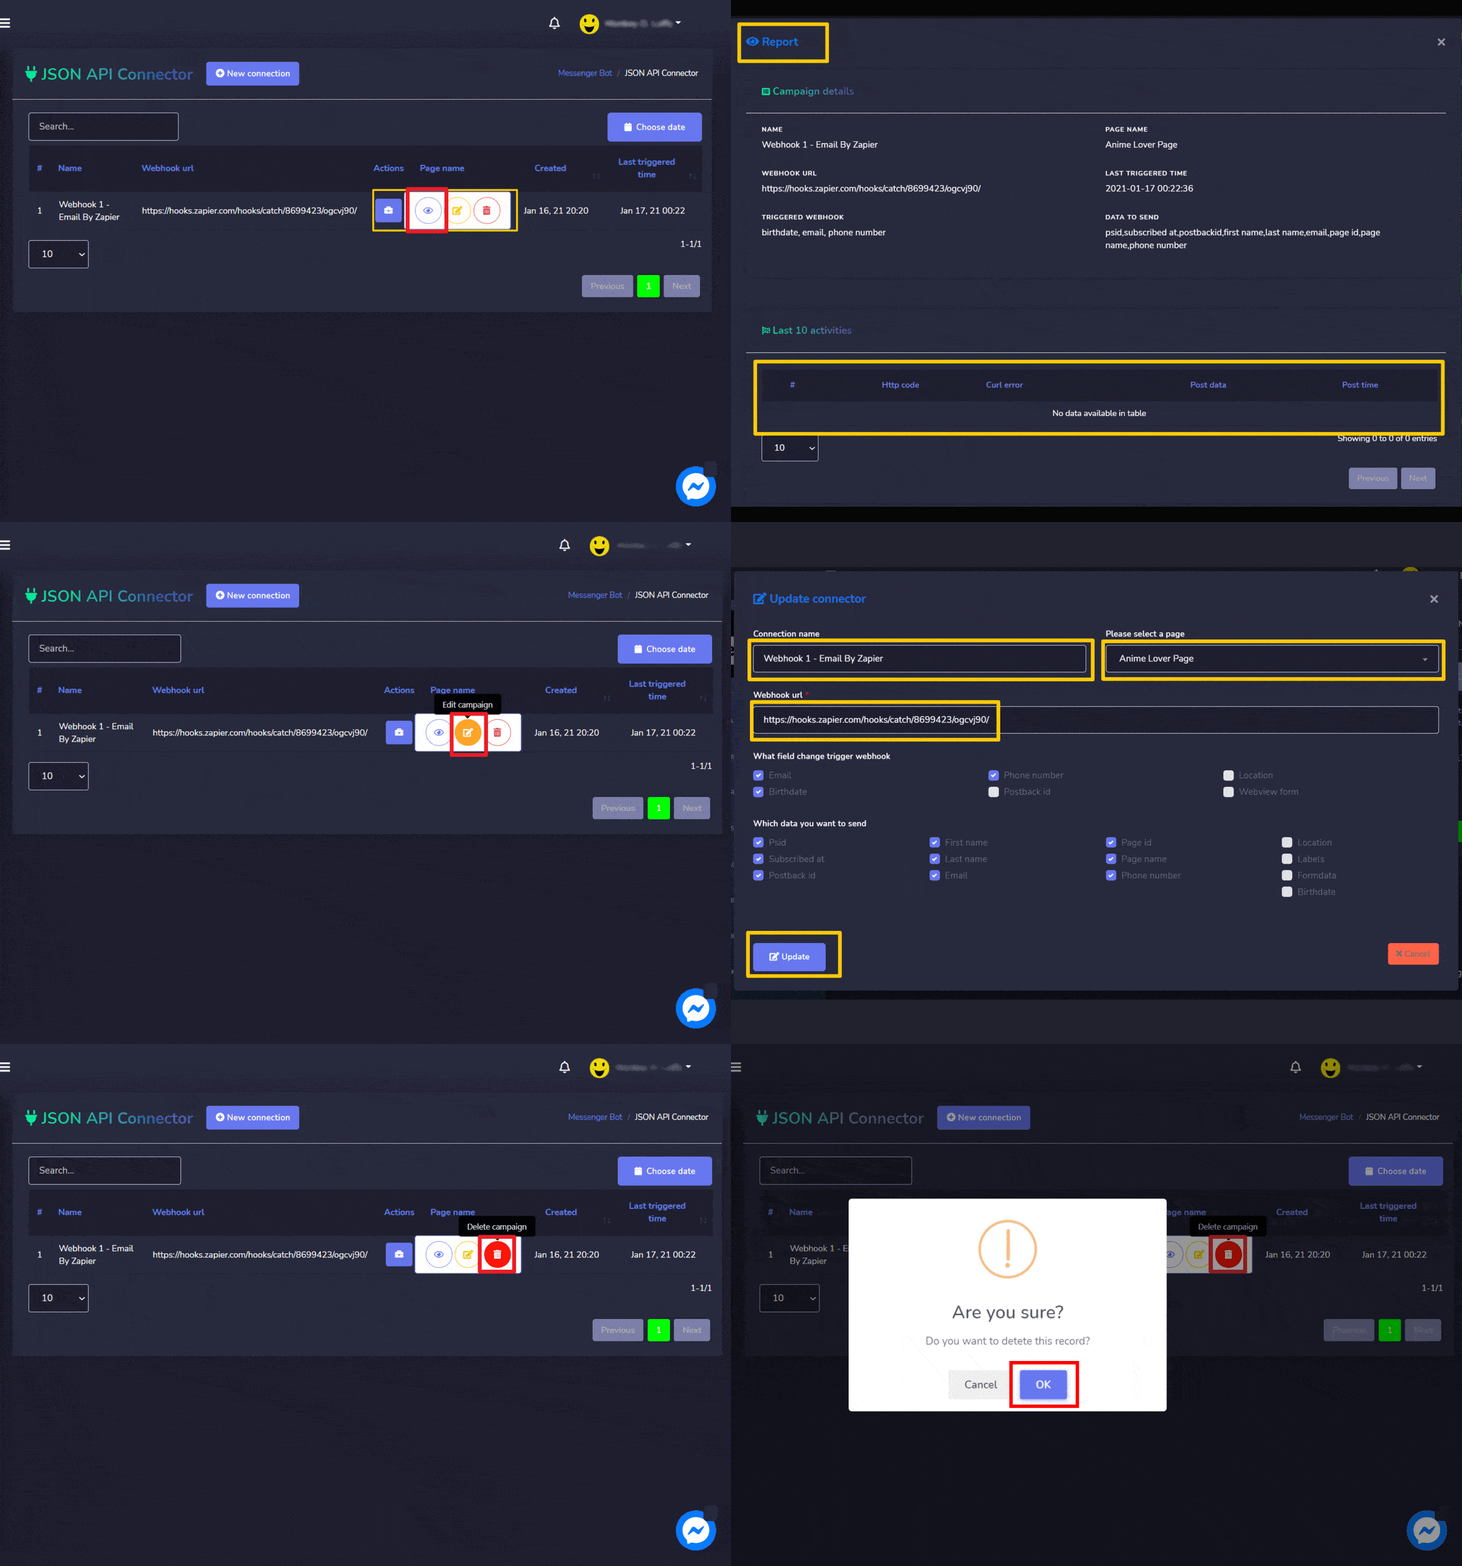
- View report selecionando
 .
. - Edit campaign
- Delete record
Create Connection
You can create a new connection by following the steps given below:
- Selecione
 do canto superior direito da tela.
 - Forneça o Nome and select the página for which you want to add the connection.
- Insira o webhook URL in the field.
- Mark the checkboxes against the field for which you want to change trigger webhook.
- Mark the checkboxes against the field for which you want to send the data.
- Selecione Salvar to make a new connection.
Construtor de formulários web
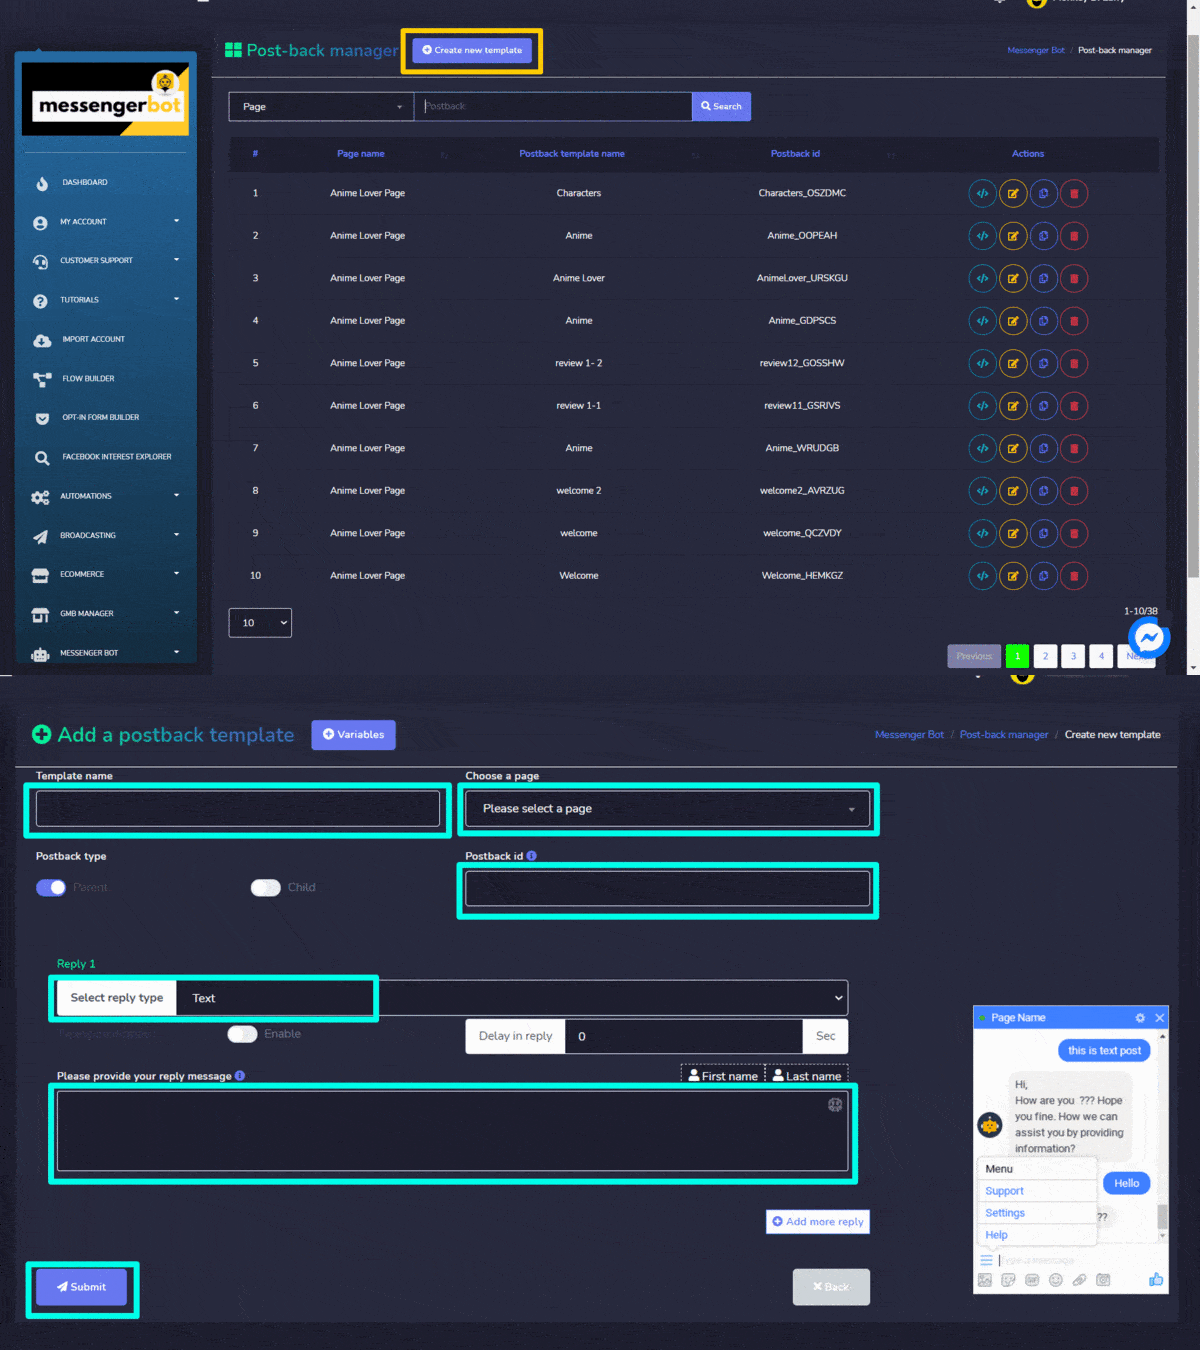
To access the webform builder section, select Construtor de formulários web, em seguida selecione Ações de Bot de mensagens tela.
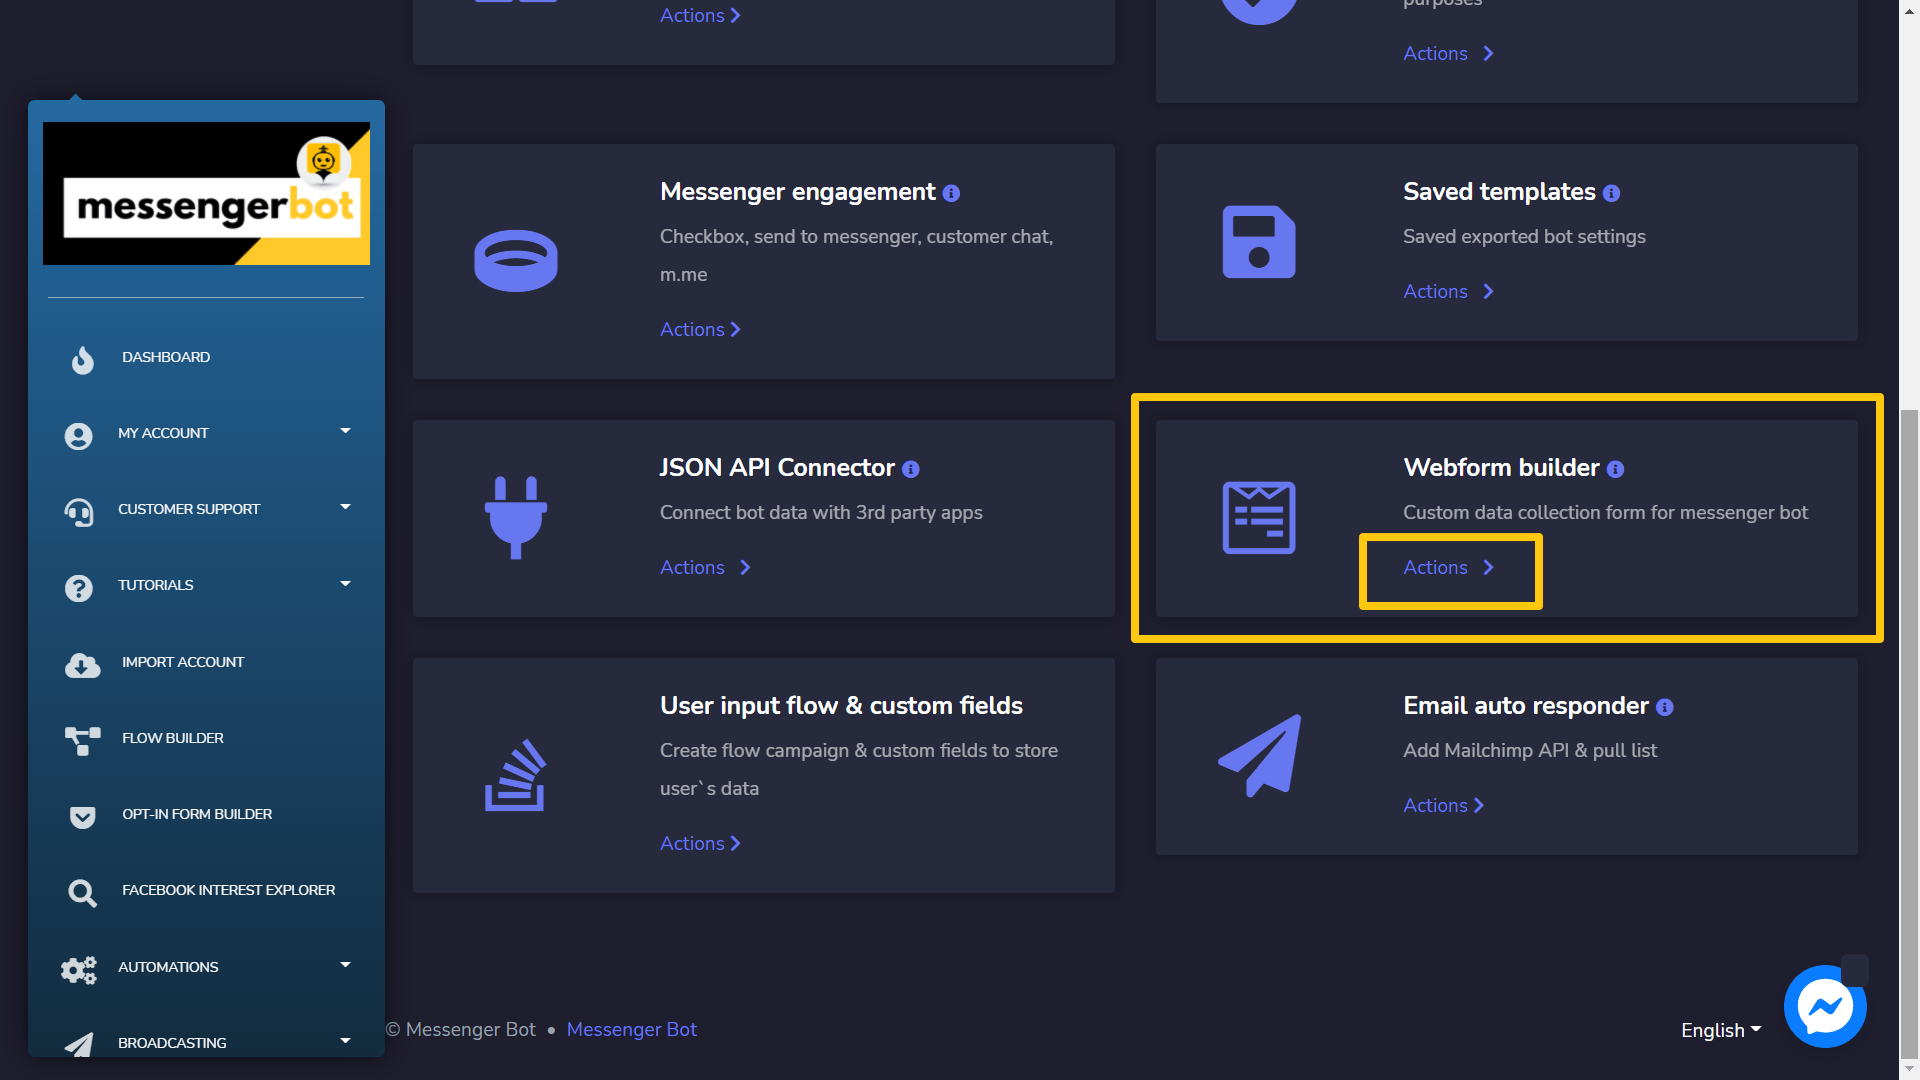
Webview manager screen consists of a list of pages, you can search for a specific page by using the barra de pesquisa. Você pode ajustar o number of pages a serem visualizadas por página. You can also arrange them in either crescente ou decrescente selecionando as setas from the header.
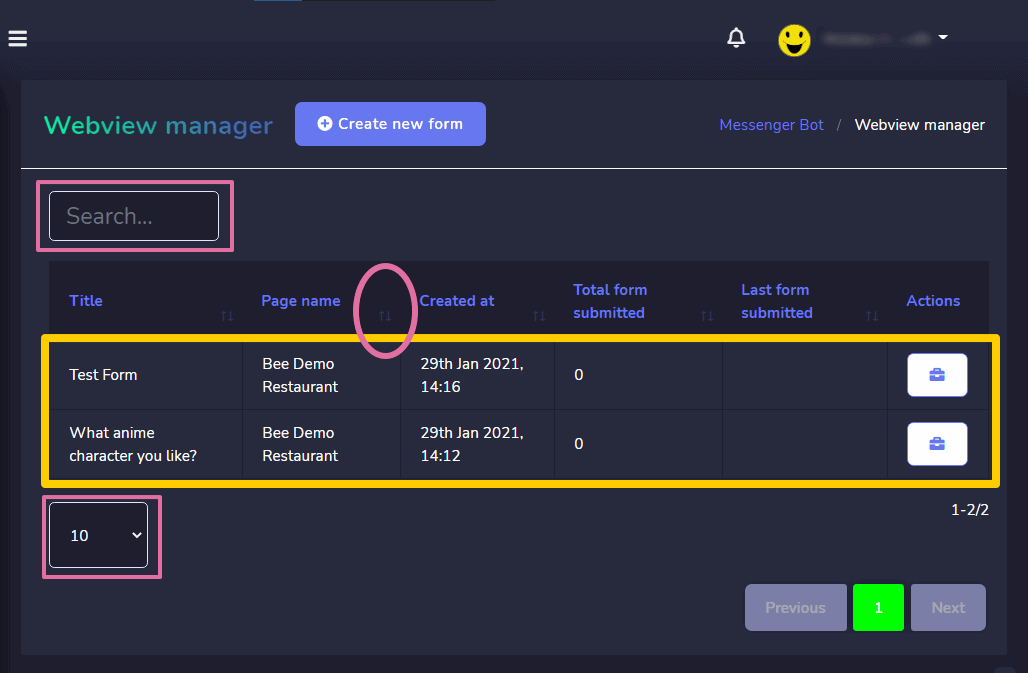
The following are the actions that can be performed:
- View the form selecionando
 .
. - View the report selecionando
 .
. - Export the data from the form selecionando
 .
. - Edit the form
- Delete the form
Webform elements
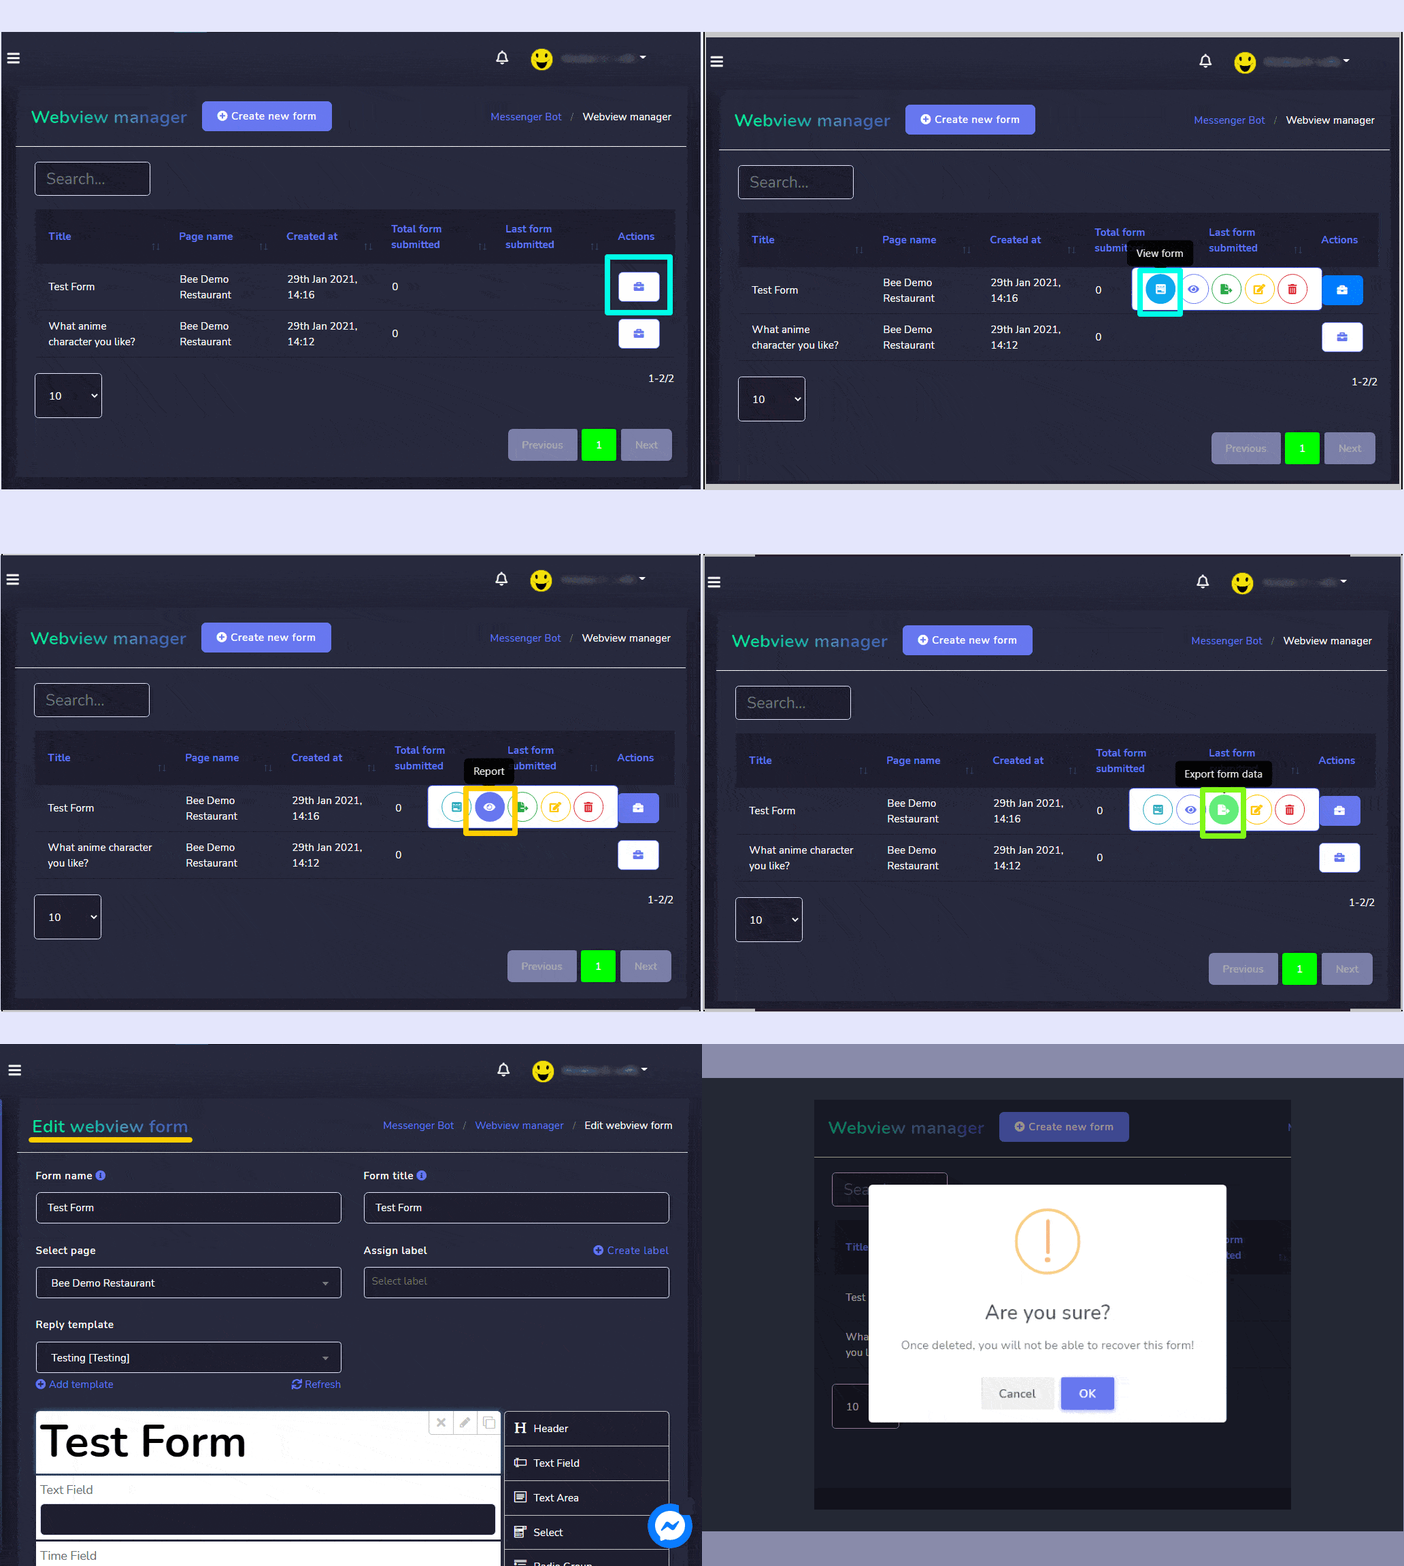
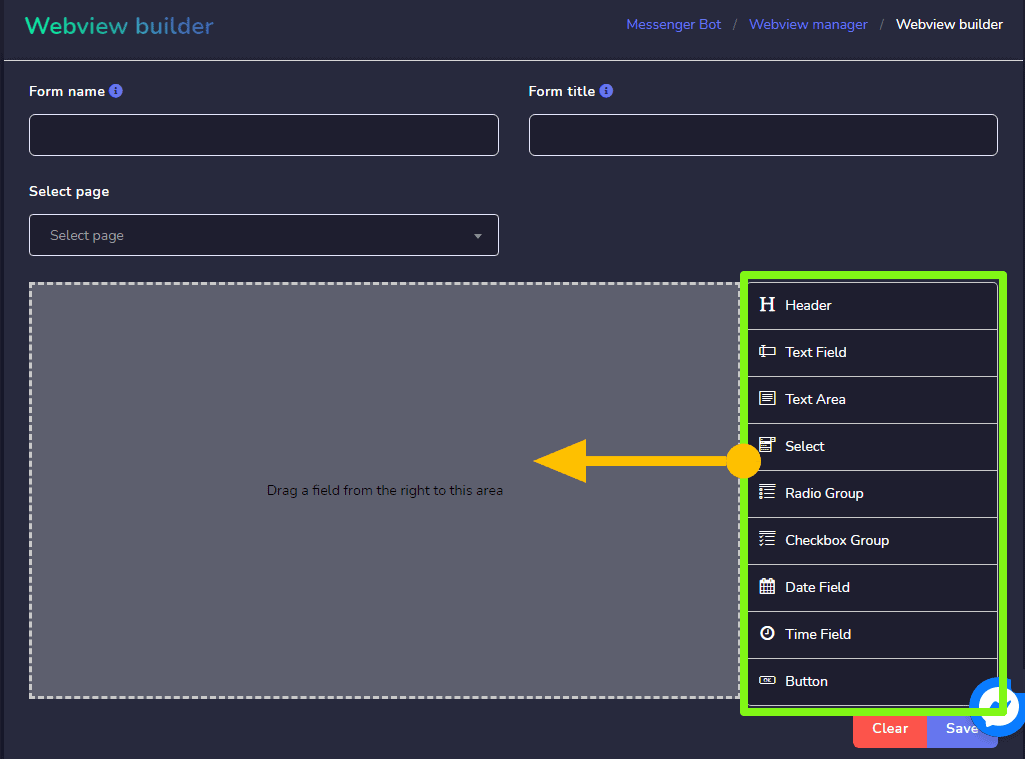
To create a webform by dragging and dropping the elements from the right side to the canvas on the left side. You can add as many components as you want in the form. You can rename these components. For this purpose, you have the following set of elements:
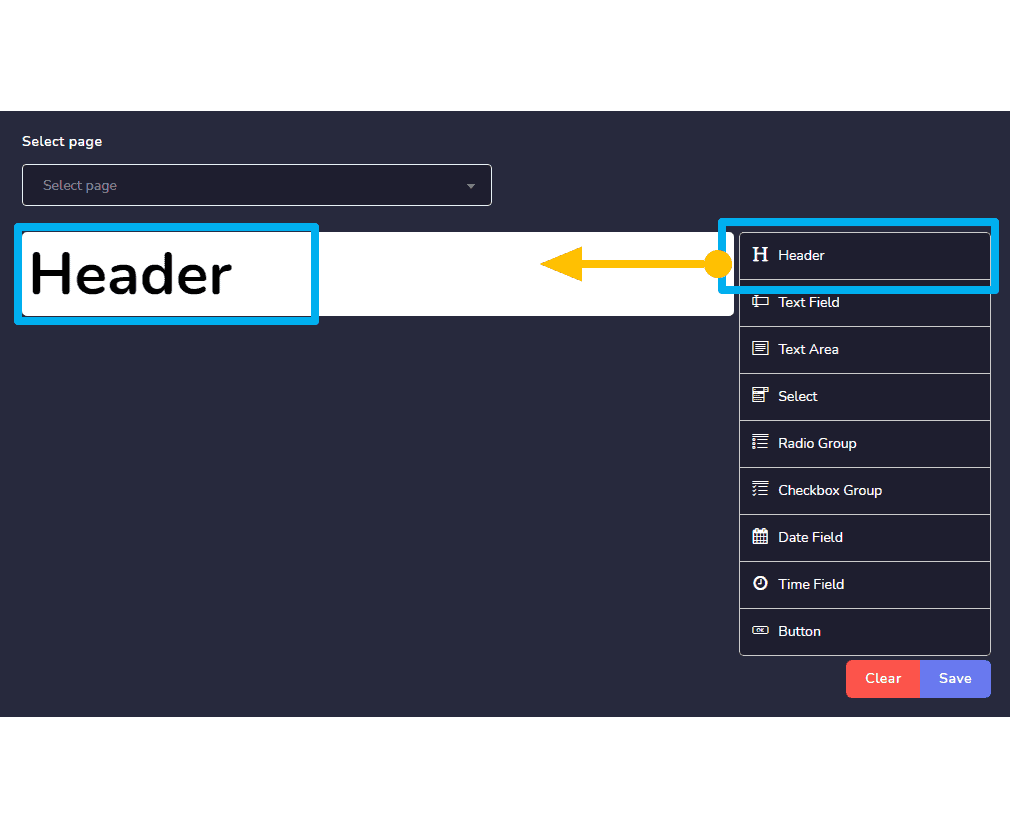
- Header: Here you can write the title/agenda of your form
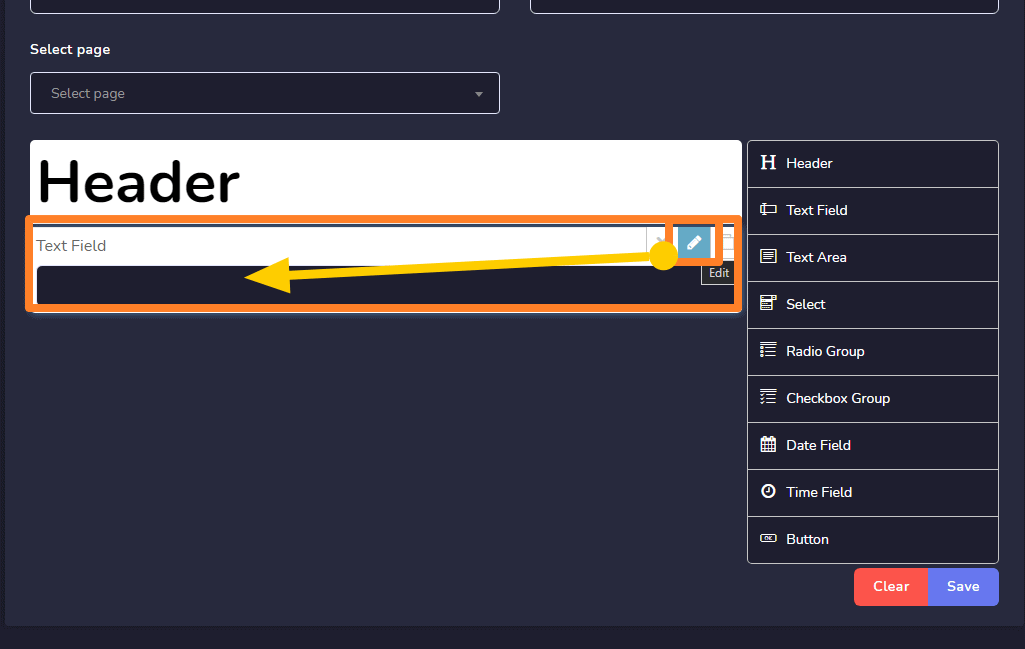
- Text field: You can add and edit a text from this field.
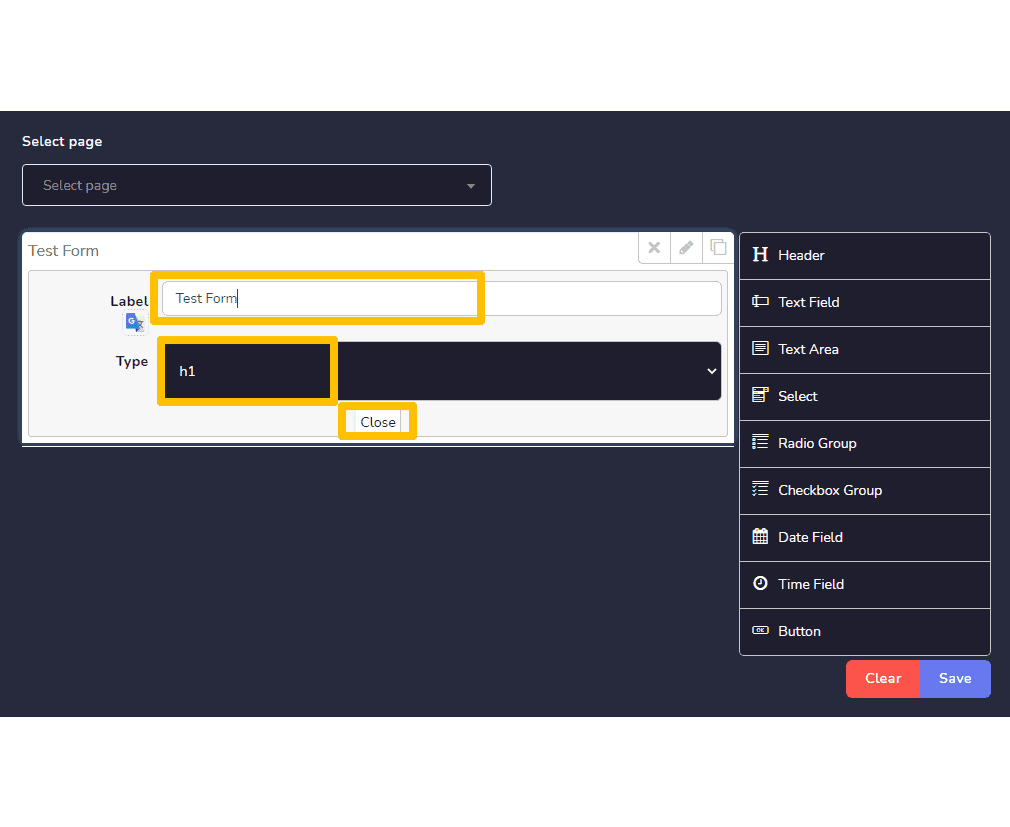
- Text area: You can add and edit a text from this area.
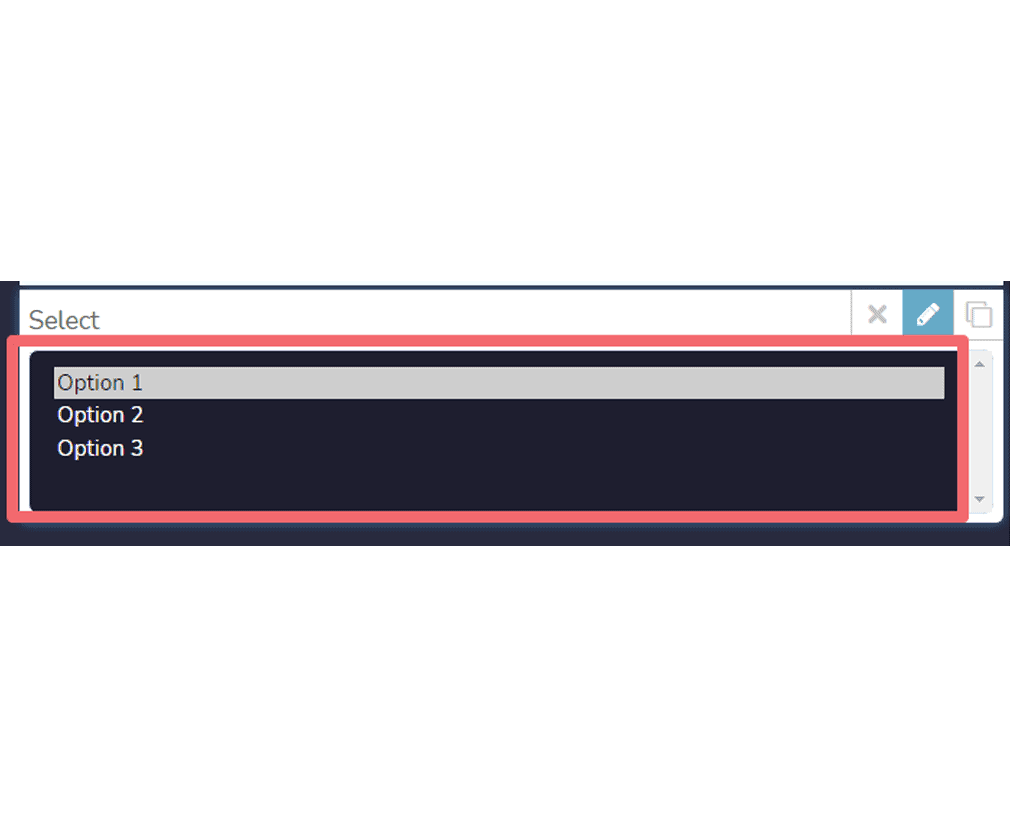
- Select: You can add a dropdown menu using this select option. It will have many options. In the form, the user can choose one option.
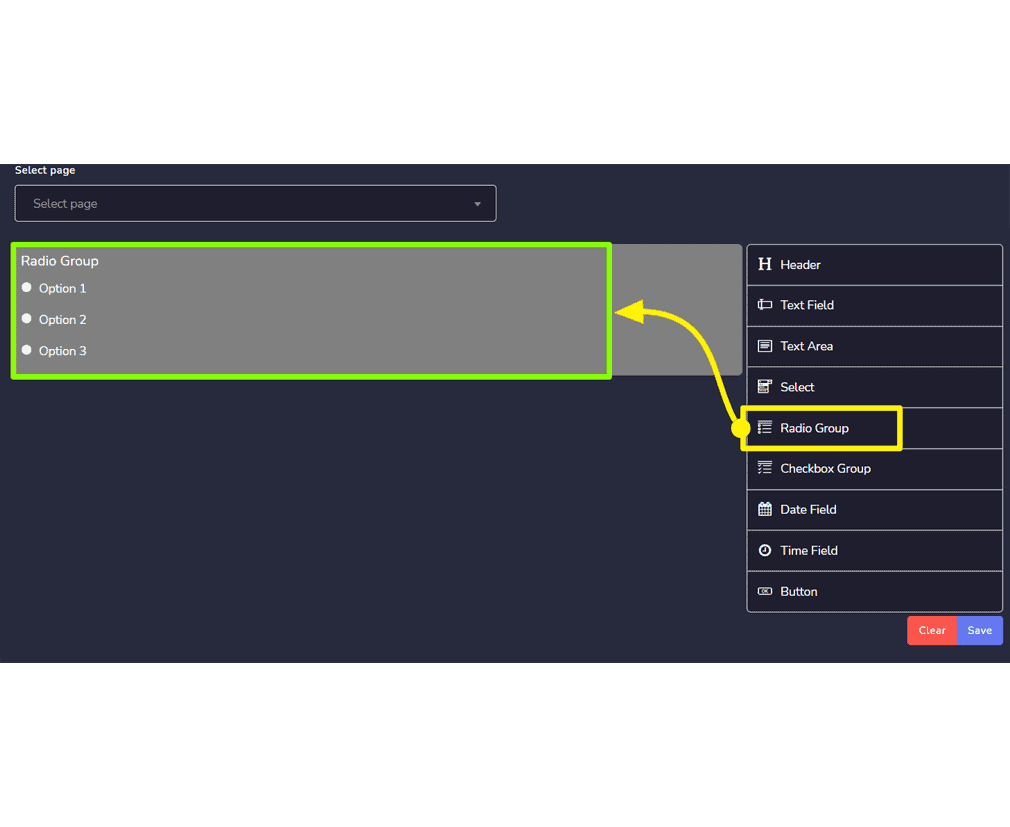
- Radio group: It will have many radio buttons, in the form user can choose one.
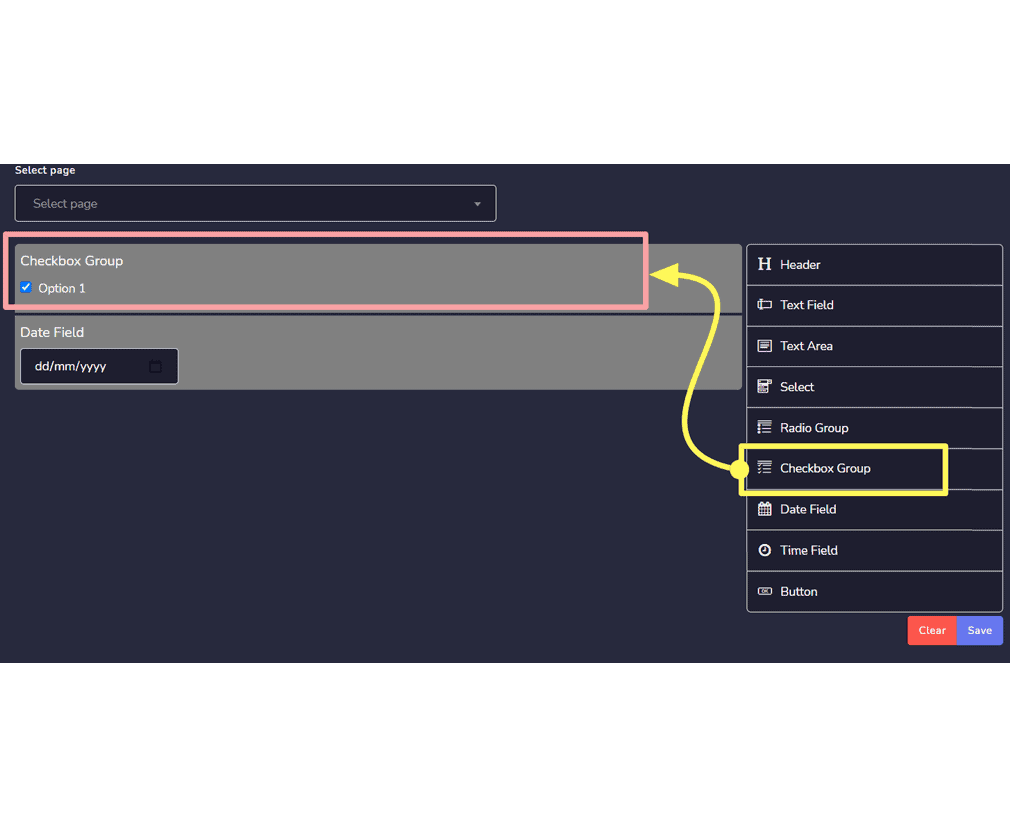
- Checkbox group: It will have many checkboxes, in the form user can choose one.
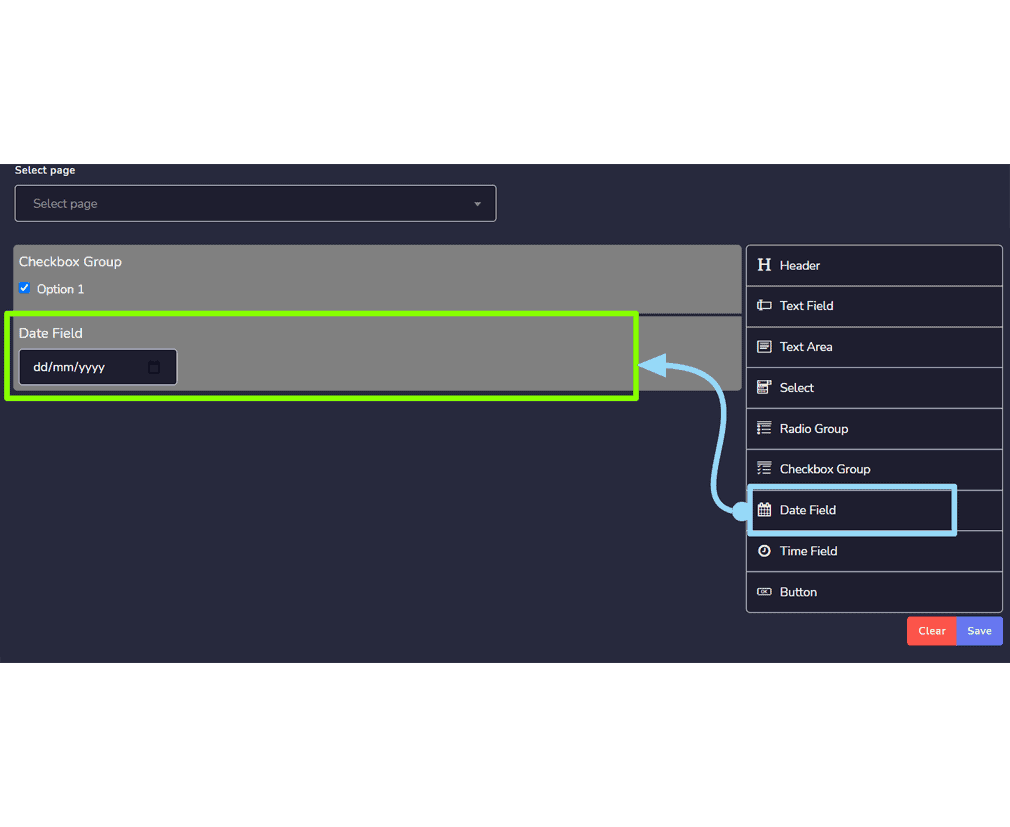
- Date field: It will have the mm/dd/yy field.
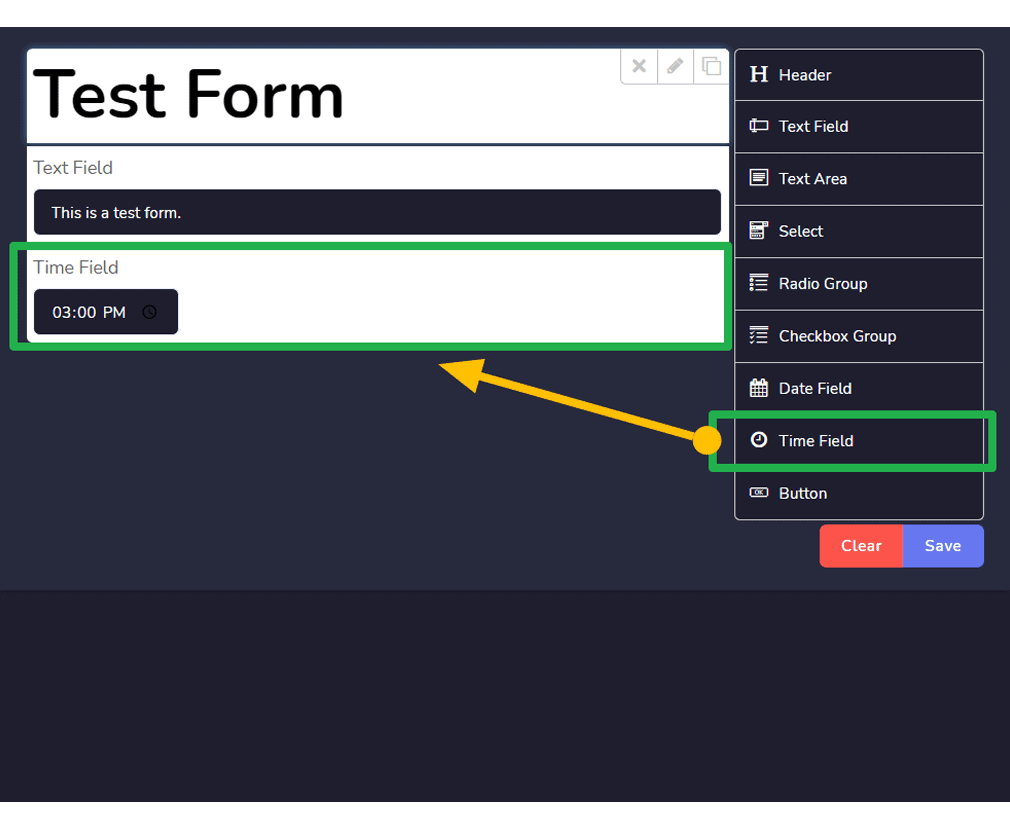
- Time field: It will have –:– — field to make the user enter the time.
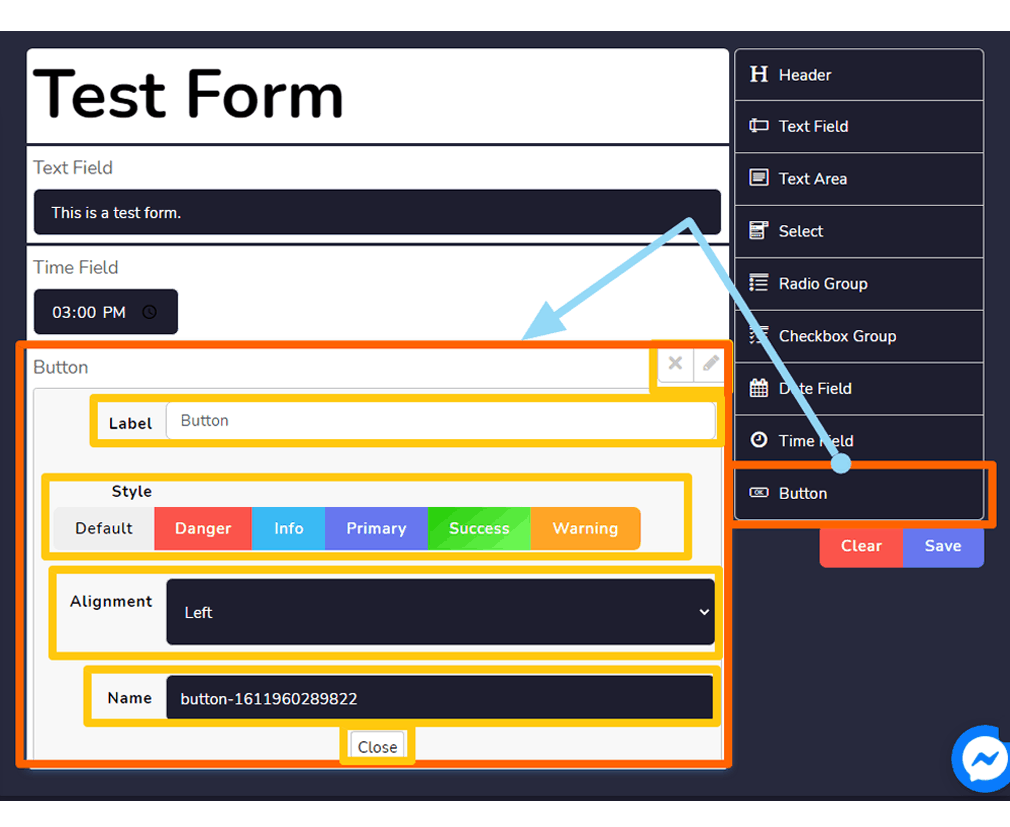
- Button: It is a clickable box that works on action.
Create new form
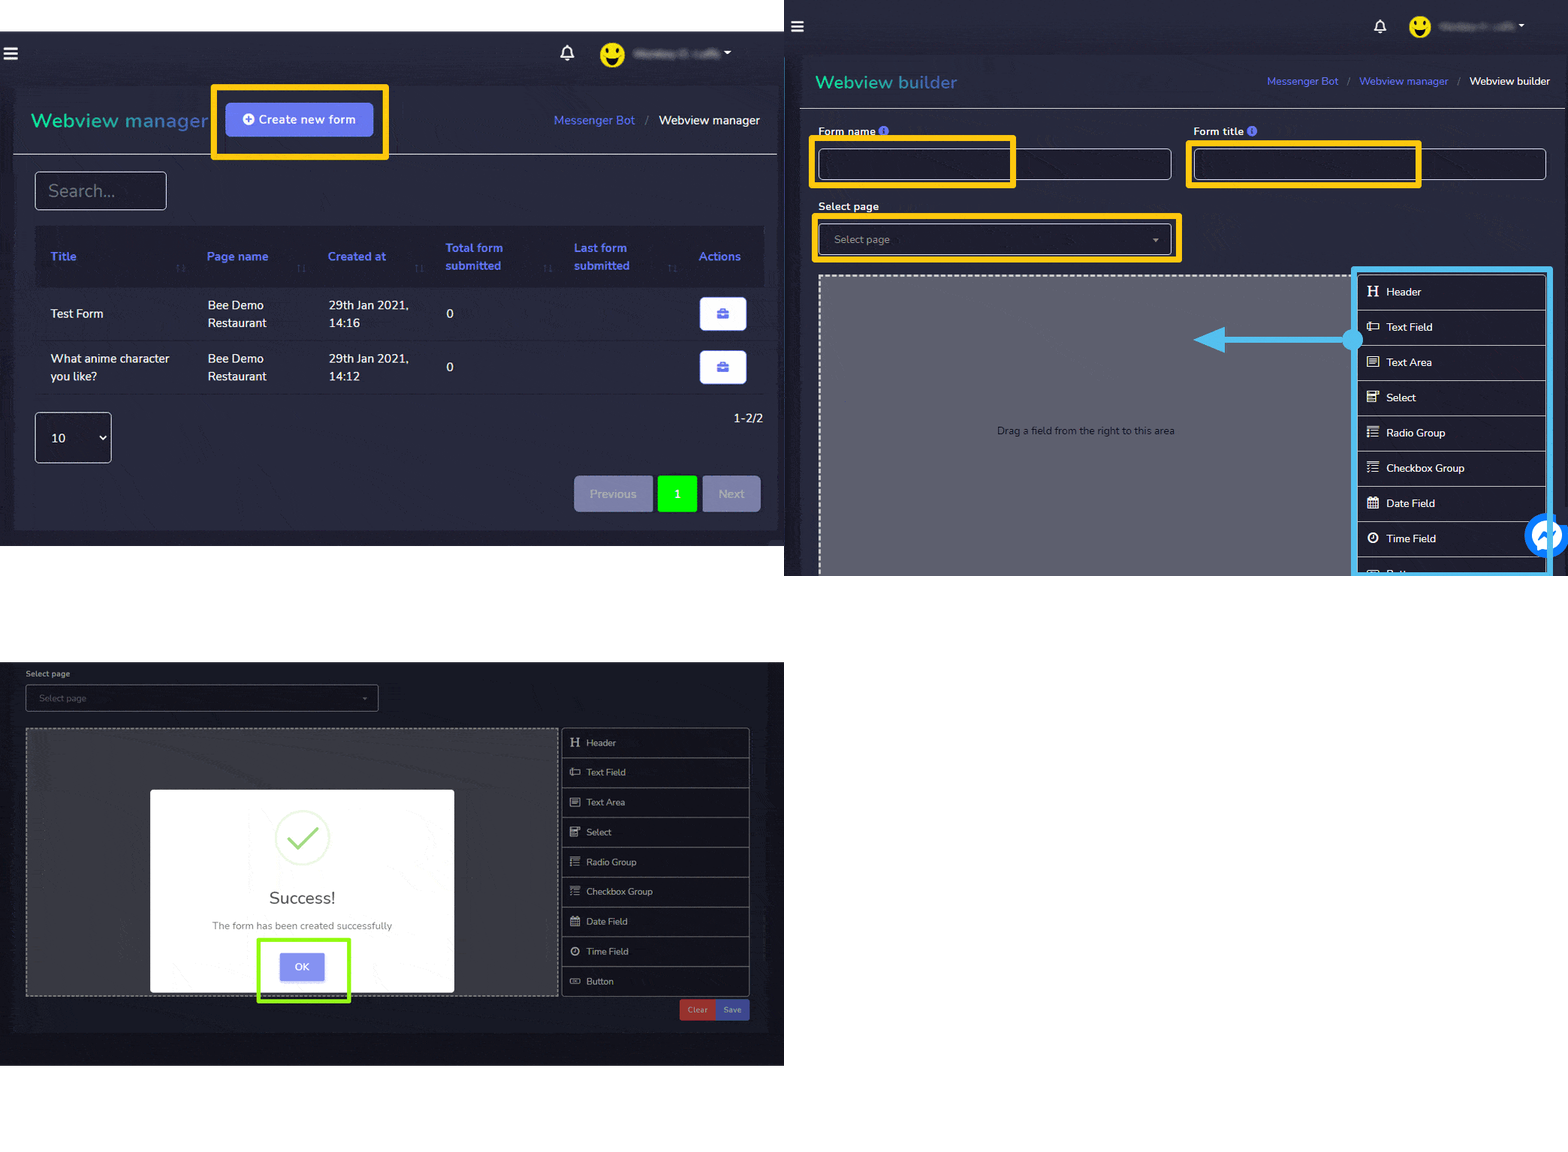
You can create a new form by following the steps given below:
- Selecione
 do canto superior direito da tela.
 - Forneça o Formulário nome e Form title for your new form.
- Selecione o página for which you want to create your form.
- Drag and drop the fields you want to drag in the form as described in Webform elements.
- Selecione Salvar to make a new form.
| Nota: | |
| · It is mandatory to choose the button field while creating a new form. | |
Resposta automática de e-mail
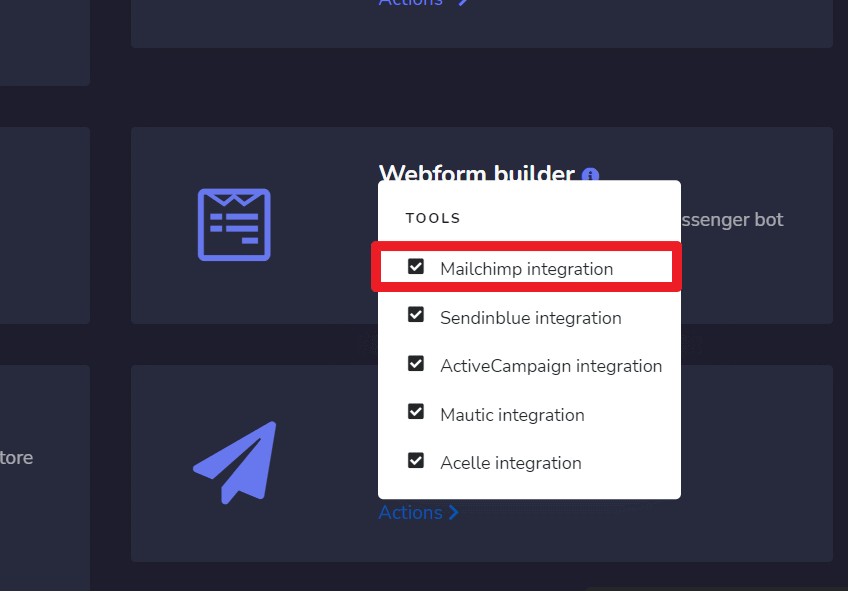
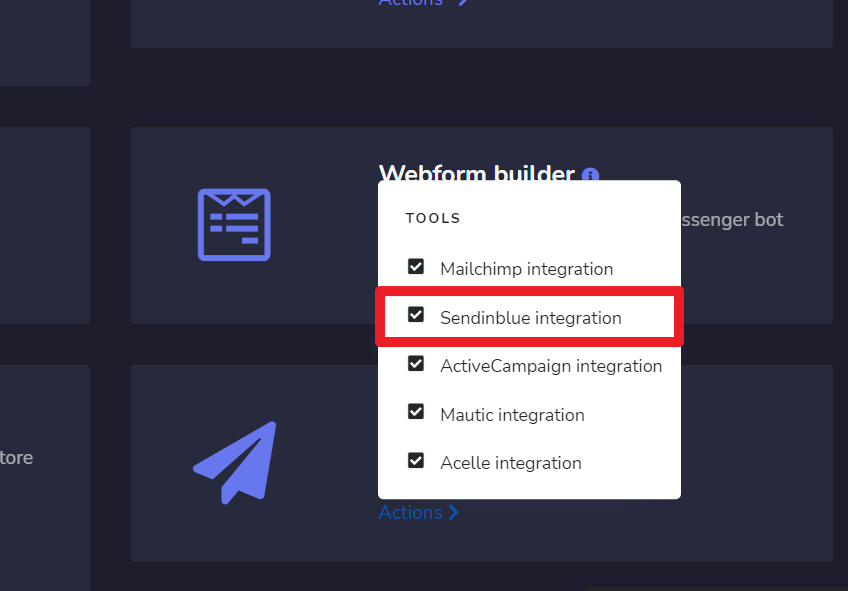
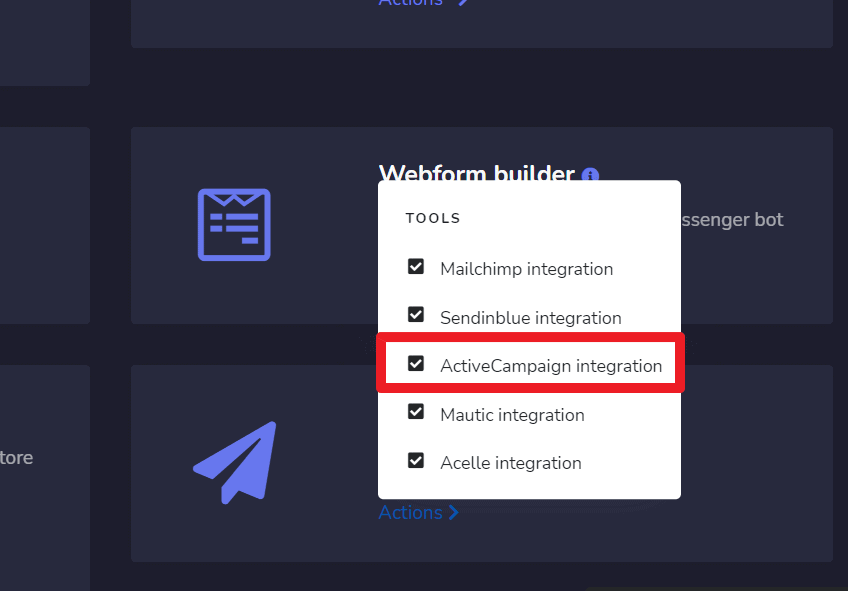
To access the email auto responder section, select Resposta automática de e-mail, em seguida selecione Ações de Bot de mensagens tela.
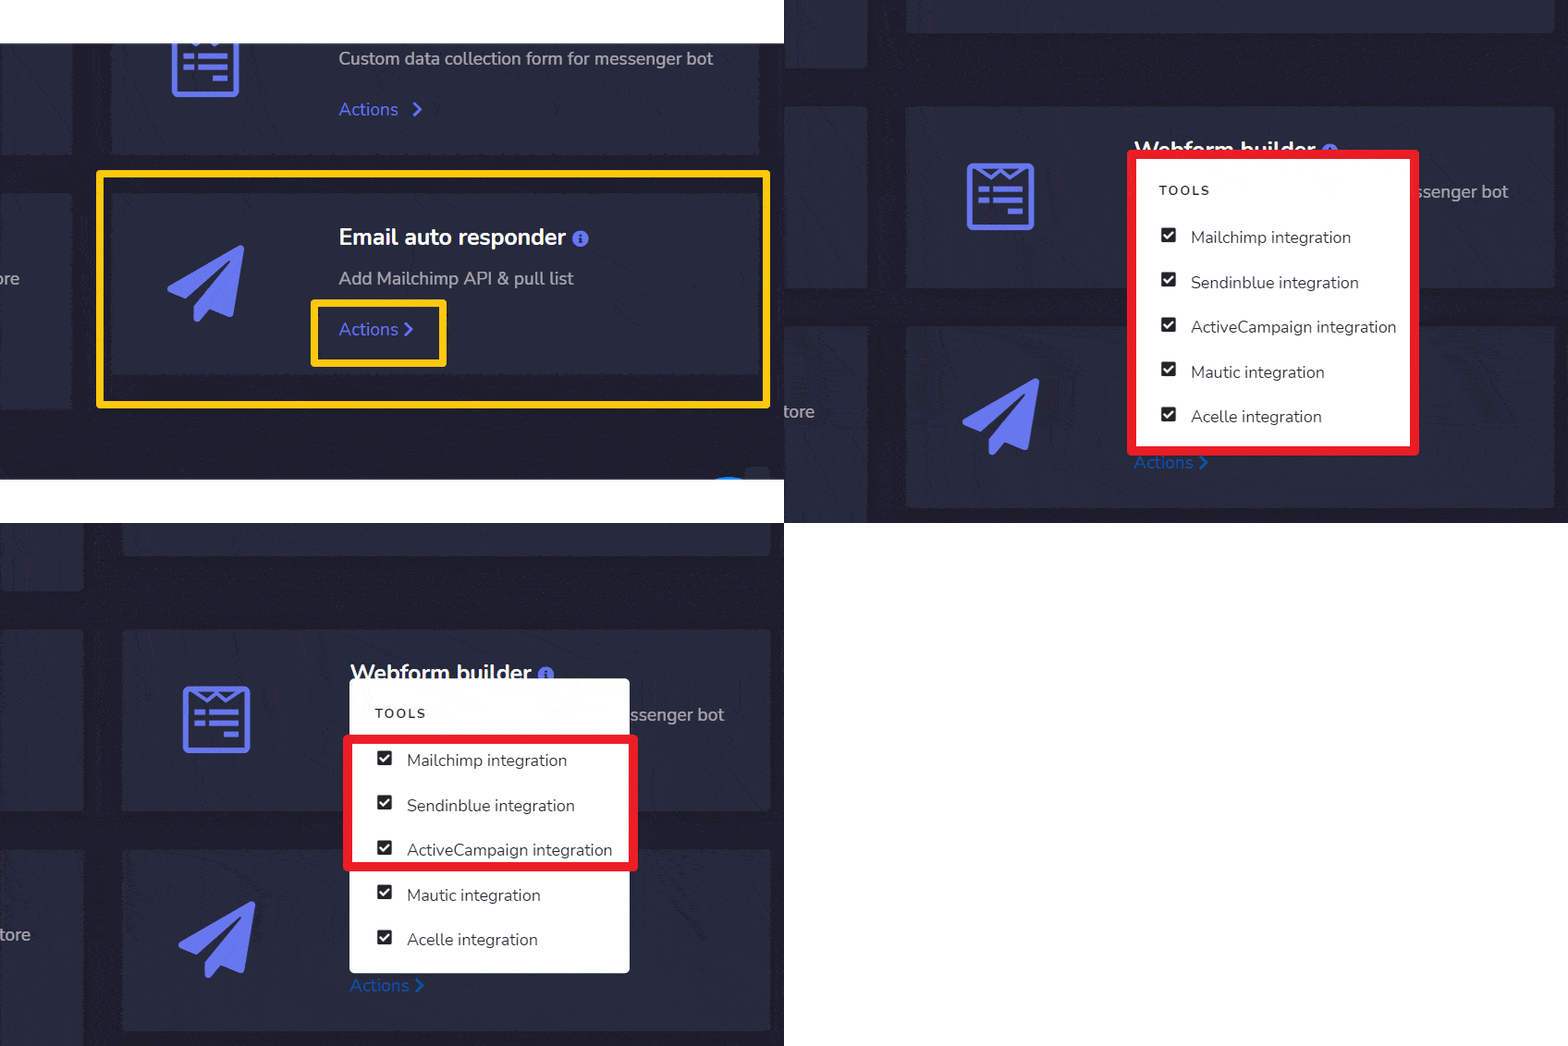
A dropdown menu containing five different options will appear on the screen:
- Mailchimp Integration
- Sendin Blue Intergration
- Activecampaign Intergration
- Mautic integration
- Acelle integration
But on this page, we will show you the first 3 options.
|
Nota: |
|
|
· It is mandatory to have accounts in all three options to make the integration possible. |
|
Mailchimp integration
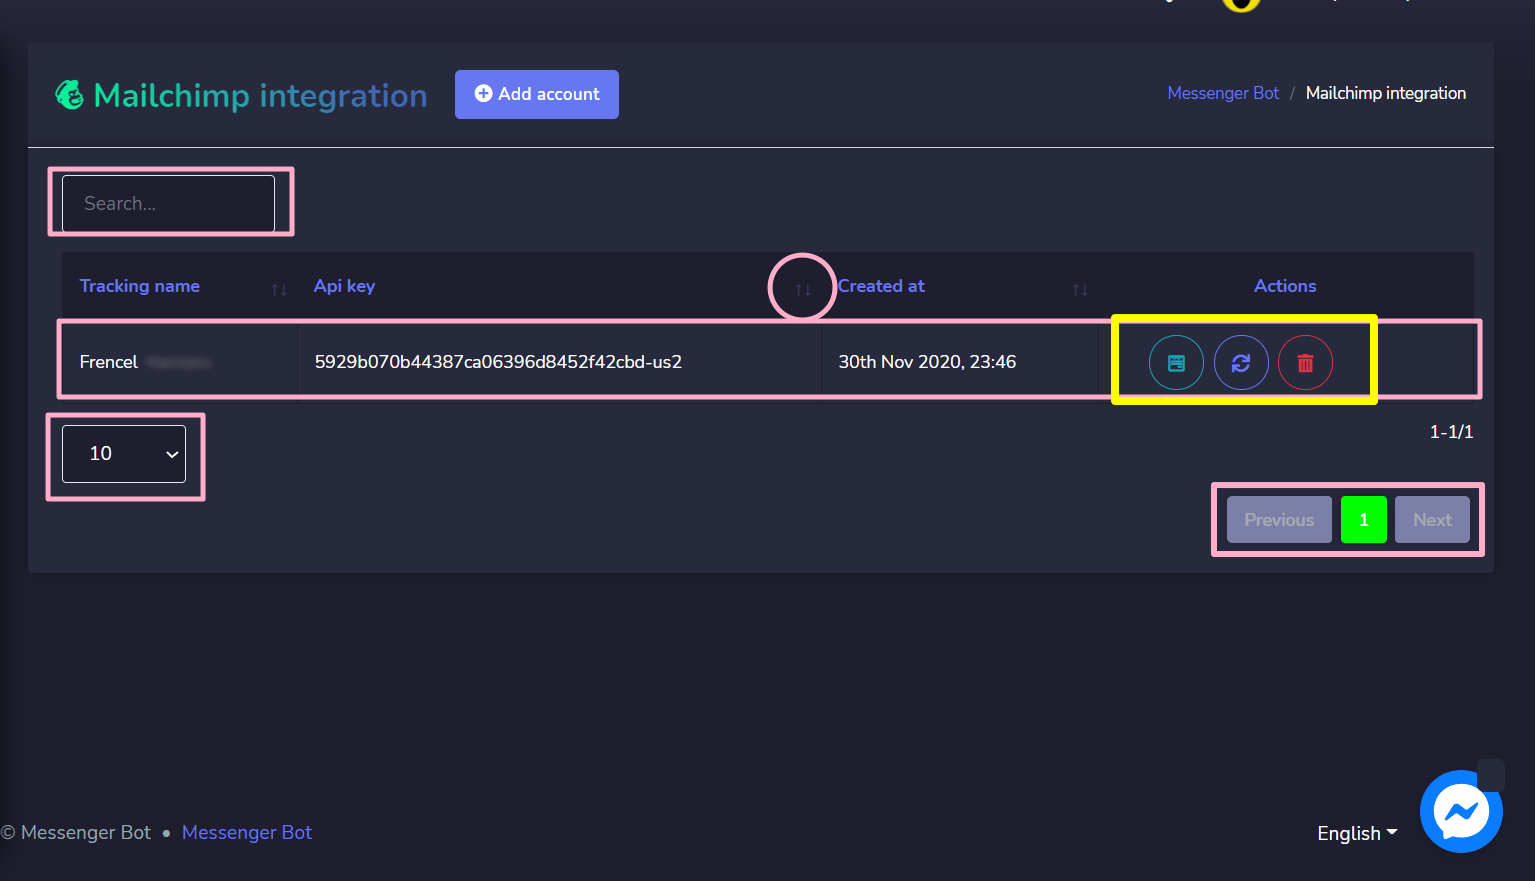
Mailchimp integration screen consists of Chaves da API, you can search for a specific tracking name by using the barra de pesquisa. Você pode ajustar o número of names to be visualizadas por página. You can also arrange them in either crescente ou decrescente selecionando as setas from the header.
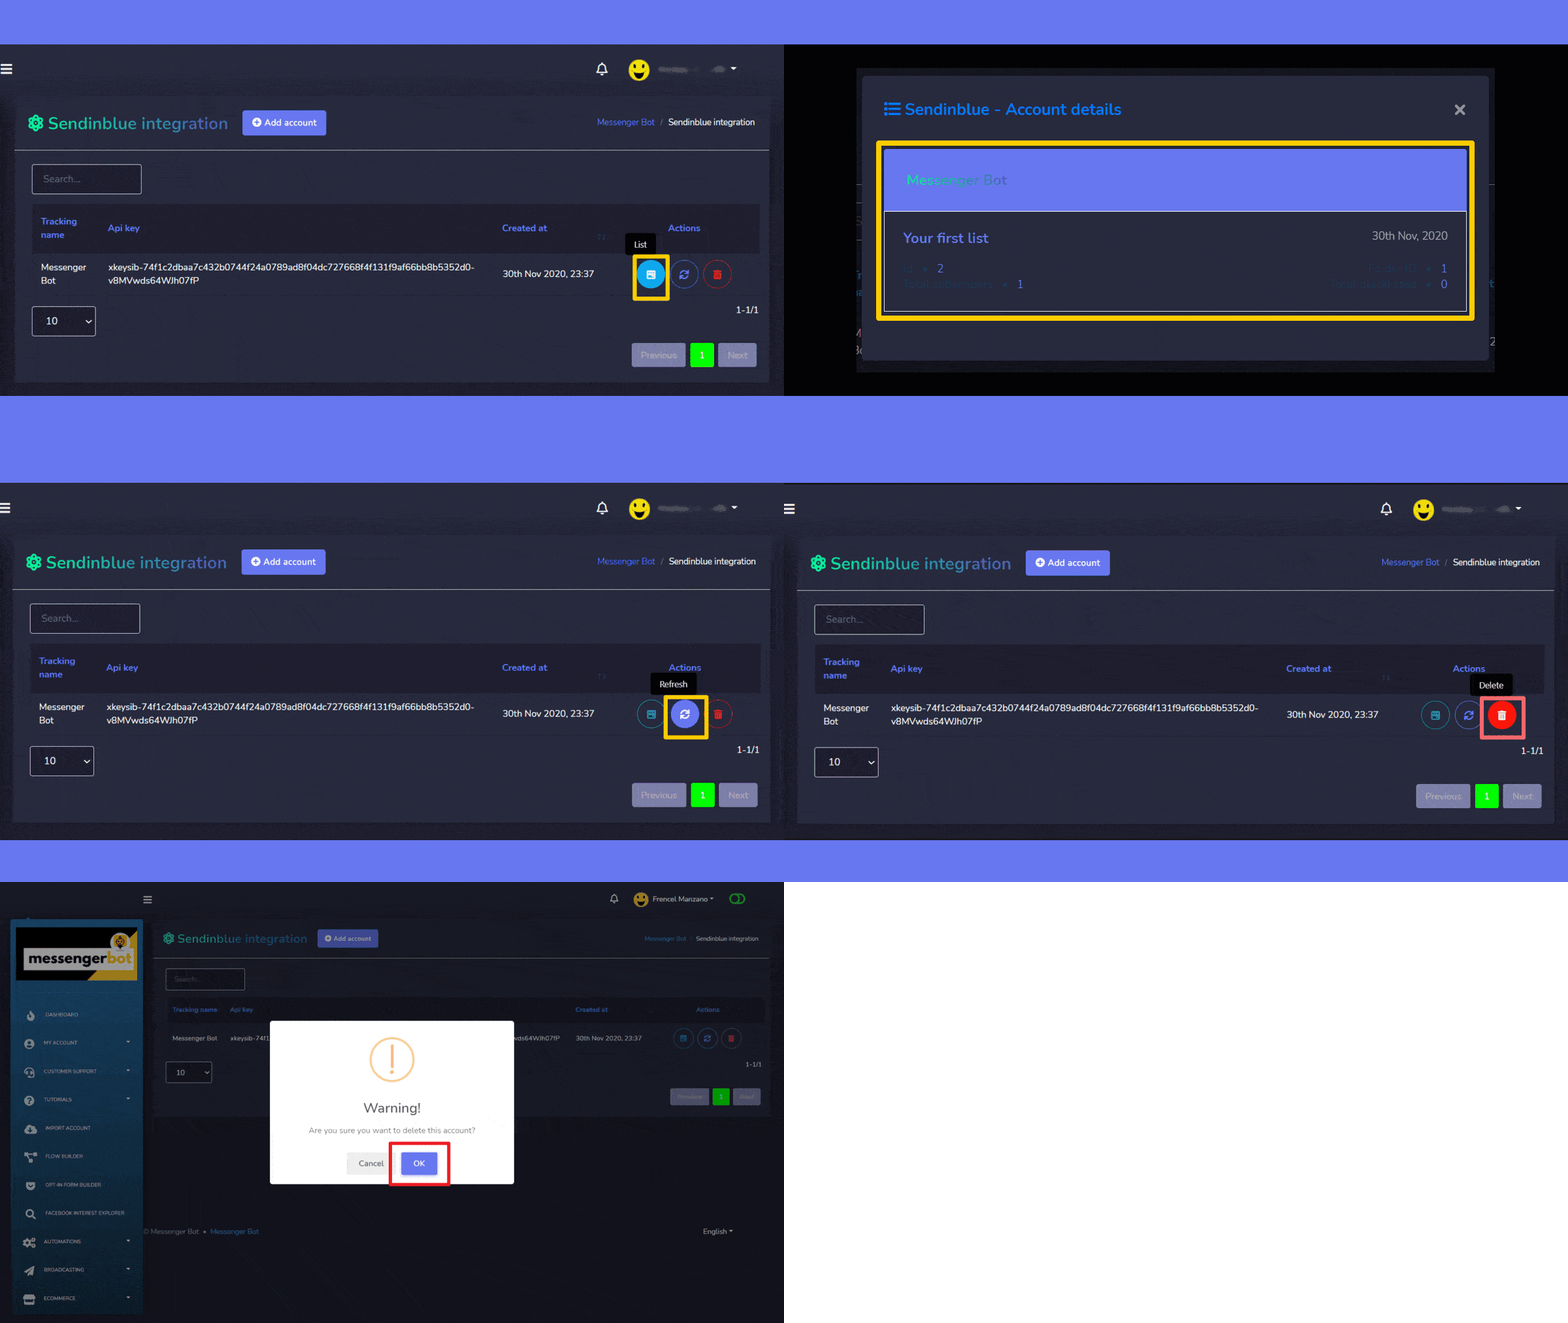
- View the list selecionando
 .
. - Refresh the list selecionando
 .
. - Delete the account
Add account
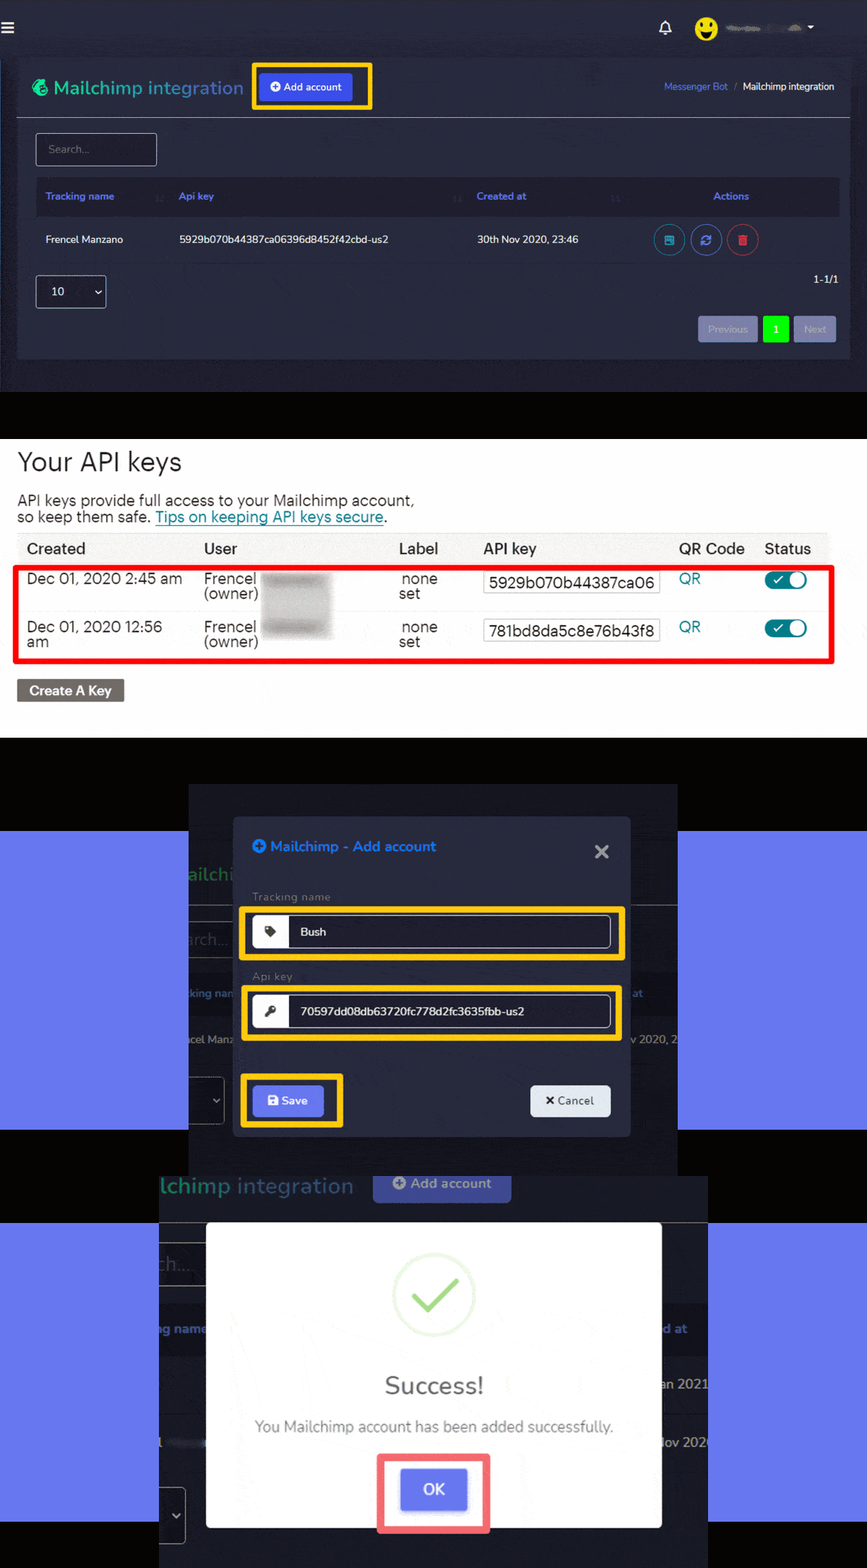
You can add an account by following the steps given below:
- Selecione
 do canto superior direito da tela.
 - Forneça o Tracking name for your list.
- Forneça chave da API generated from Mailchimp account.
- Selecione Salvar to add the new account.
Sendin Blue integration
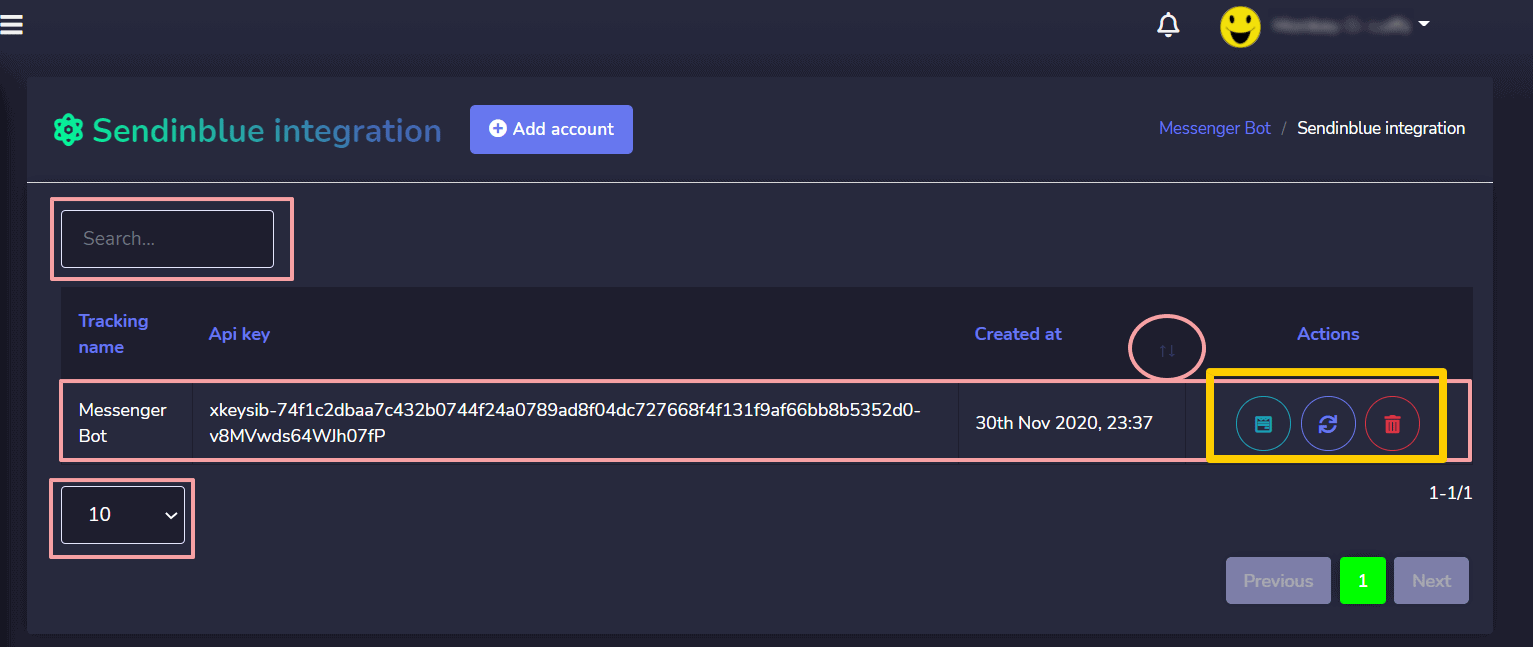
Sendinblue integration screen consists of Chaves da API, you can search for a specific tracking name by using the barra de pesquisa. Você pode ajustar o número of names to be visualizadas por página. You can also arrange them in either crescente ou decrescente selecionando as setas from the header.
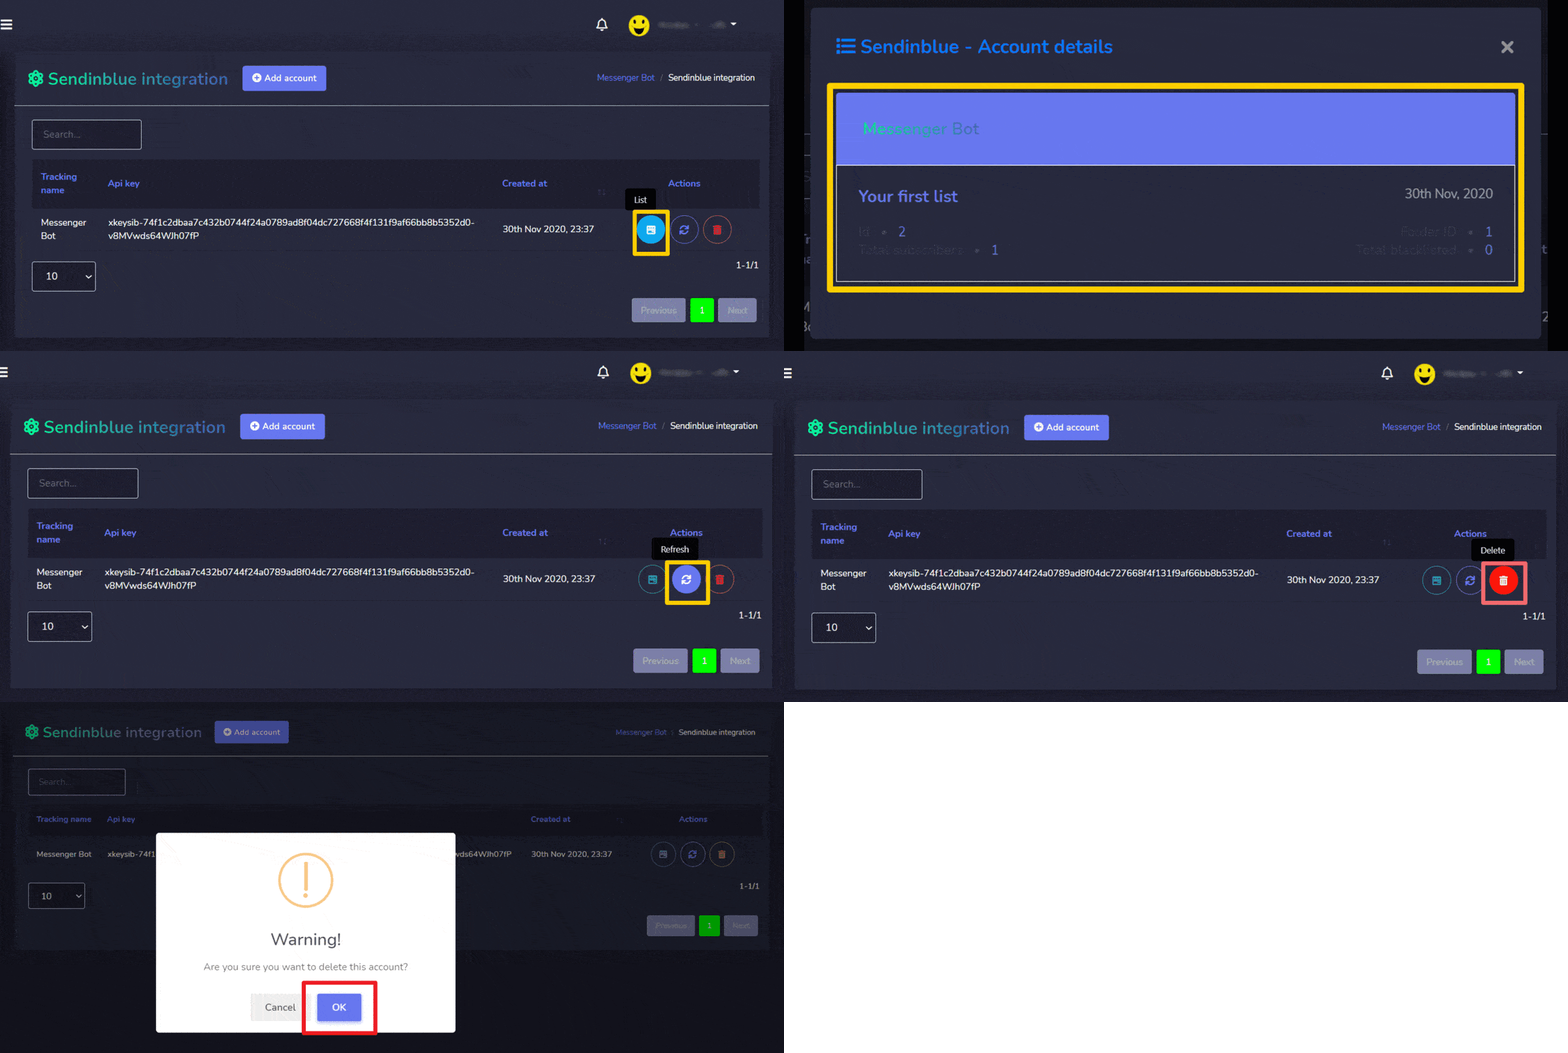
- View the list selecionando
 .
. - Refresh the list selecionando
 .
. - Delete the account
Add account
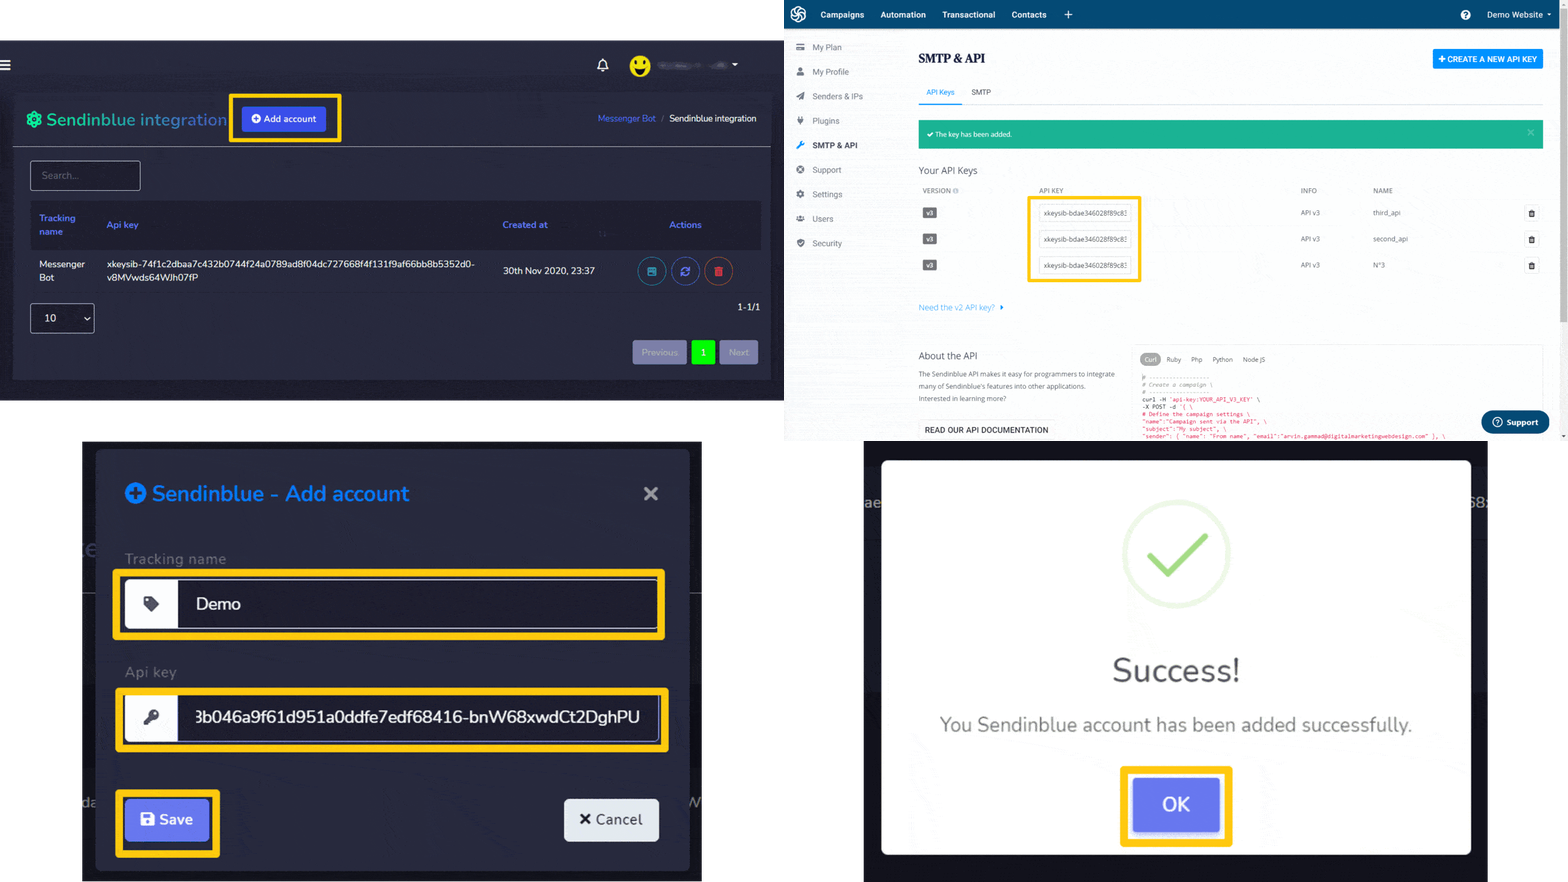
You can add an account by following the steps given below:
- Selecione
 do canto superior direito da tela.
 - Forneça o Tracking name for your list.
- Forneça chave da API generated from Sendinblue account.
- Selecione Salvar to add the new account.
Activecampaign integration
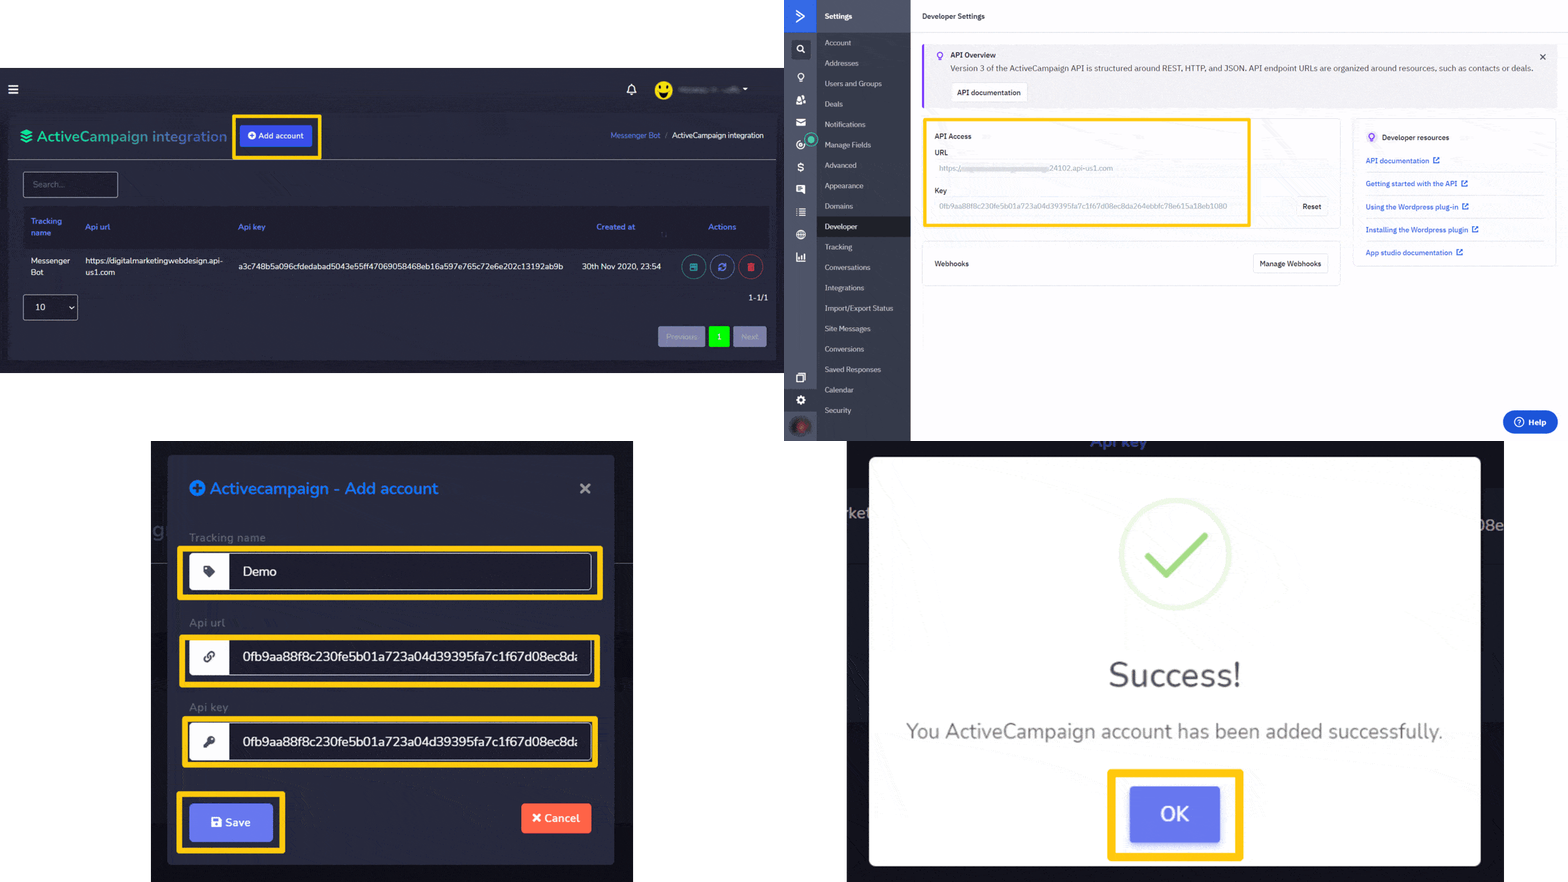
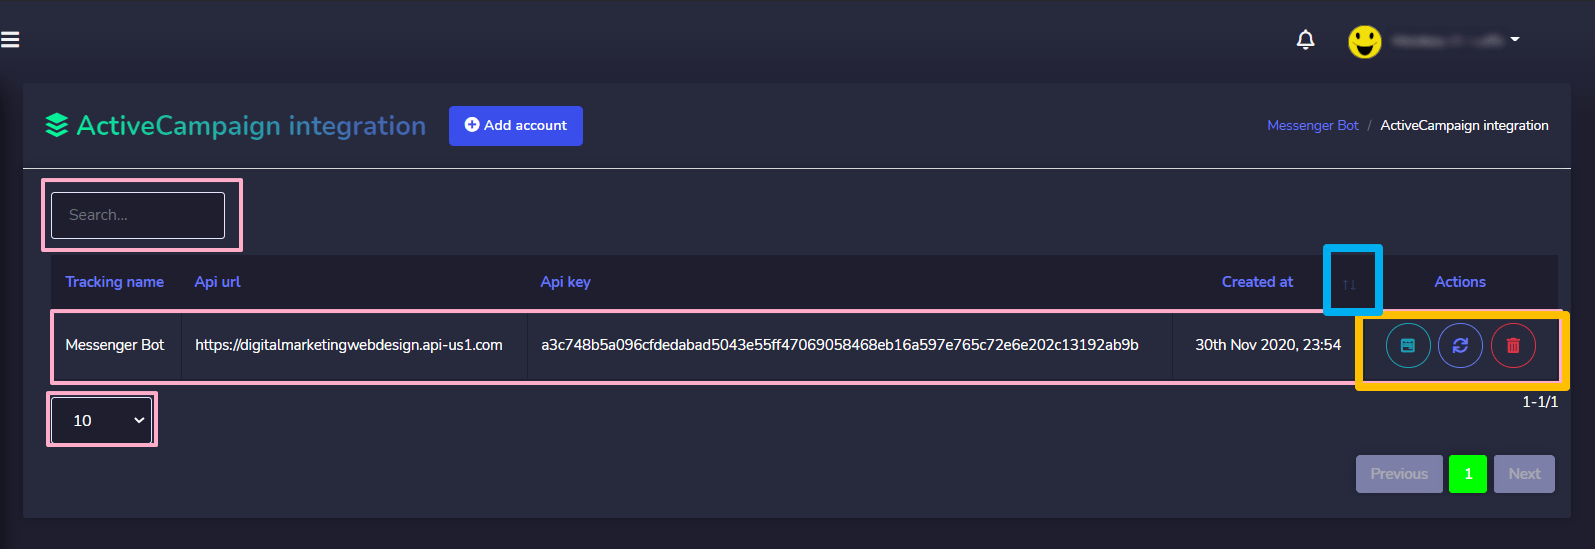
Activecampaign integration screen consists of API Keys, you can search for a specific tracking name by using the barra de pesquisa. Você pode ajustar o número of names to be visualizadas por página. You can also arrange them in either crescente ou decrescente selecionando as setas from the header.
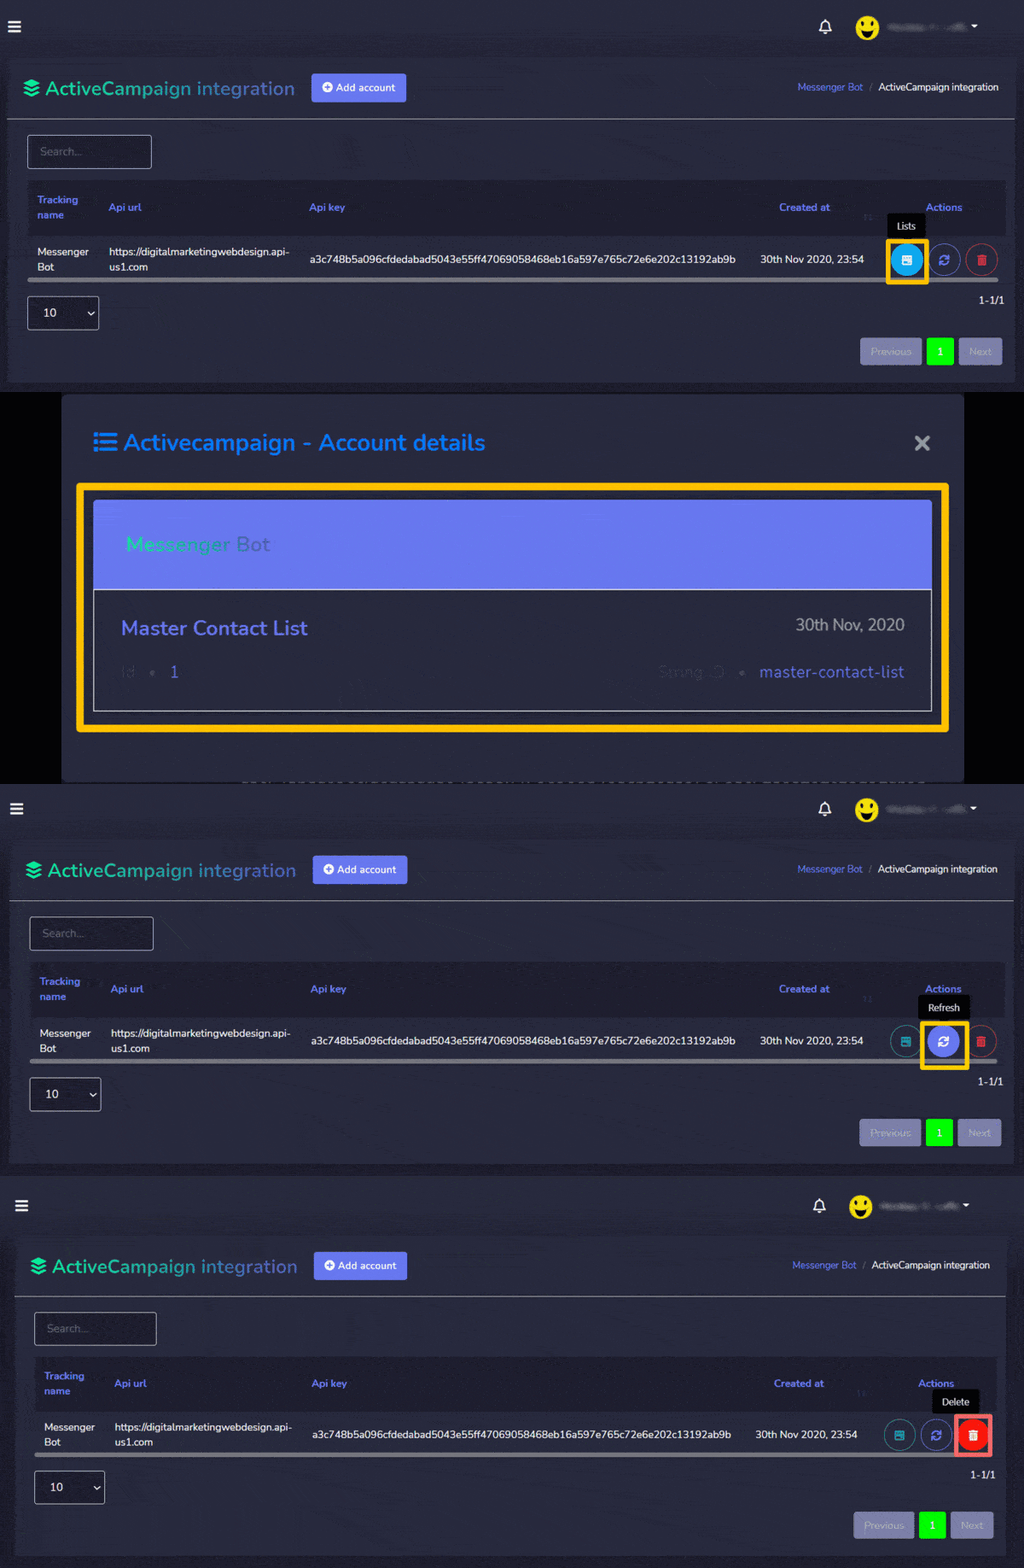
The following are the actions that can be performed:
- View the list selecionando
 .
. - Refresh the list selecionando
 .
. - Delete the account
Add account
You can add an account by following the steps given below:
- Selecione
 do canto superior direito da tela.
 - Forneça o Tracking name for your list.
- Forneça API URL generated from Activecampaign API account.
- Forneça chave da API generated from Activecampaign API account.
- Selecione Salvar to add the new account.
