How To Build An eCommerce Store With Messenger Bot
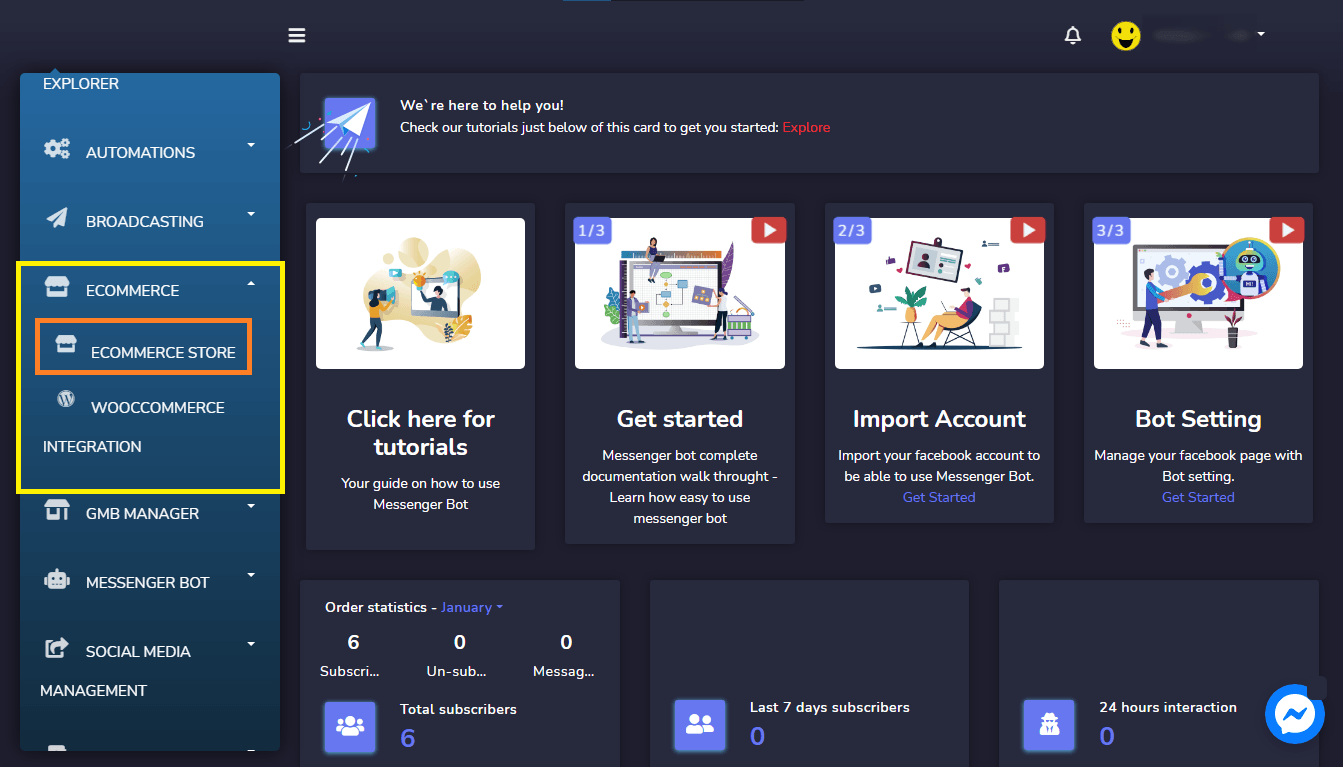
Log in to Messenger Bot Application. And in your Dashboard select Ecommerce then dropdown to click 전자상거래 스토어.
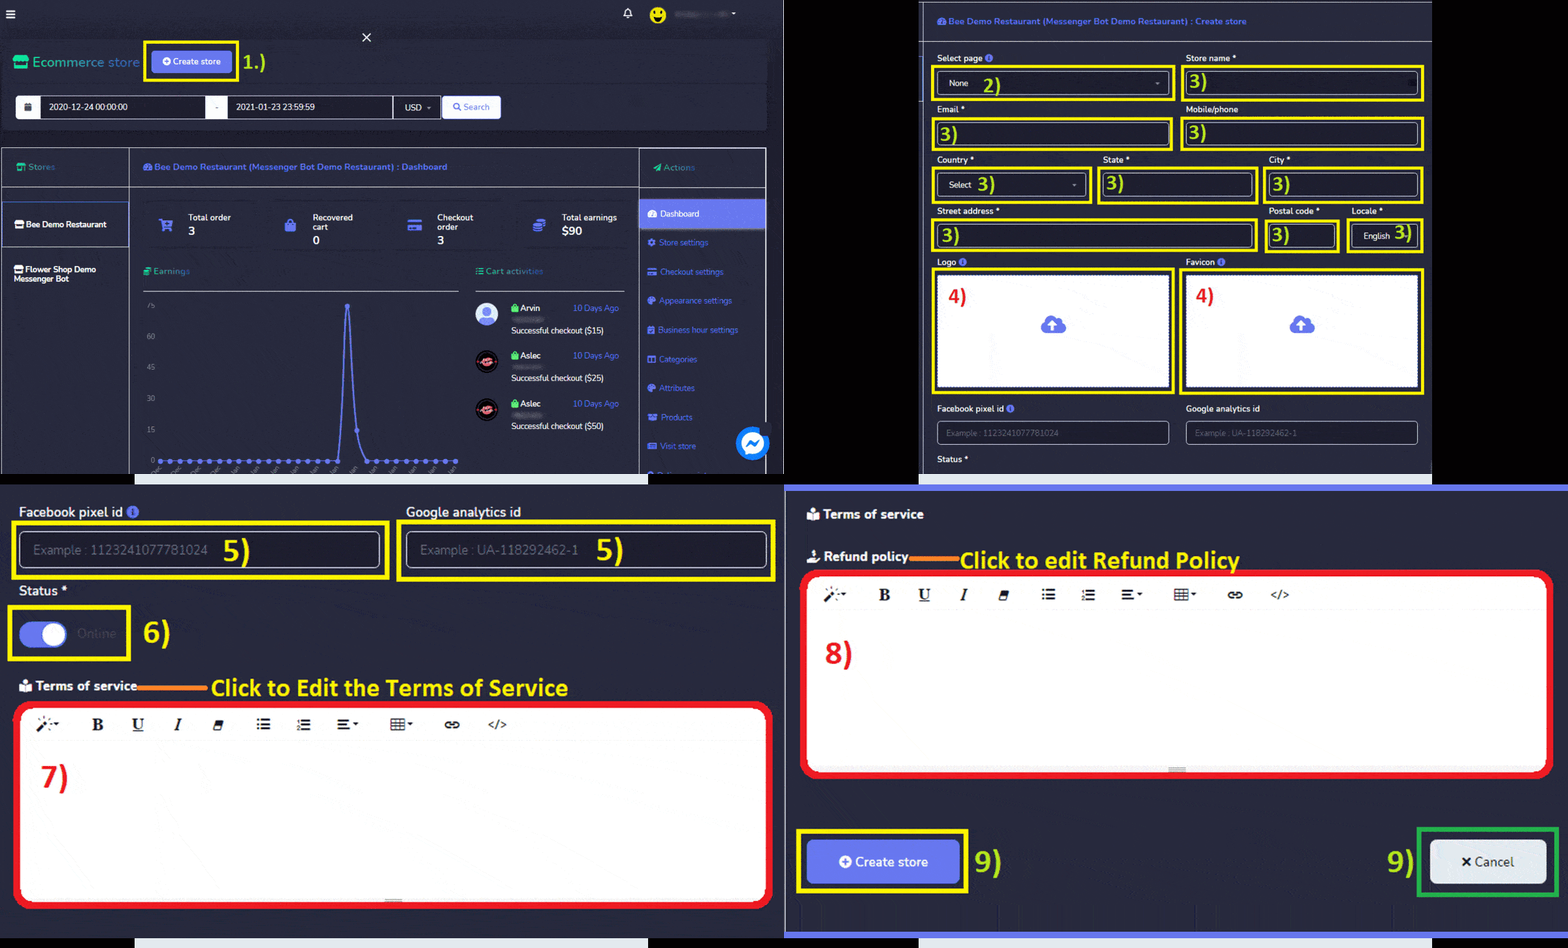
In Ecommerce Store Dashboard: It displays a summary of the statistics that will include:
- Total order: The number of items ordered on selected dates.
- Checked out the order: The number of orders that have been processed
- Total earnings: Total amount of earnings till the selected date.
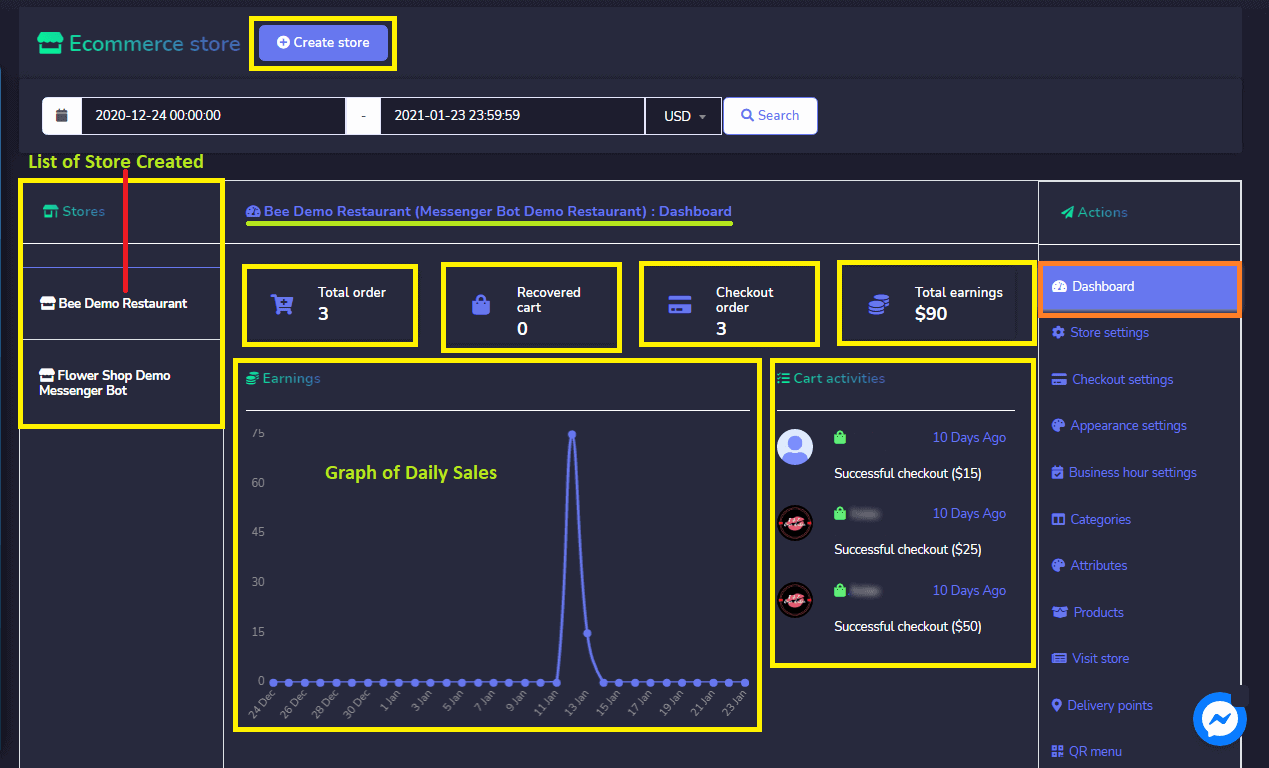
Create store: You can create a new store by following the steps:
- Select an option from the top right of the screen. Click Create a store.
- 제공 store information, select the page name.
- 제공 the store name, email address, postal address, mobile|phone number.
- 업로드 Logo and Favicon.
- 제공 Facebook pixel id 그리고 Google analytics id if you have.
- Set the status of the store.
- Zap에 대한 Terms of services.
- Provide a refund policy.
- Click, Create 상점 또는 취소.
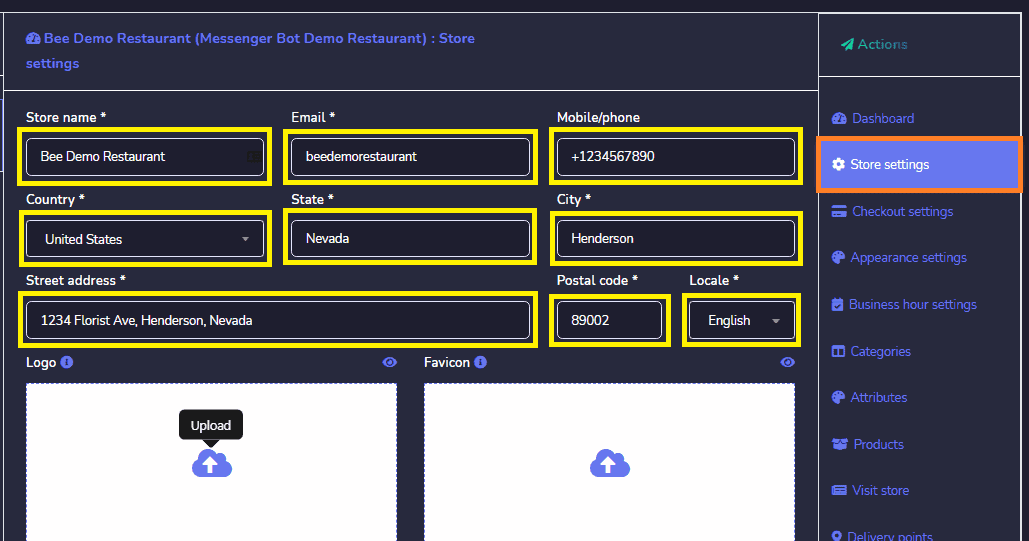
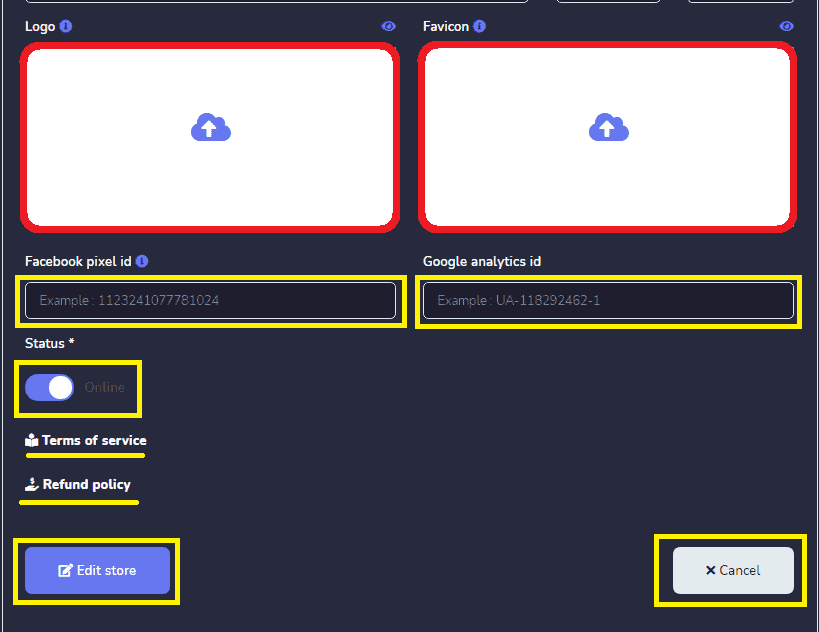
Store Settings: It displays the information about E-commerce Store. It can be edited and updated at any time if changes may occur.
Checkout Settings: This allows you to adjust the settings of all payment accounts. You need to follow these steps below:
- 제공된 필드에 PayPal email address and enable PayPal sandbox mode.
- Enter a stripe secret key 그리고 stripe publishable key 그리고 enable stripe billing address.
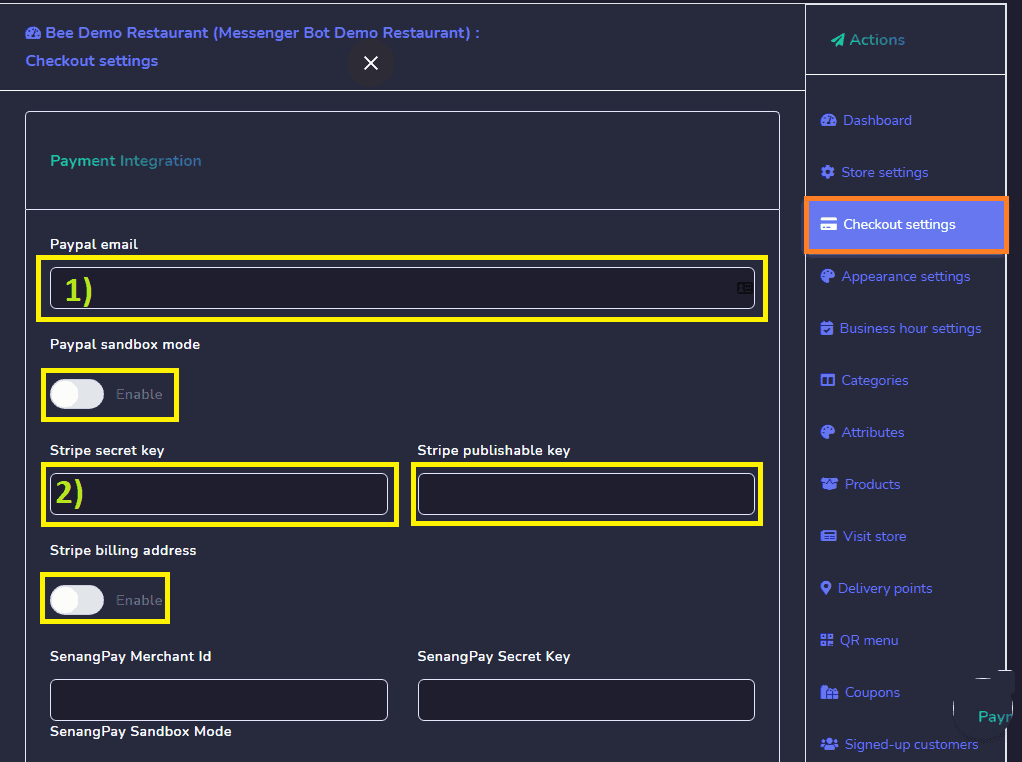
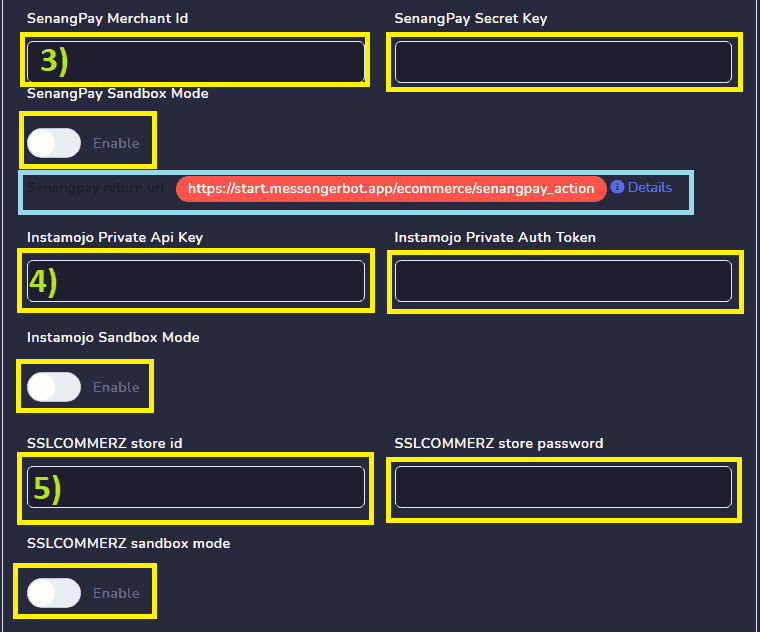
- 입력 SenangPay Mearchant Id and SenangPay Secret Key. 그런 다음, Enable SenangPay Sandbox Mode. Click, details Senangpay return URL.
- 입력 Instamojo Private API Key and Instamojo Private Auth Token. 클릭, Enable Sandbox Mode.
- 입력 SSLCOMMERZ store id 그리고 SSLCOMMERZ store password. 그런 다음 클릭하세요 enable SSLCOMMERZ sandbox mode.
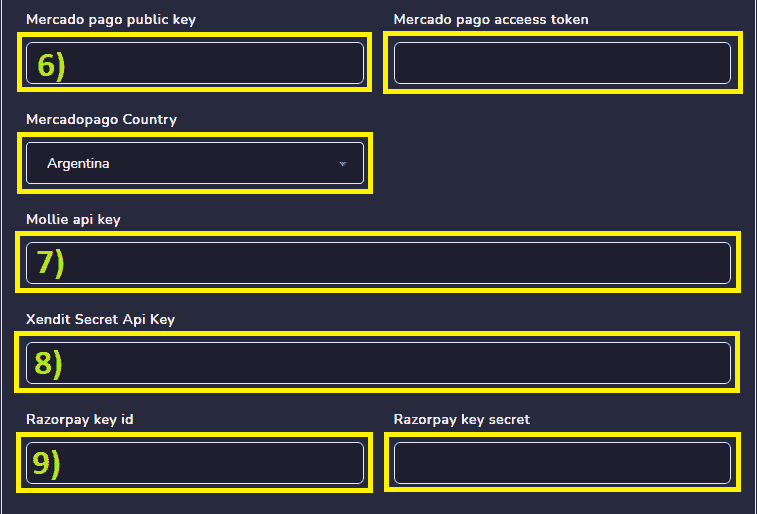
- 입력 Mercado pago public key 그리고 Mercado pago acceess token. Select Mercadopago Country.
- 입력 Mollie API key.
- 입력 Xendit Secret API Key.
- 입력 Razorpay key id and Razorpay key secret.
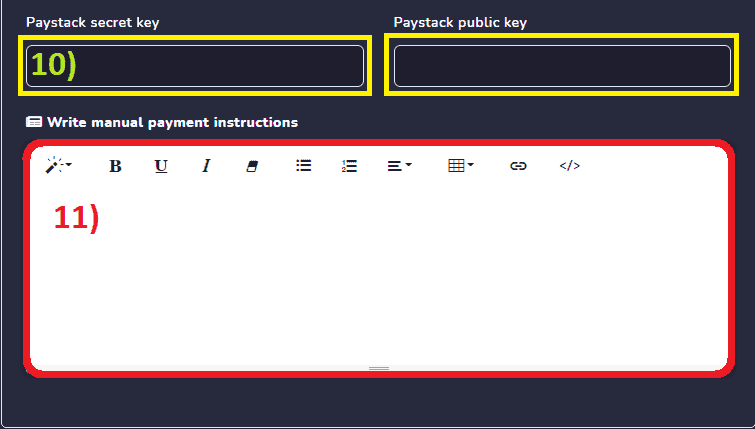
- 입력 Paystack secret key and Paystack public key.
- Write Manual payment instructions.
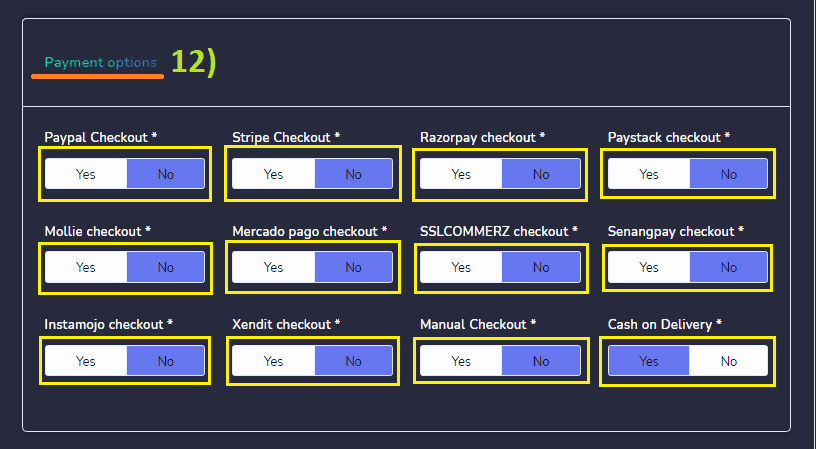
- Checkout Payment Options: Choose what payment options that your customer can choose upon checking out their orders. From Paypal, Stripe, Razorpay, Paystack.Mollie, Mercado Pago, SSLCOMMERZ, Senangpay, Instamojo, Xendit, Manual, and Cash on Delivery.
- Currency & Formatting: Select the currency of your country with options on Right alignment, Two decimals, and Display comma.
- Tax & Delivery Charge: you can set up tax percent for all products and delivery charges.
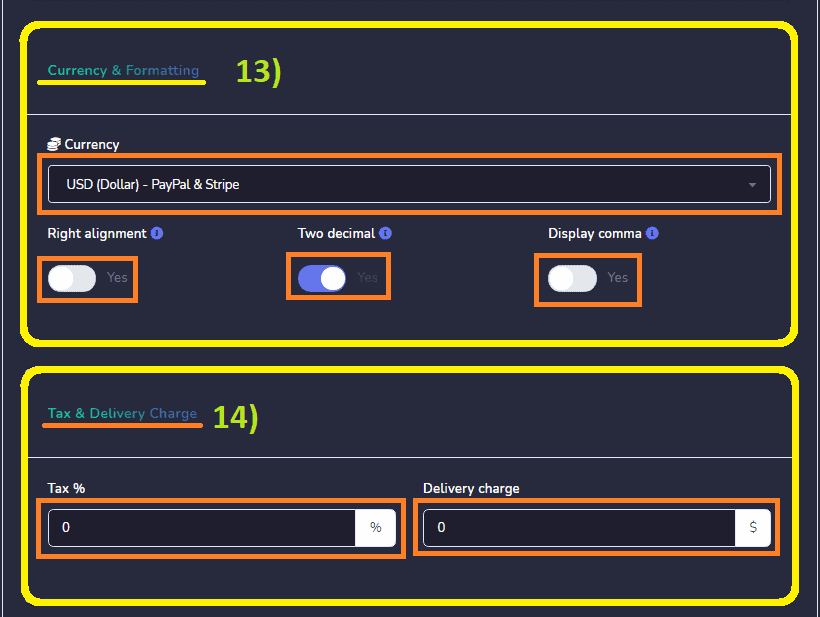
- You can also select Delivery Preference 에 의해 Enabling Store Pickup, Home Delivery, Preparation Time, and Scheduled order.
- Login Preference: Enable Guest Purchase.
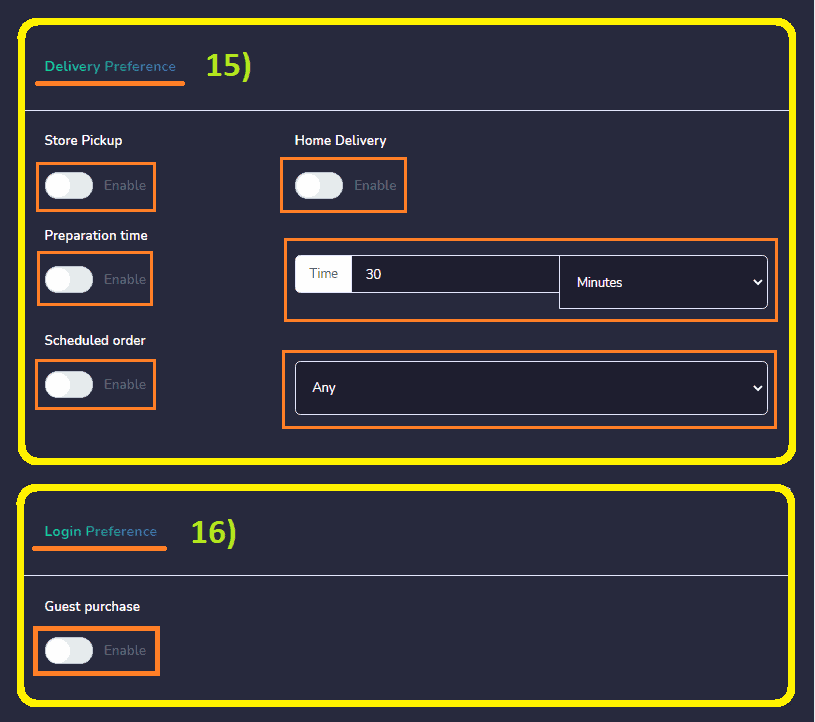
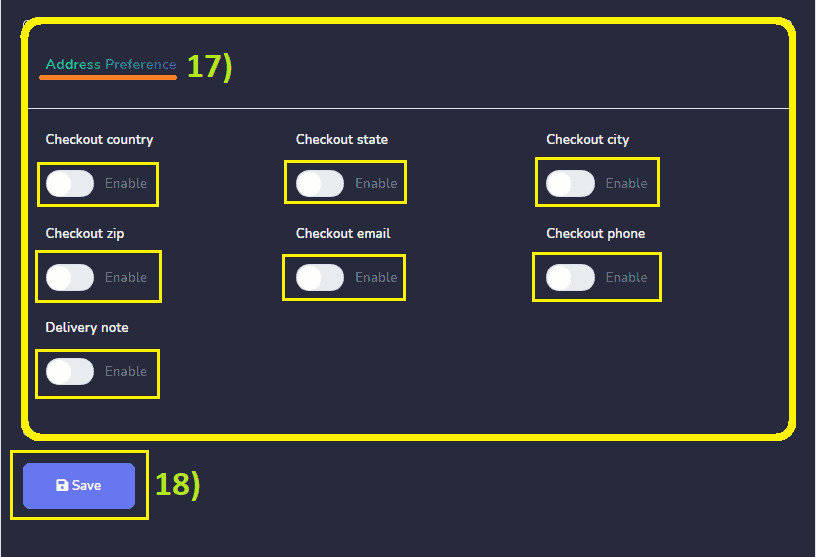
- Address Preference: Enable Checkout country, Checkout state, Checkout City, Checkout zip, Checkout email, Checkout phone, and Delivery Note.
- 클릭 저장.
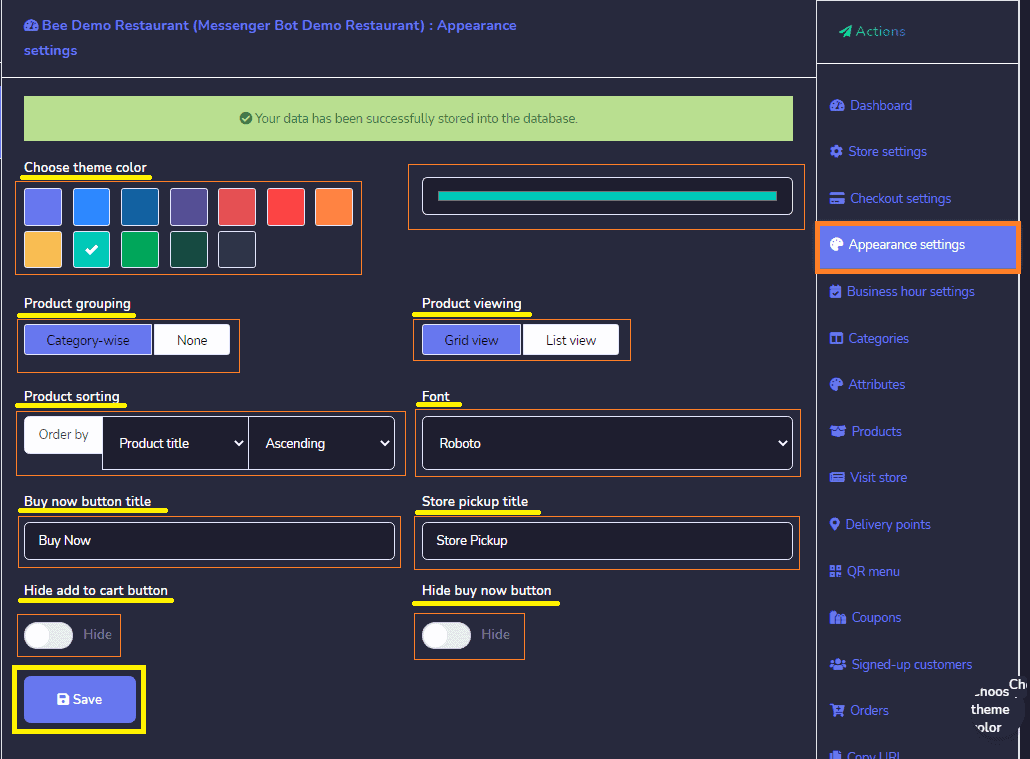
Appearance Settings: 당신은 customize your eCommerce store. Like, Choose theme color, Product grouping, Product viewing, Product sorting, Font, Buy now button title, Store pickup title, Hide add to cart button and Hide buy now button. 그런 다음 클릭하세요 저장.
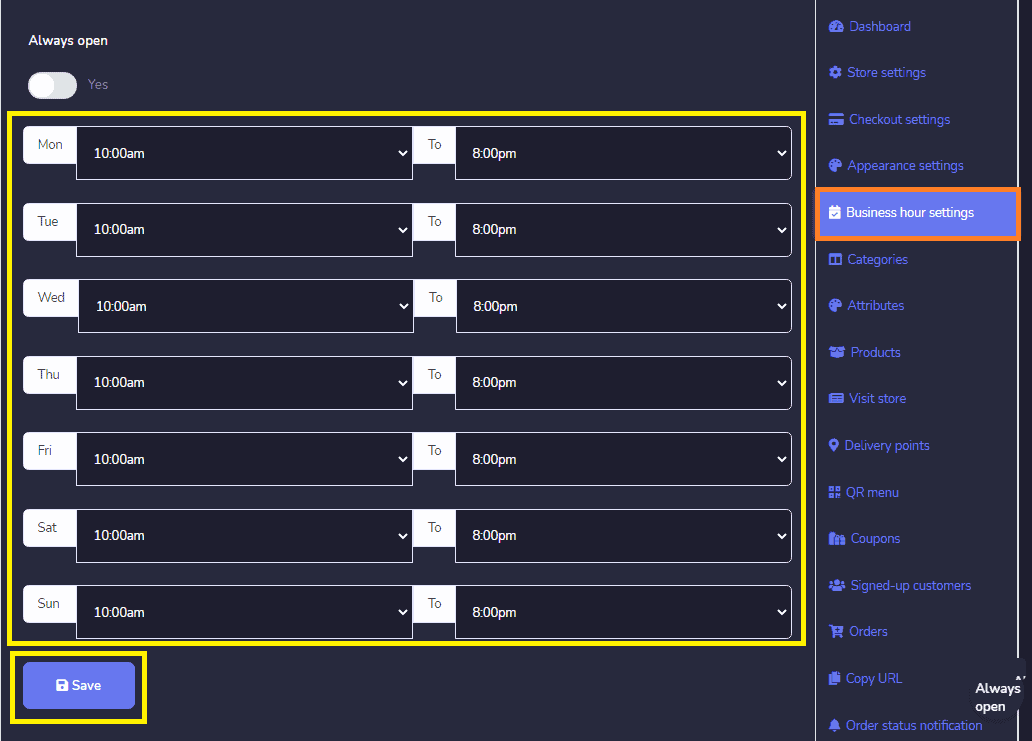
Business Hour Settings: You can choose Always open.
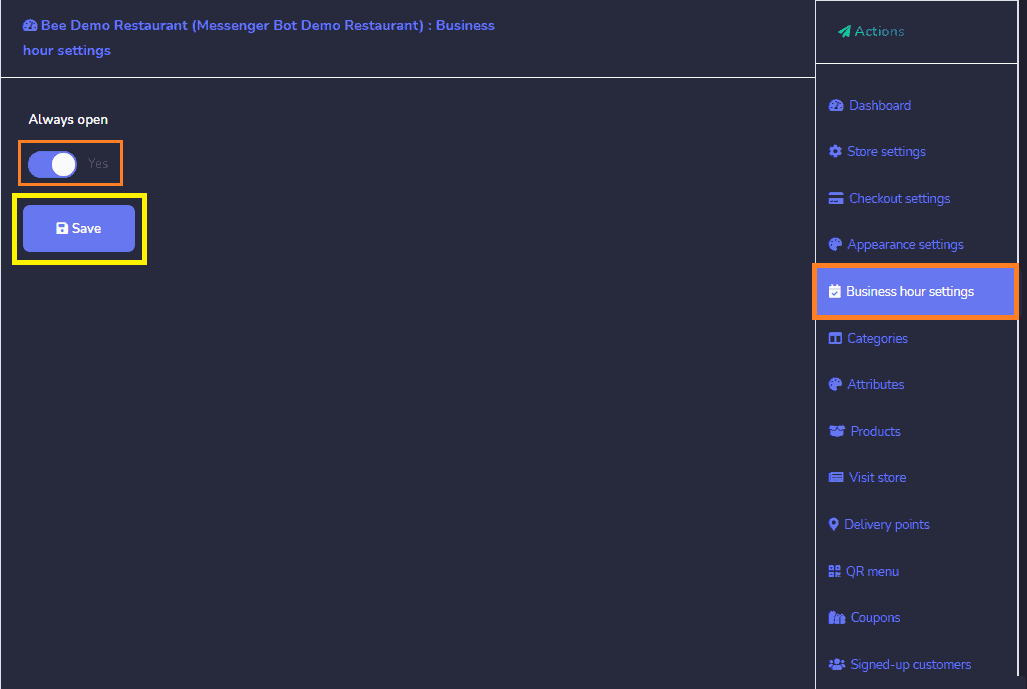
Or 선택하십시오. your opening time from Monday to Sunday. 그런 다음 클릭하세요 저장.
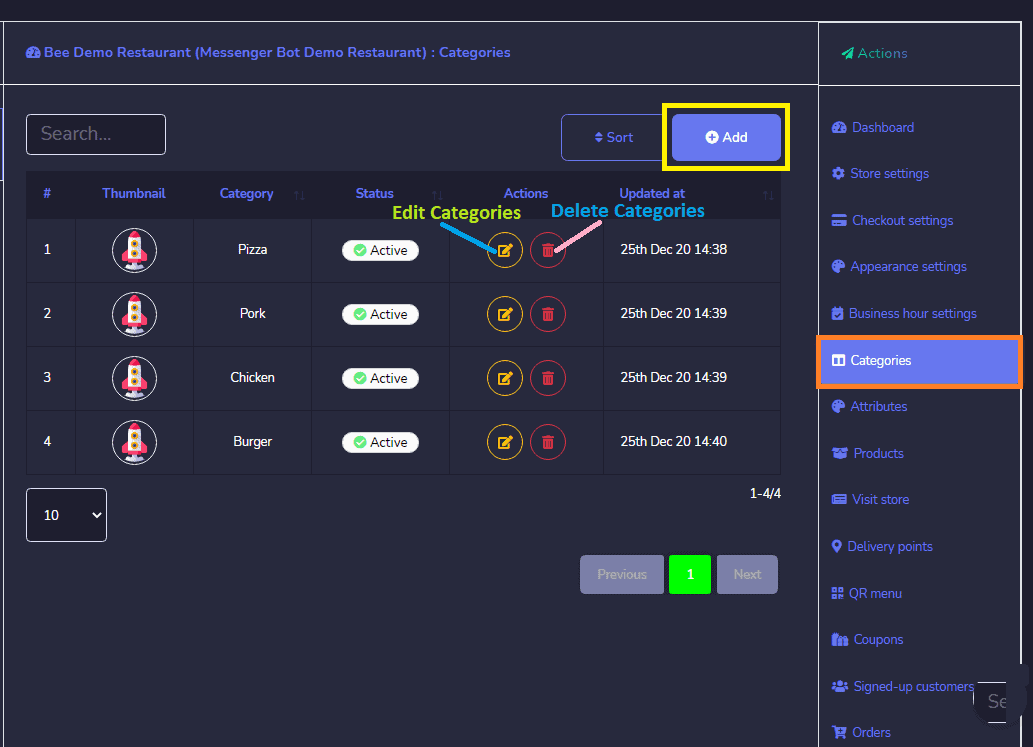
Categories: The categories for your stores appear in this section. You can perform the following actions:
- 편집 the category.
- Delete the category.
You can also add a new category to the database by following the steps: Click, Add category 에서 top right of the categories screen.
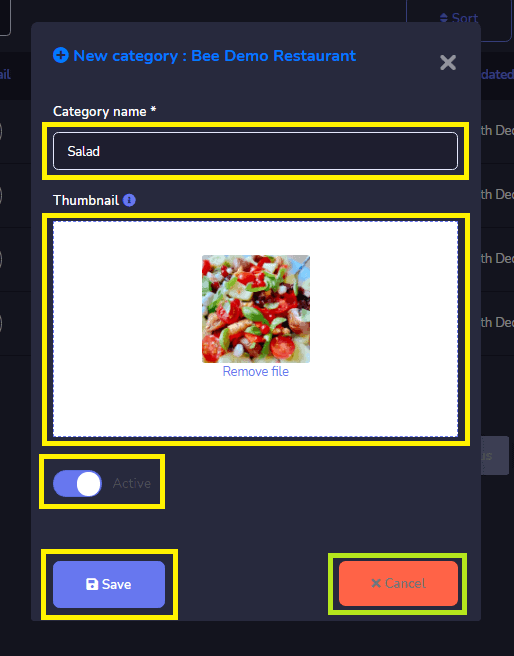
A new category window will appear. Provide Category name, Add Thumbnails, and enable status to Active. You cancel or Save your category.
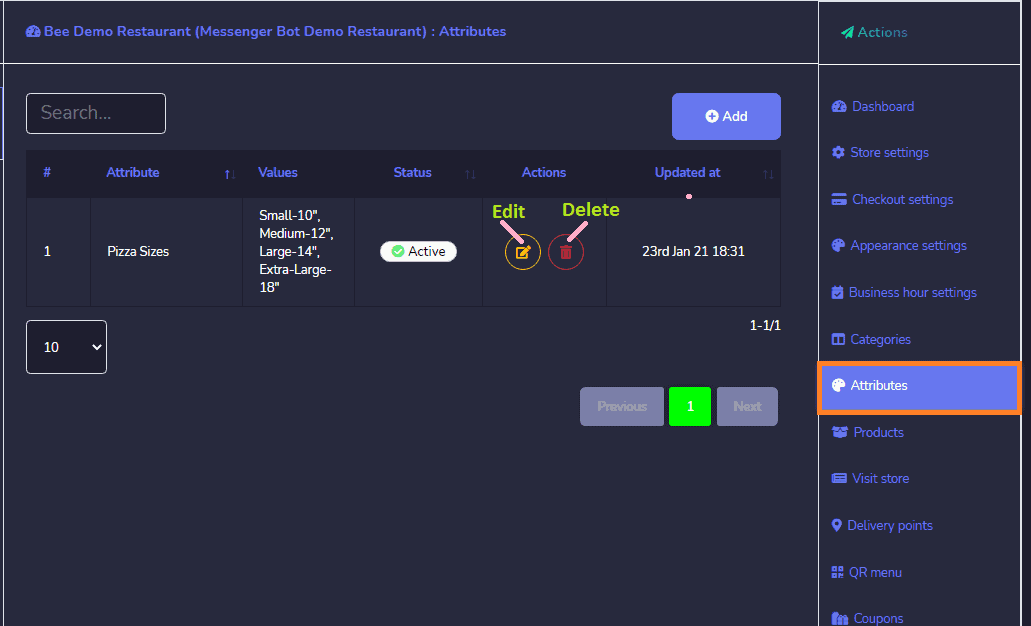
Attributes: The attributes for your stores appear in this section. You can perform the following actions:
- 편집 an attribute.
- Delete an attribute.
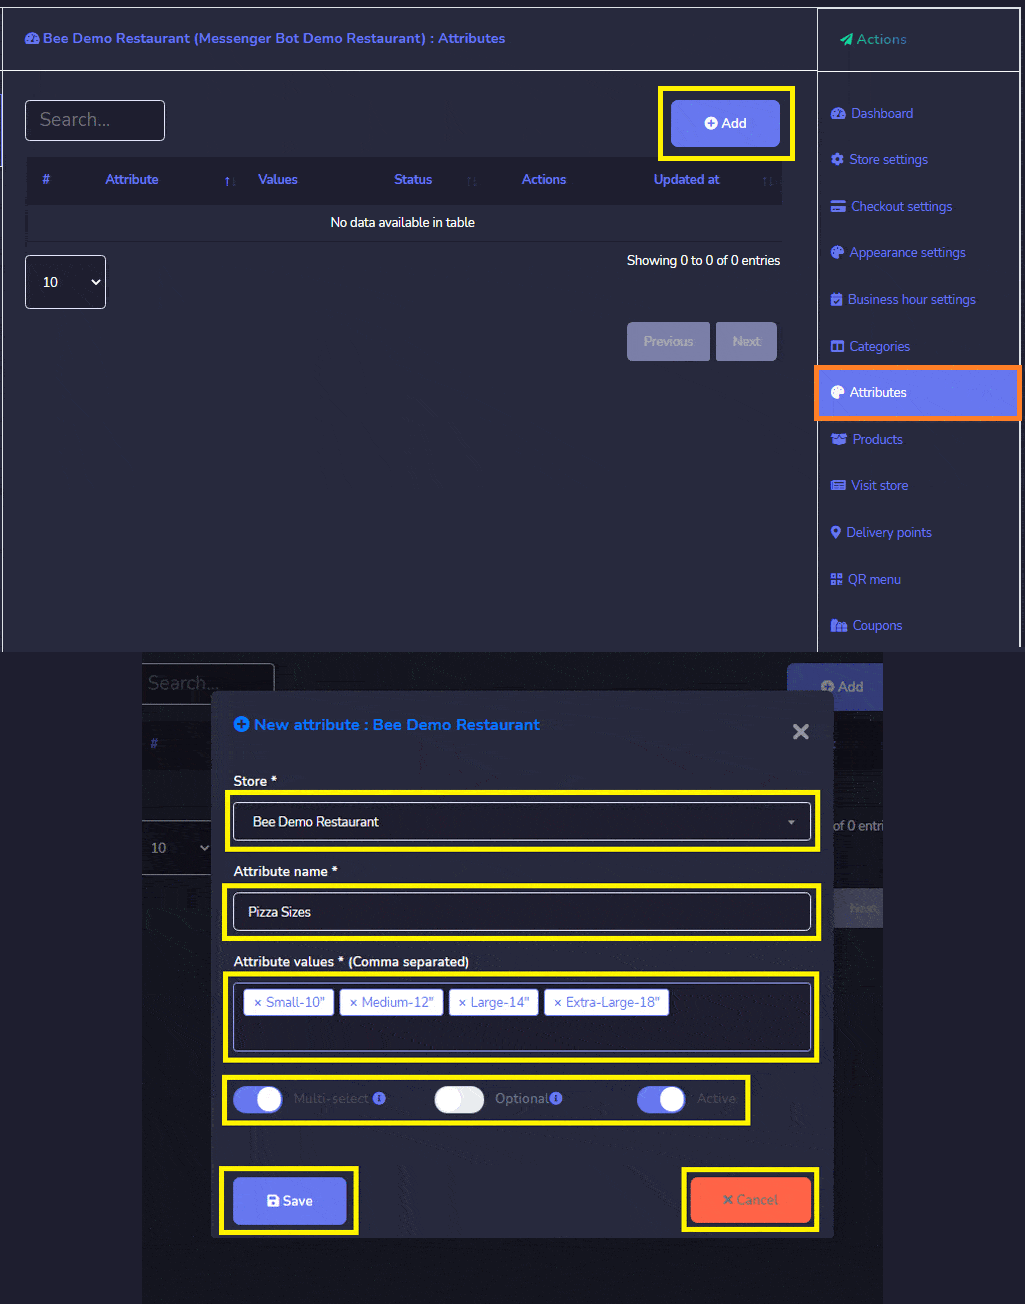
You can also add a new attribute in the database by following the steps:
- 선택하십시오. Add attribute from the top right of the attributes screen. A new attribute window will appear.
- Select the store for which you want to create attributes.
- Provide the name for your attributes.
- Enter attribute values separated with commas. 선택하십시오. Attributes Status: Multi-select, Optional, and Active. Click, Save or Cancel your Attribute.
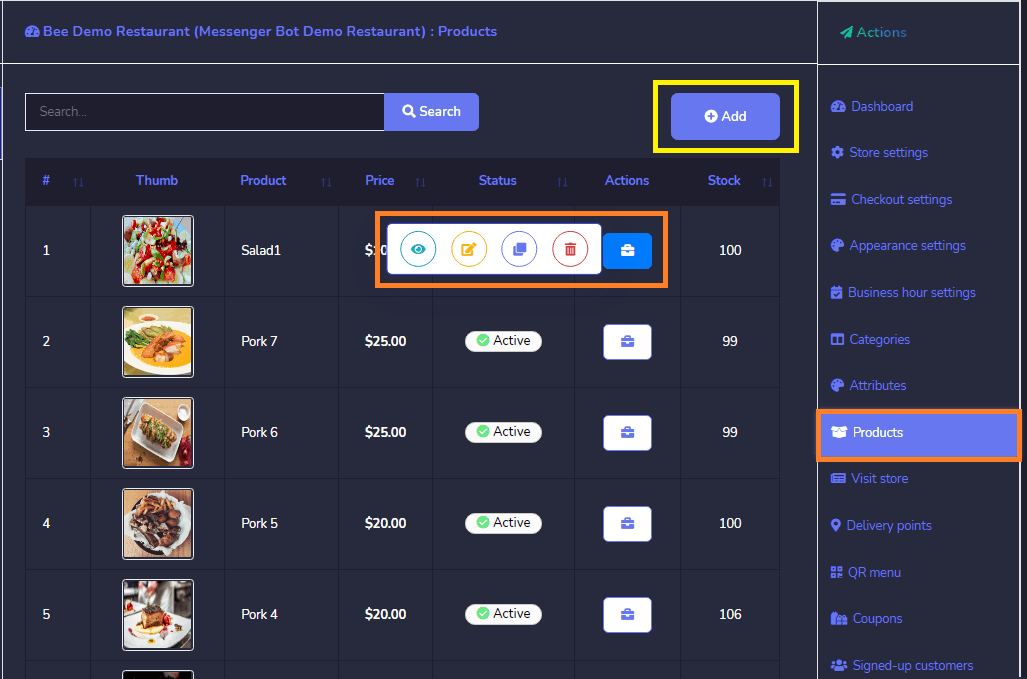
Products: The products option allows you to get access to all existing products. You can perform the following actions:
- View the product page by selecting the eye.
- 편집 the product.
- 복제 the product.
- Delete the product.
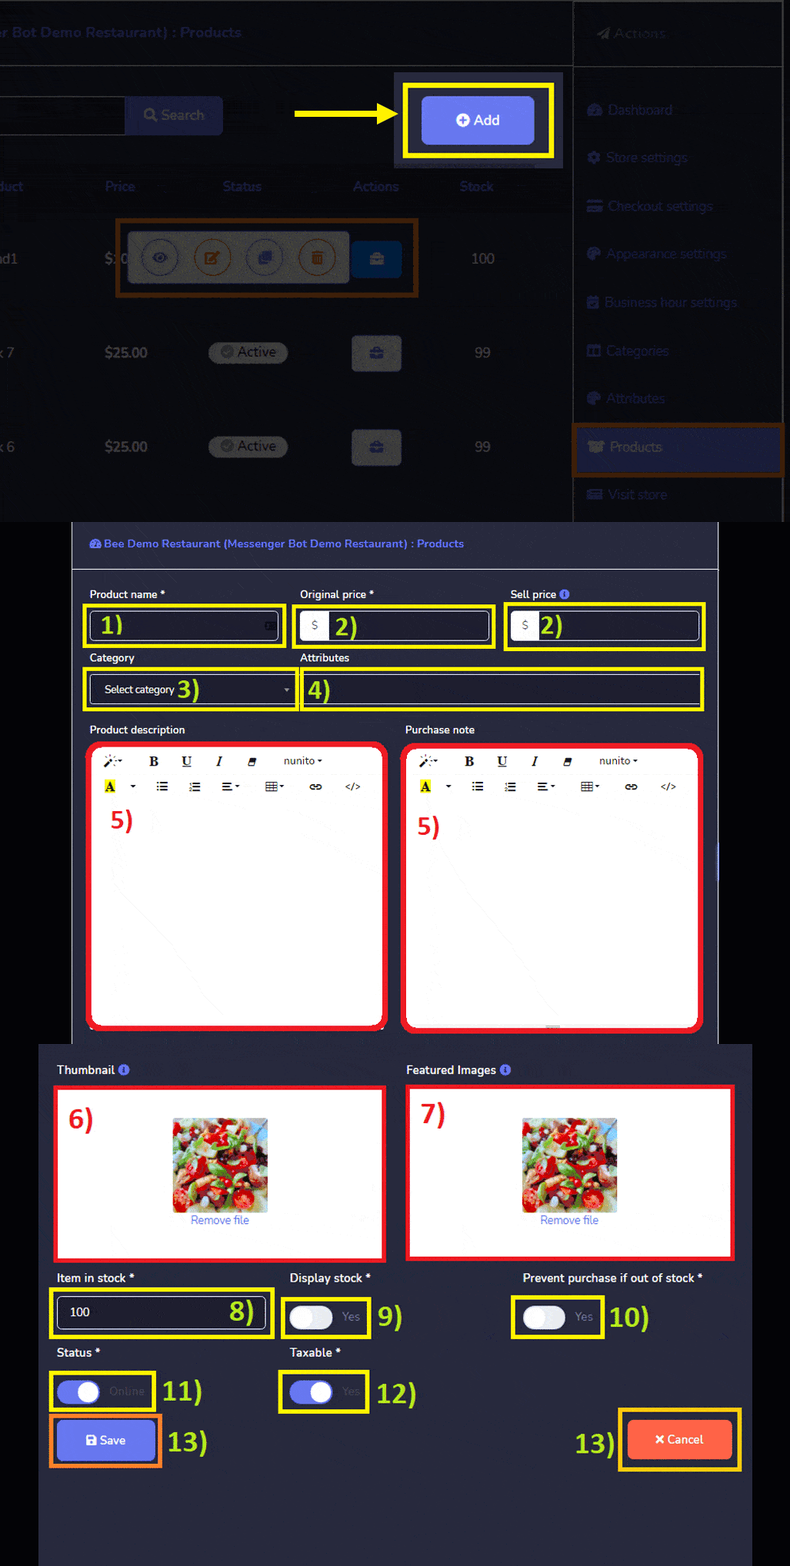
You can also add a new product to the database by following the steps:
- Add Product from the product screen. Provide your Product name.
- 당신의 입력 Original Price or Sell Price.
- 선택하세요 카테고리 for your product.
- 귀하의 Attributes.
- Write about your Product description and your Purchase note.
- Upload your Thumbnail.
- Upload your Featured Images.
- Provide Item in stock.
- Enable Display stock to Yes.
- Enable Prevent purchase if out of stock.
- Enable 당신의 Status Online.
- Enable 당신의 Taxable to Yes or No.
- Then click, 저장 또는 취소 your Product.
Delivery Points is a single mailbox or other places at which mail is delivered. It differs from a street address, in that each address may have several delivery points, such as an apartment, office department, or other room.
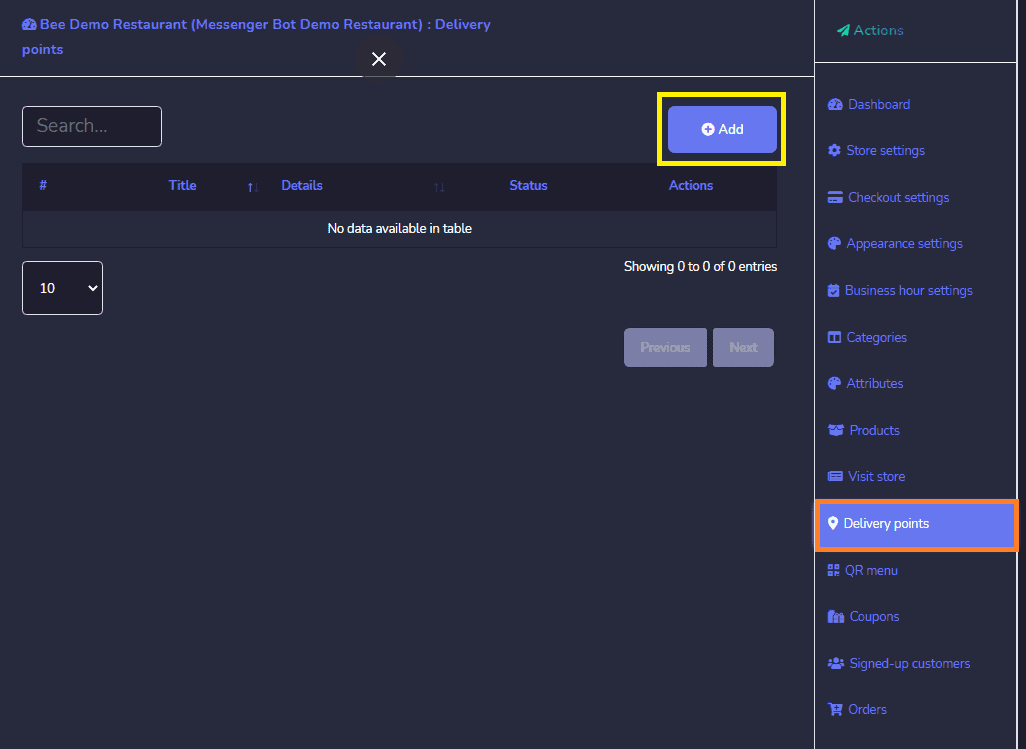
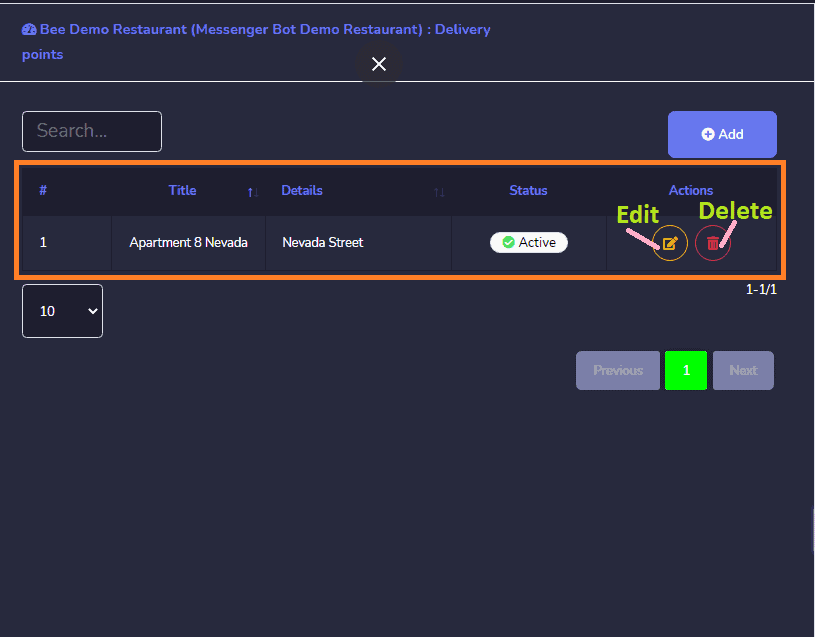
사용자의 perform the following:
- 편집 a point.
- Delete a point.
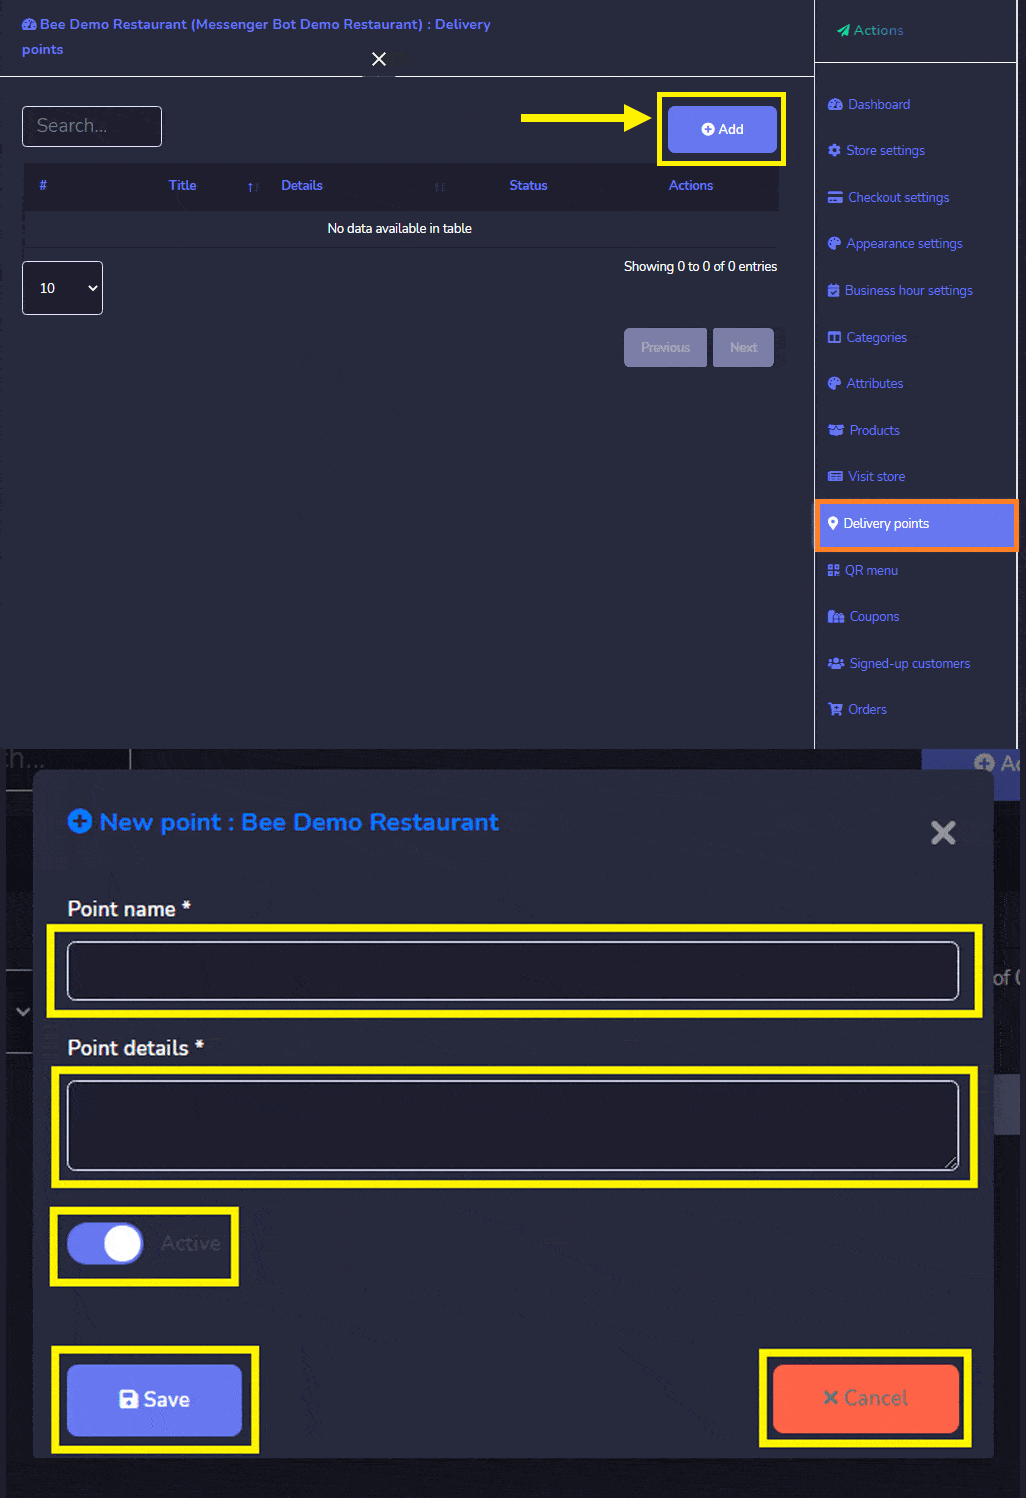
클릭 Add from the top right of the point screen. A new point window will appear. Provide the point name for your point 그리고 provide the point detail where the delivery happens. Enable an active status. Then, click 저장 또는 취소.
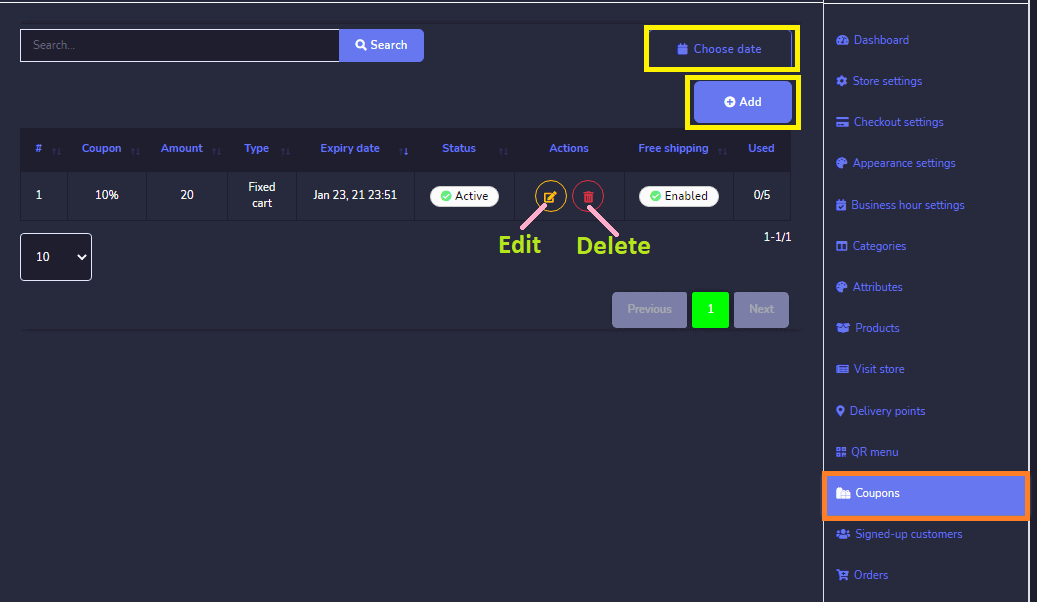
Coupons: The product option allows you to get access to all existing coupons. You can perform the following actions:
- 편집 the coupon information.
- Delete the coupon information.
- 사용자의 choose the date range for this view as well.
You can also add a new coupon to the database by following the steps:
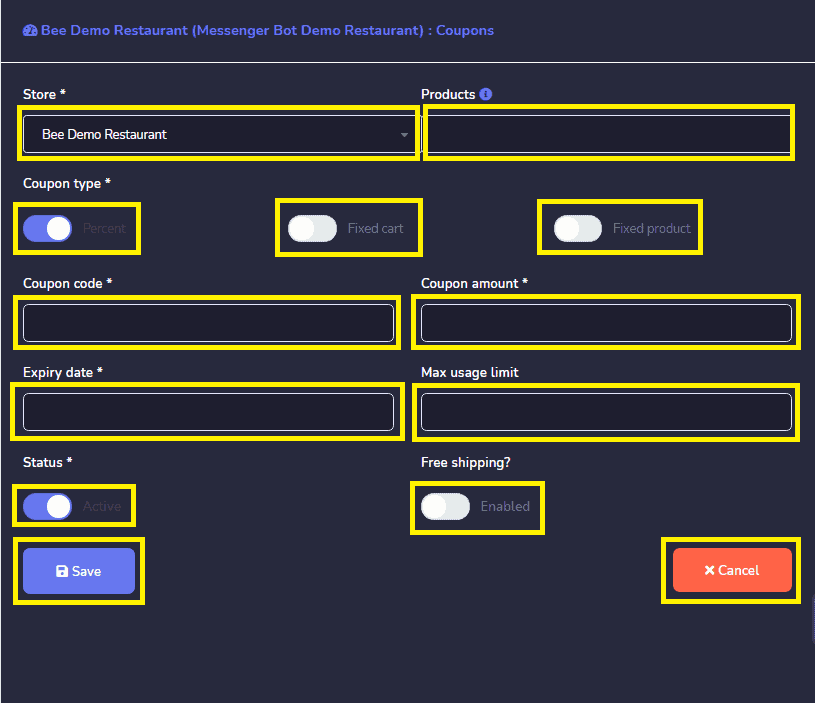
- 선택하십시오. Add from the coupon screen.
- 선택하세요 store for which you want to add the coupon.
- Then, Provide the product for which you want to add the coupon.
- Enable Coupon Type between Percent, Fixed Cart, and Fixed Product. 그런 다음, enter a code 당신의 coupon and enter an amount for your coupon.
- Select an Expiry date 그리고 maximum usage limit for your coupon.
- Enable Activate Status and Free shipping.
- 그런 다음 클릭하세요. 저장.
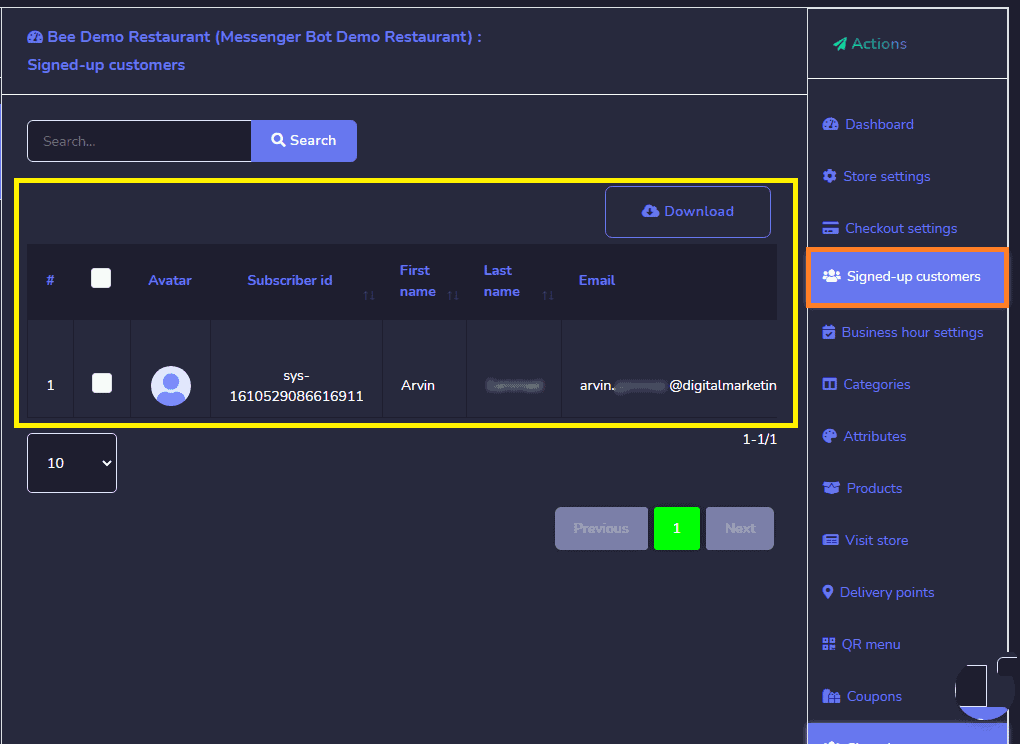
Signed-up Customers: You can find here the list of your Customer who signed up.
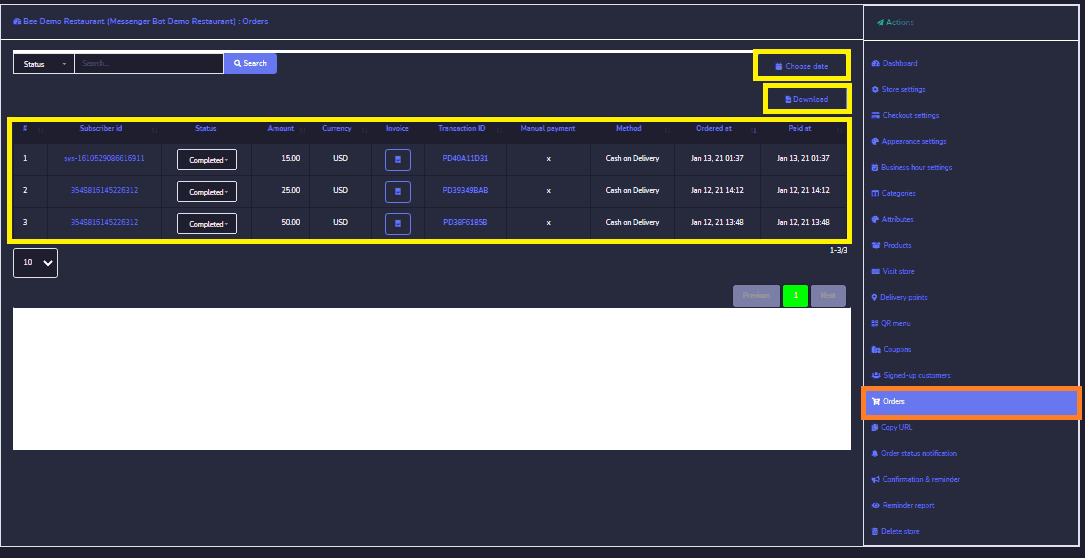
Orders: 당신은 view the details of all orders from this screen. You can search for a particular order using the 검색창 또는 sort them date-wise for narrowing down the search. You can arrange them in any order 에 의해 selecting the arrows in the header. You can also Download orders.
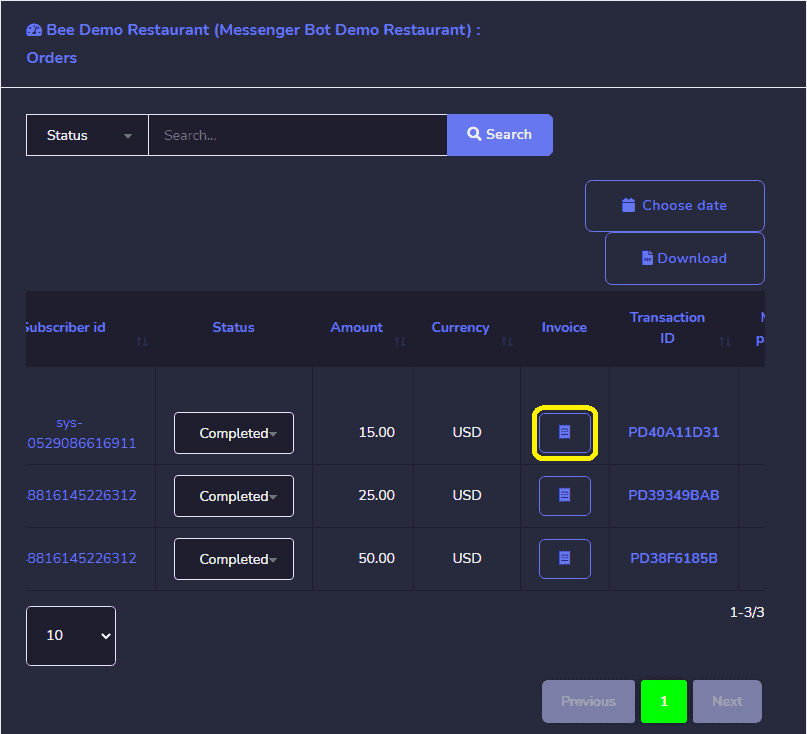
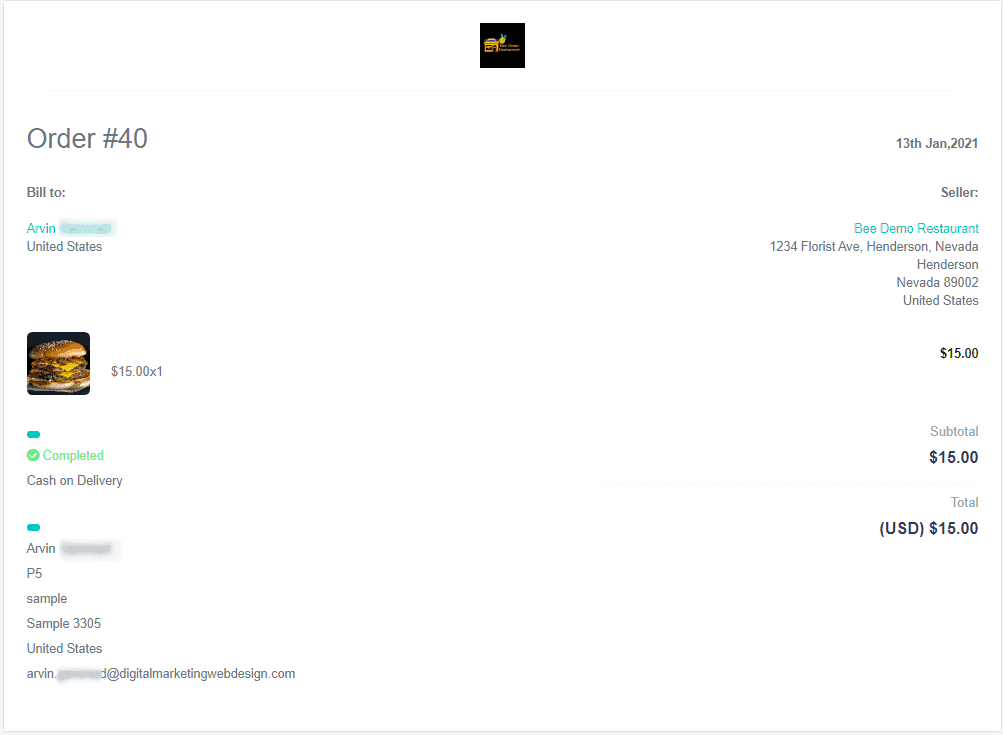
Clicking this icon will be redirecting you to the summary of the Order that you will all the details of the order 그리고 have an option to print it.
Order Overview with an option to print it.
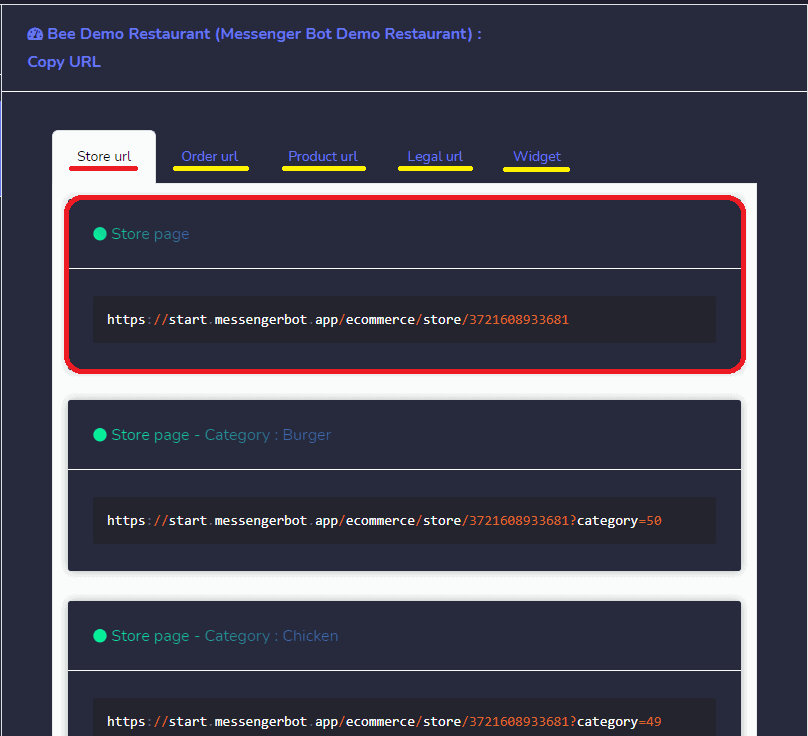
Copy URL: You can copy your store page, order, product, and legal URL. Hover over the code, then select the Copy an option that appears over the code line.
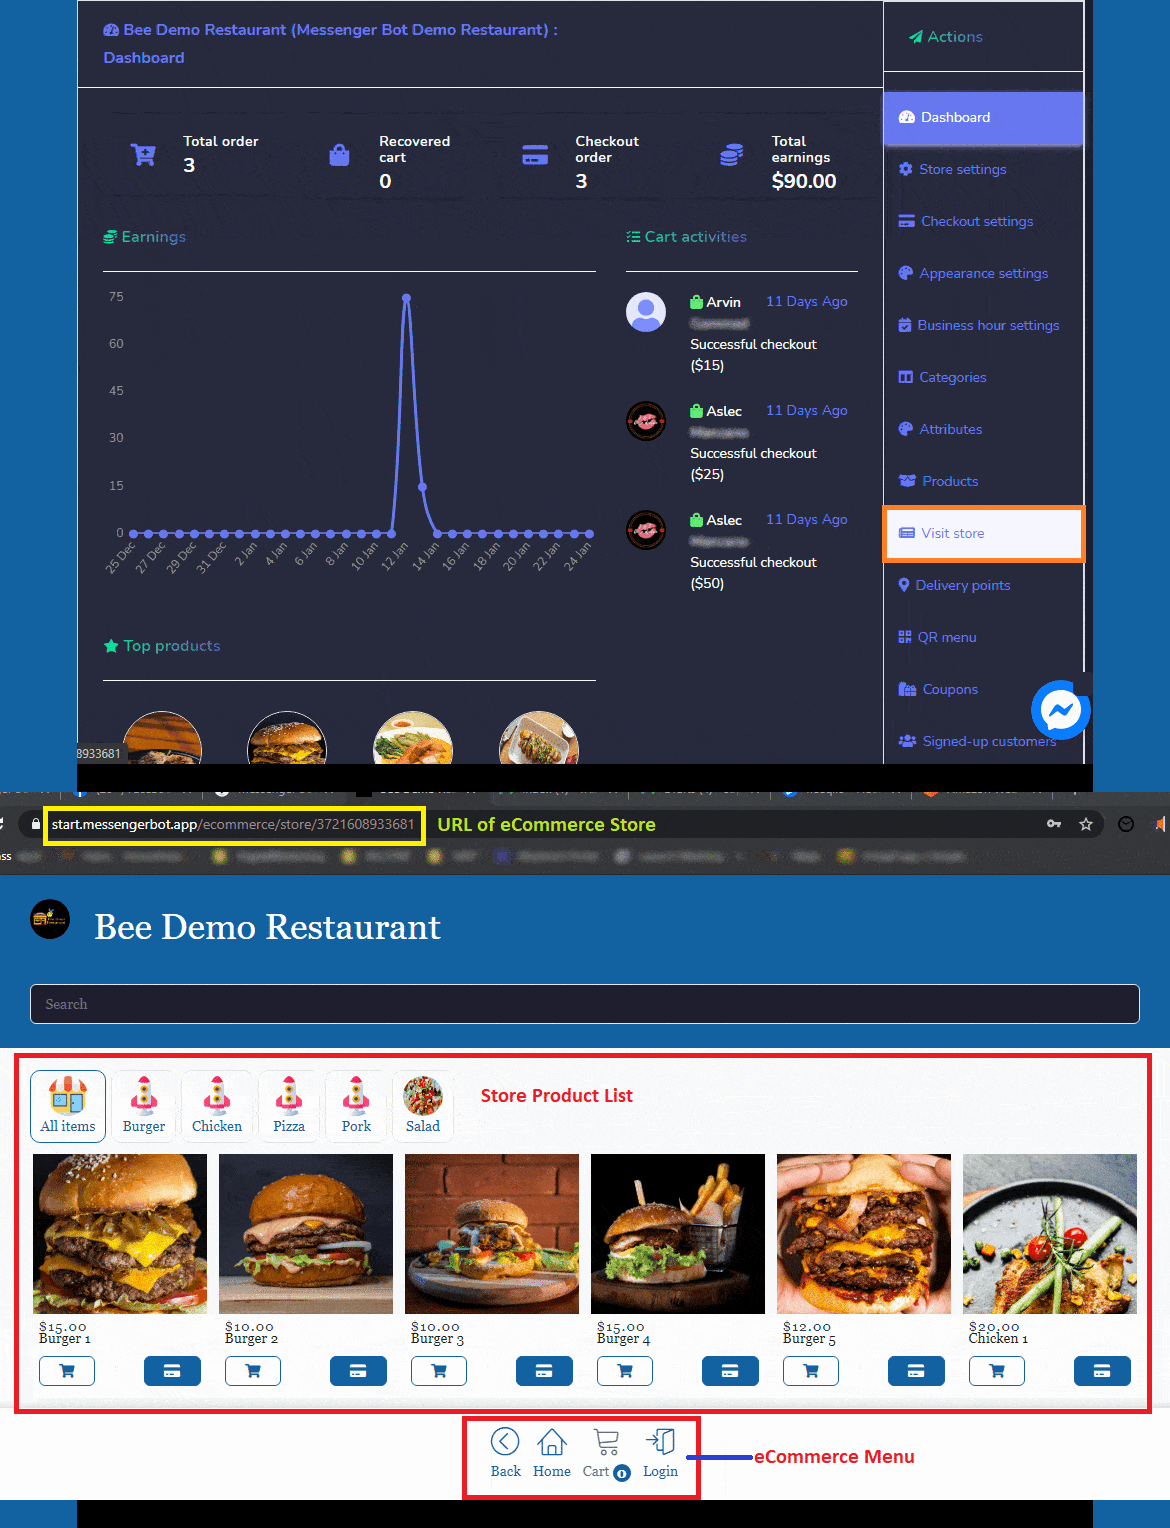
Visit Store: You can visit the store by selecting this option. It will redirect you to the store.
그 Store Overview. It has a Store product thumbnail 와 choices of the category to click on. Store Homepage, Cart, and Login option.
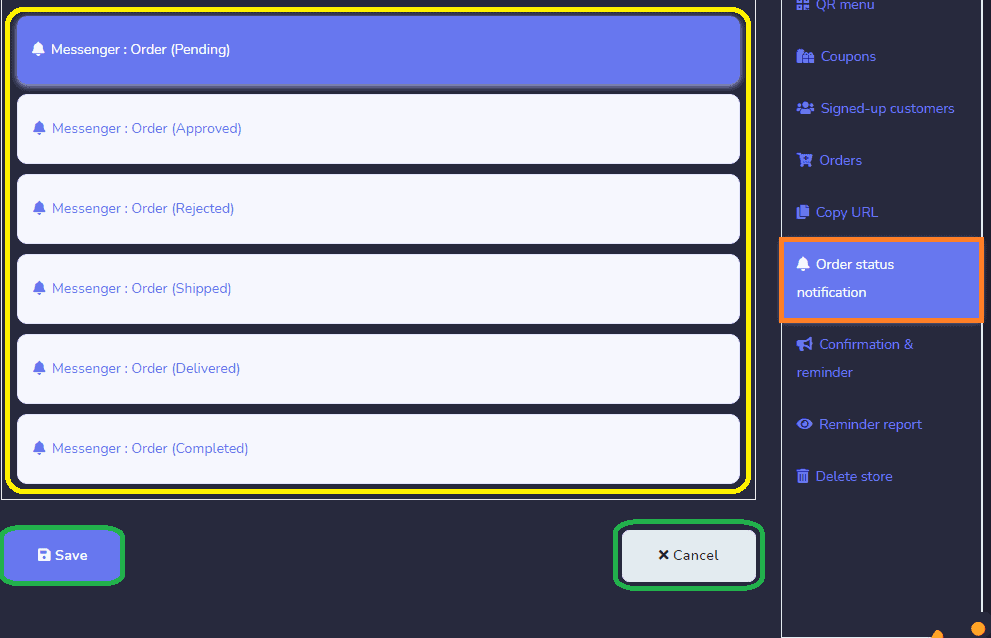
You can also choose what Messenger, SMS, and Email Notification you want to send. From Order Pending, Approved, Rejected, Shipped, Delivered, 그리고 Completed.
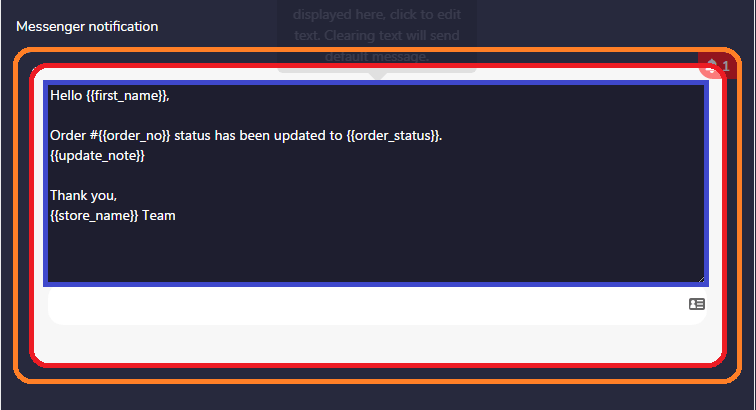
사용자의 customize your Messenger, SMS, and Email notification.
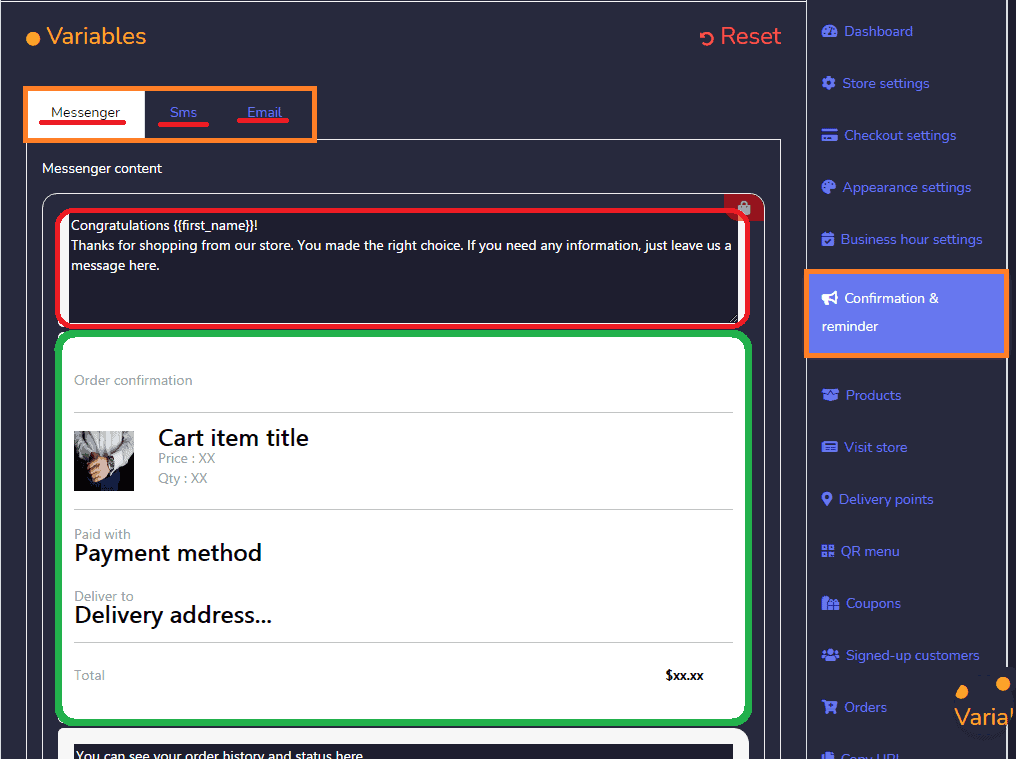
Confirmation & Reminder: 이것은 displays the Messenger, SMS, and Email confirmation and reminder to be sent to the customer. You can also edit the content.
It also has 3 reminder options with time interval choices.
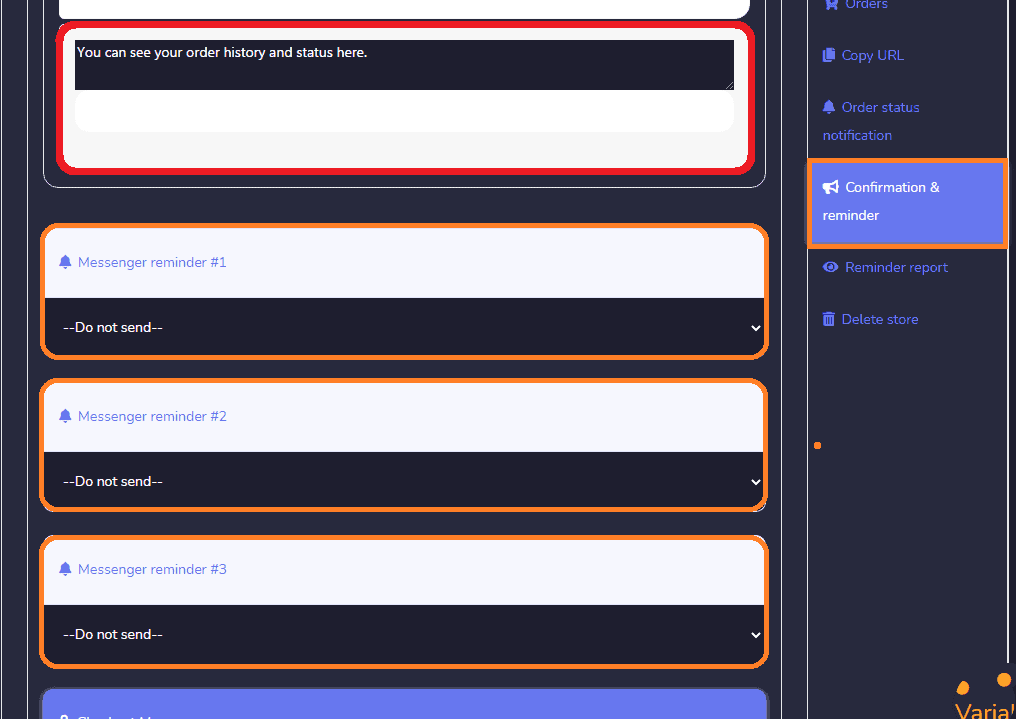
창의적인 산업 checkout messenger. 당신은 edit it anytime you wanted. Then, 저장 또는 취소.

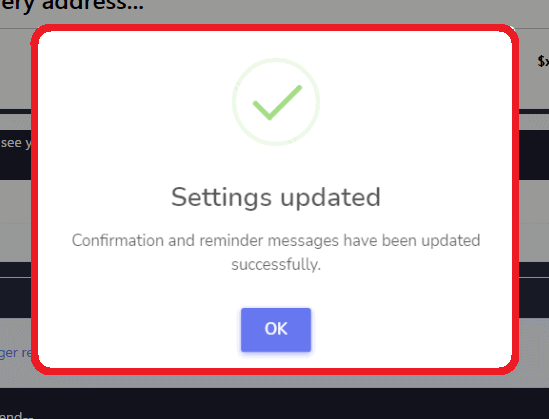
Your Confirmation and reminder message have been updated successfully.
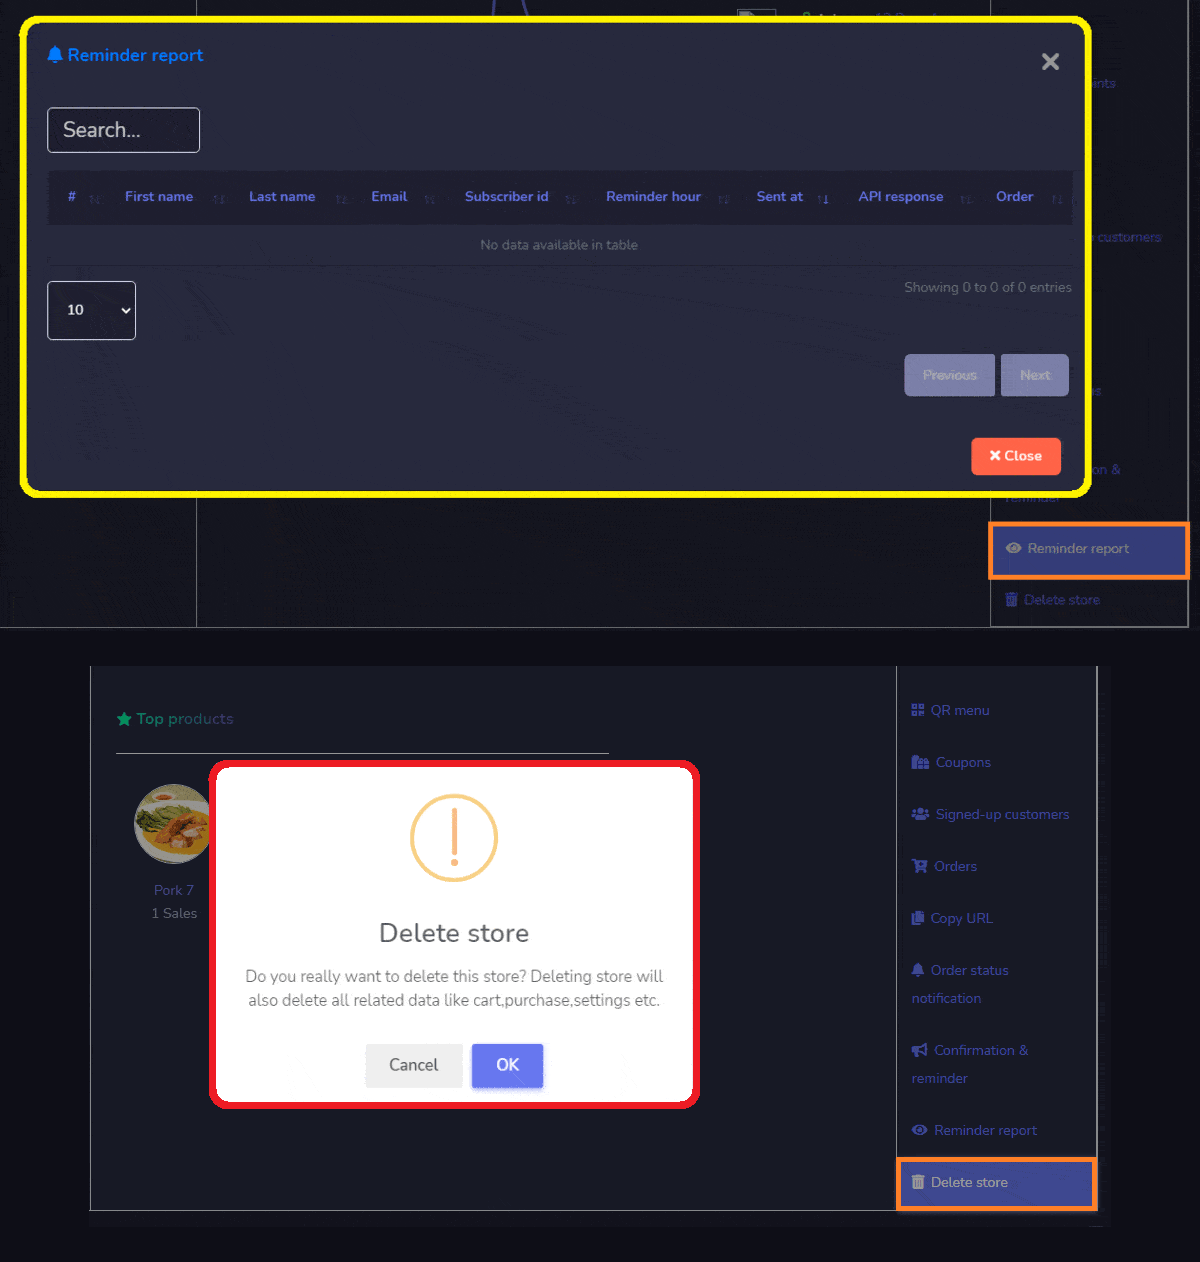
Reminder Report: Display the report of your sent confirmation Email, SMS, and Email to your Subscriber or customer.
You can also Delete Store if you want. But remember you cannot restore it after if you delete it. And when you delete your FB Page your store will be deleted too.
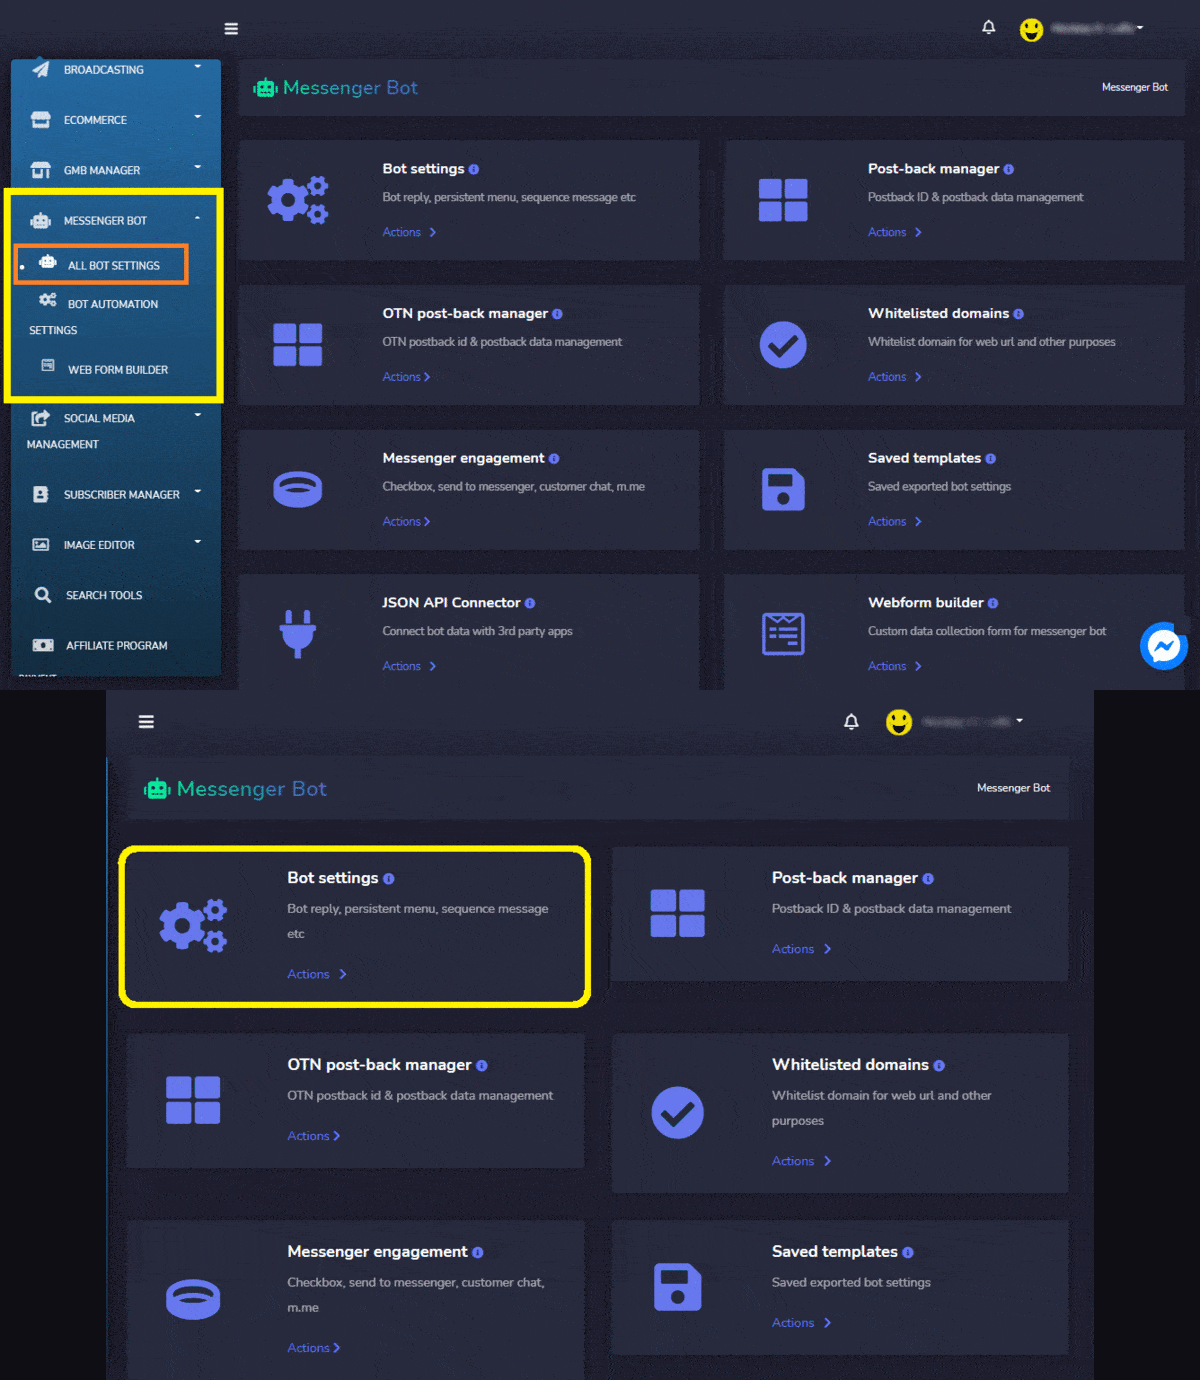
After creating your Ecommerce. Now, set up your Bot Reply. Back to Dashboard, select Messenger Bot, and click All Bot Settings. Then, Select 봇 설정. and click 작업.
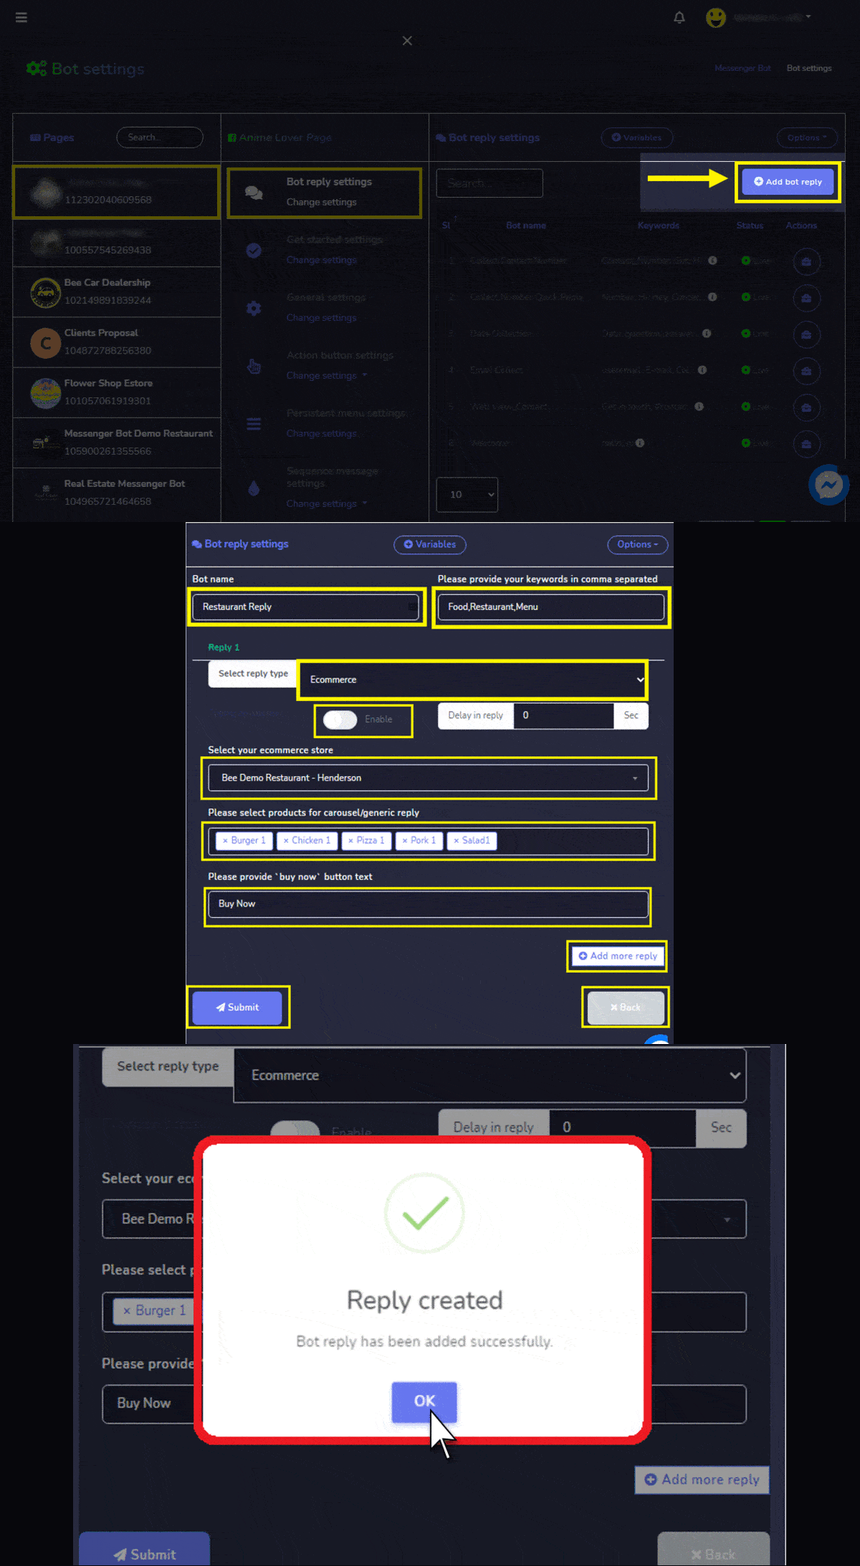
선택하십시오. Facebook Page 그리고 봇 응답 설정 를 클릭하세요 봇 응답 추가. 귀하의 Bot name and 이 keywords separated by a comma. Select reply type and enable typing delay. Select your e-commerce store 그리고 products for the carousel|generic reply. Then, provide the “buy now” button text. Or you can add more replies 를 클릭하세요 제출. Bot reply has been added successfully. Click, OK. Then, go to your Facebook Page to test the Ecommerce Store and bot reply.
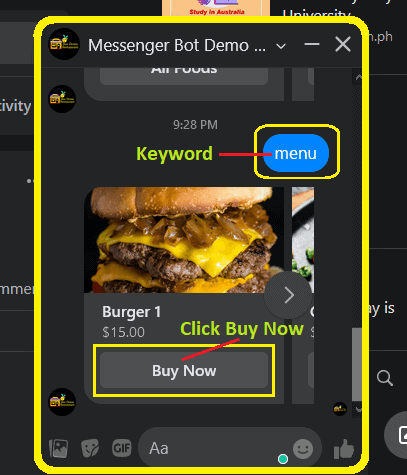
Type the Keyword you created. This is the Bot Reply created. Click, Buy Now.
그 overview of the “Buy Now” per product.
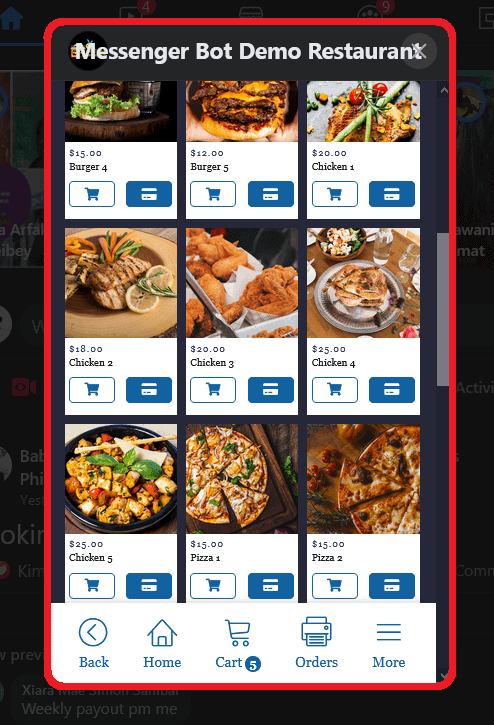
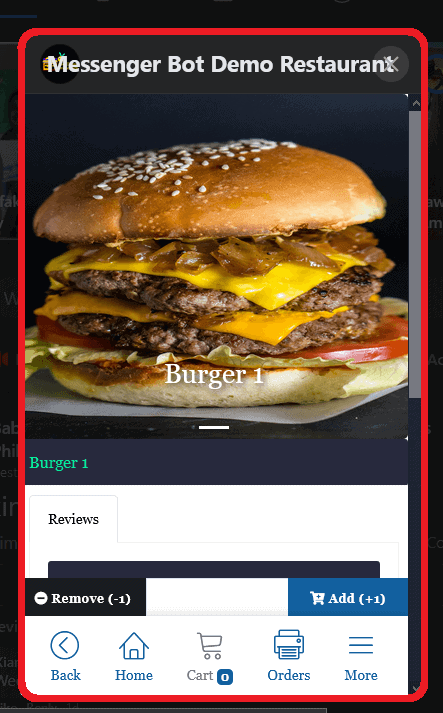
Detailed information about the product.
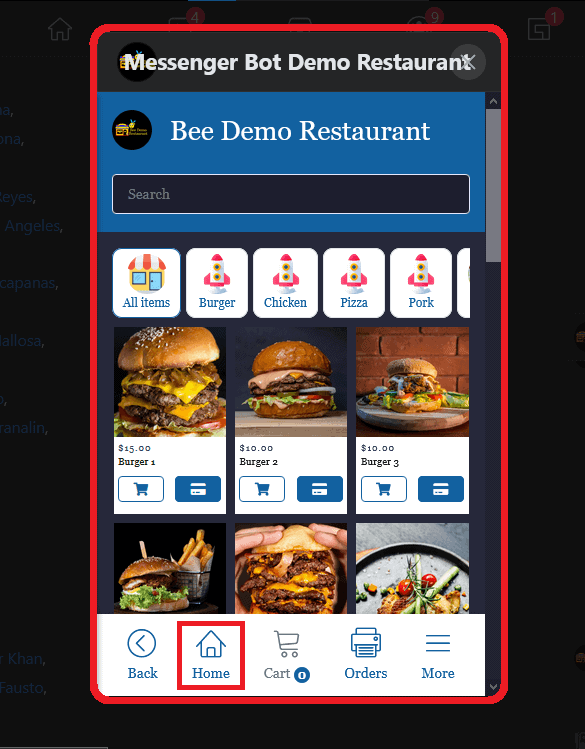
Home Overview of the Ecommerce Store in Facebook Messager. All the products will be seen here. In any category. An option to view by categories.
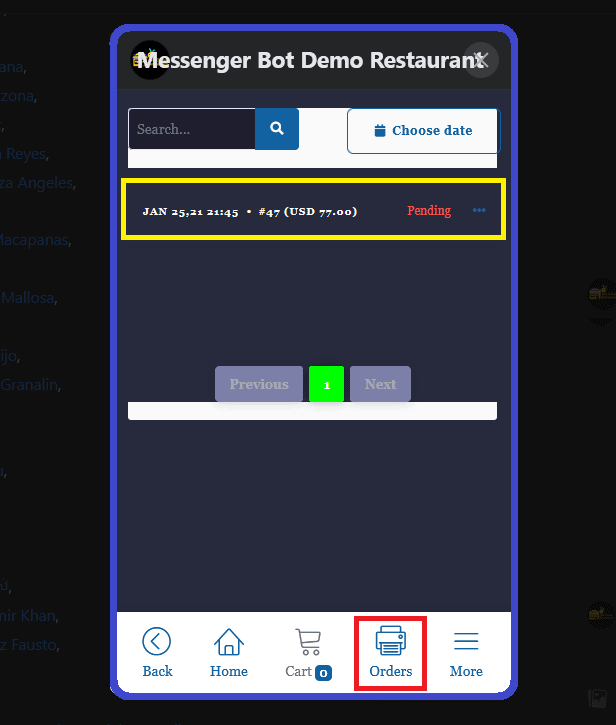
Overview of your Orders. It displays the status of all the orders you made.
Cart overview. All your orders will be seen here. Then, you can proceed with Checkout.
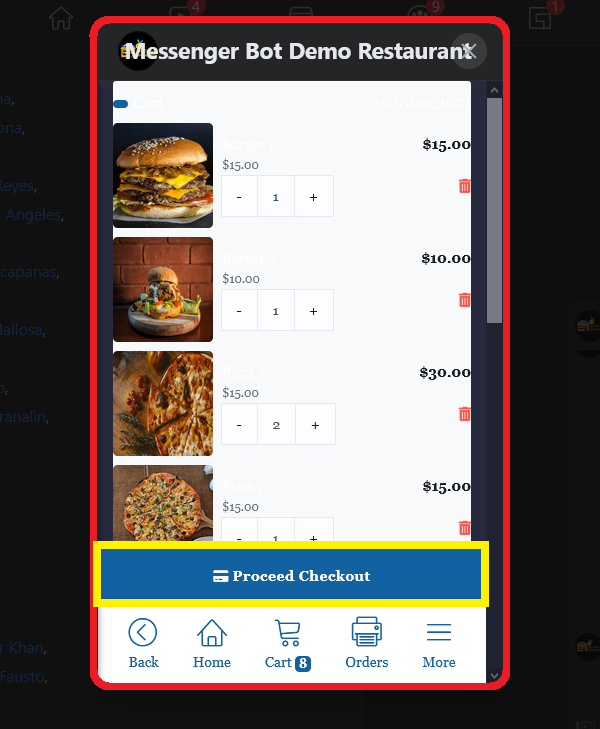
After clicking the proceed checkout. It will redirect you to payment options.
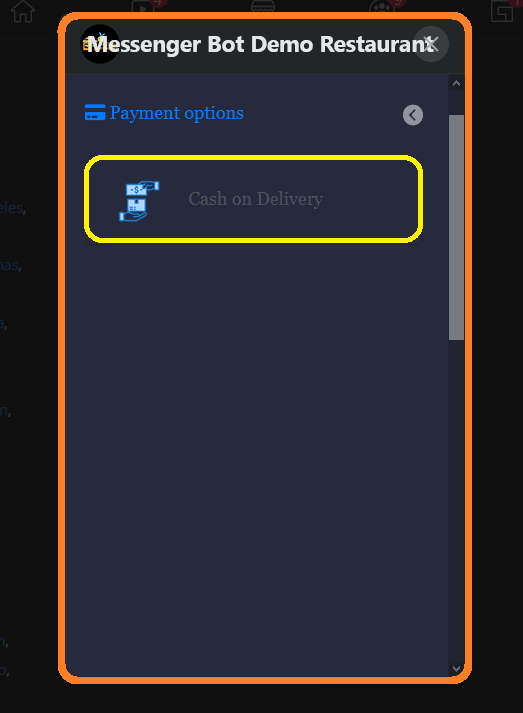
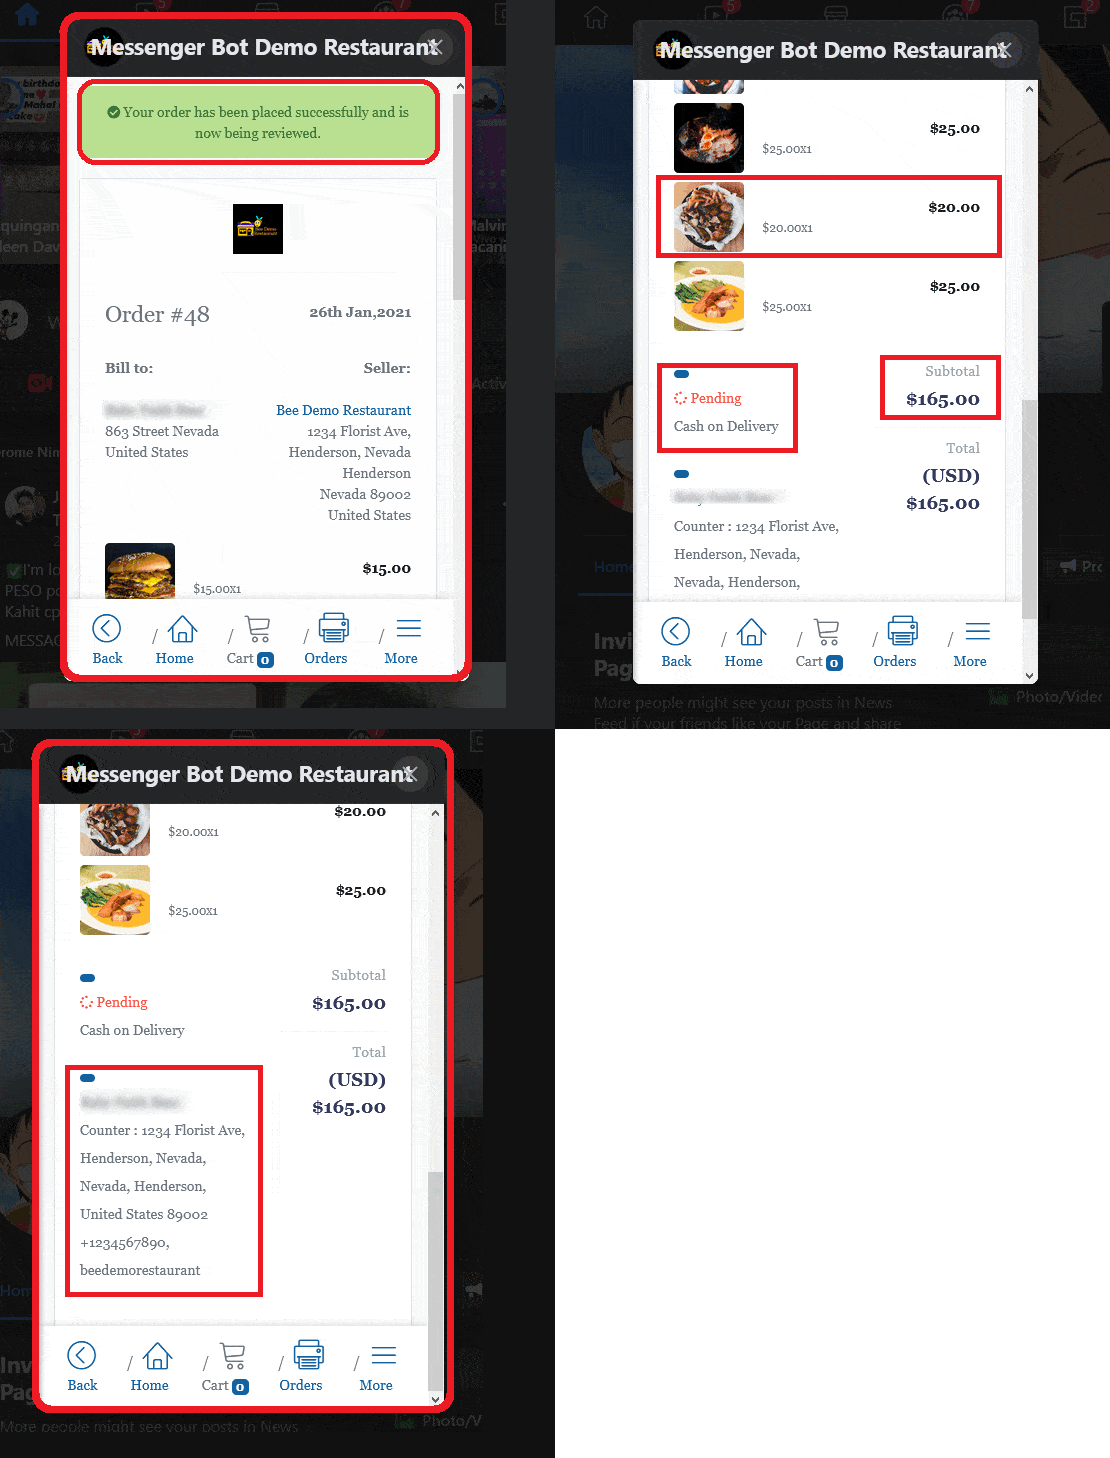
After choosing payment. Overview of your order after payment. It contains a message that your order has been placed successfully and is being reviewed.
It also contains all the detailed order with price per unit, quantity, and total per product. Order status. Payment Method chooses and Subtotal all the orders.
As well it has the Deliver to: Name of the biller. Delivery address and Email address.
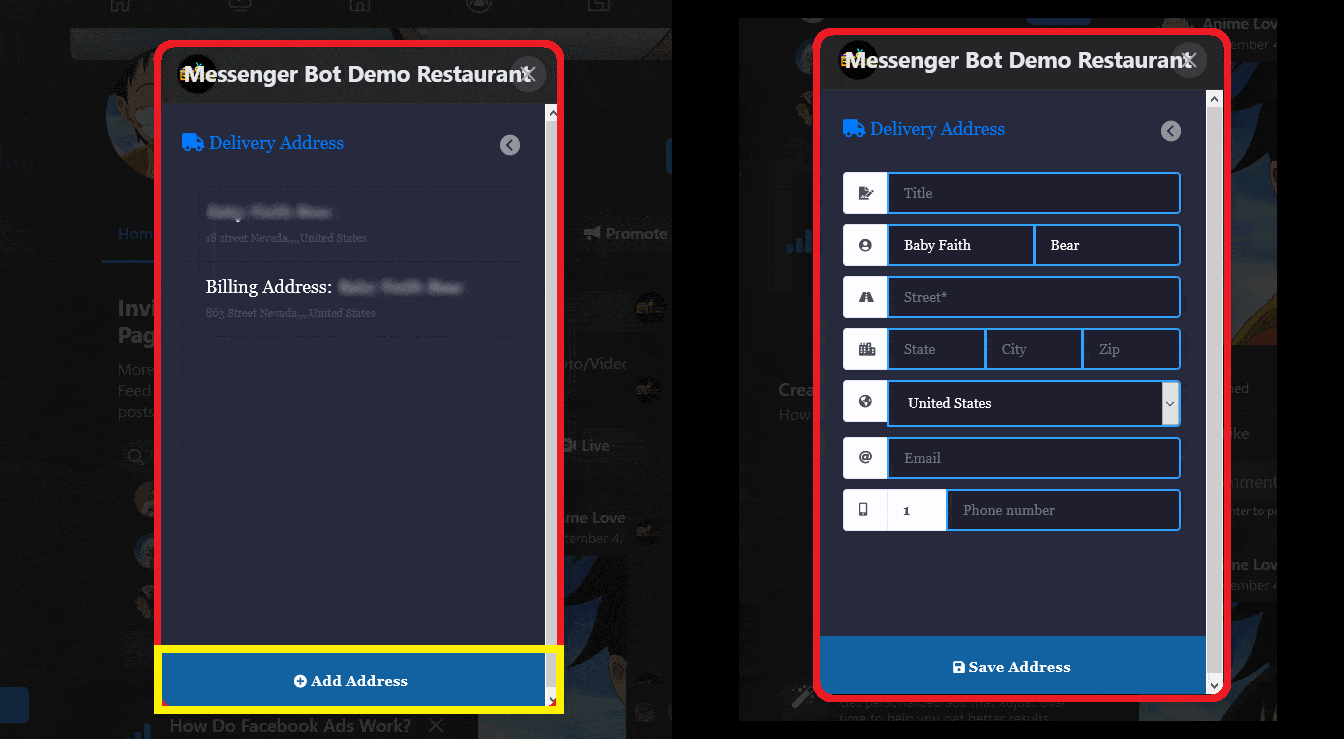
Add Address: When the customer adds an address it will make it easy to check out every time they order. It will be their default address. An overview of Delivery Address Setup. After the buyer providing the details. They need to click Save the Address.
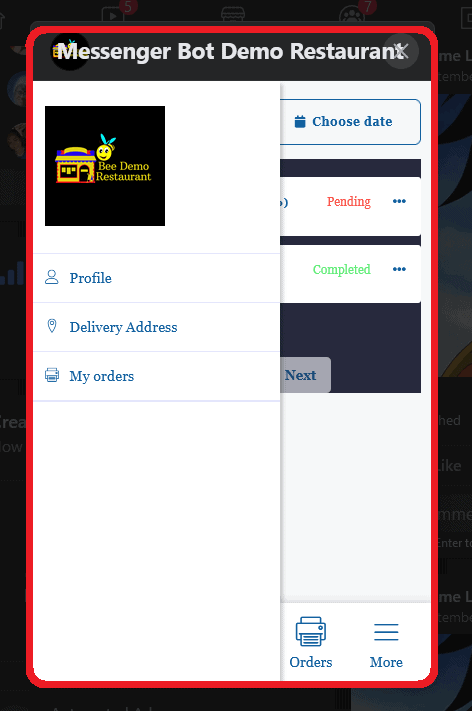
Now, click More. It will display the profile, delivery address, my orders, and terms|refund.
