Table of Contents:
Messenger Bot
Messenger Bot to manage different bot activities, post back data, enlist the whitelisted domains, do messenger engagement, view the already created templates. This view also helps you to connect the bot data with 3rd party applications, helps you generate web forms, and integrates with auto email responders. Messenger Bot helps you run your E-commerce and WooCommerce business through this platform.
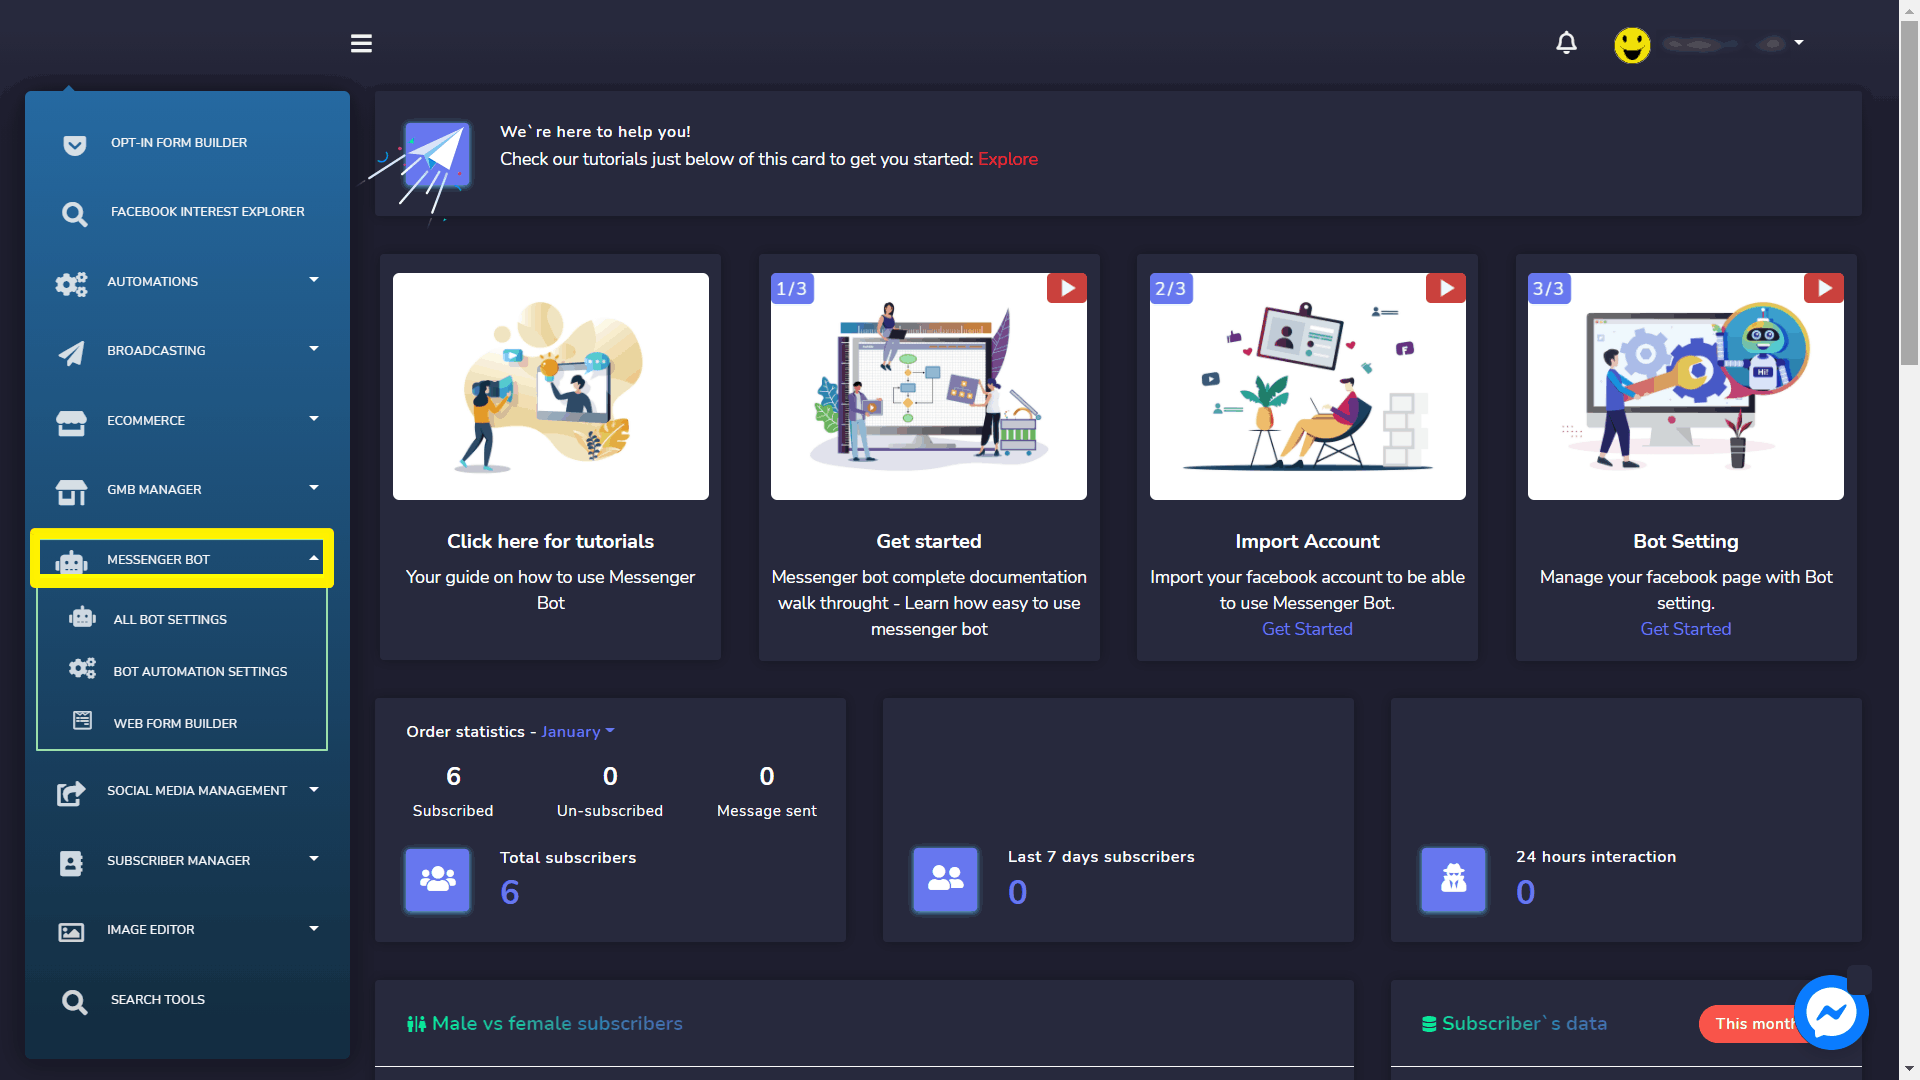
To view this section, navigate to Messenger Bot from the navigation menu located at the left. Tab on it and under this it has another 3 parts. Here we have:
- ALL BOT SETTINGS
- BOT AUTOMATION SETTINGS
- WEB FORM BUILDER
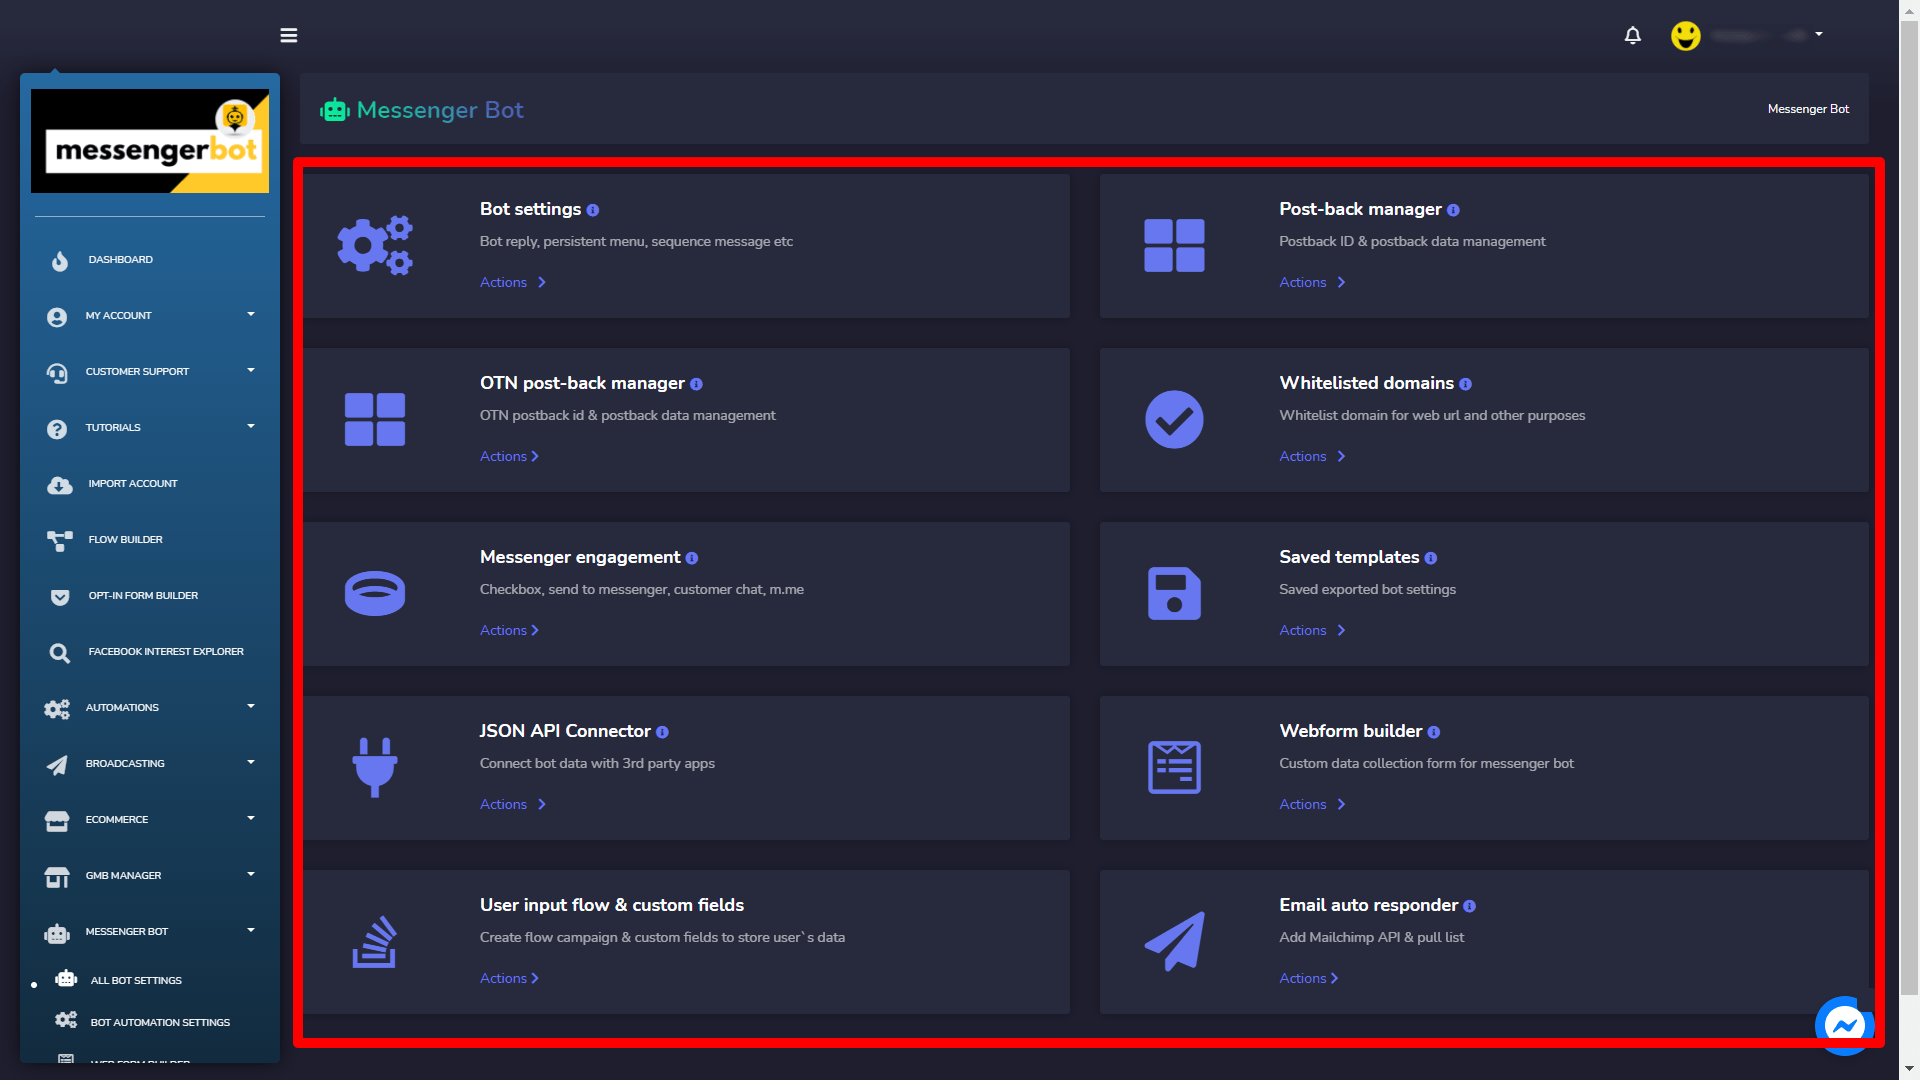
First, let’s go through All Bot Settings. A screen containing the following two sections will appear:
- Bot settings
- Post-back manger
- OTN post back manager
- Whitelisted domains
- Messenger engagement
- Saved templates
- JSON API connector
- Webform builder
- User input flow & custom fields
- Email auto responder
Bot settings
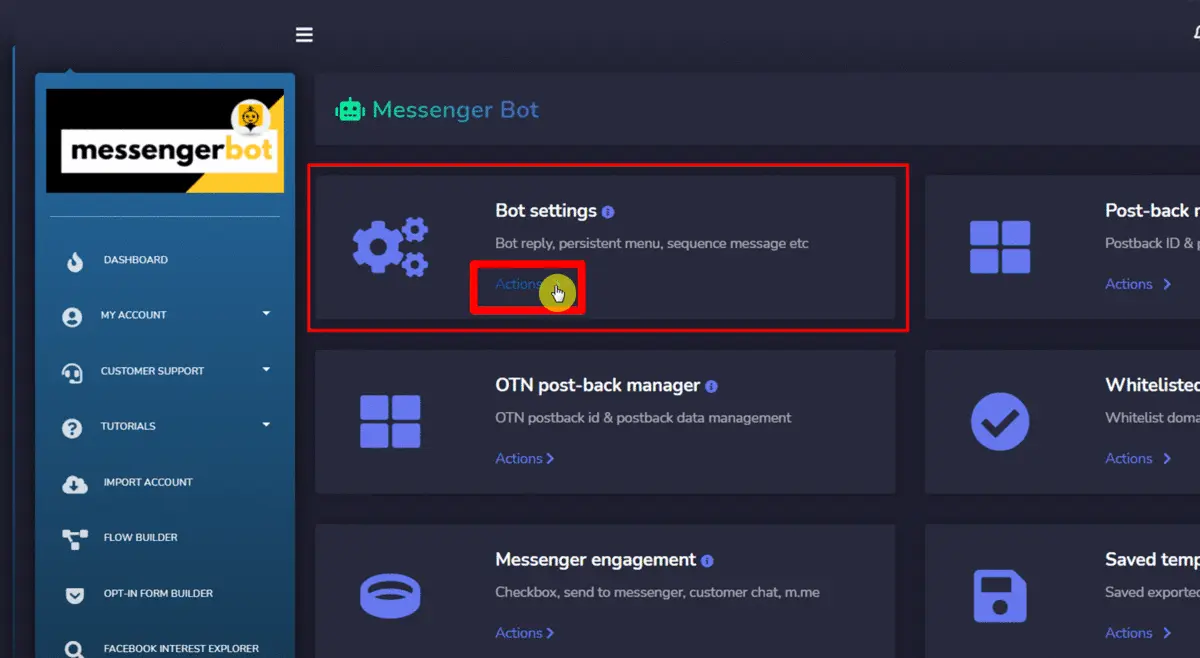
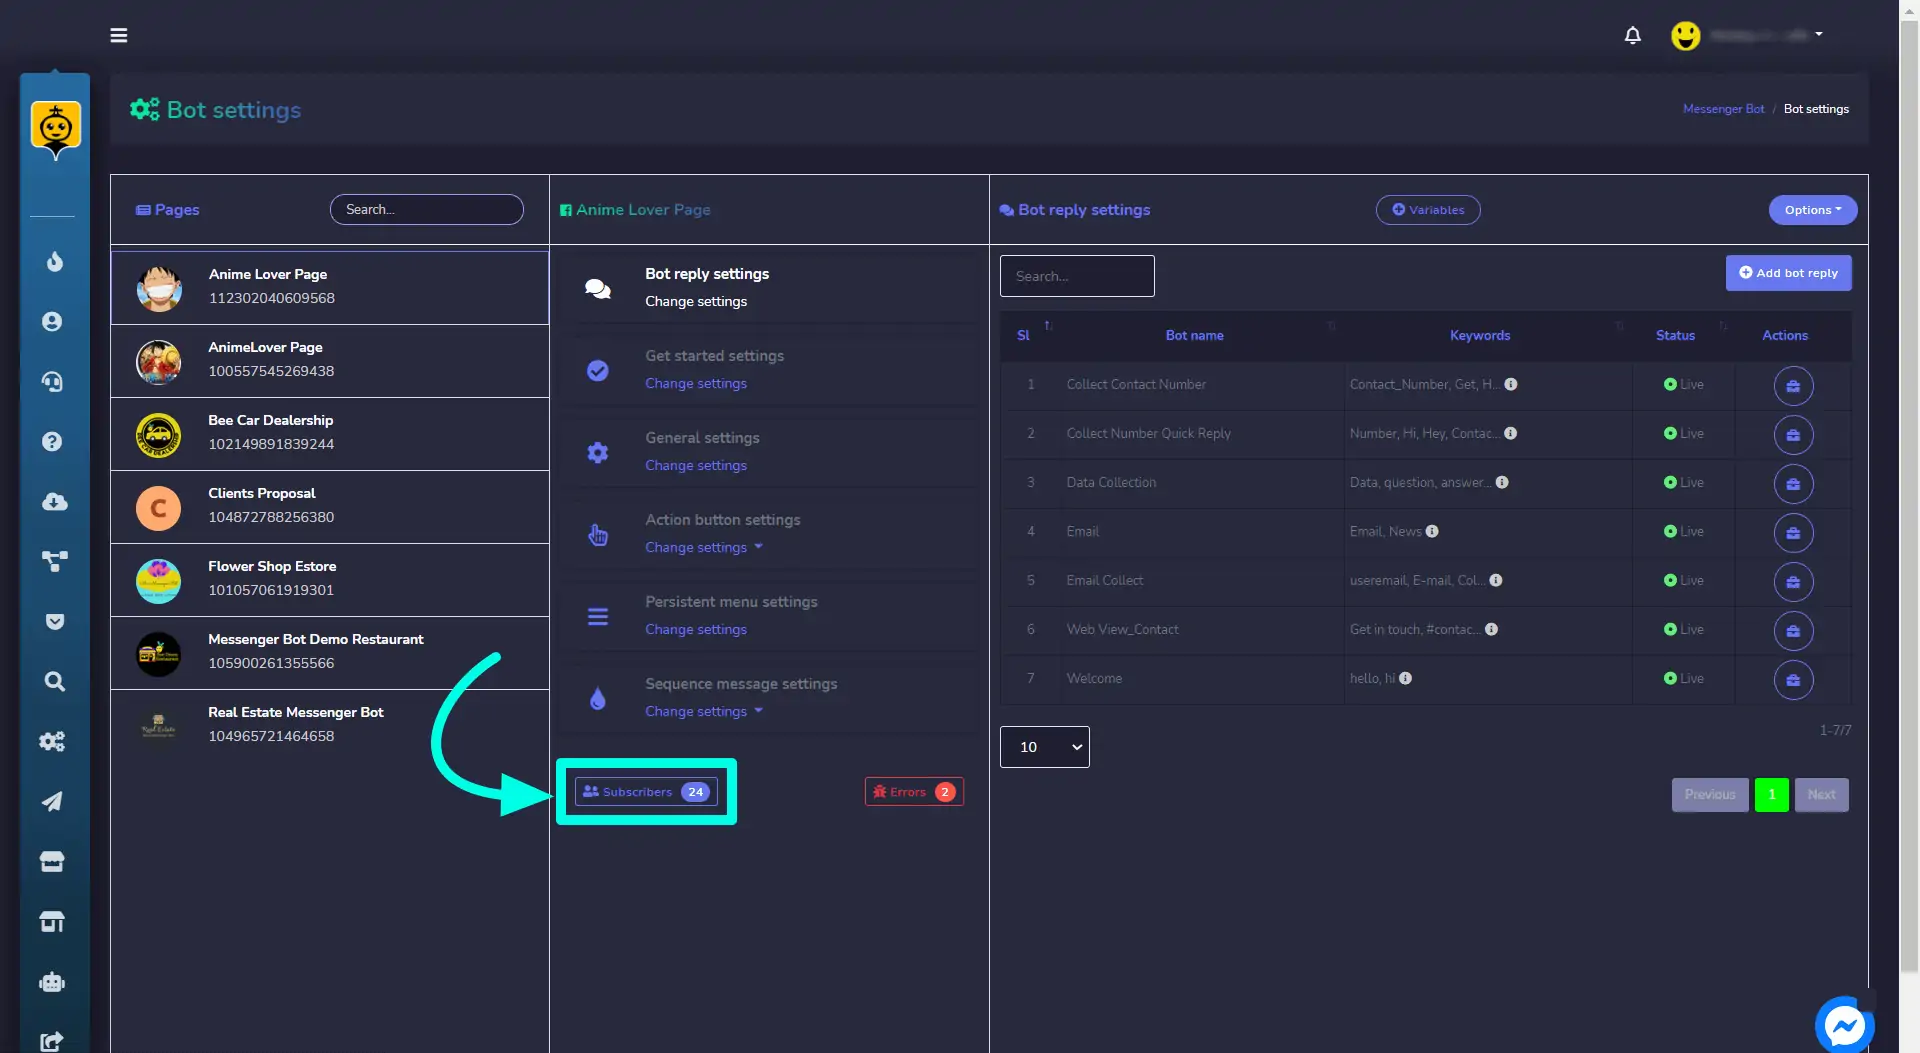
To access the bot settings section, select Bot settings, then select Actions from Messenger Bot screen. The following screen will appear.
- Select
from the bottom of the settings menu. This option will redirect you to Bot Subscribers workflow.
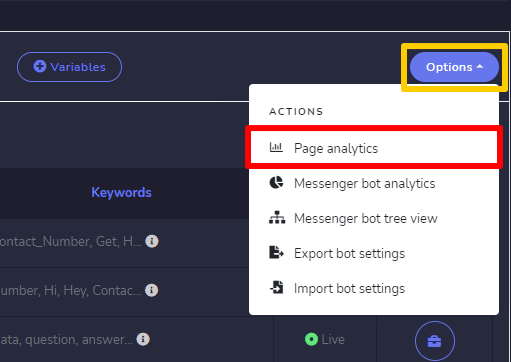
- Select
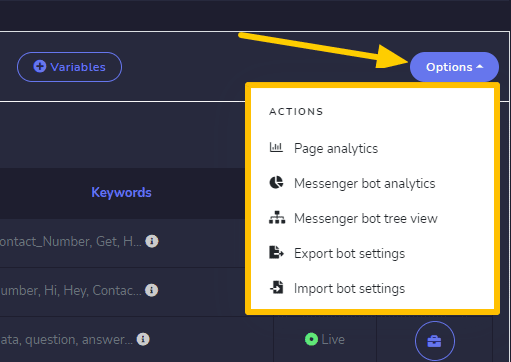
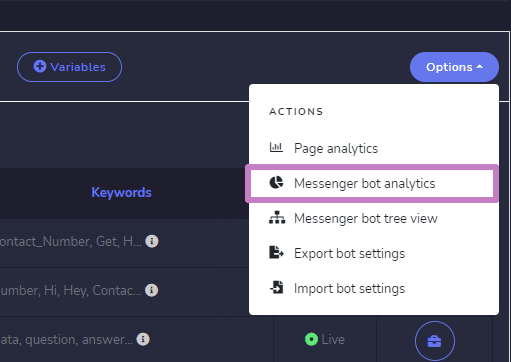
from the right side of Bot settings screen. A list of the following options will appear:
- Page analytics
- Messenger bot analytics
- Messenger bot tree view
- Export bot settings
- Import bot settings
- Select Page analytics option, you will be redirected to the analytics of your page based on different parameters. You can adjust the date as per your requirement.
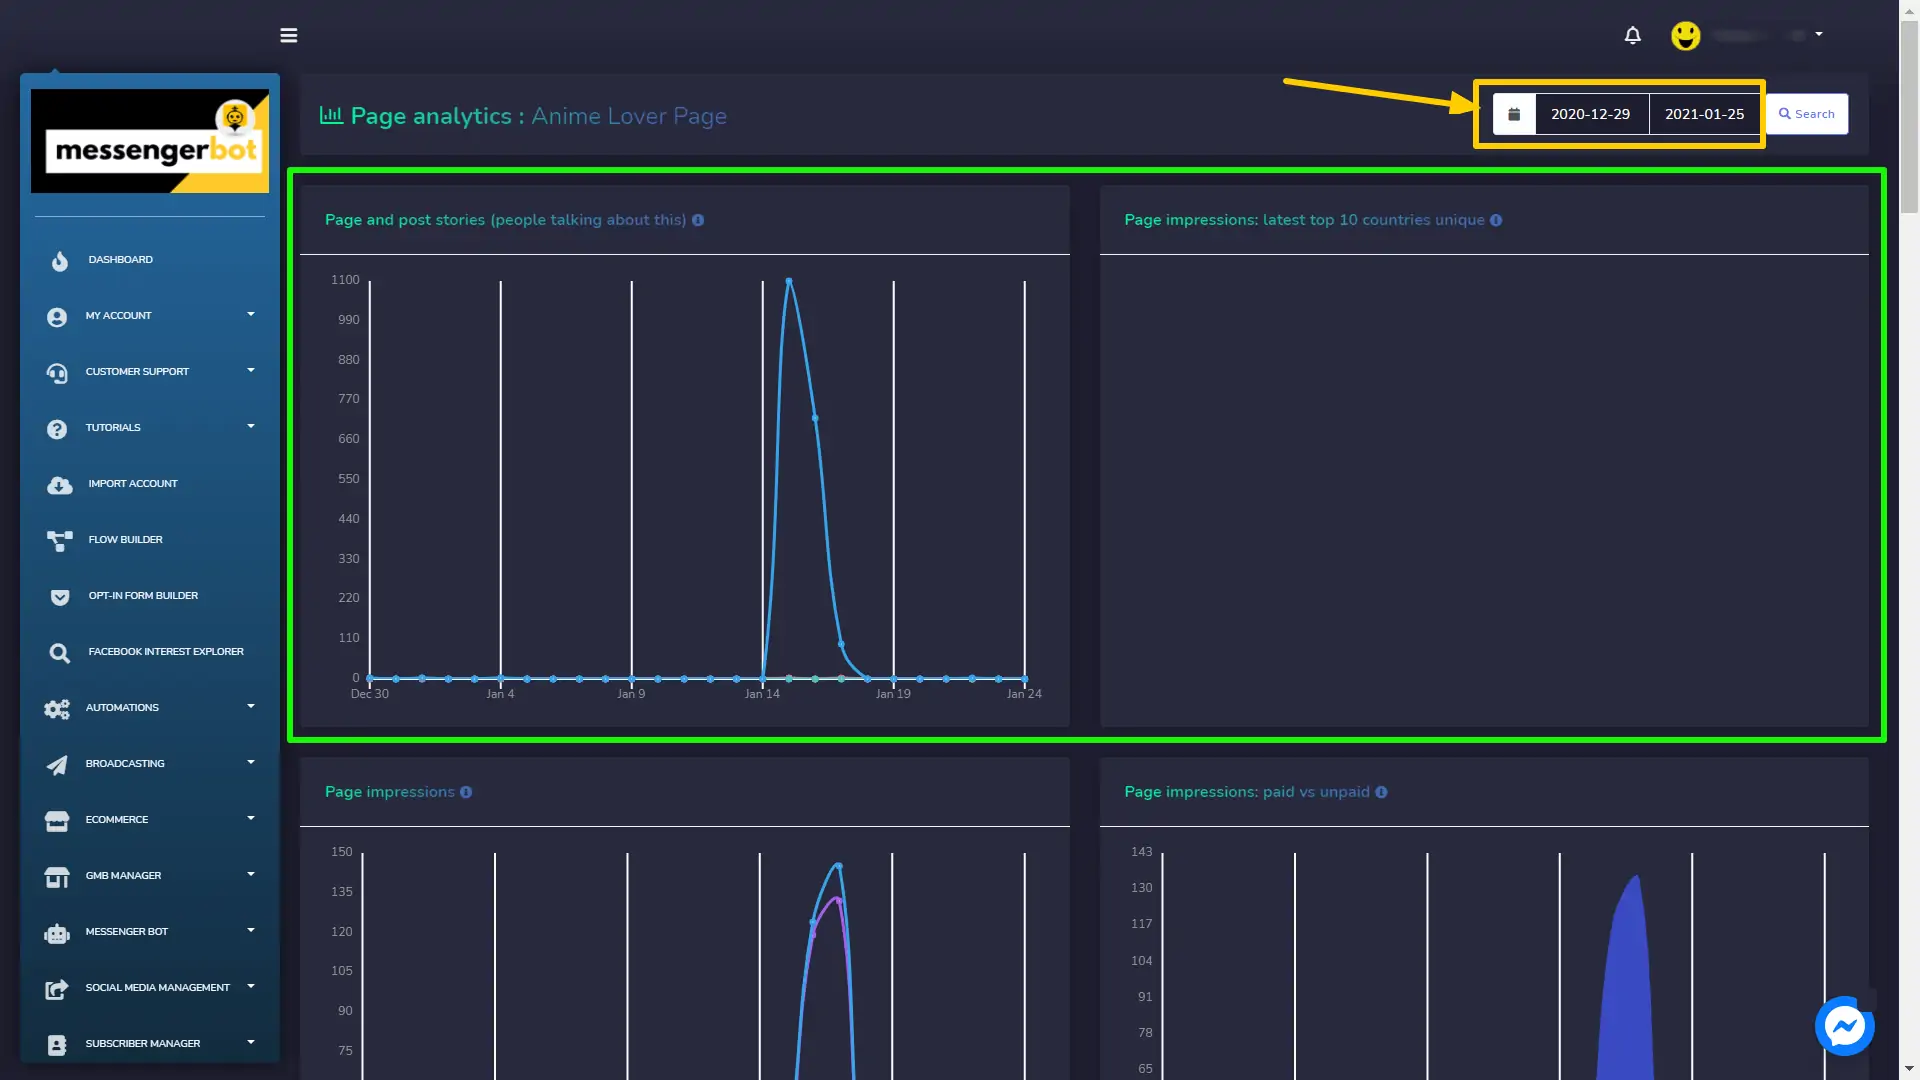
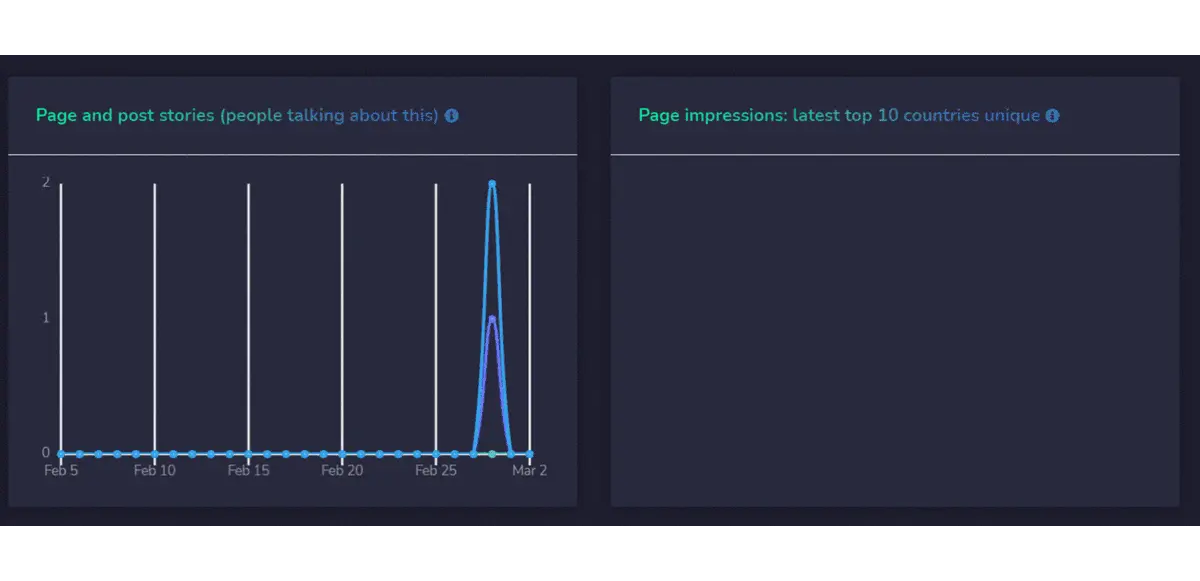
Following are the different graphs that can be demonstrated:
- Page and post stories (people talking about this)
- Page impressions: latest top 10 countries unique
- Page impressions
- Page impressions: paid vs unpaid
- Page engagement
- Page reactions
- Page cta clicks
- Page cta clicks: device statistics
- Page fans
- Daily fan adds and removes in your page
- Page fans: top 10 countries
- Page views: latest viewed each page profile tab
- Page views: latest device statistics
- Page views: latest page views by referrers domains
- Page video views
- Page video views: paid vs unpaid
- Page post impressions: viral vs nonviral
- Page post impressions: paid vs unpaid
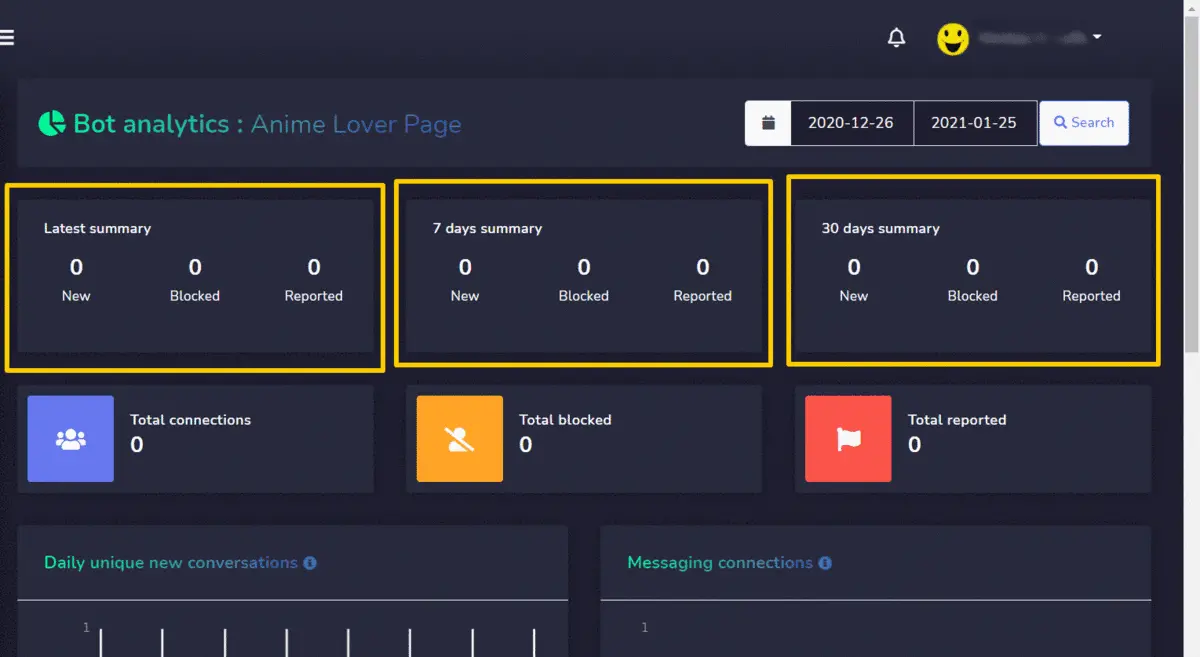
- Select the Messenger bot analytics option, you will be redirected to the bot analytics of your page based on different parameters. You can view the following details:
- Latest summary
- 7 days summary
- 30 days summary
- Total connections
- Total blocked
- Total reported
- Daily unique new conversations
- Messaging connections
- Daily unique blocked conversations
- Daily unique reported conversations
- Daily unique reported vs blocked conversations
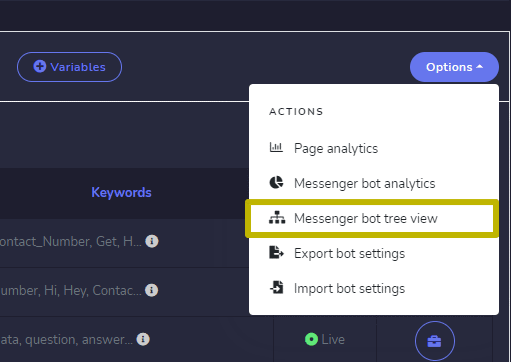
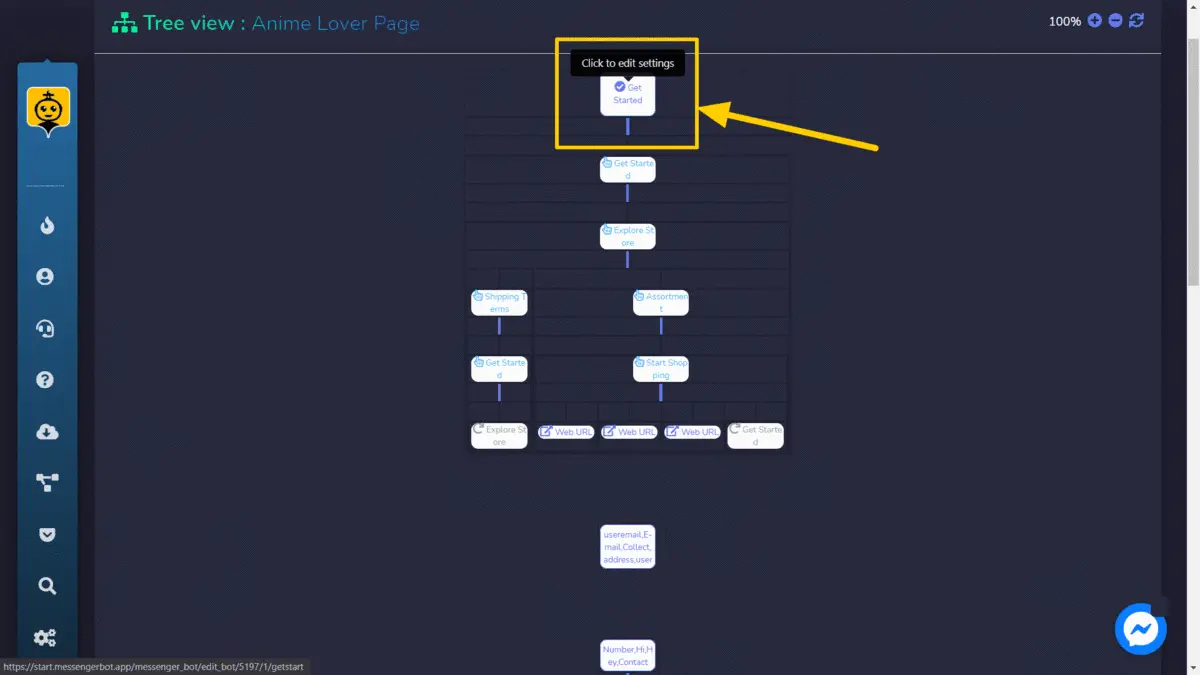
- Select the Messenger bot tree view option, you will be redirected to a bot tree view of all existing bots. You can click on each bot to make the edits.
- Select the bot you want to edit, Tree view: Settings screen will appear.
- Once updated, select the Update button, your bot settings will be updated.
- This demo “No Match” would be your second bot option.
- Update your bot reply message for no match here then click Update when done.
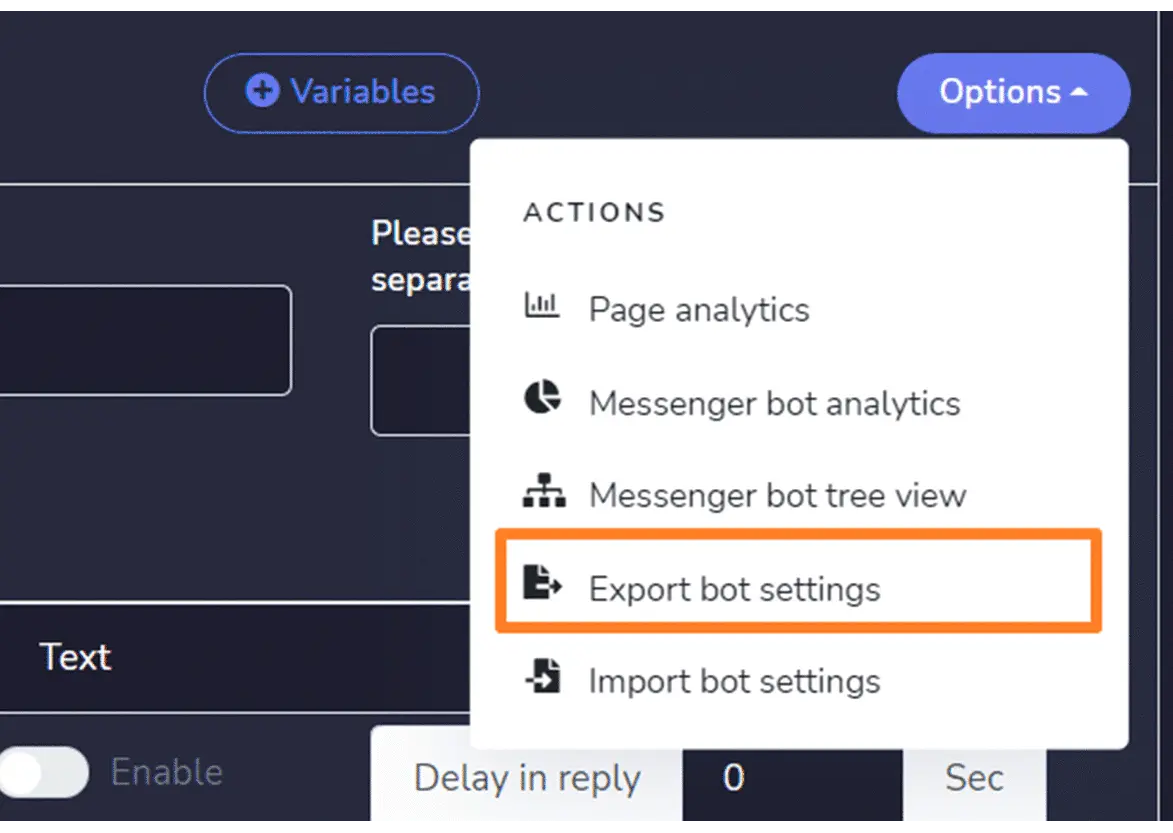
- Select Export bot settings option, a modal will appear on your screen.
- Edit your template name and template description.
- Select Export to export the bot settings.
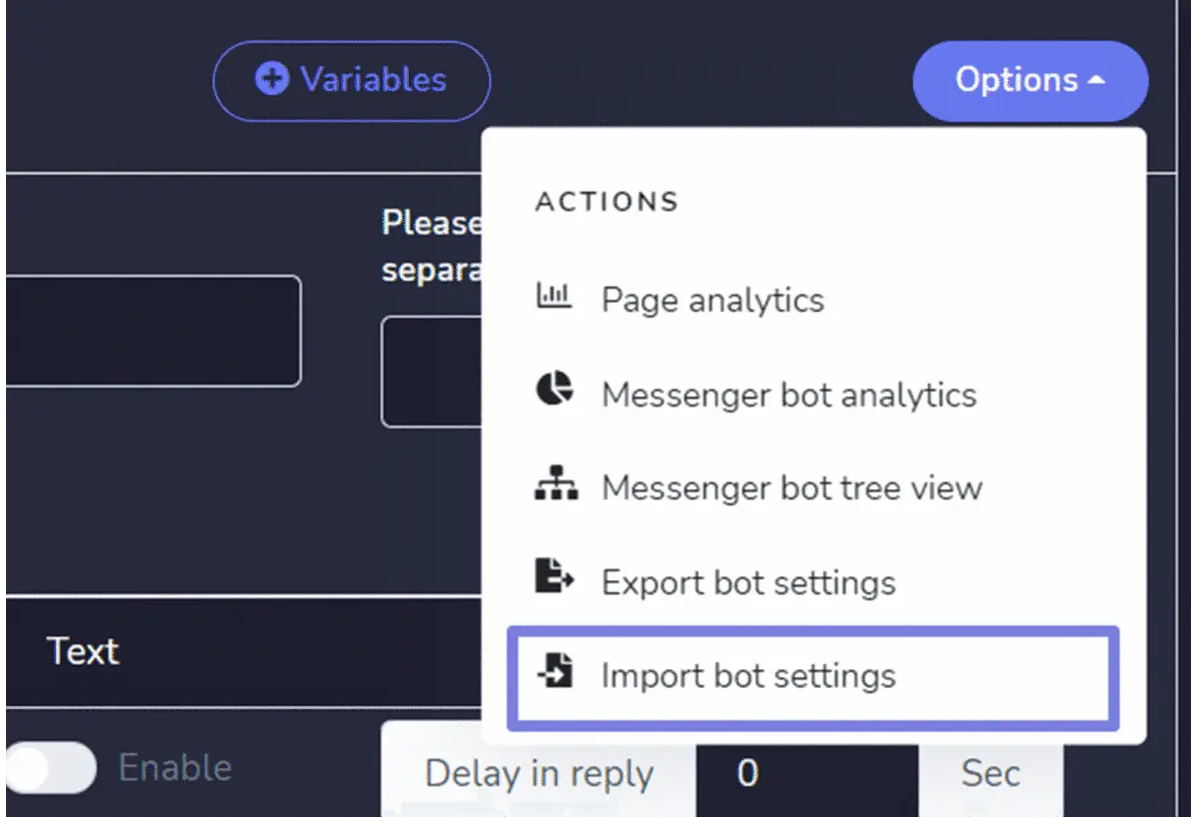
- Select the Import bot settings option, a modal will appear on your screen.
- Select the Upload option, and attach the file to be uploaded
- Select Import to import your bot settings.
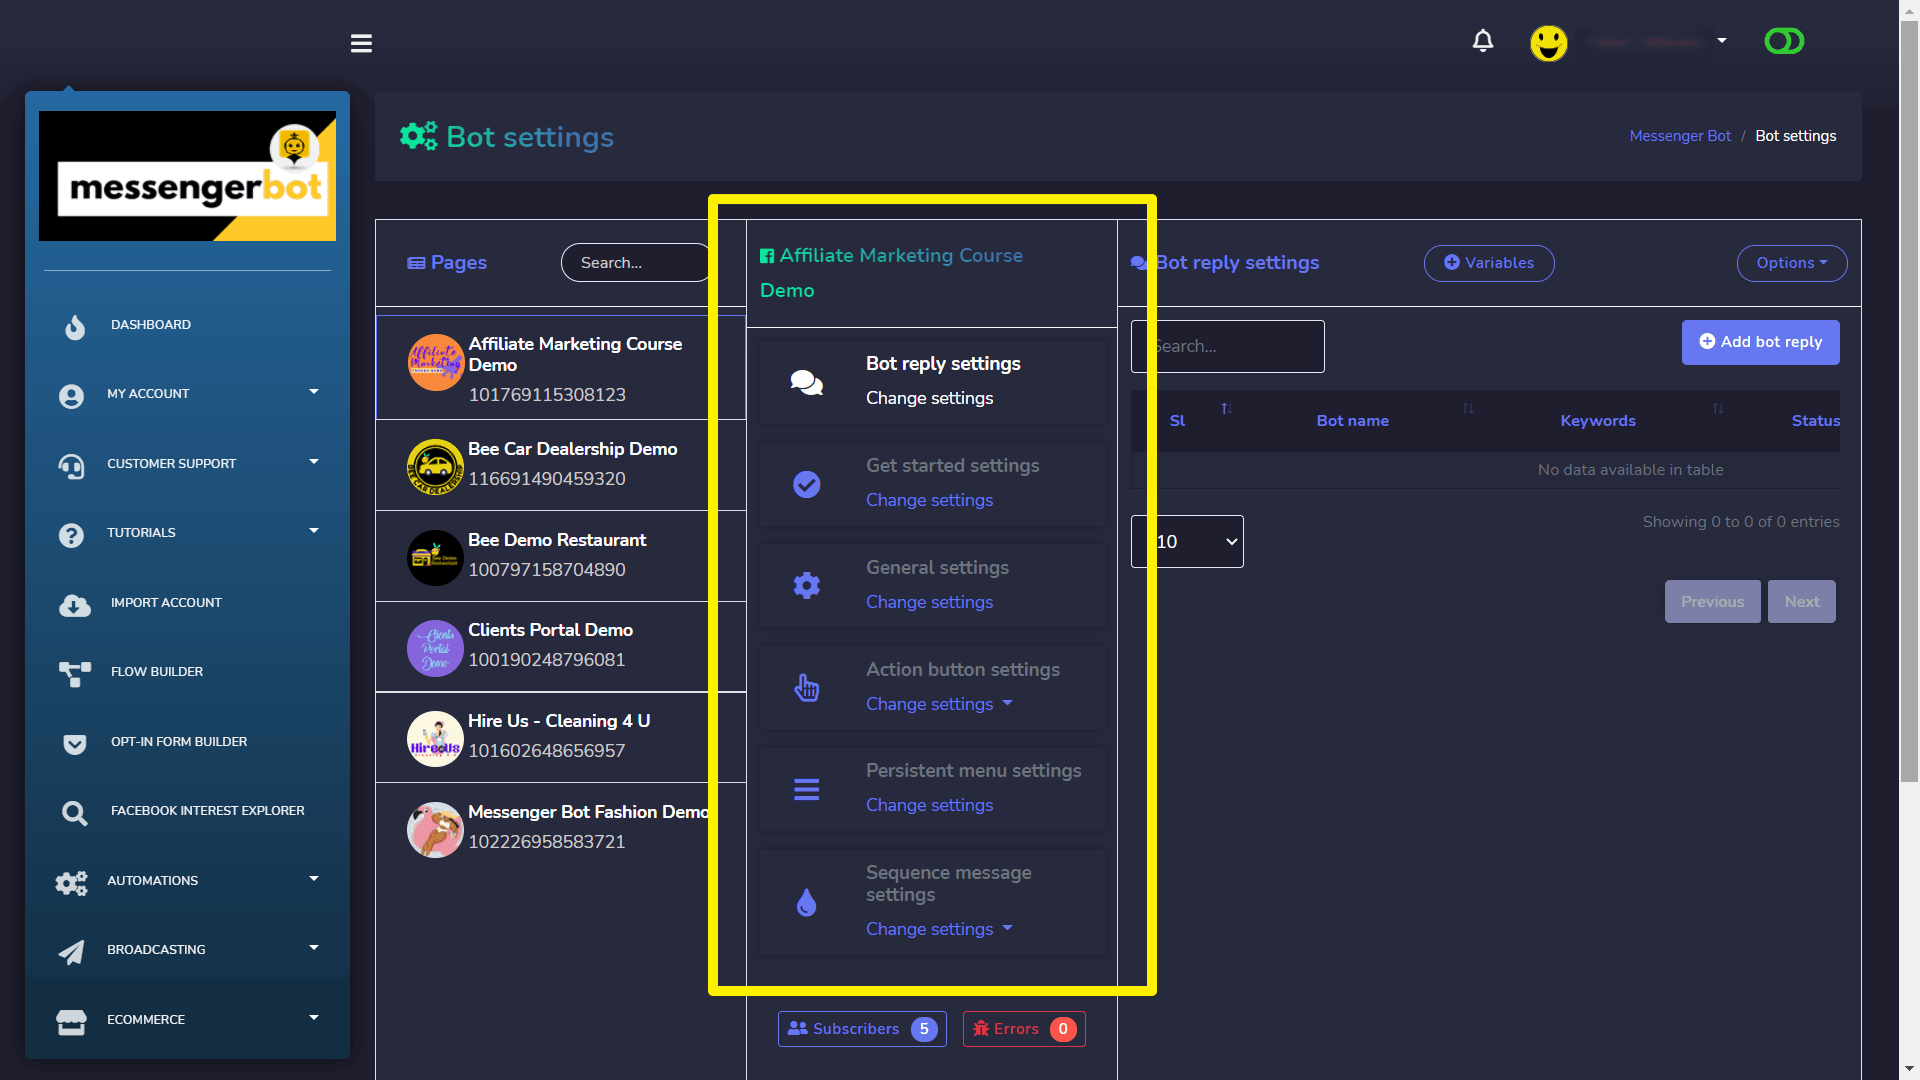
You can adjust the following Bot settings:
- Bot reply settings
- Get started settings
- General settings
- Action button settings
- Persistent menu settings
- Sequence message settings
Bot reply settings
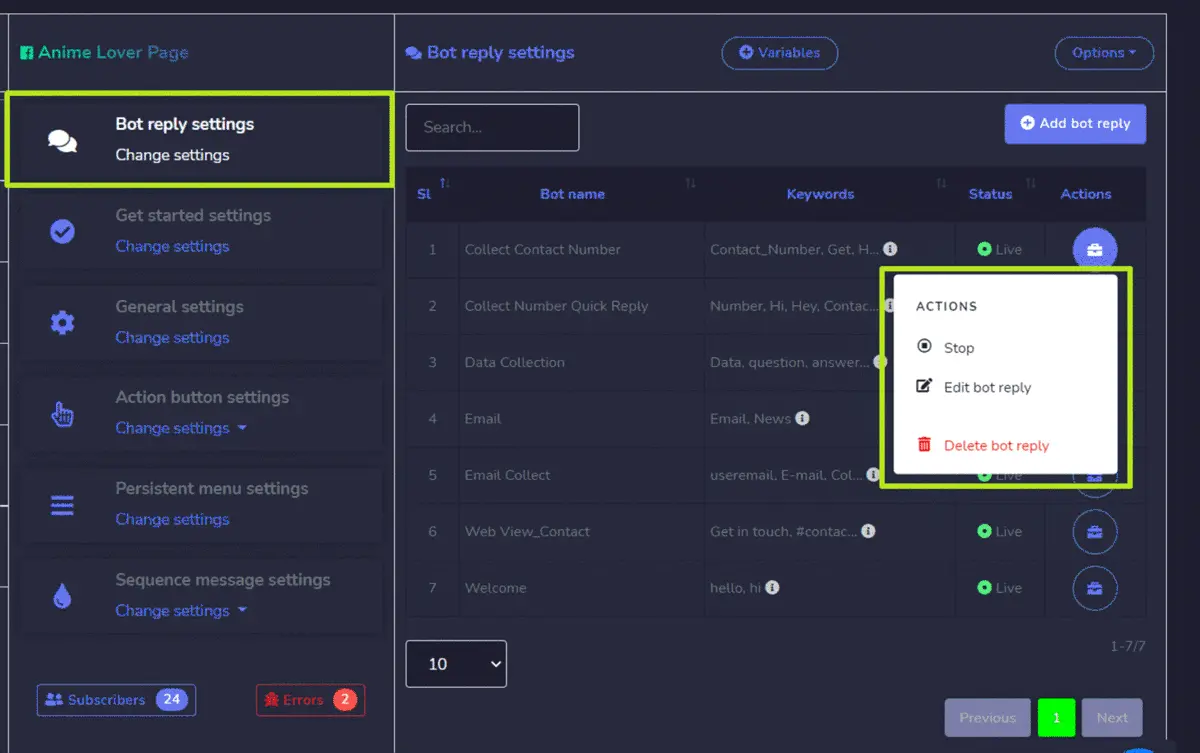
Select Bot reply settings option from the menu, then select change settings. A list of bot replies will appear on the screen. To perform different actions on a bot reply, select option against the reply you want to perform actions on. The following are the actions that can be performed:
- Stop: change the state.
- Edit bot reply: make changes in the bot reply then select Update
- Delete bot reply
Add a bot reply
You can add a bot reply by following the steps given below:
- Select
from the top right of the screen.
- Enter Bot name, provide your keywords.
- Provide a reply in the Reply field, first select the type then enter your reply.
- Select Submit to save your bot reply.

Types of bot reply
Bot replies are of the following different types:
Text
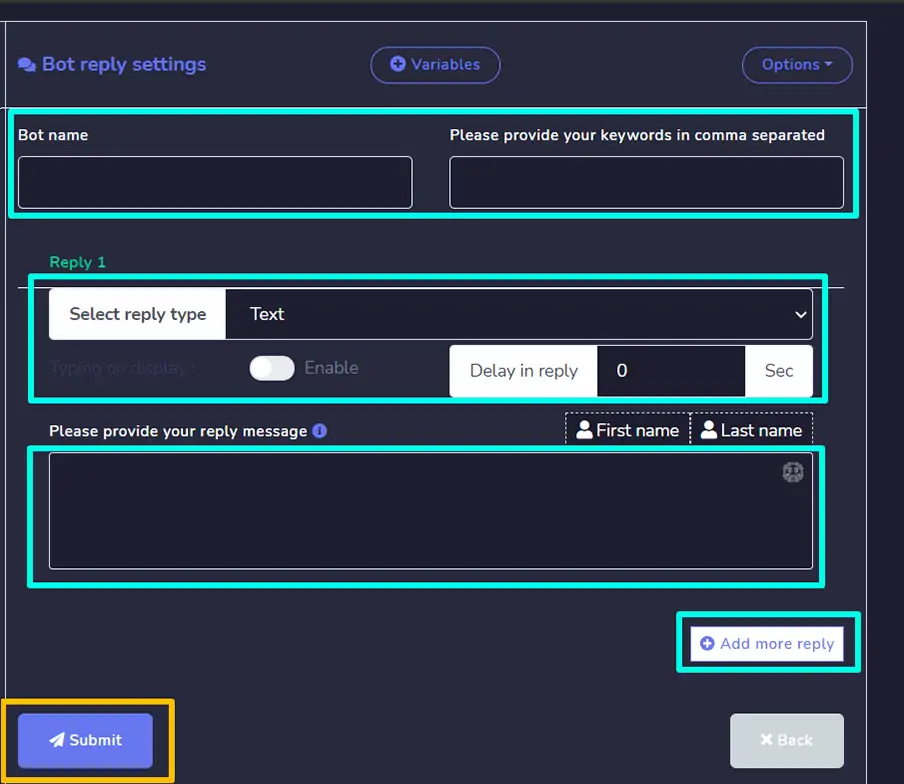
For the bot reply to be a text type, you need to provide the following information:
- Provide a Bot name.
- Provide your keywords, separated by commas.
- Provide the reply message in the field provided.
- You can enter a delay time as well in seconds.
- Hit Submit.
Image
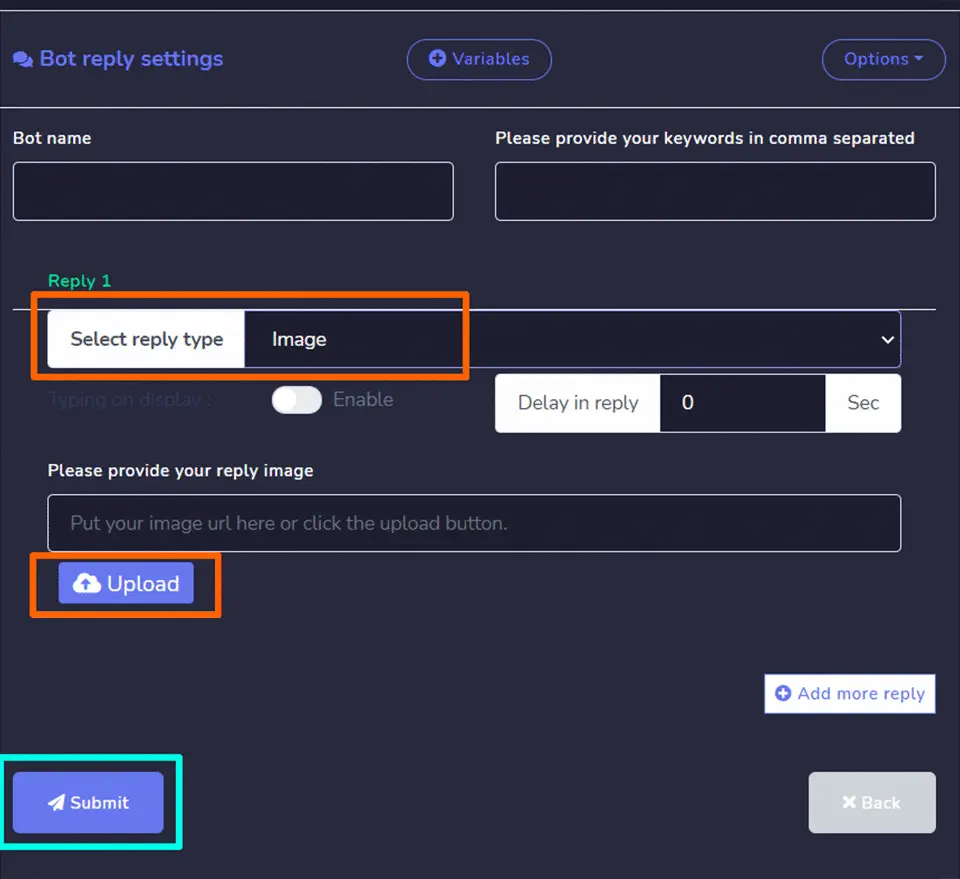
For the bot reply to be an image type, you need to provide the following information:
- Provide a Bot name.
- Provide your keywords, separated by commas.
- Provide and upload the image.
- You can enter a delay time as well in seconds.
- Hit Submit.
Audio
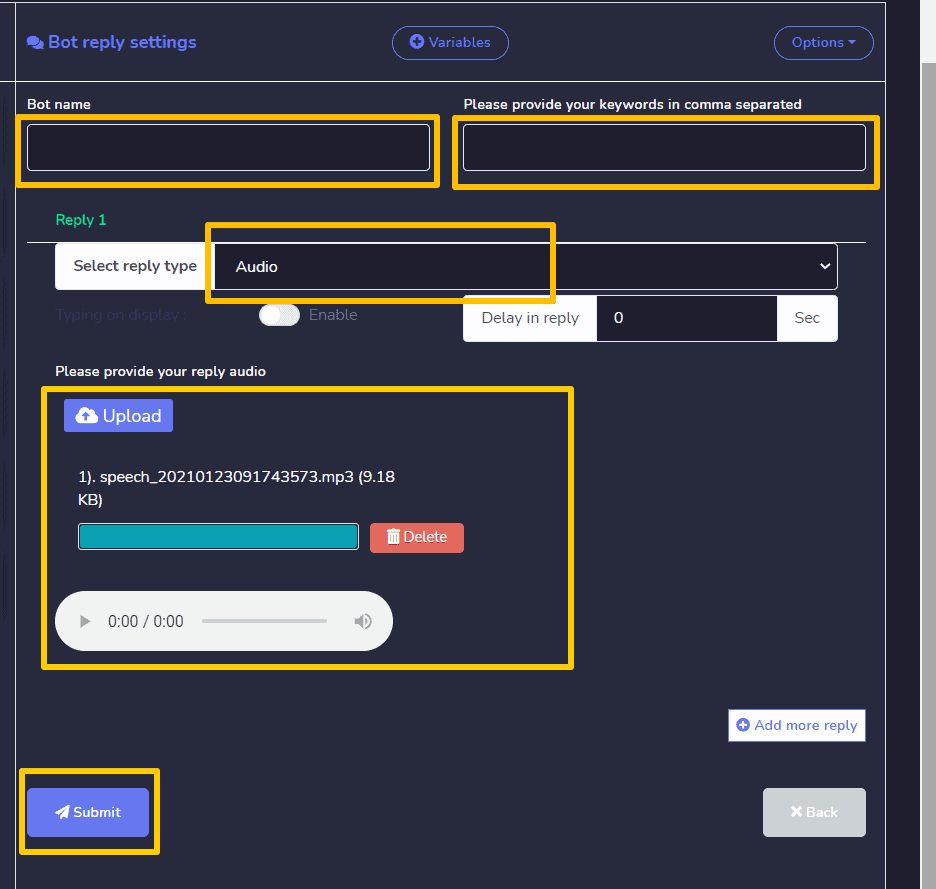
For the bot reply to be a audio type, you need to provide the following information:
- Provide a Bot name.
- Provide your keywords, separated by commas.
- Provide and upload the audio.
- You can enter a delay time as well in seconds.
- Hit Submit.
Video
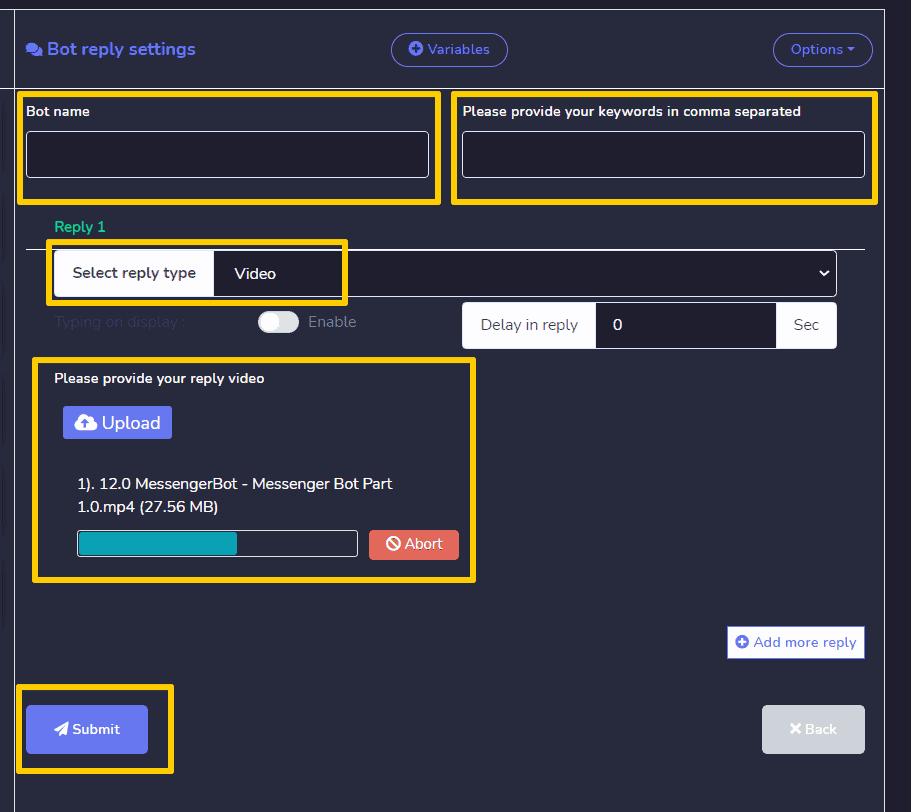
For the bot reply to be a video type, you need to provide the following information:
- Provide a Bot name.
- Provide your keywords, separated by commas.
- Provide and upload the video.
- You can enter a delay time as well in seconds.
- Hit Submit.
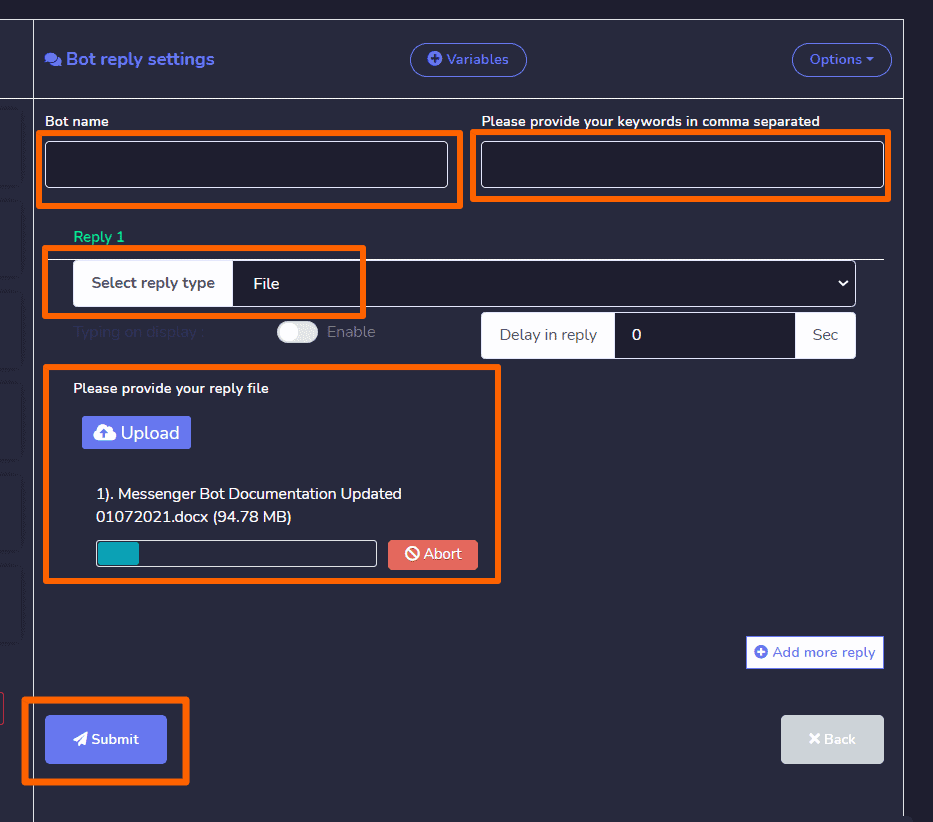
File
For the bot reply to be a file type, you need to provide the following information:
- Provide a Bot name.
- Provide your keywords, separated by commas.
- Provide and upload the file.
- You can enter a delay time as well in seconds.
- Hit Submit.
Quick reply
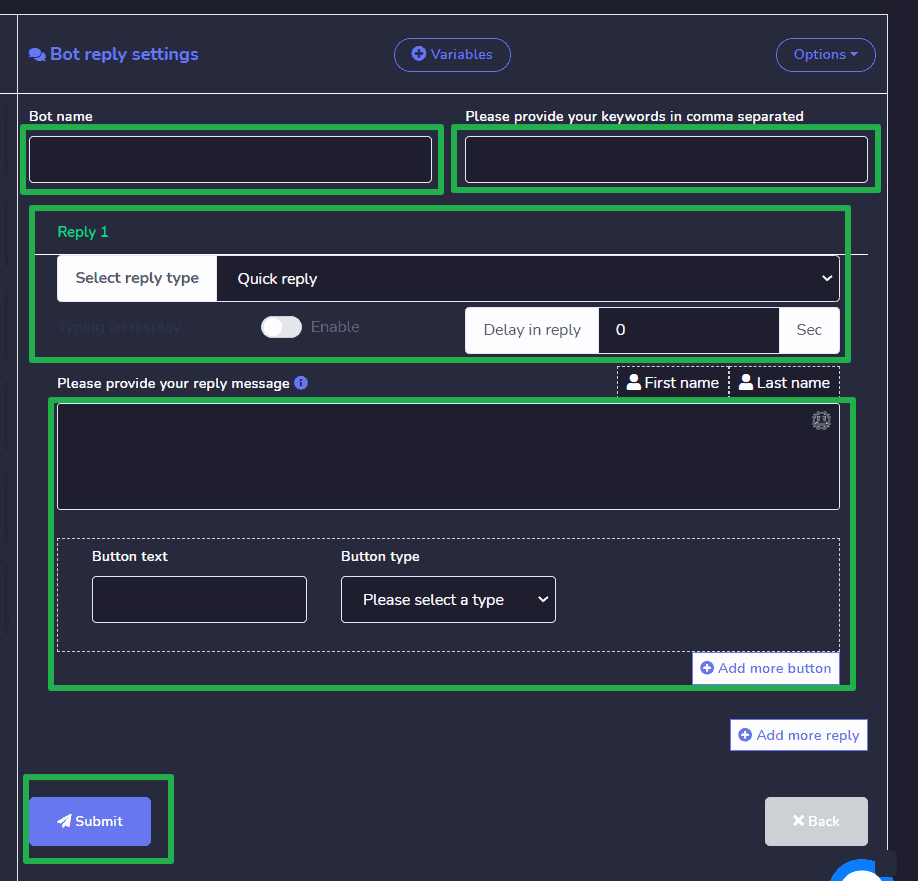
For the bot to be a quick reply, you need to provide the following information:
- Provide a Bot name.
- Provide your keywords, separated by commas.
- Provide your reply message in available field.
- Provide a text for the button and choose the type of the button based on your requirements.
- You can enter a delay time as well in seconds.
- Hit Submit.
Text with buttons
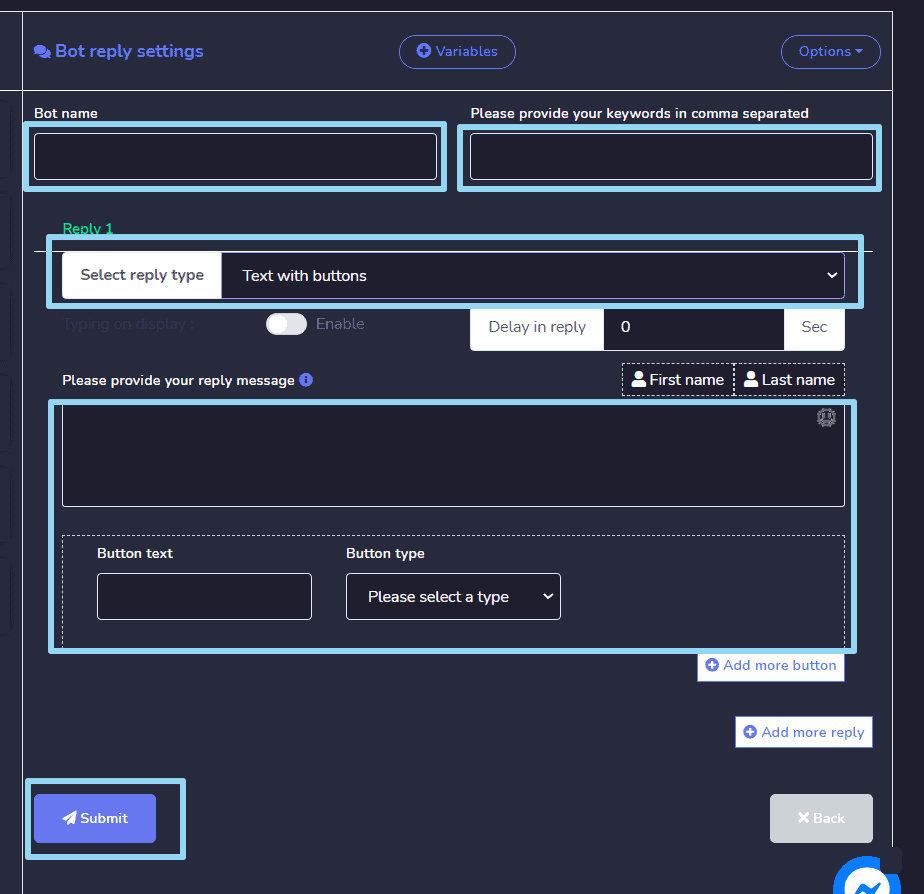
For the bot to be a text with buttons, you need to provide the following information:
- Provide a Bot name.
- Provide your keywords, separated by commas.
- Provide your reply message in available field.
- Provide a text for the button and choose the type of the button based on your requirements.
- You can enter a delay time as well in seconds.
- Hit Submit.
Generic template
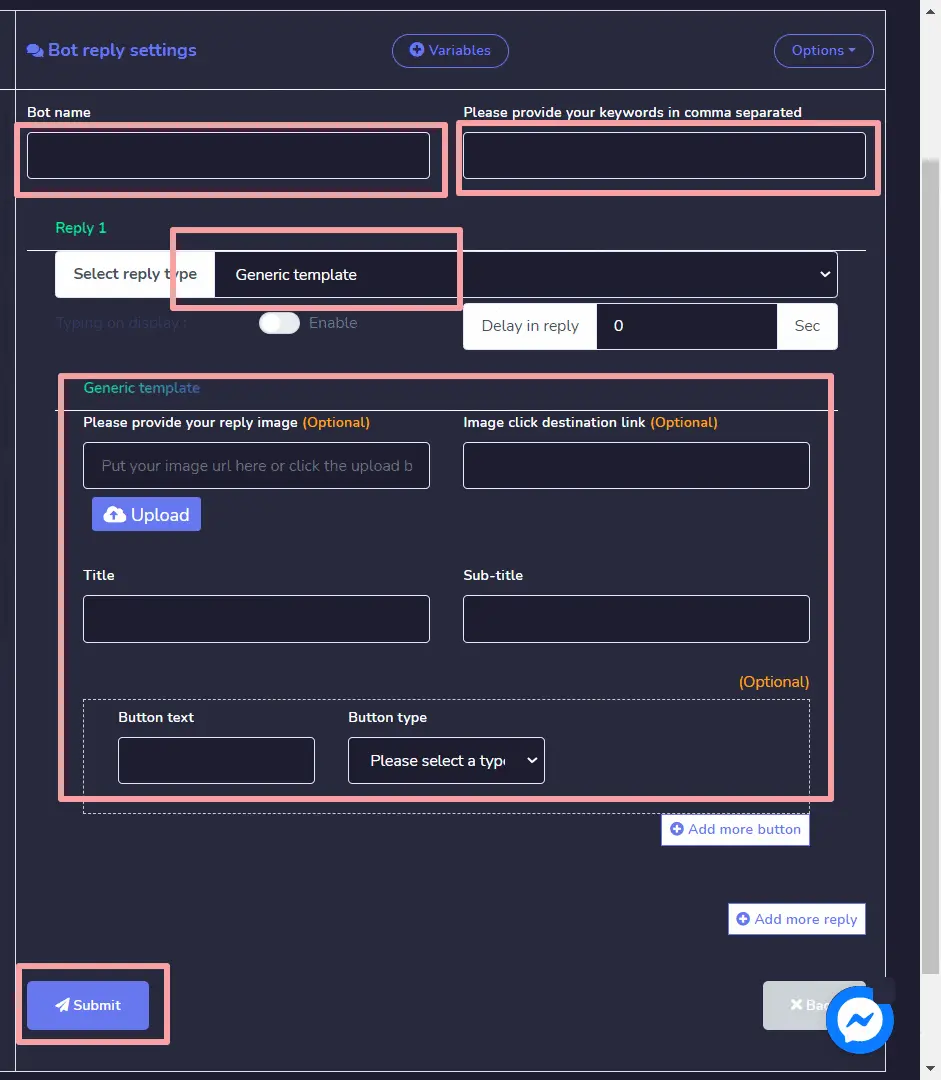
For the bot reply to be a generic template, you need to provide the following information:
- Provide a Bot name.
- Provide your keywords, separated by commas.
- If needed, provide your reply image.
- Provide a title and a sub-title to your template.
- Provide a text for the button and choose the type of the button based on your requirements.
- You can enter a delay time as well in seconds.
- Hit Submit.
Carousel
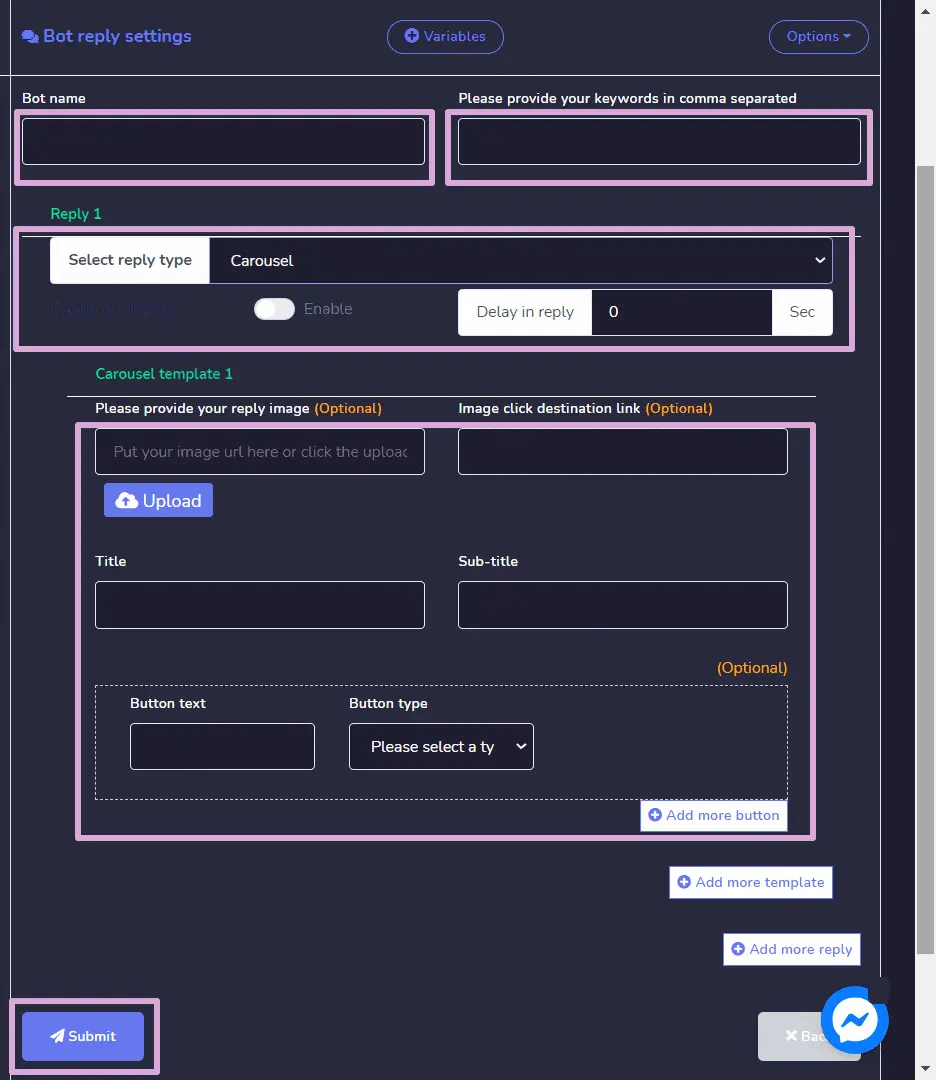
For the bot reply to be a carousel, you need to provide the following information:
- Provide a Bot name.
- Provide your keywords, separated by commas.
- If needed, provide an image click destination link.
- If needed, provide your reply image.
- Provide a title and a sub-title to your template.
- Provide a text for the button and choose the type of the button based on your requirements.
- You can enter a delay time as well in seconds.
- Hit Submit.
Media
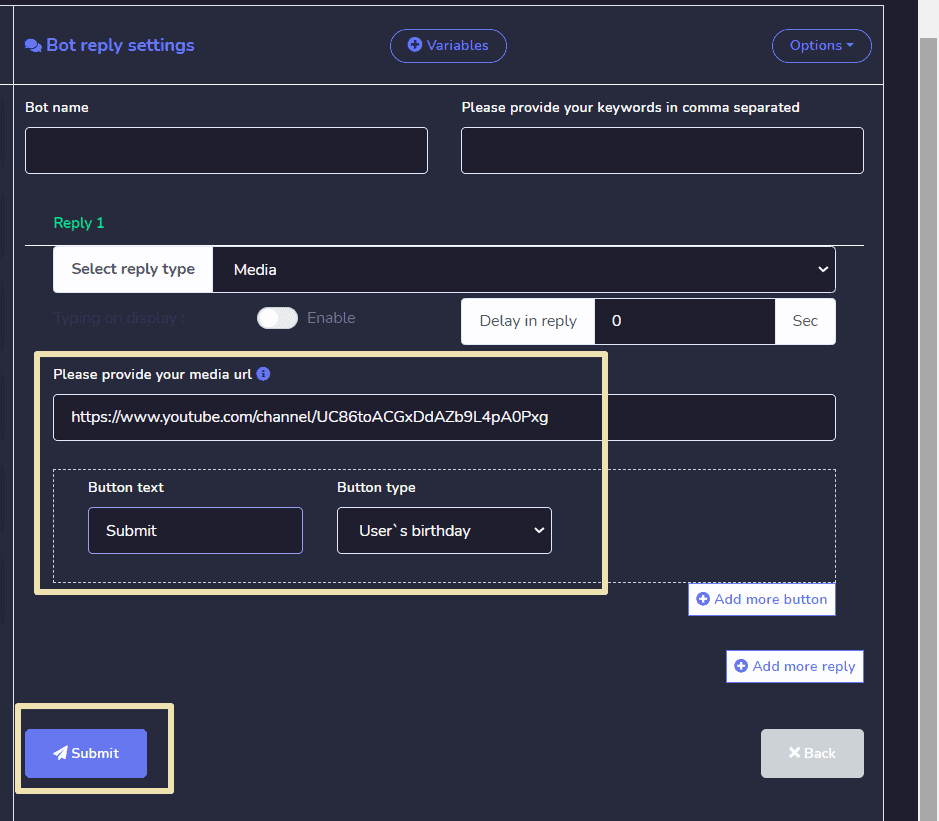
For the bot reply to be a media, you need to provide the following information:
- Provide a Bot name.
- Provide your keywords, separated by commas.
- If needed, provide your Media URL.
- Provide a text for the button and choose the type of the button based on your requirements.
- You can enter a delay time as well in seconds.
- Hit Submit.

 from the right side of Bot settings screen. A list of the following options will appear:
 from the top right of the screen.