Post-back manager
To access the post-back manager section, select Post-back manager settings, then select Actions from Messenger Bot screen.
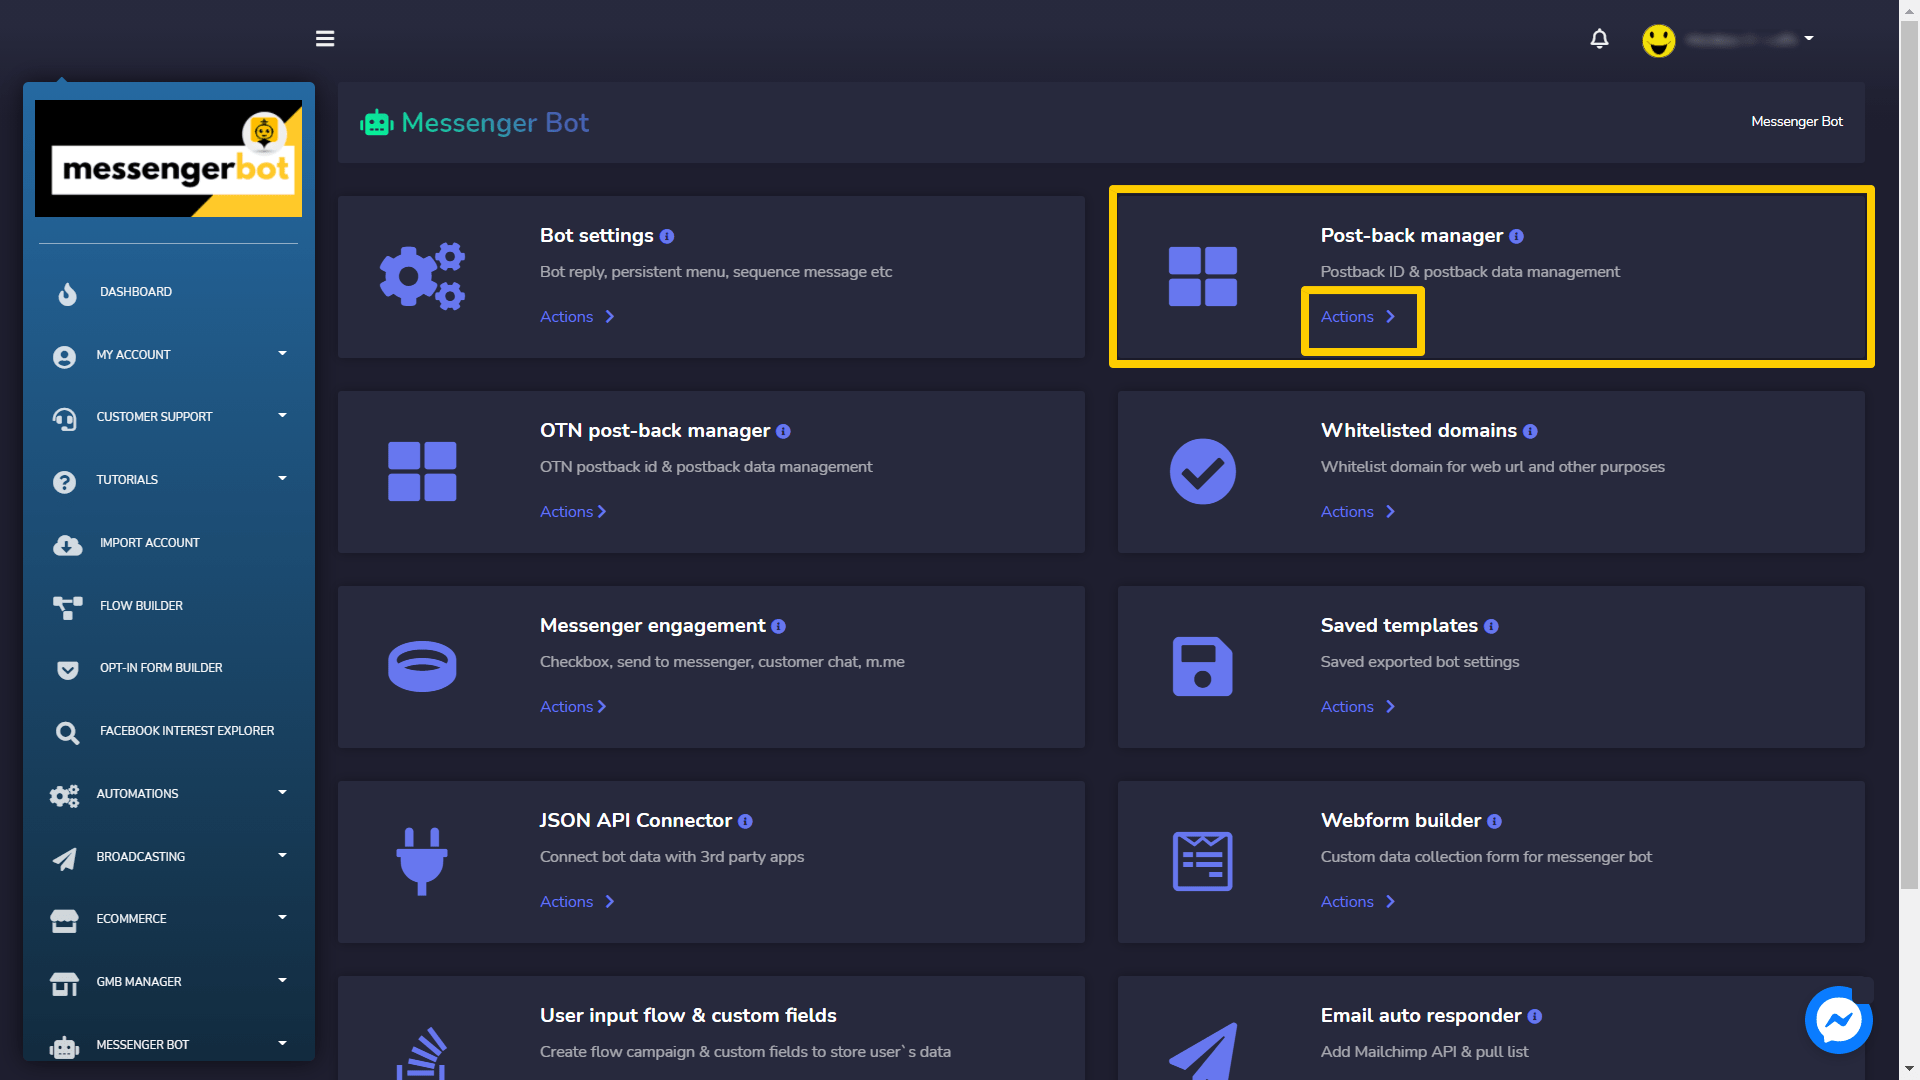
Post-back manager screen consists of a list of templates, you can search for a specific template by using the search bar. You can adjust the number of templates to be viewed per page. You can also arrange them in either ascending or descending order by selecting the arrows from the header.
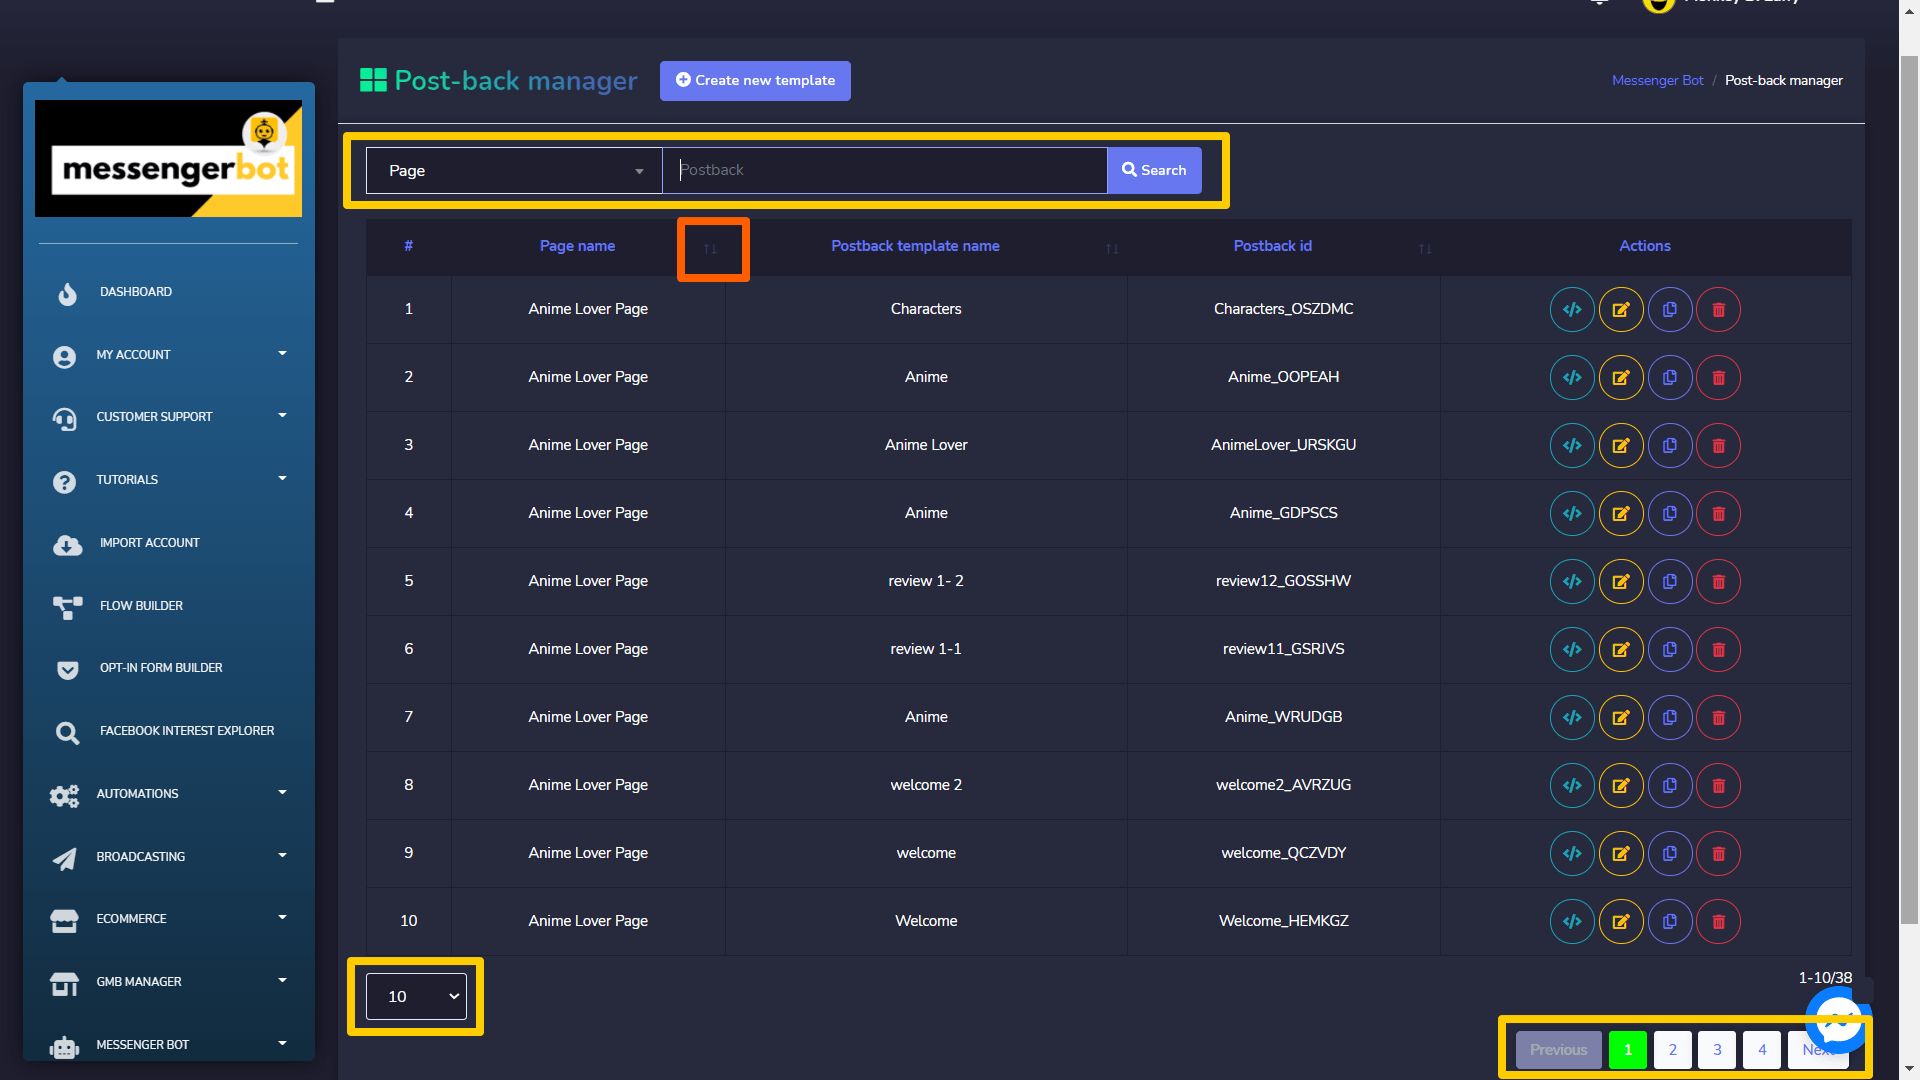
- Copy post-back template: Select
 to copy the JSON code which can be used in Messenger or Facebook ads.
 - Edit template: You can edit and update the template
- Clone post-back template: Select
 to clone the post back template. Select the template name, postback type, postback id, sequence campaign. Provide a reply and your reply message, then select Clone.
 - Delete the template
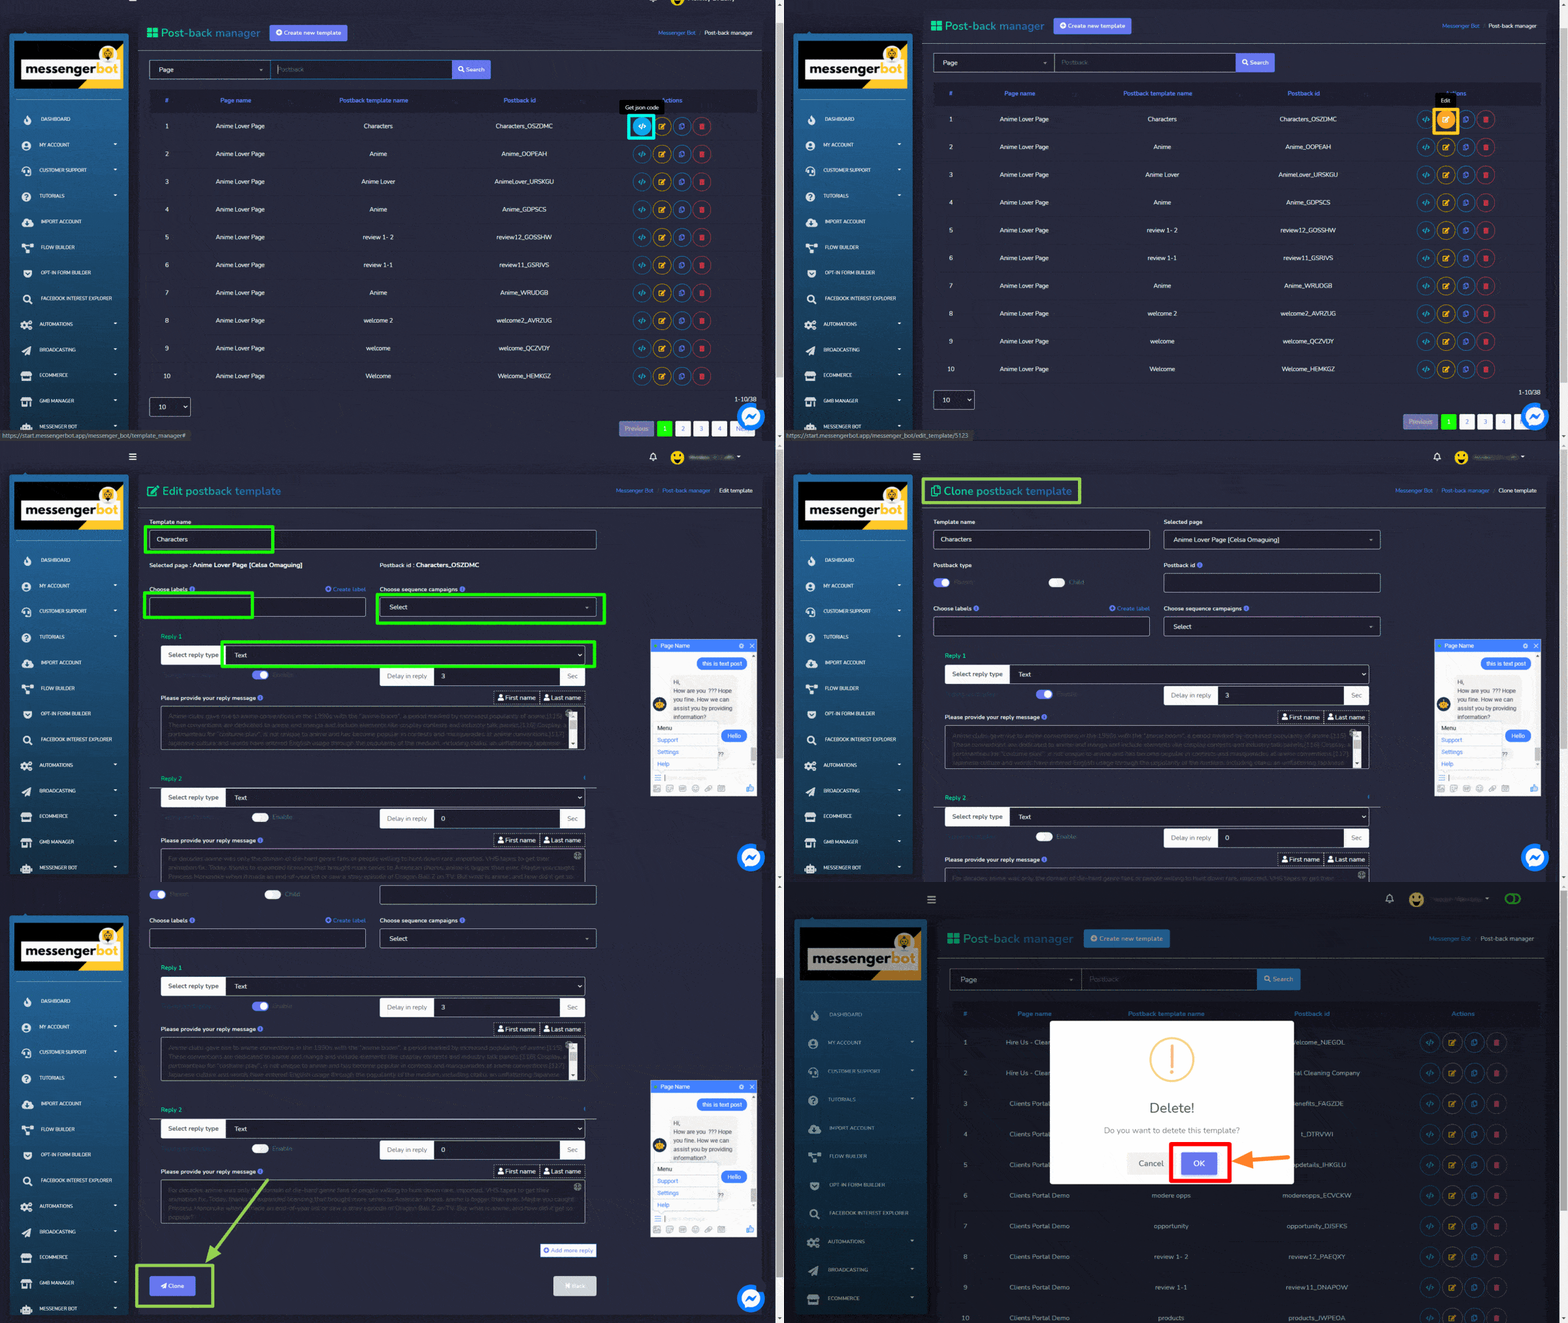
Create new template
You can create a new template by following the steps given below:
- Select
 from the top right of the screen.
 - Provide Template name.
- Select a page for which you want to create a template.
- Select the type of postback, and turn on the toggle button for that option.
- Provide a Postback id.
- Select a reply type and provide your message.
- Select Submit.
Whitelisted domains
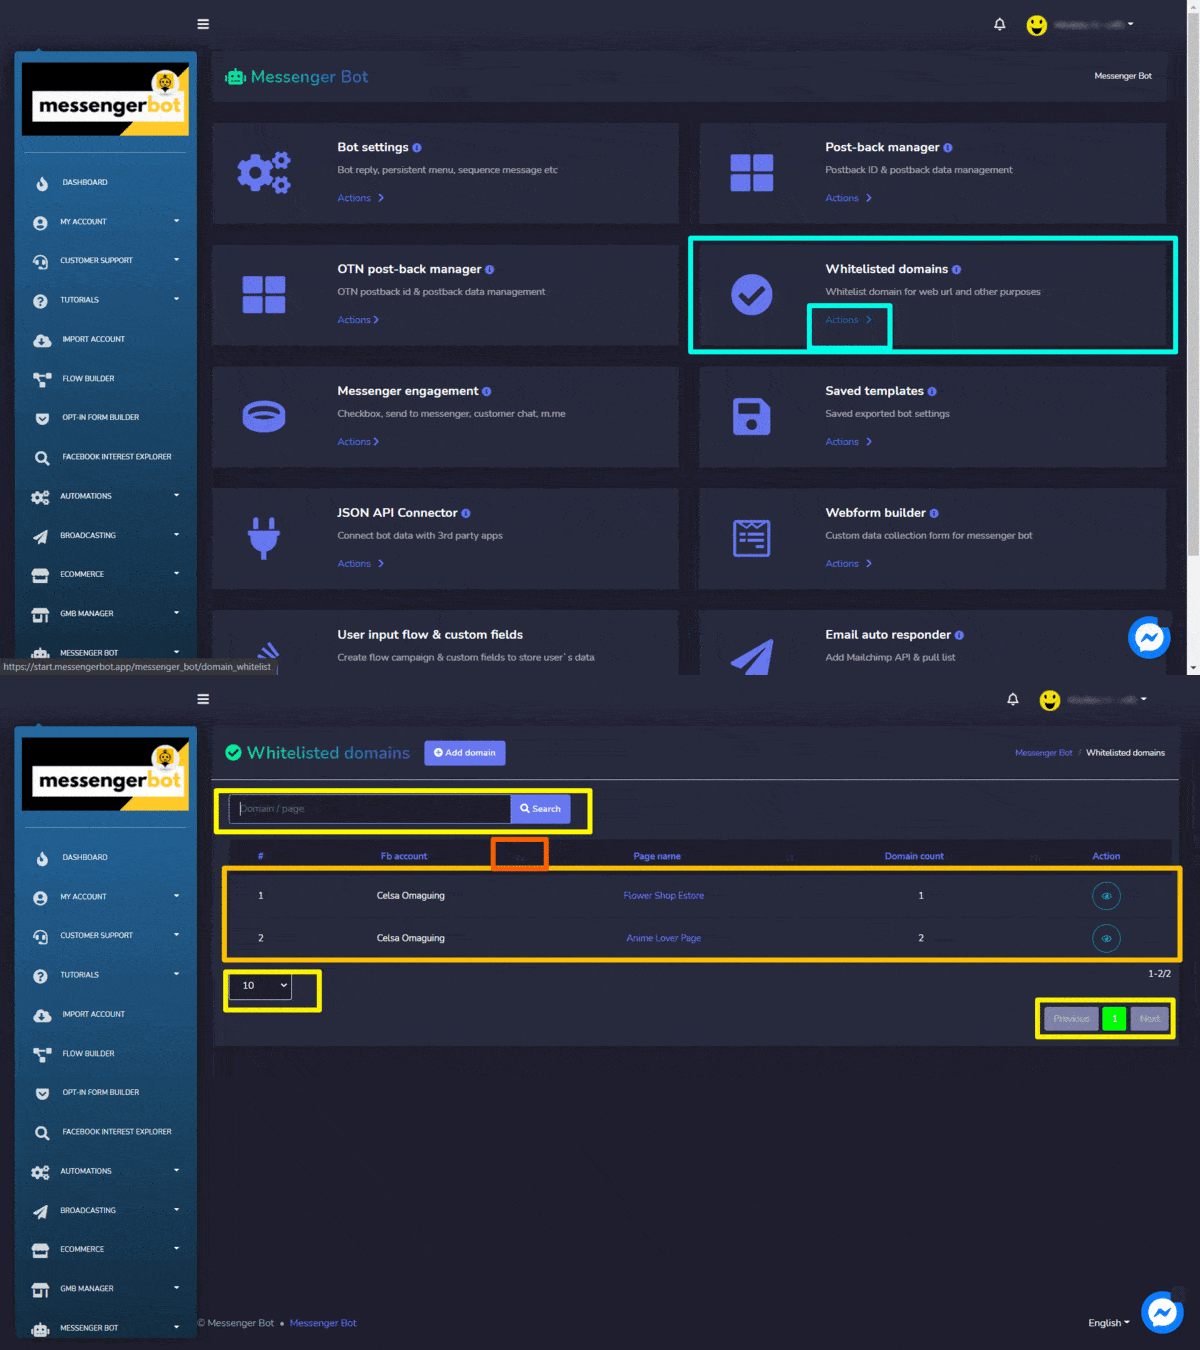
To access the post-back manager settings section, select Whitelisted domains, then select Actions from Messenger Bot screen.
Whitelisted domain screen consists of a list of domains that are added in the white list, you can search for a specific domain by using the search bar. You can adjust the number of templates to be viewed per page. You can also arrange them in either ascending or descending order by selecting the arrows from the header.
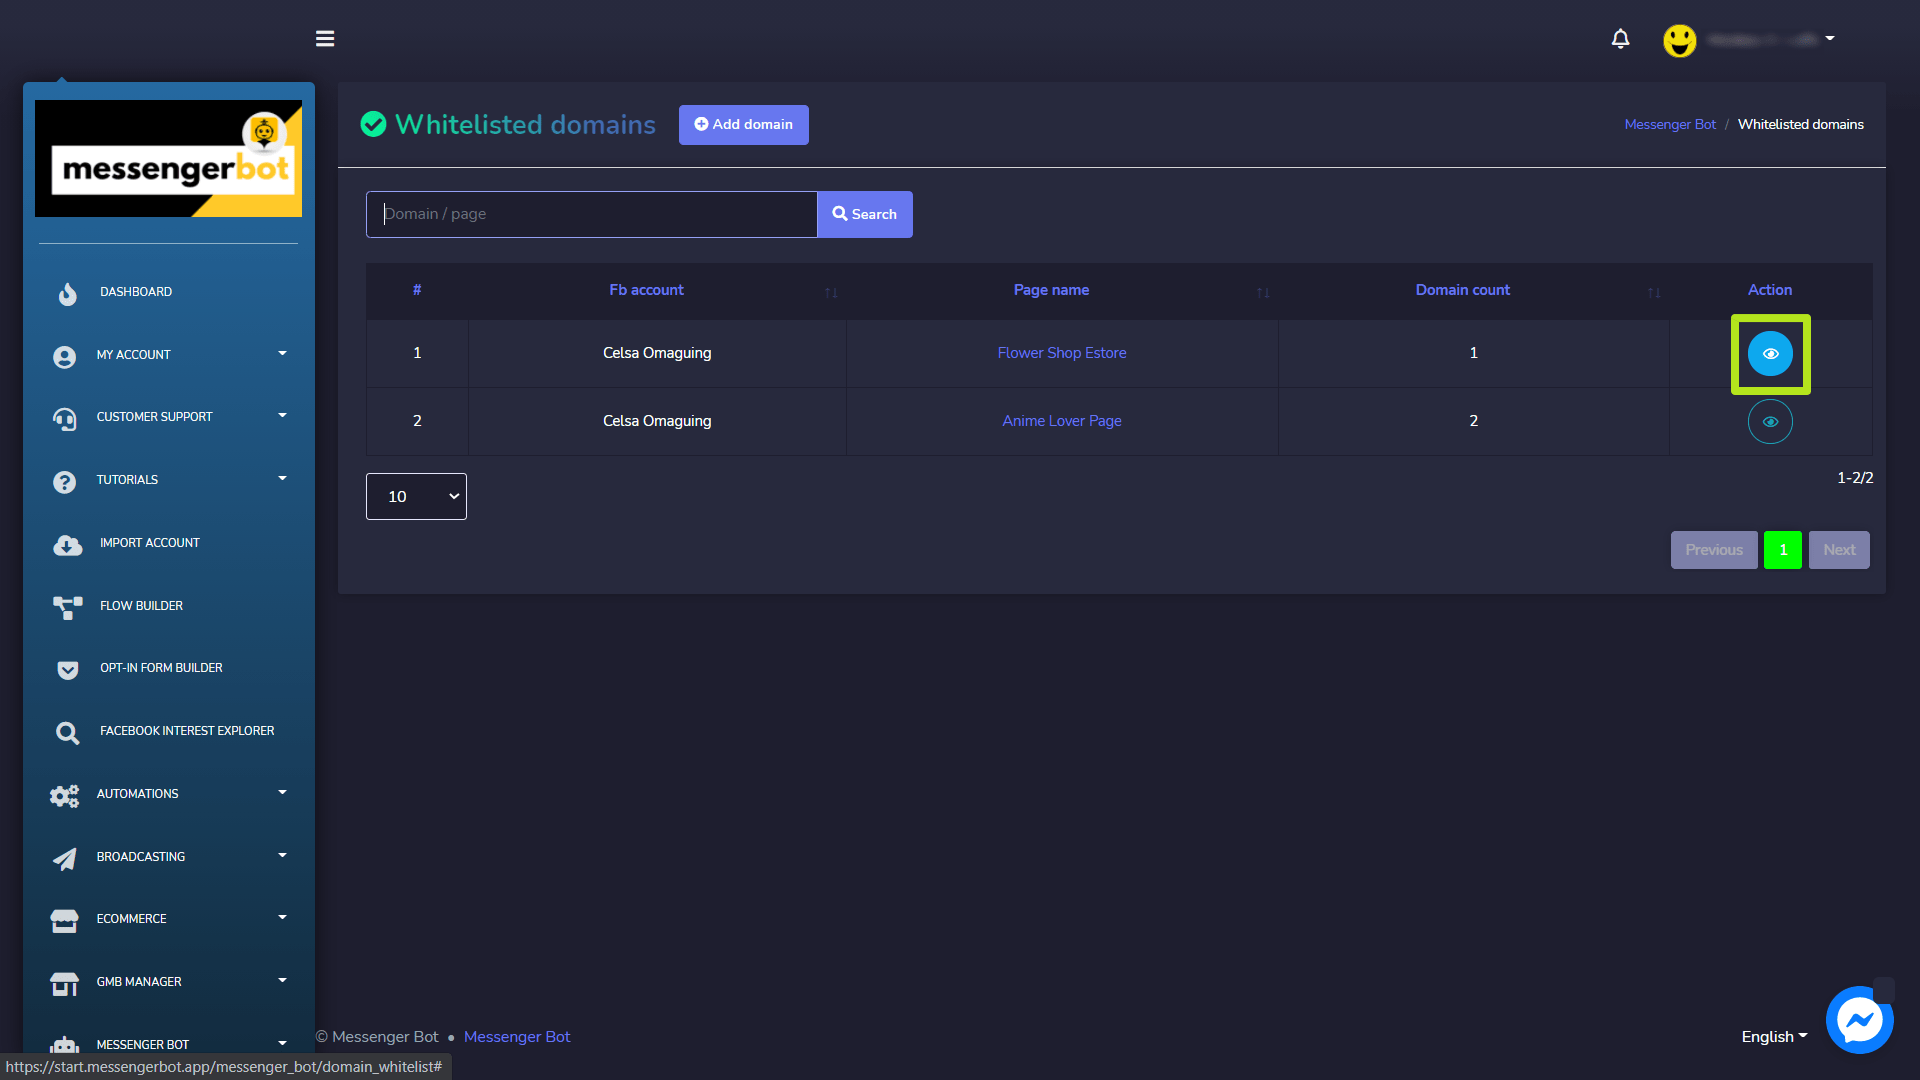
To perform different actions on the templates, select ![]() option against the domain you want to perform actions on.
option against the domain you want to perform actions on.
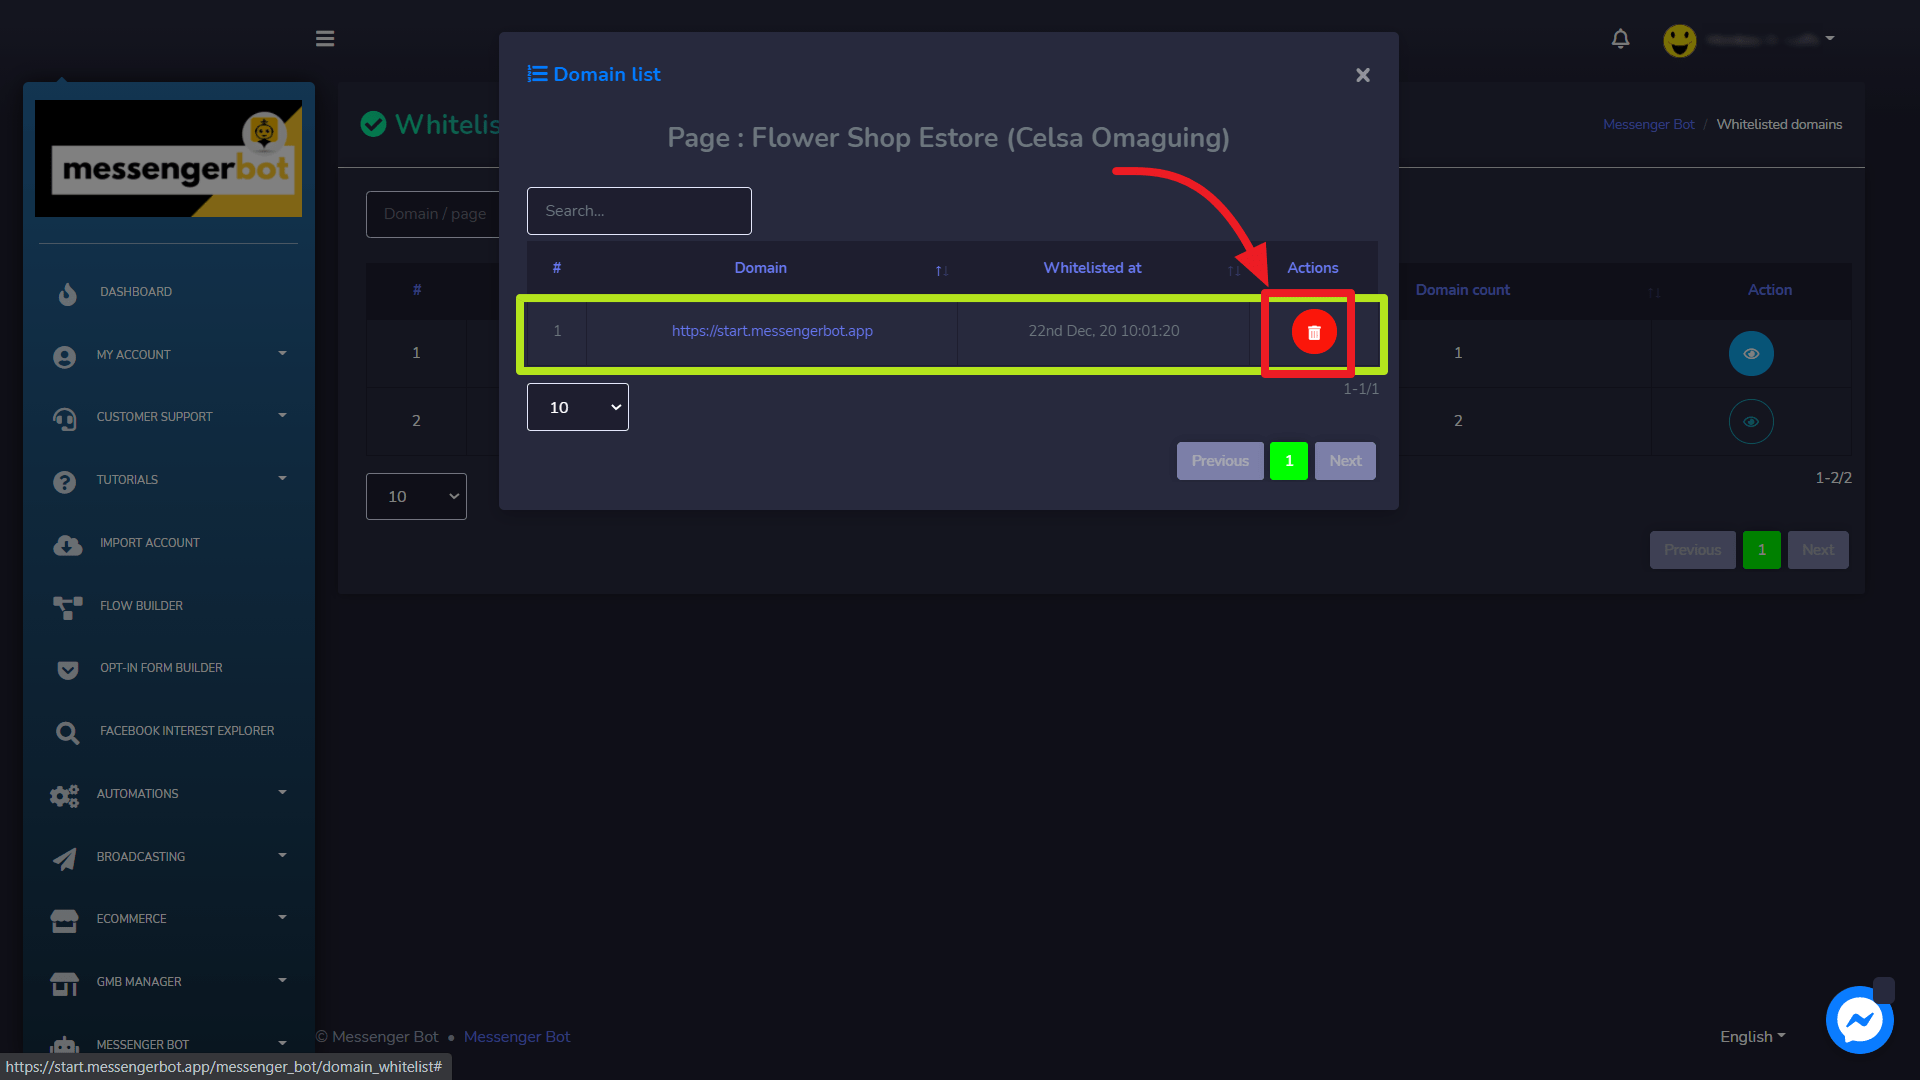
A modal will appear containing the domain list. This displays the time at which the domain was added and the domain name. You can delete the domain by selecting the ![]() icon.
icon.
Add domain
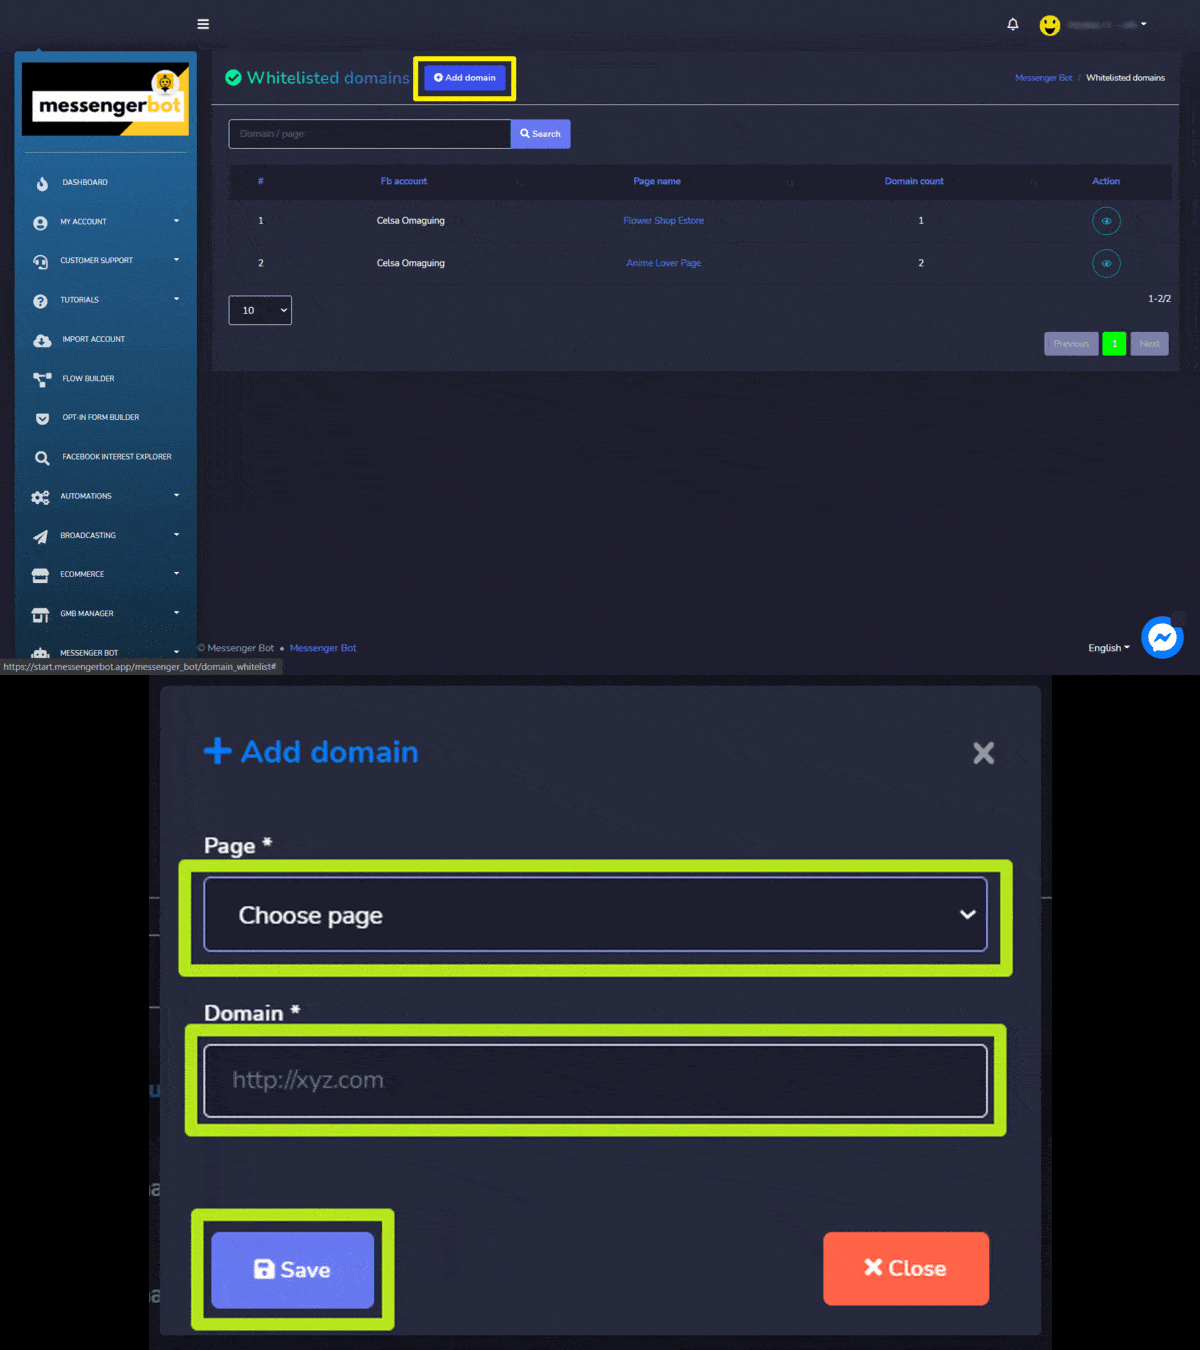
You can a new domain in your whitelisted category. Follow the steps given below:
- Select
 from the top of the whitelisted domain screen.
 - A modal will appear. Select the page for which you want to add a new domain.
- Provide the domain which is to be added to the whitelisted list.
- Select Save to make changes.
Messenger engagement
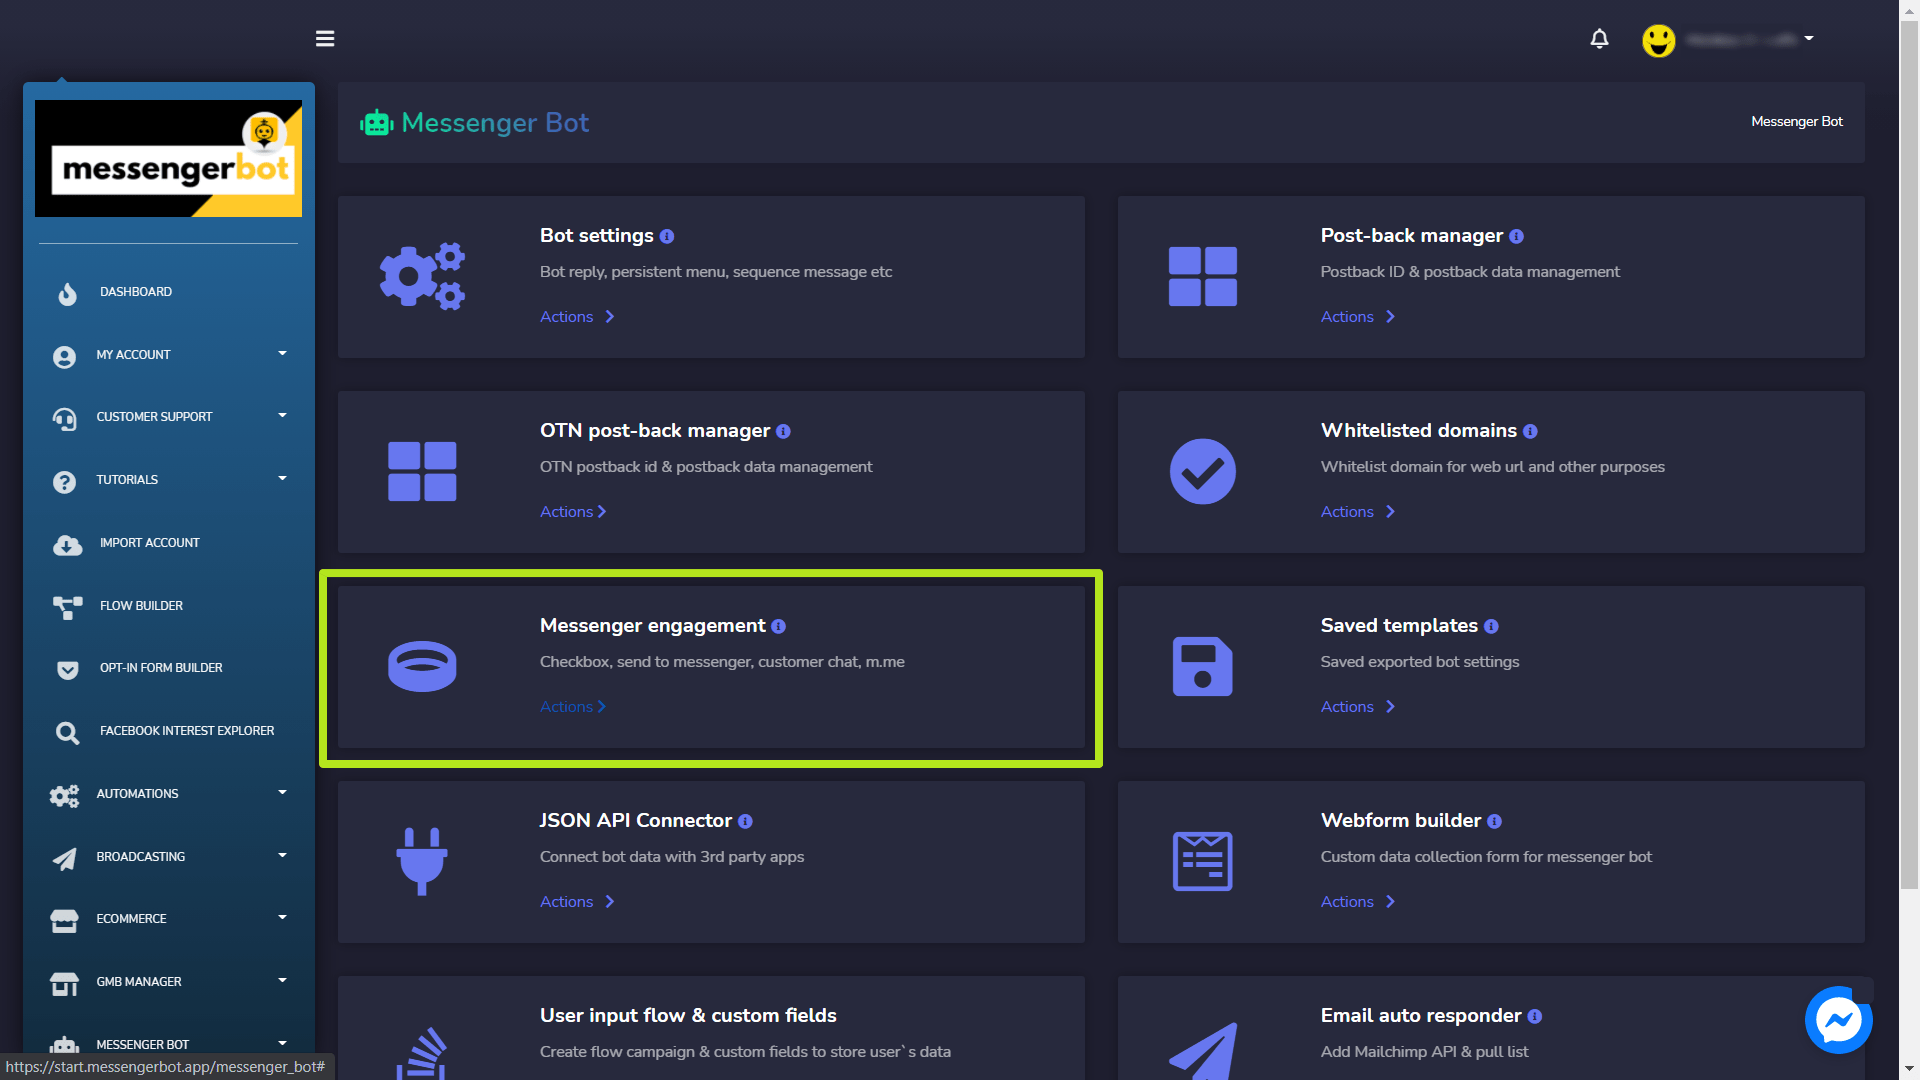
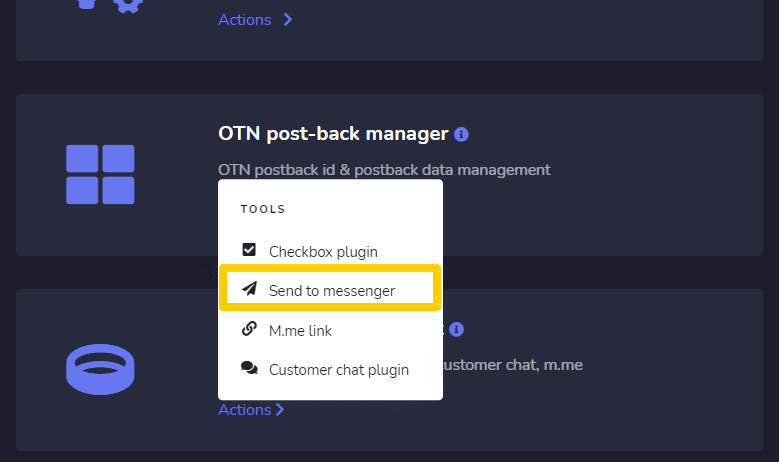
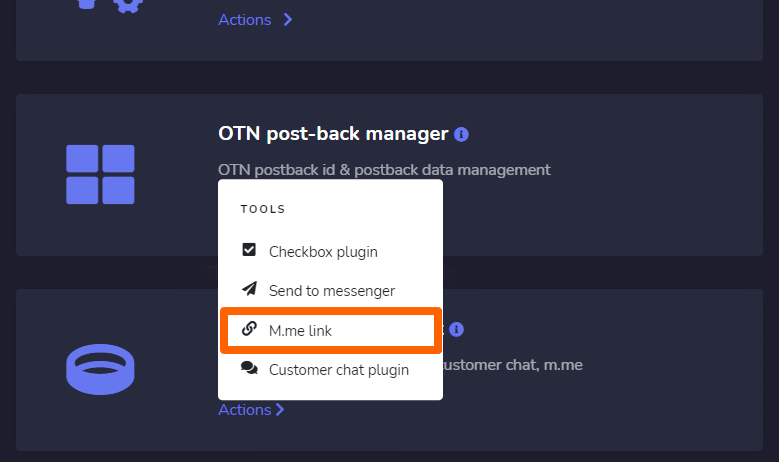
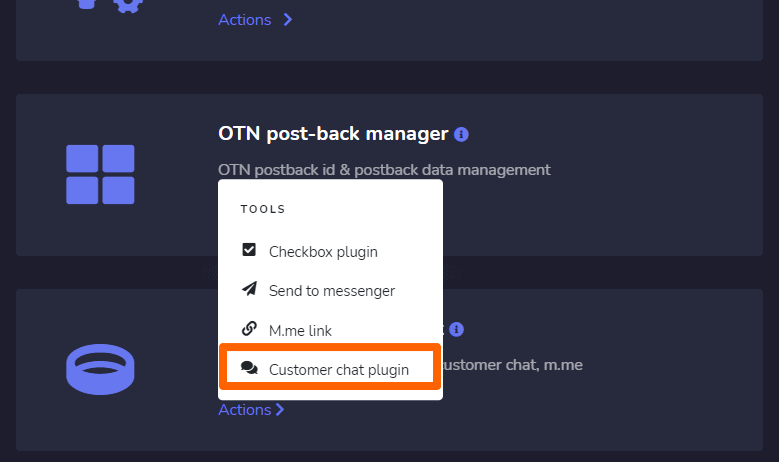
To access the messenger engagement section, select Messenger engagement, then select Actions from the Messenger Bot screen.
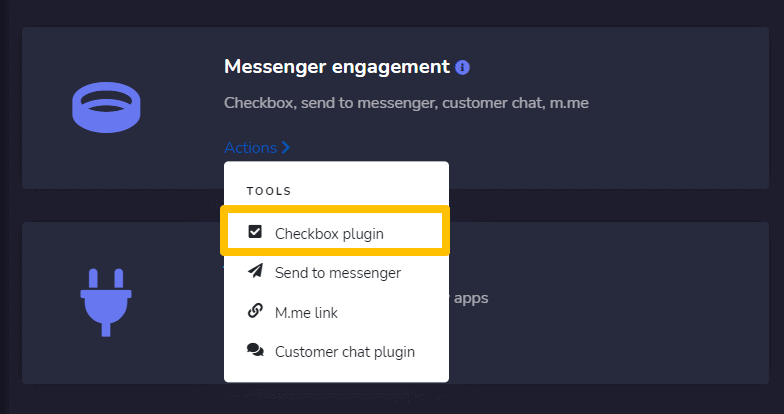
A dropdown menu containing the following options:
- Checkbox plugin
- Send to messenger
- me link
- Customer chat plugin
A detail of these settings can be found in the next headings.
Checkbox plugin
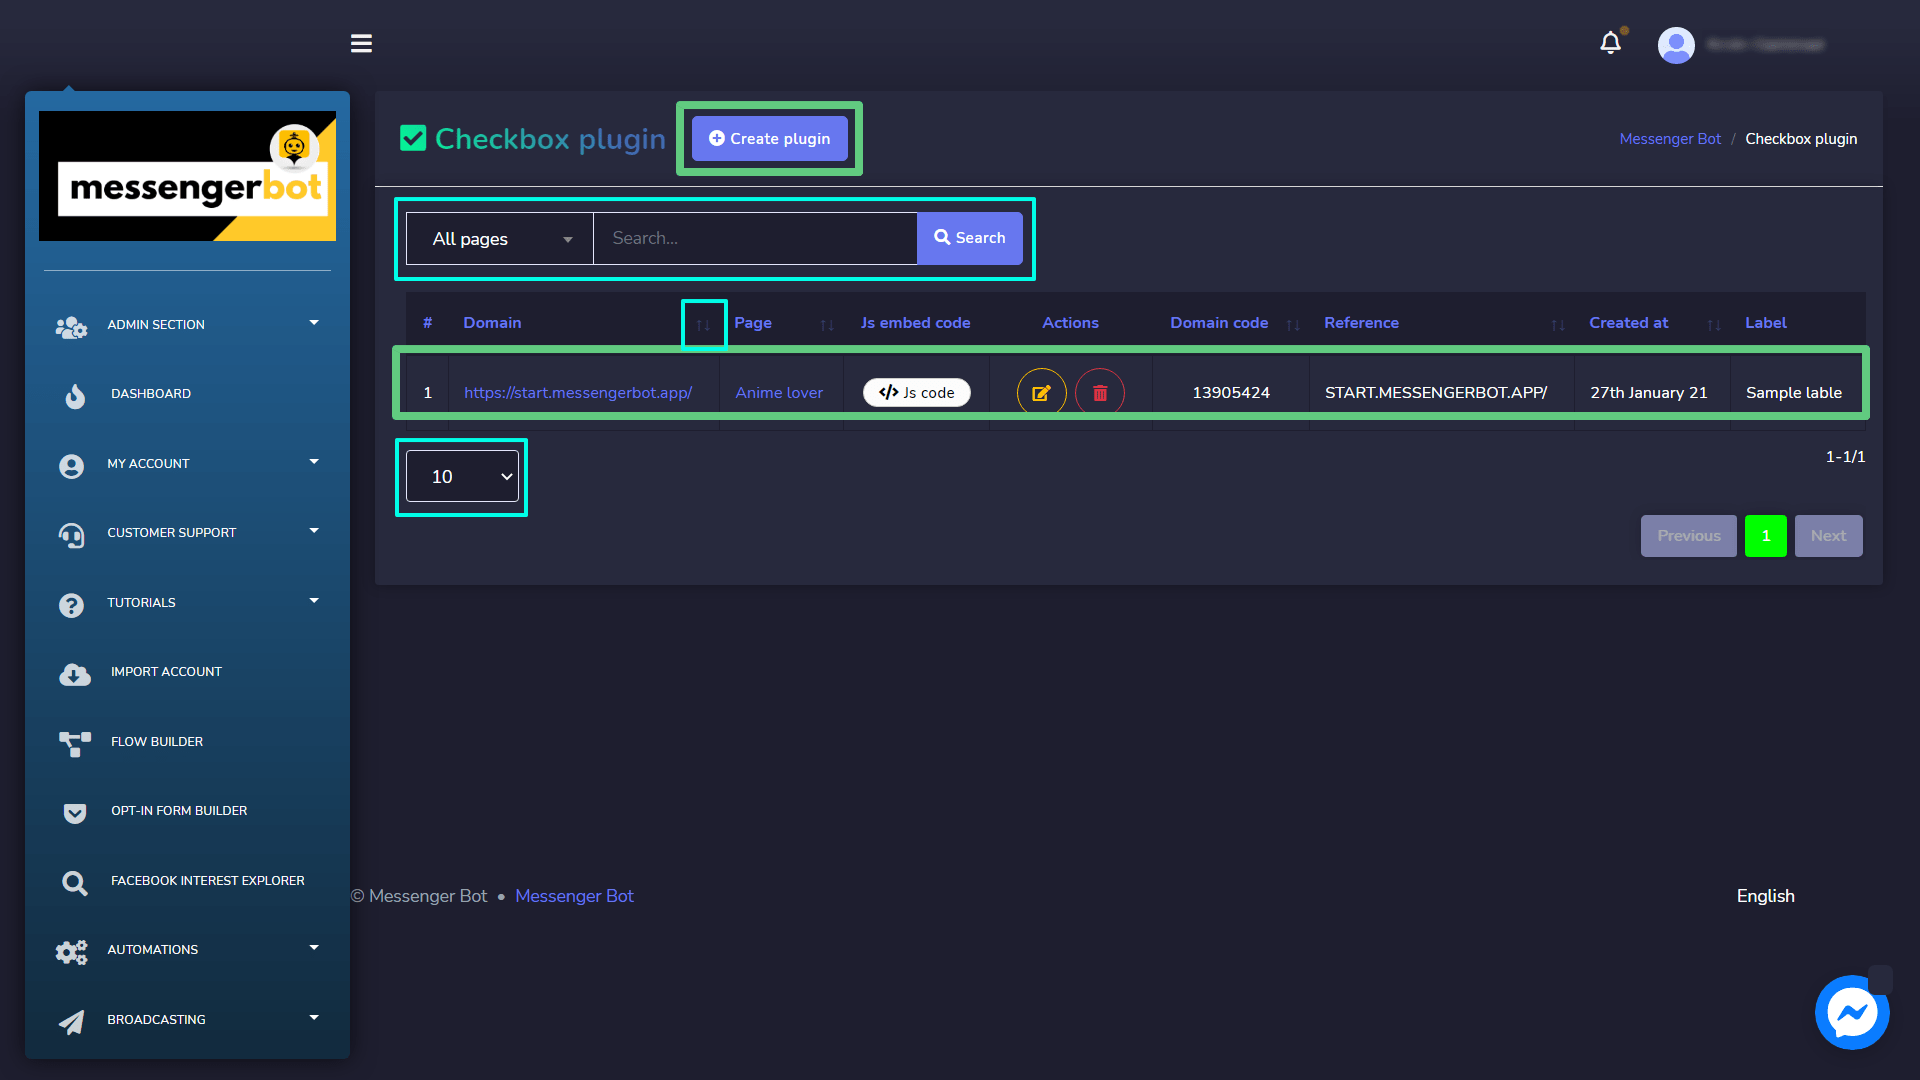
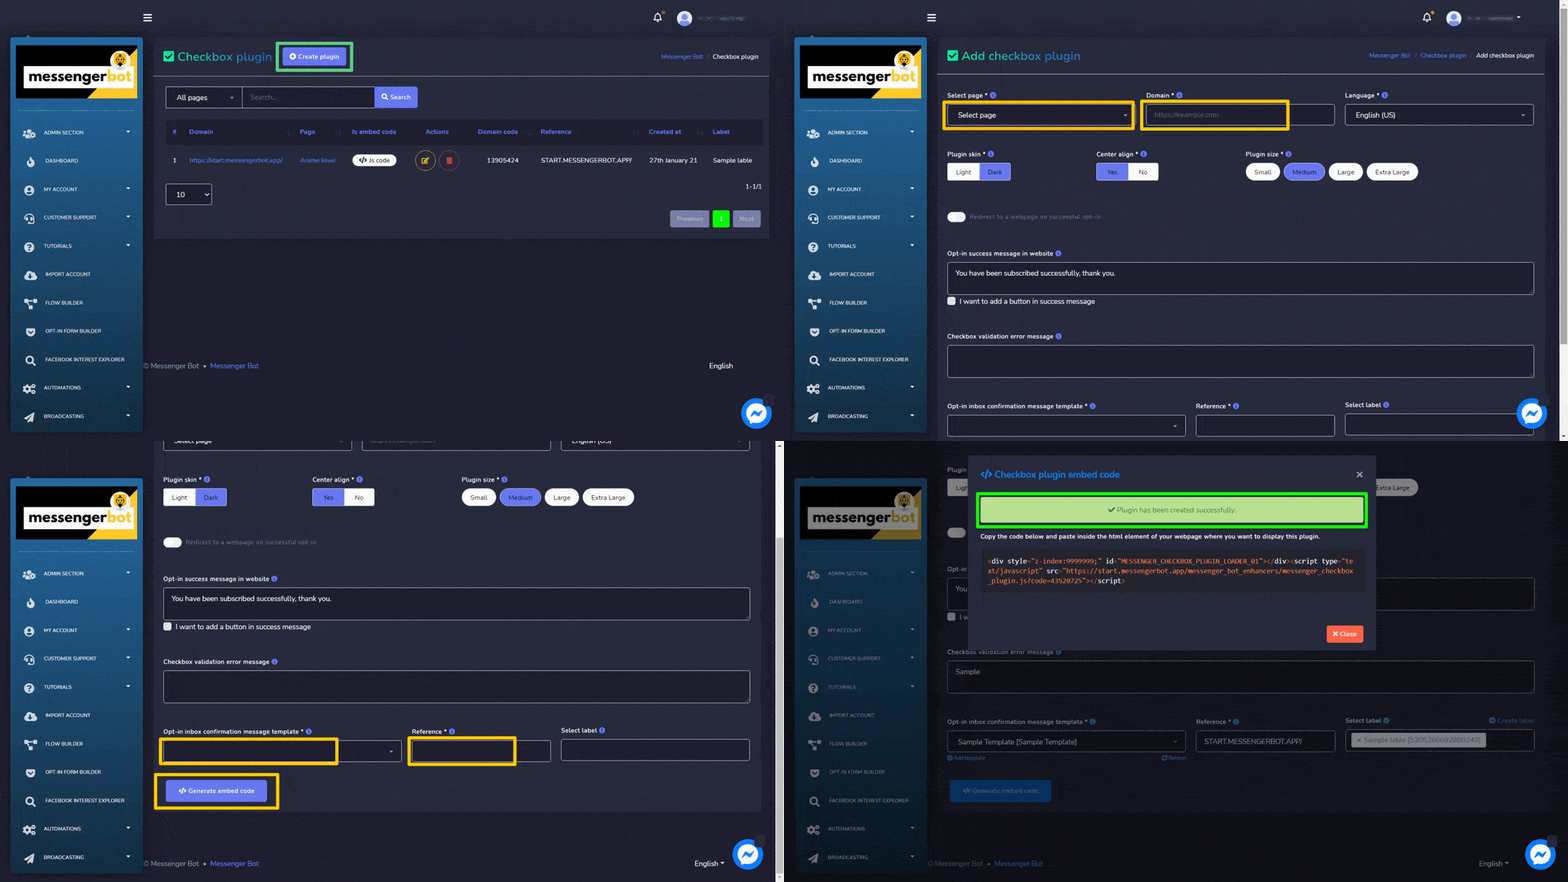
Checkbox plugin screen consists of a list of domains, you can search for a specific domain by using the search bar. You can adjust the number of domains to be viewed per page. You can also arrange them in either ascending or descending order by selecting the arrows from the header.
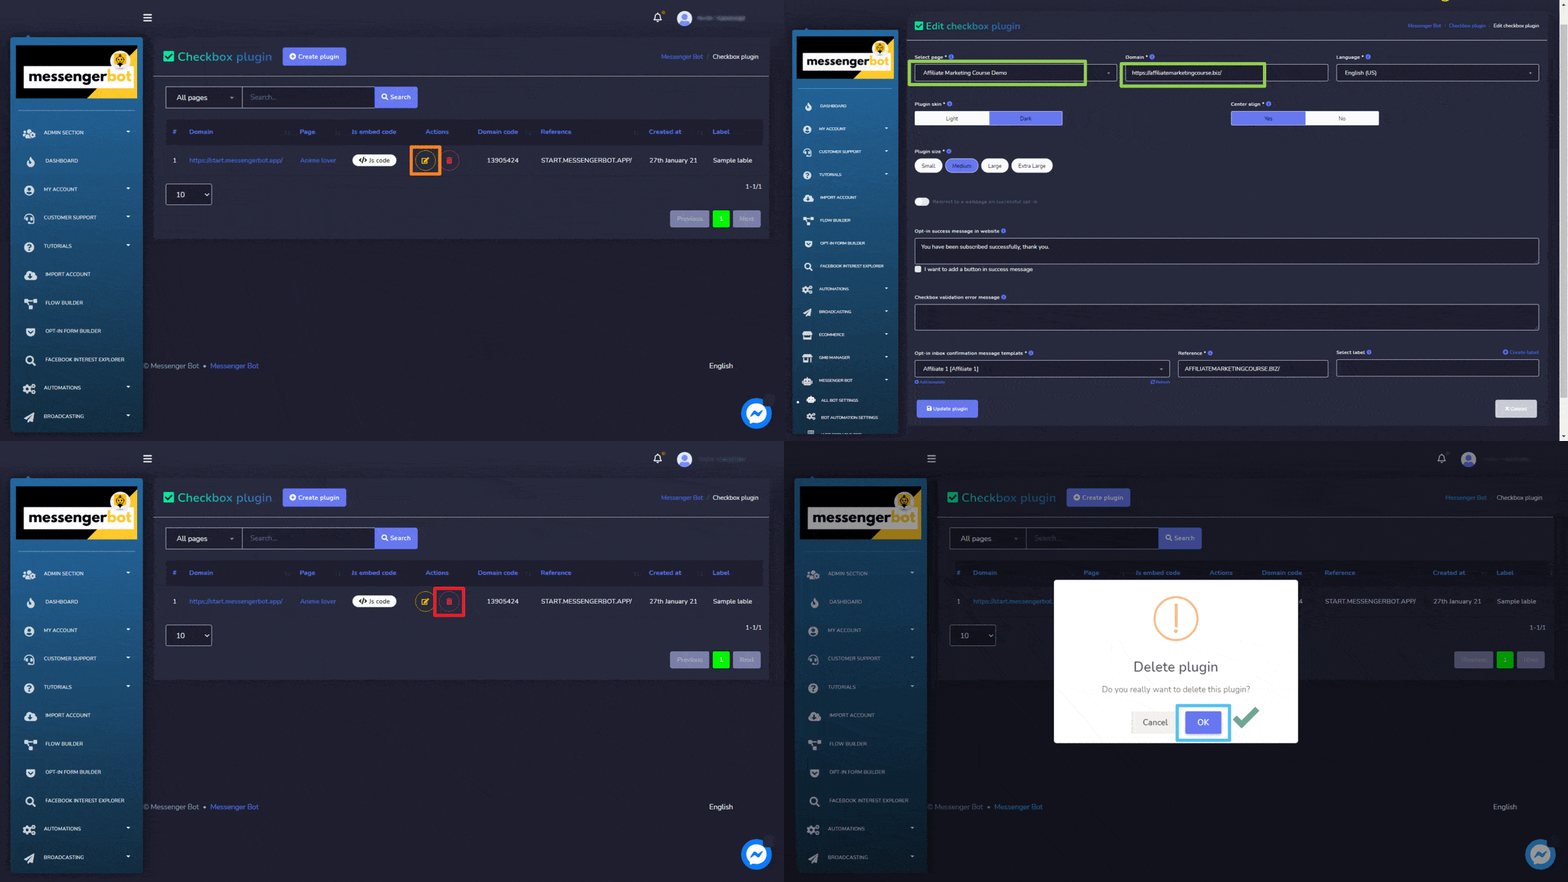
Following actions can be performed from the checkbox plugin view:
- Edit the plugin: Edit checkbox plugin and select Update plugin.
- Delete the plugin
Create plugin
You can create a plugin by following the steps given below:
- Select
 from the top right of the screen.
 - Select the page for which you want to add the plugin.
- Provide the domain.
- Select the language.
- Select the Plugin skin, turn it to either light or dark and center align option.
- Select the Plugin size.
- Write an Opt-in success message in website and a Checkbox validation error message.
- Select an opt-in inbox confirmation message template, reference, and label.
- Select Generate embed code option to create the send to messenger plugin.
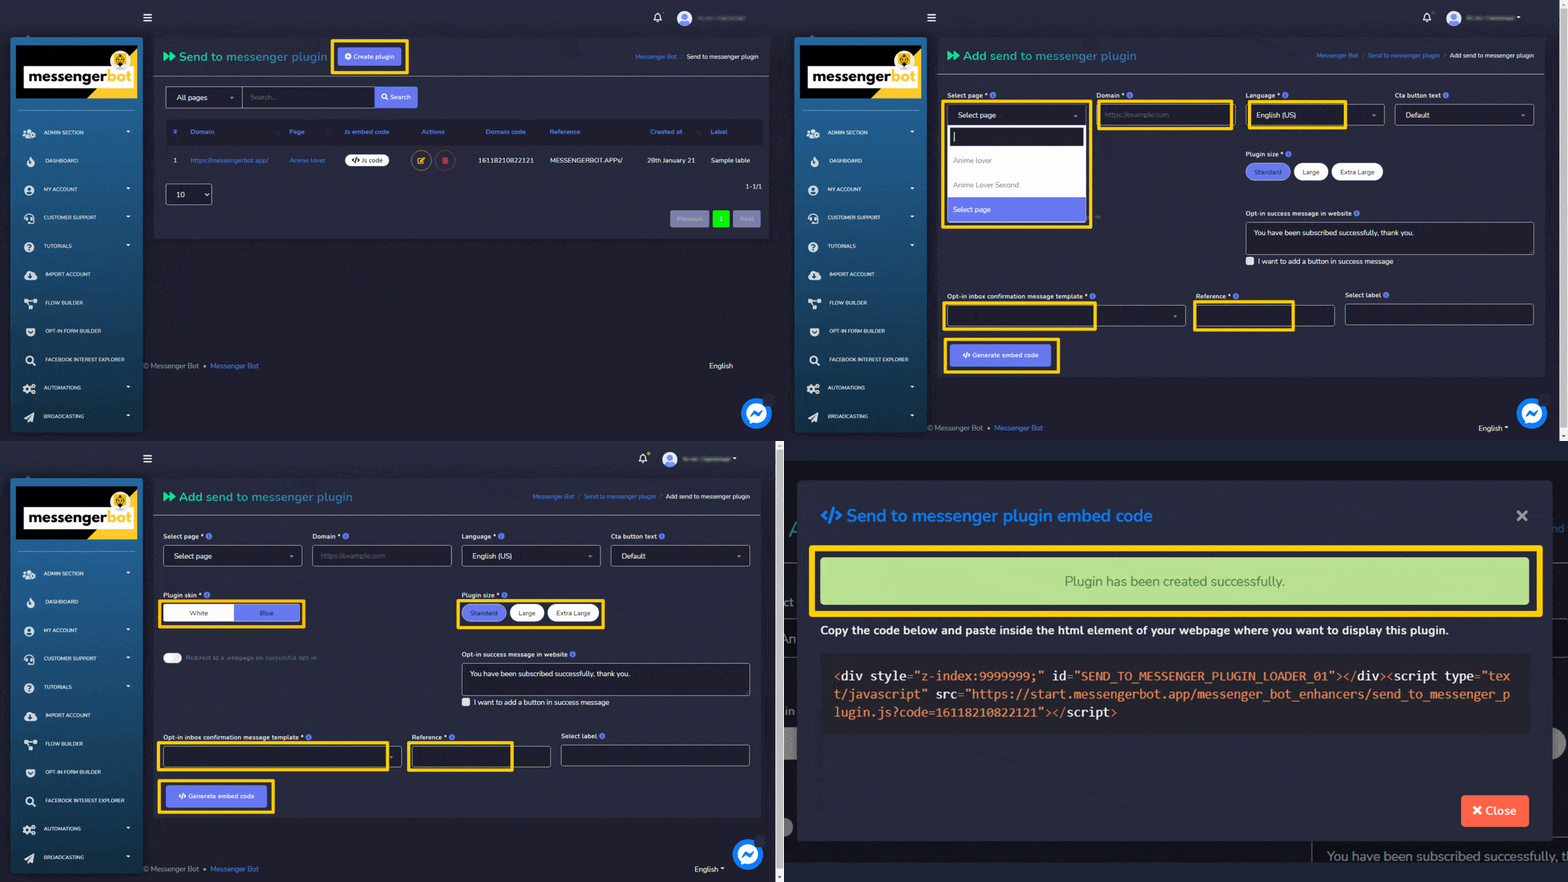
Send to messenger
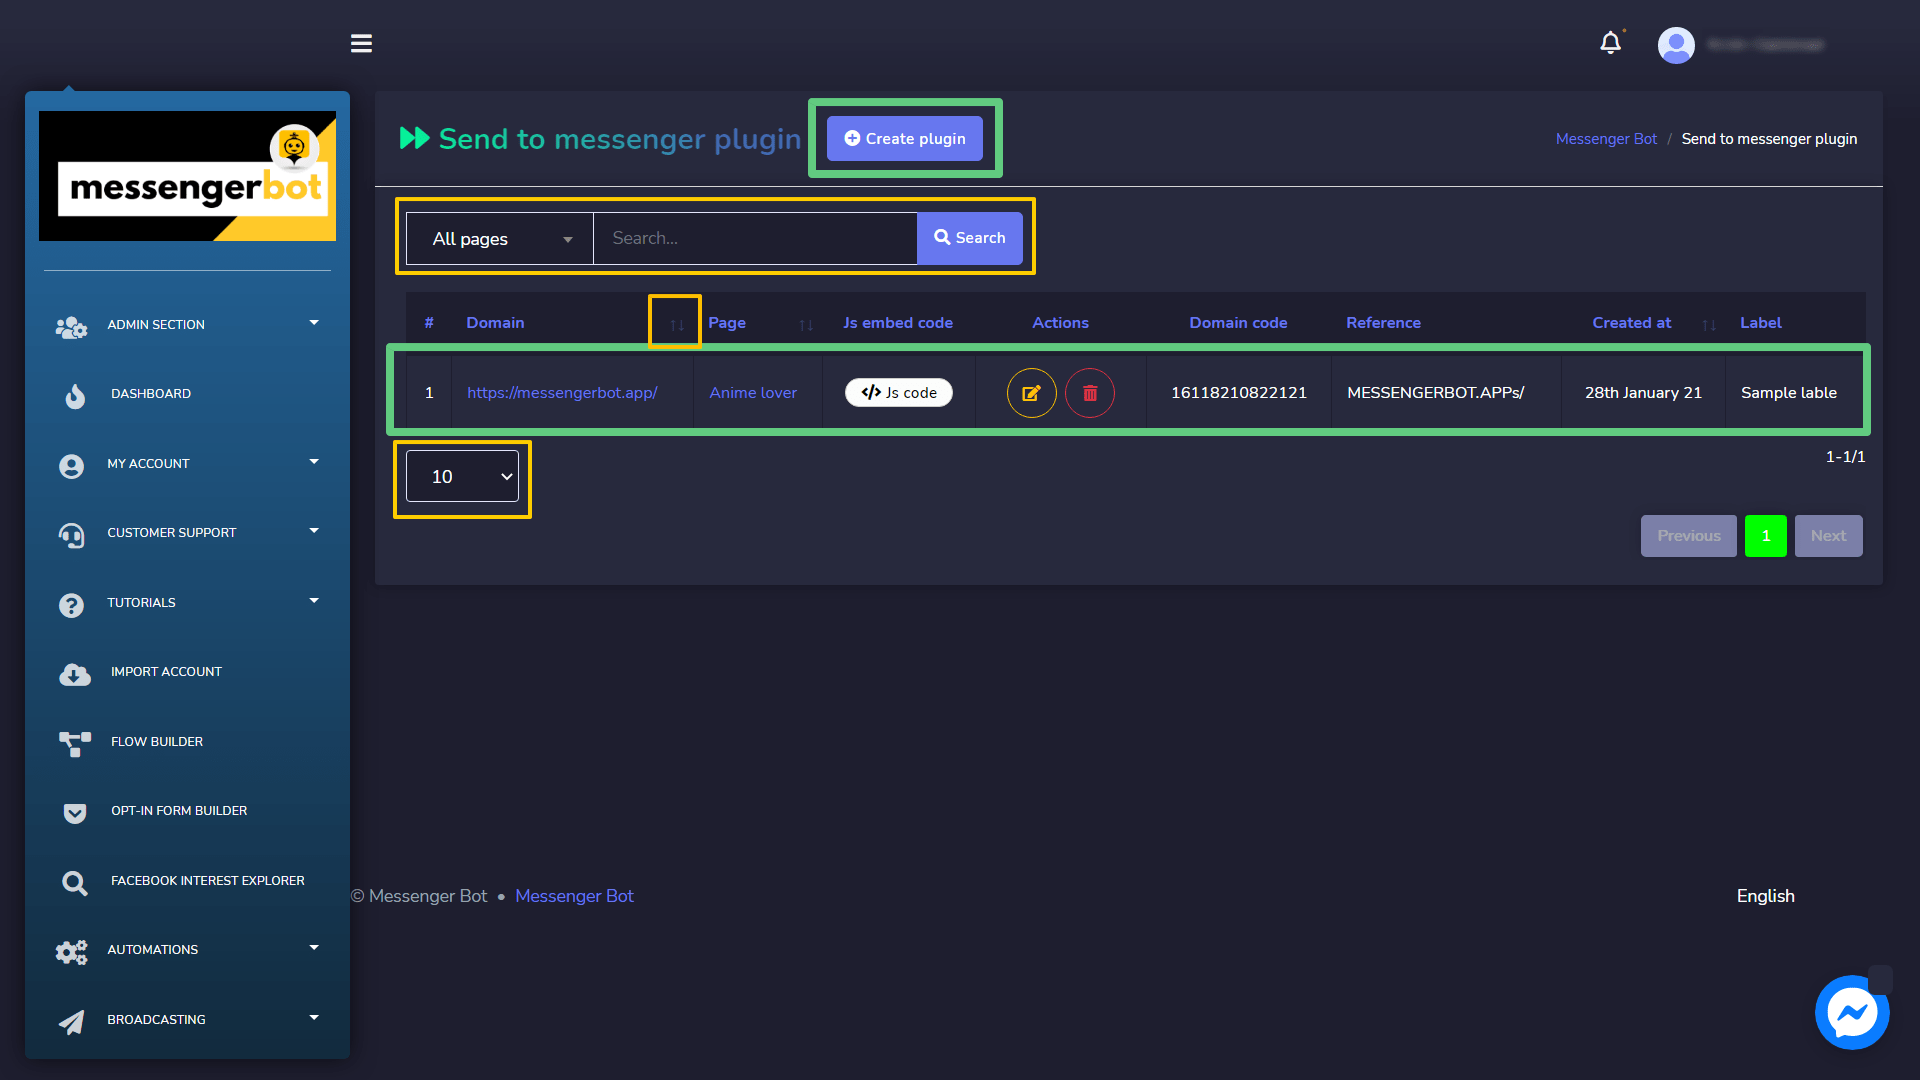
Send to messenger plugin screen consists of a list of domains, you can search for a specific domain by using the search bar. You can adjust the number of domains to be viewed per page. You can also arrange them in either ascending or descending order by selecting the arrows from the header.
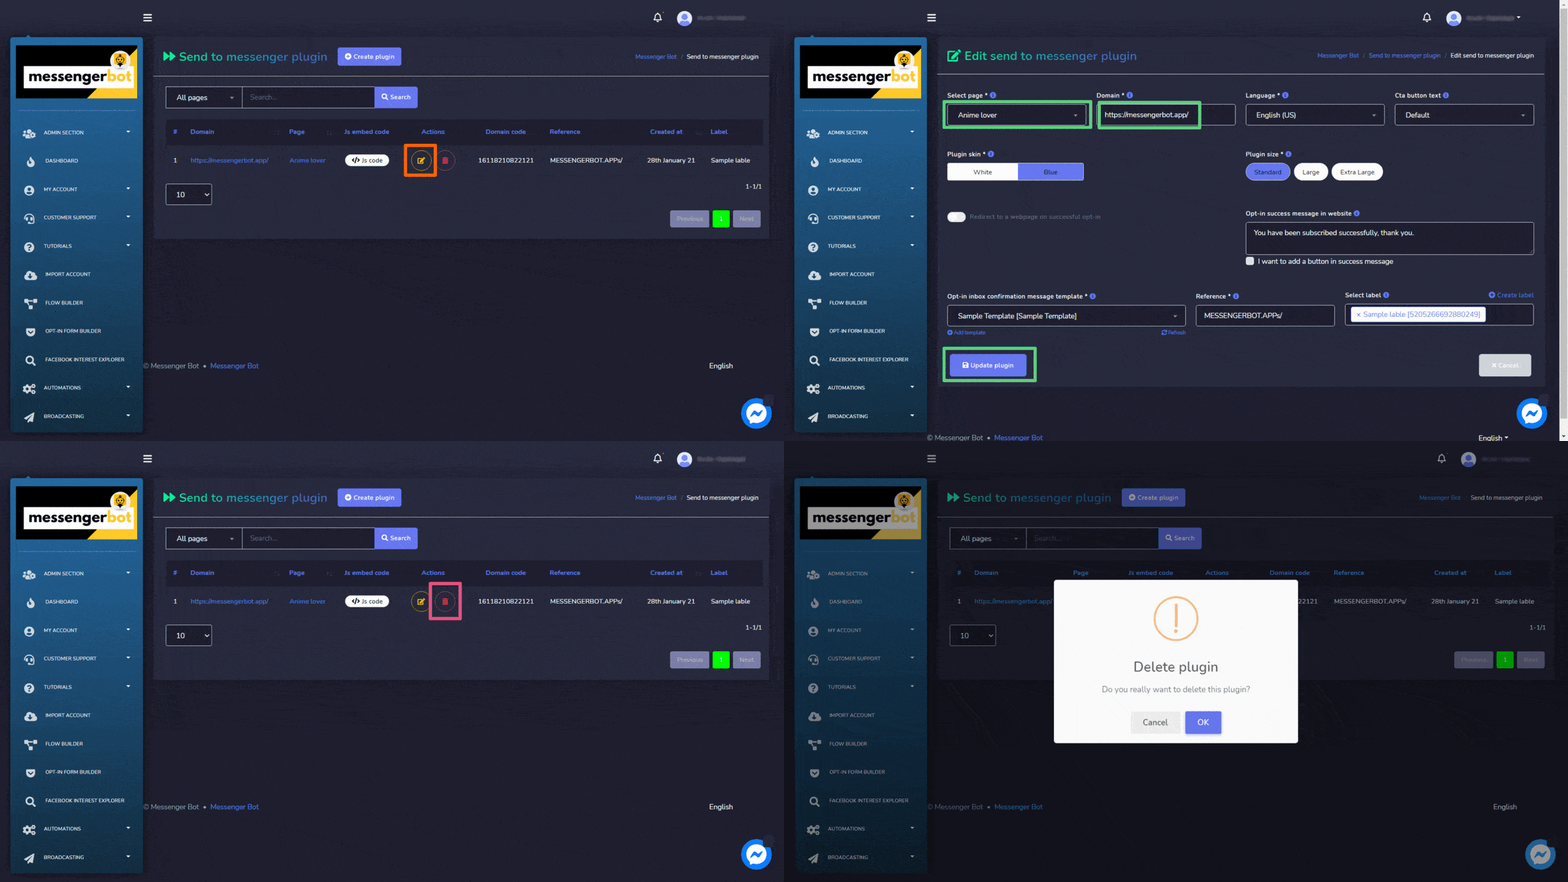
Following actions can be performed from the send to messenger plugin view:
- Edit the plugin: Edit messenger plugin and select Update plugin.
- Delete the plugin
Create plugin
You can create a plugin by following the steps given below:
- Select
 from the top right of the screen.
 - Select the page for which you want to add the plugin.
- Provide the domain.
- Select the language and Cta button text option.
- Select the Plugin skin, turn it to either white or blue.
- Select the Plugin size.
- Select an opt-in inbox confirmation message template, reference, and label.
- Select Generate embed code option to create the send to messenger plugin.
M.me link
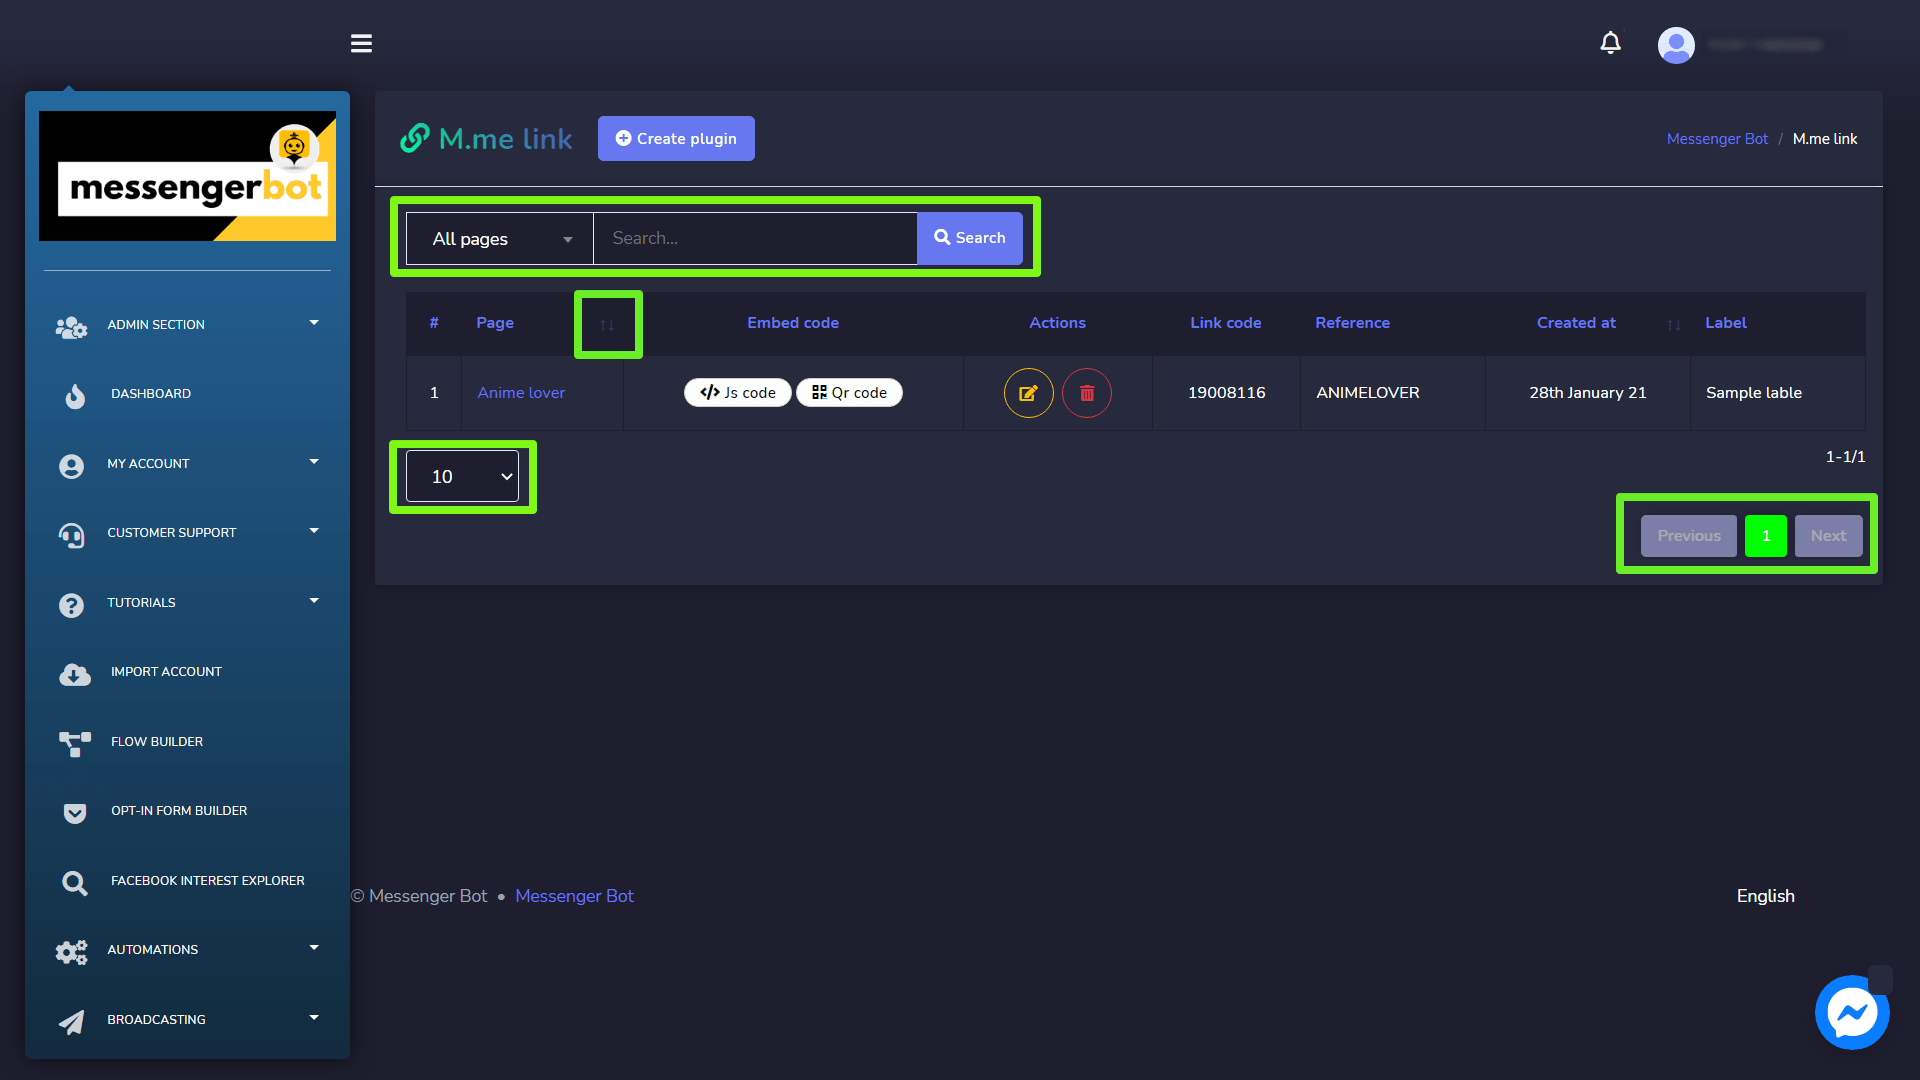
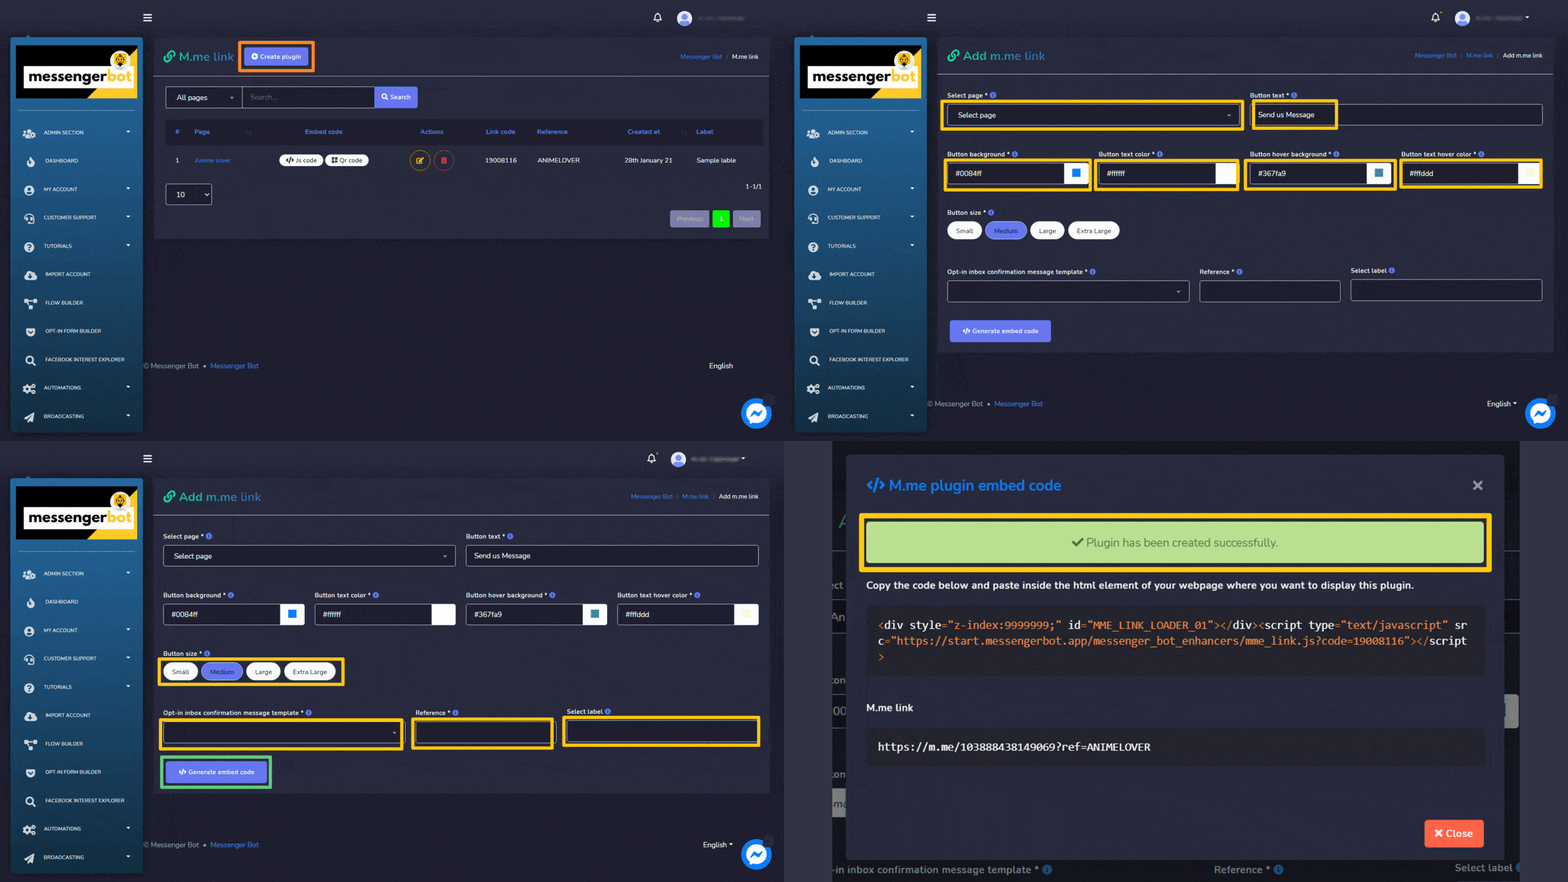
M.me link screen consists of a list of pages you can search for a specific page by using the search bar. You can adjust the number of pages to be viewed per view. You can also arrange them in either ascending or descending order by selecting the arrows from the header.
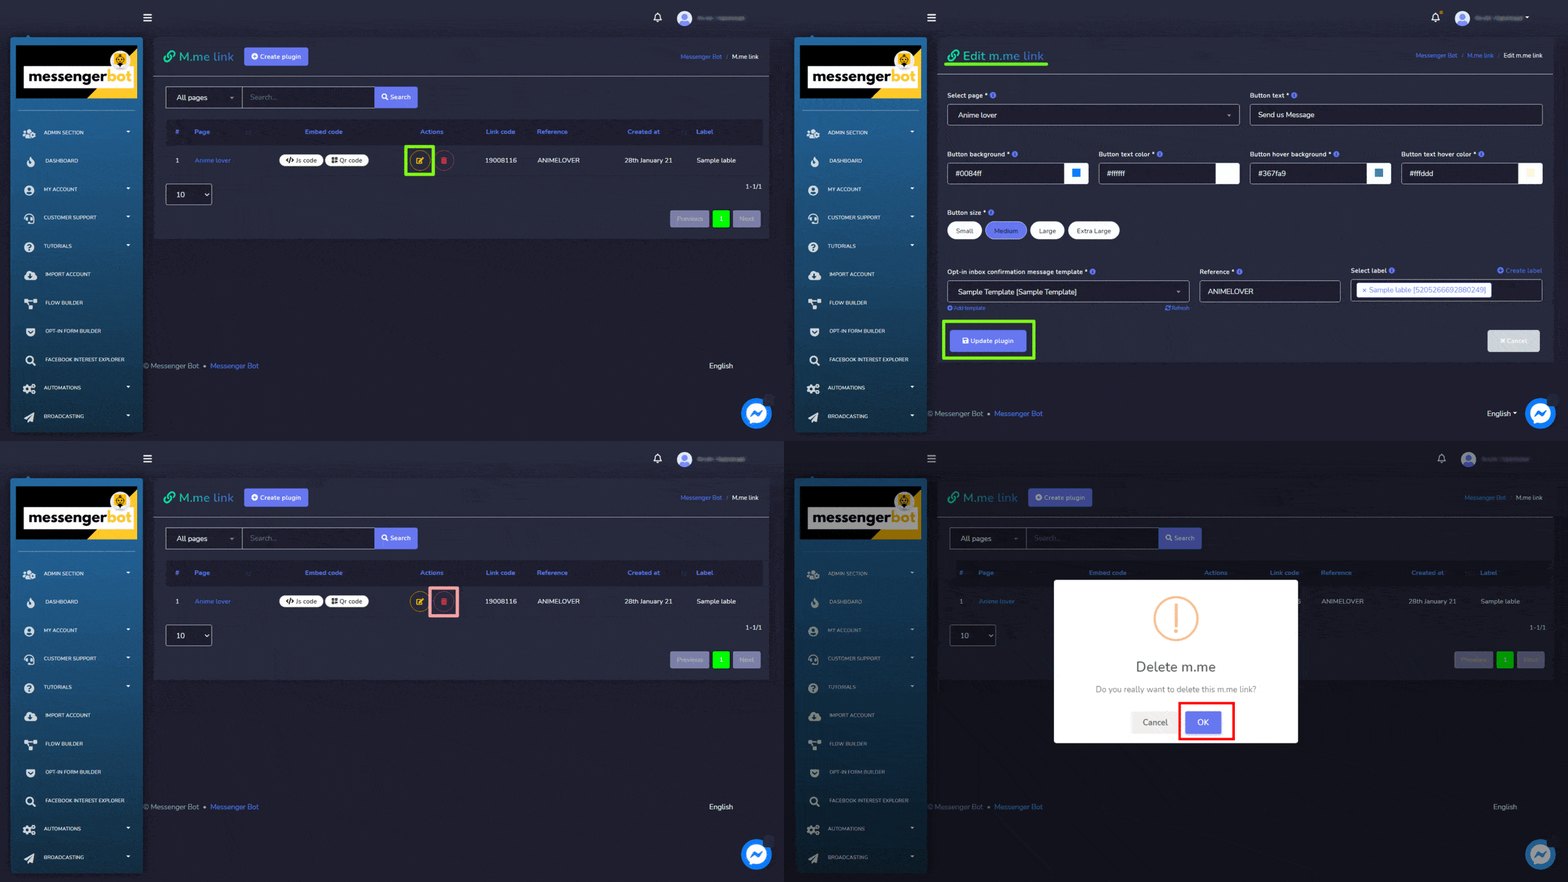
Following actions can be performed from the M.me link view:
- Edit the plugin: Edit M.me link and select Update plugin.
- Delete the plugin
Create plugin
You can create a plugin by following the steps given below:
- Select
 from the top right of the screen.
 - Select the page for which you want to add the plugin.
- Provide the Button text.
- Provide the Button background, text color, hover over color.
- Select the Button size.
- Select an opt-in inbox confirmation message template, reference, and label.
- Select Generate embed code option to create the send to messenger plugin.
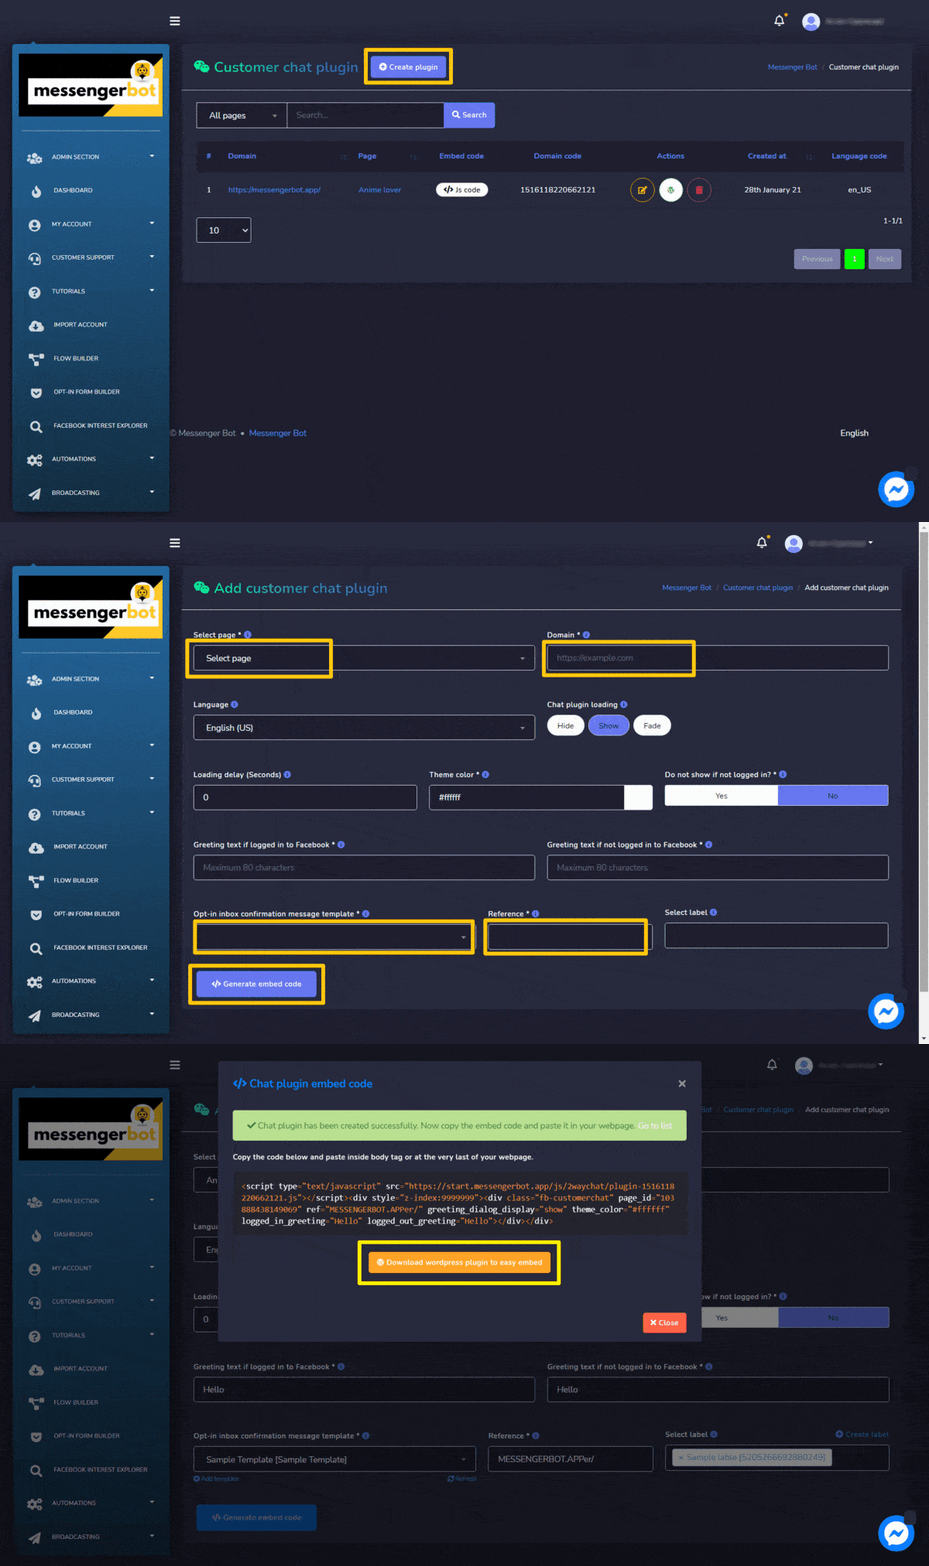
Customer chat plugin
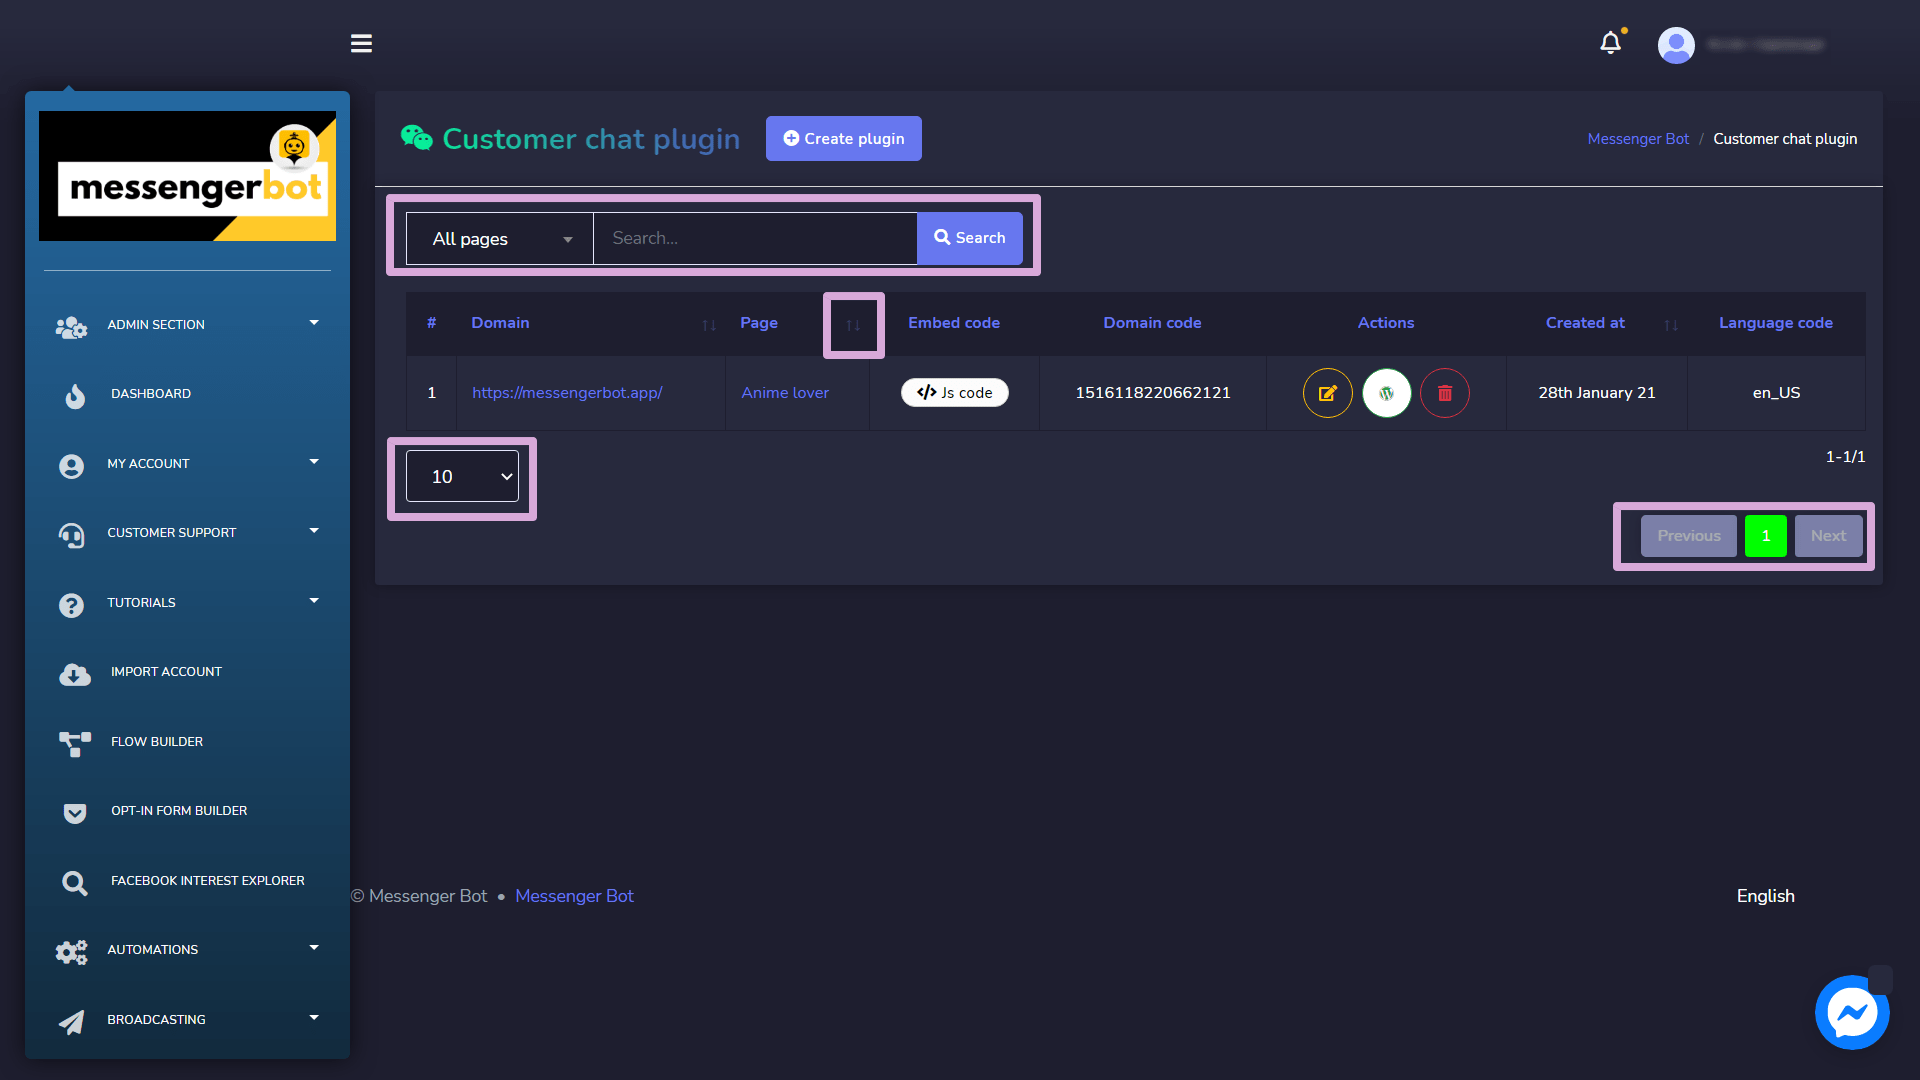
The customer chat plugin screen consists of a list of domains, you can search for a specific domain by using the search bar. You can adjust the number of domains to be viewed per page. You can also arrange them in either ascending or descending order by selecting the arrows from the header.
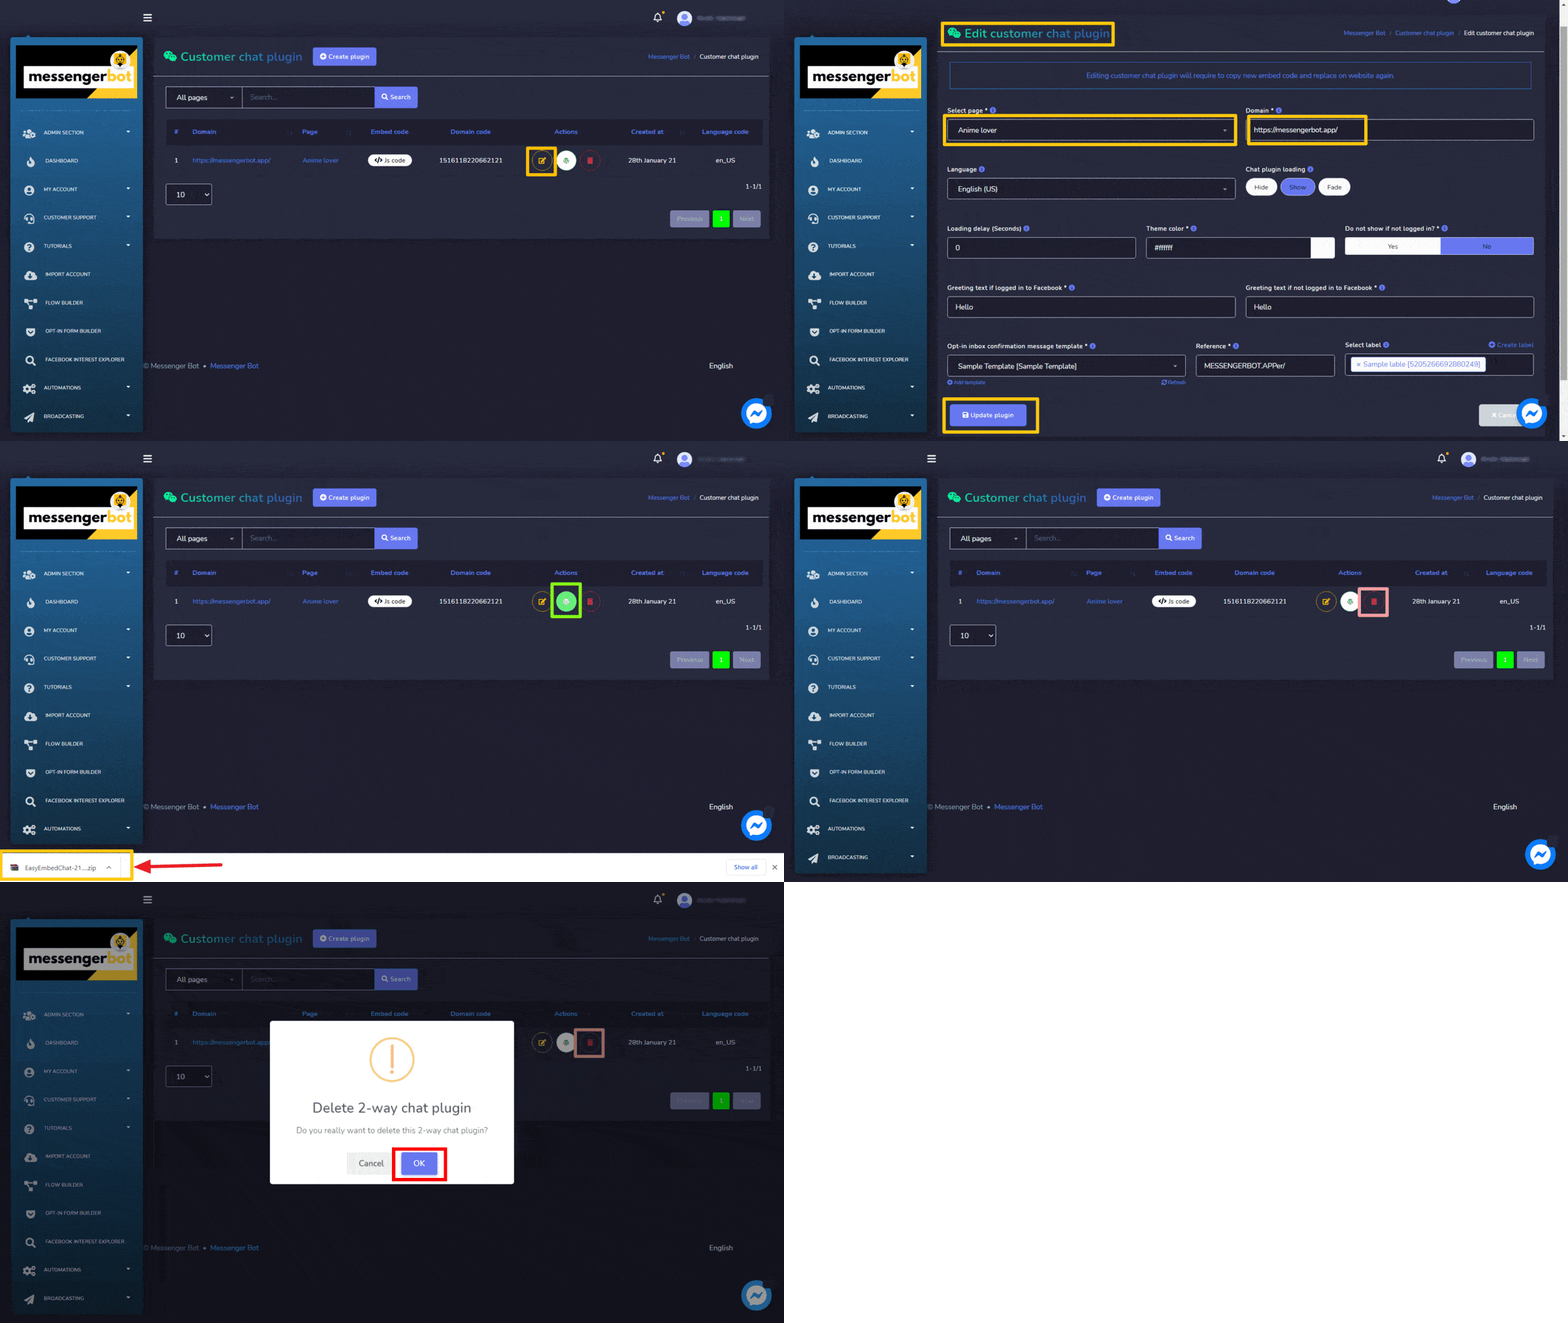
- Edit the plugin: Edit customer chat plugin and select Update plugin.
- Download WordPress plugin: Download the WordPress plugin by selecting
 .
. - Delete the plugin
Create plugin
You can create a plugin by following the steps given below:
- Select
 from the top right of the screen.
 - Select the page for which you want to add the plugin.
- Enter the domain to be added in the domain
- Select the language and chat plugin loading
- Provide the Delay.
- Provide the theme color.
- Select an opt-in inbox confirmation message template, reference, and label.
- Select Generate embed code option to create the customer chat plugin.
Saved templates
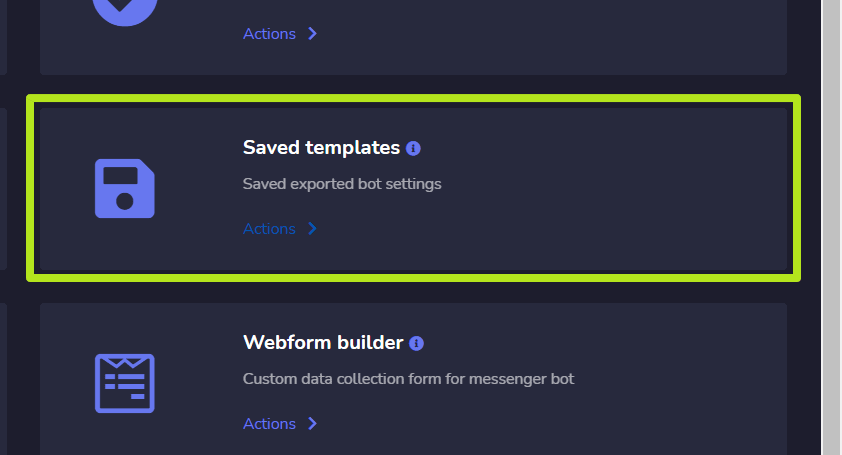
To access the post-back manager settings section, select Saved templates, then select Actions from Messenger Bot screen.
The saved templates screen consists of a list of templates, you can search for a specific template by using the search bar. You can adjust the number of templates to be viewed per page. You can also arrange them in either ascending or descending order by selecting the arrows from the header. Select the page filter to narrow down your search.
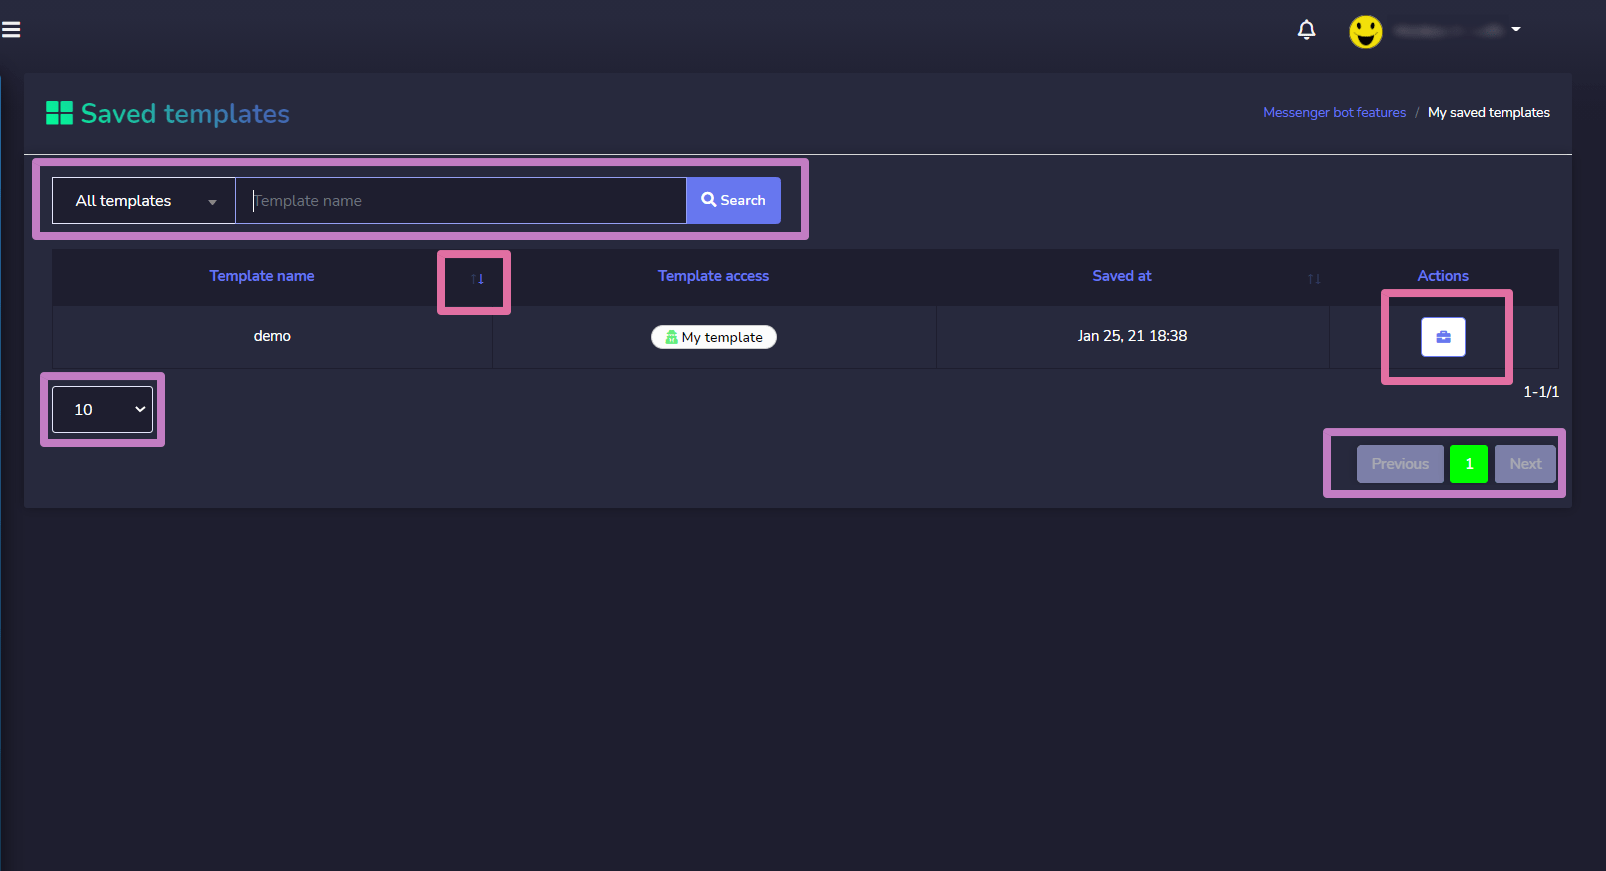
- View the template by selecting
 .
. - Download the template files by selecting
 .
. - Edit the template
- Delete the template

