How To Integrate Zapier With Messenger Bot Using Webhook – Email by Zapier
Follow this process to make your own integration with this third-party application.
The Webhooks by Zapier trigger supports sending more than a single trigger event per webhook request. You can send an array of properly formed JSON objects and will trigger the Zapier once for each object in the array. It triggers the actions 3 times – once for every object in the array.
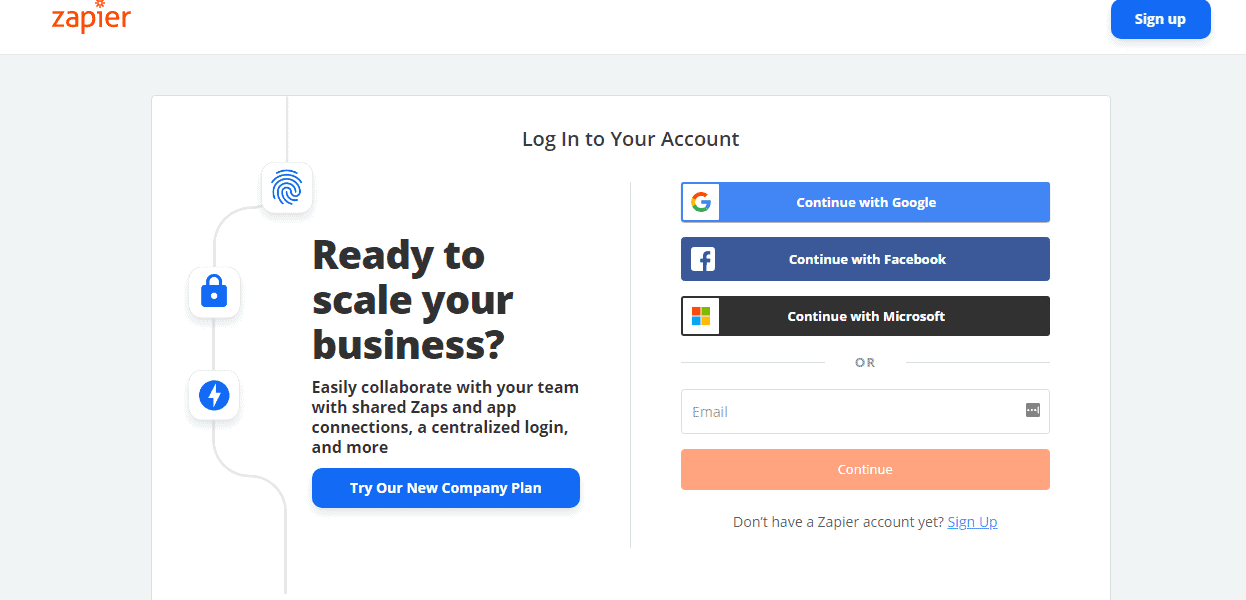
First, Log In to your Zapier account. If you don’t have Zapier make an account to use its features to integrate Webhook to Messenger Bot.
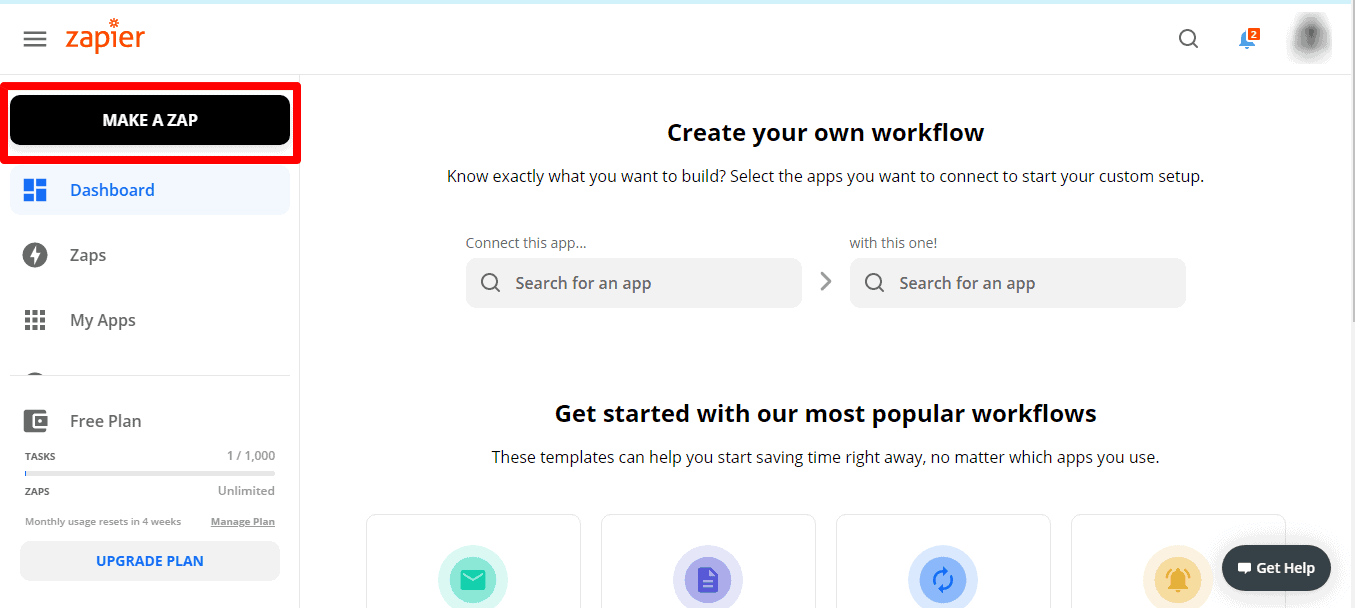
Then, click the Make a Zap. To make your first Zapier.
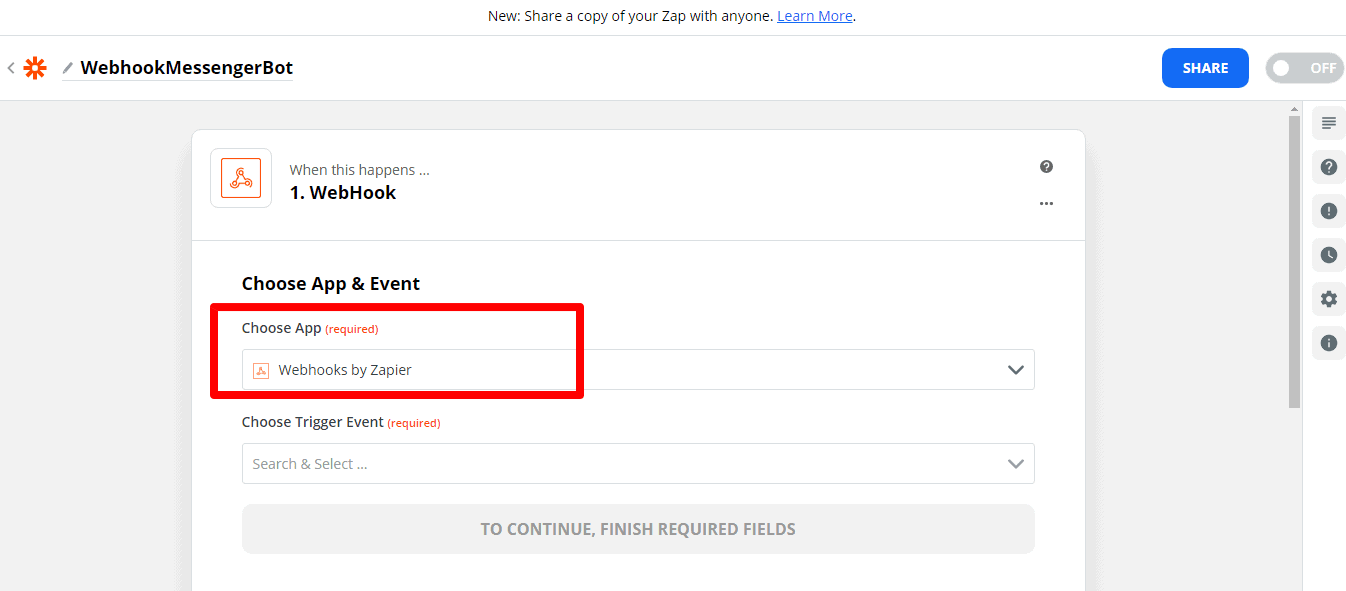
Provide a Name for your Zap. In your Zap, click “1. When this happens” and renames it to whichever name you want. and Choose App & Event. You can see below that lots of Apps to choose from Zapier. Then, search for what app you like to use. Let’s choose Webhooks, and select Webhooks by Zapier.
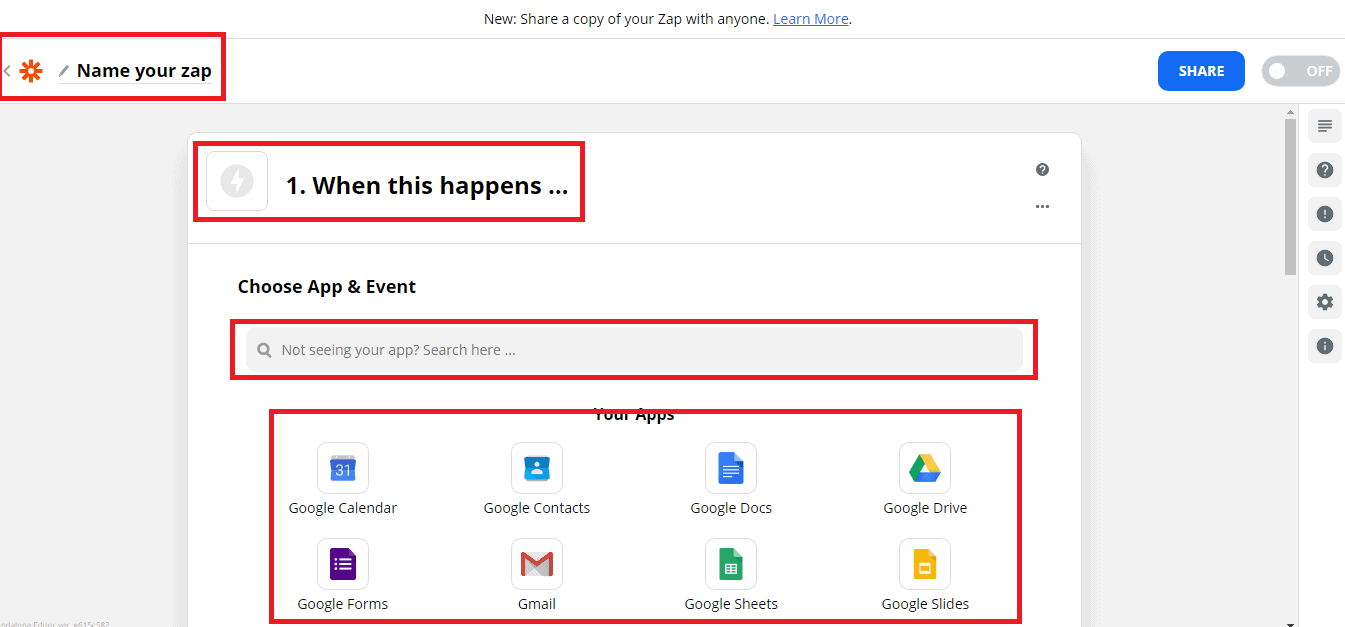
Choose Webhooks by Zapier As a Trigger App For Messenger Bot.
Click the Choose Trigger Event dropdown menu and select your webhook type.
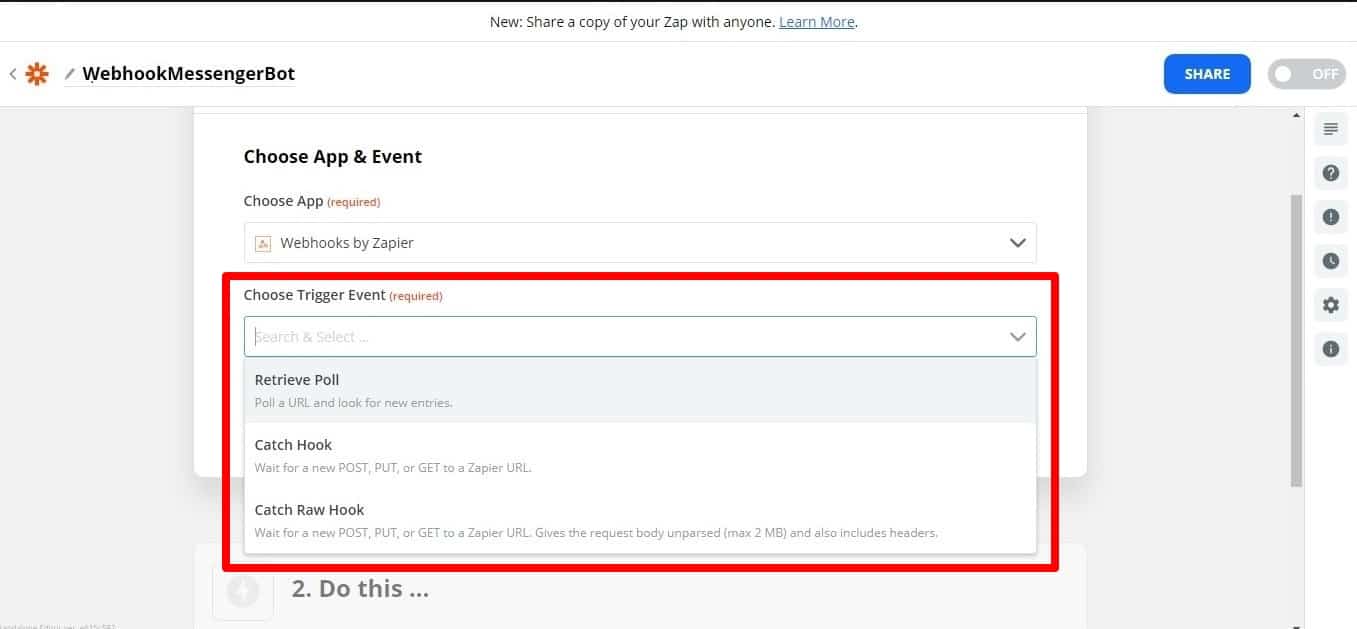
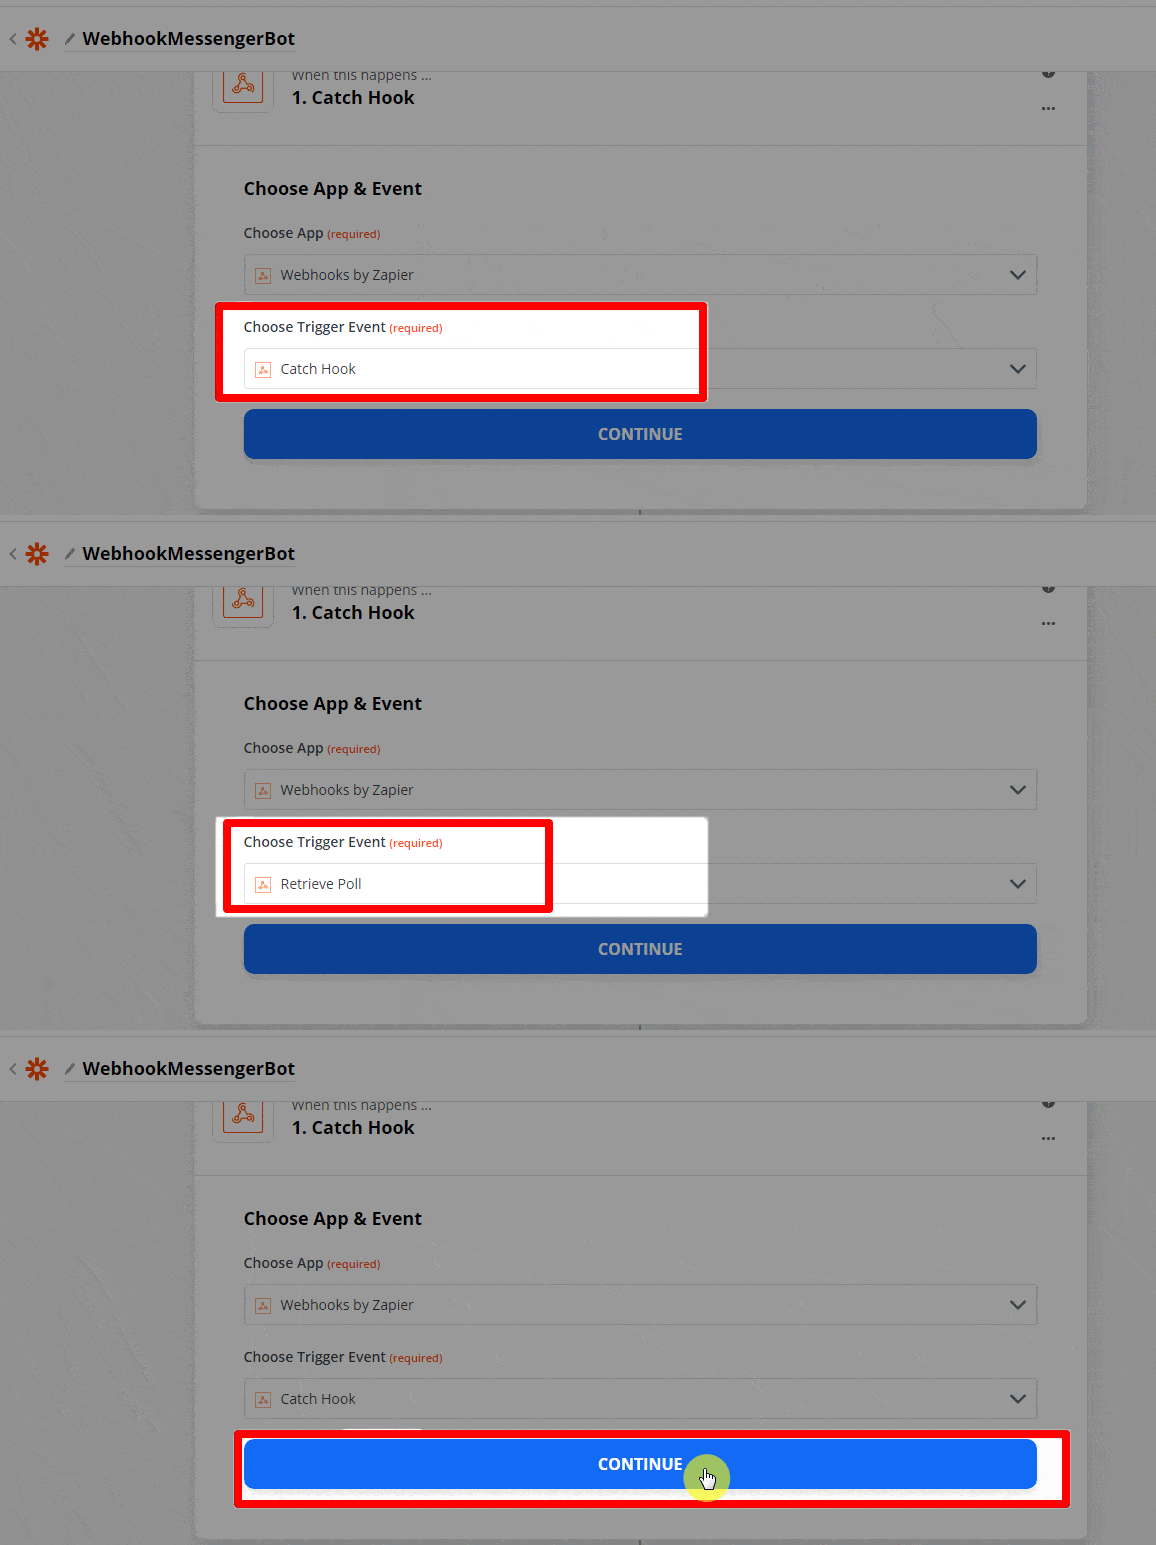
For most webhooks, the Catch Hook trigger will be the best one to use. Catch hooks work by giving you a unique URL that you can then make requests to. If you want Zapier to make a GET request of an external URL to check for new entries, use a Retrieve Poll webhook trigger. But, now let’s choose Catch Hook. Then, click Continue.
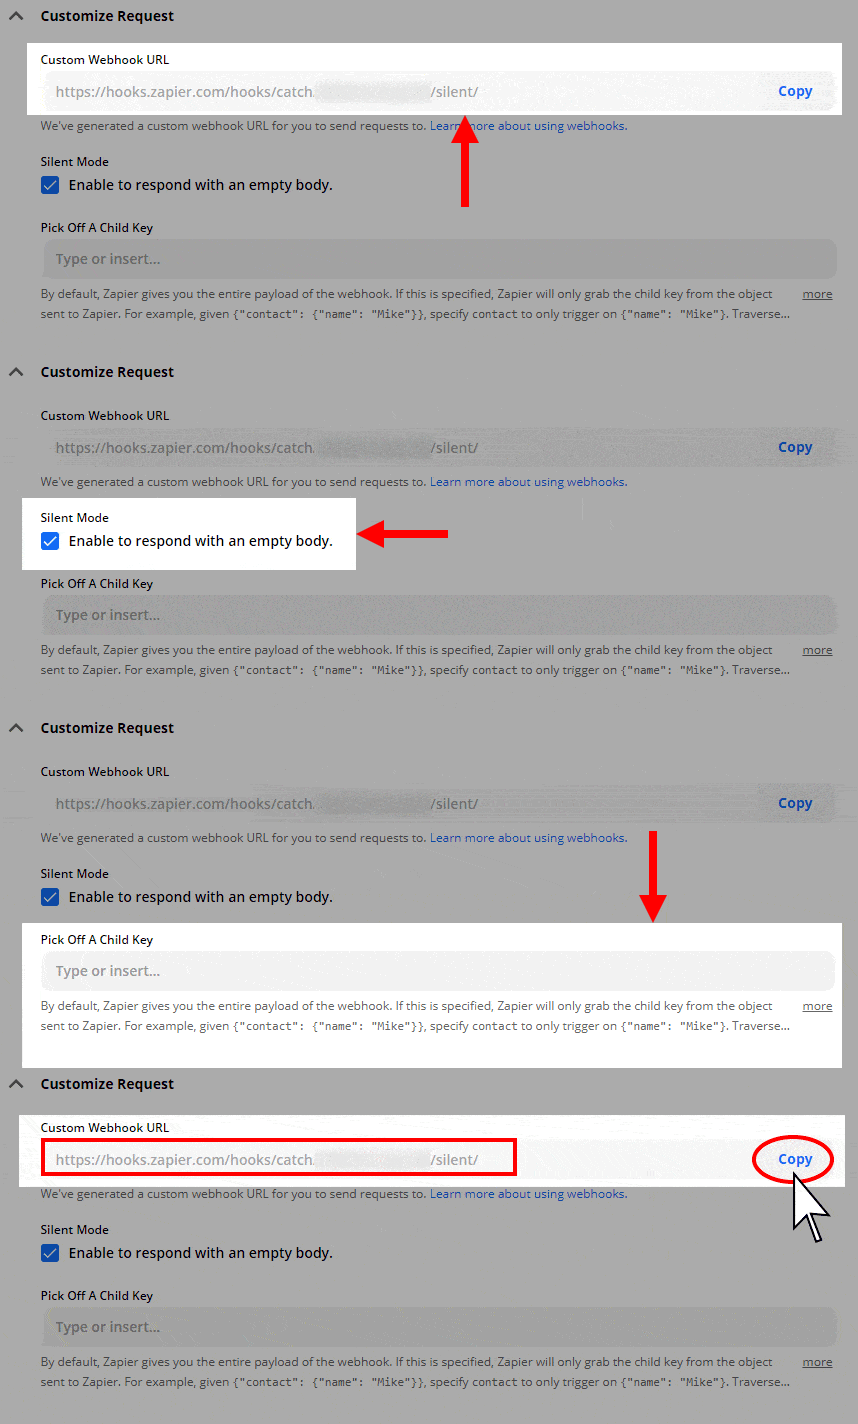
Next, you’ll be given the URL for your webhook and can customize your webhook.
Silent mode: some apps want to receive an empty body. If you don’t want to receive content in the response from Zapier, select the Silent mode checkbox.
Pick off child key: This is the specific key you want Zapier to use from the request you make to the webhook URL. This is useful if you only care about getting a subset of the data that is sent to the webhook.
Copy the webhook URL and paste it to Messenger Bot JSON API Connector features.
Open the app you want to connect to Zapier and find its webhooks settings page. You’ll often find that in your app’s core settings or options page, or inside the options for a specific project or list. Check your app’s help and support documentation if you can’t locate it.
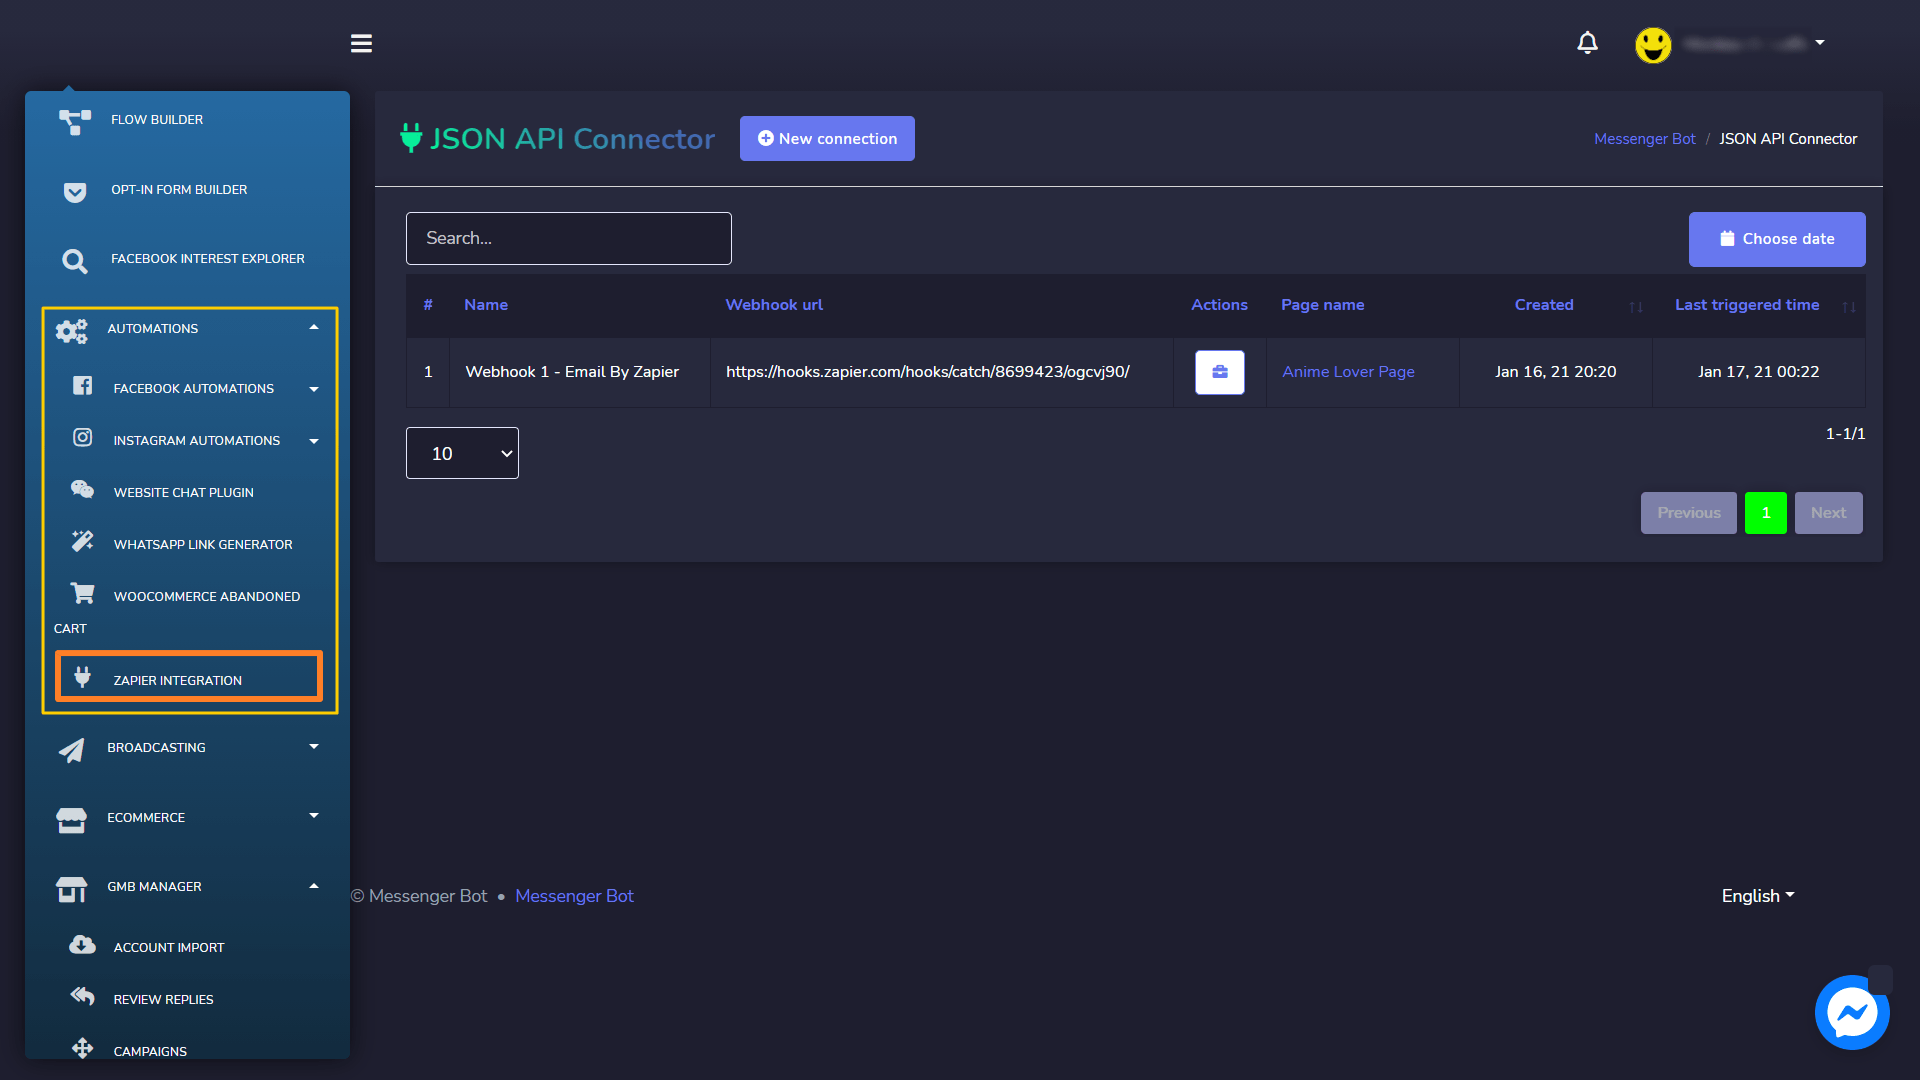
In your Dashboard select Automations and click Zapier Integration. The JSON API Connector will appear immediately.
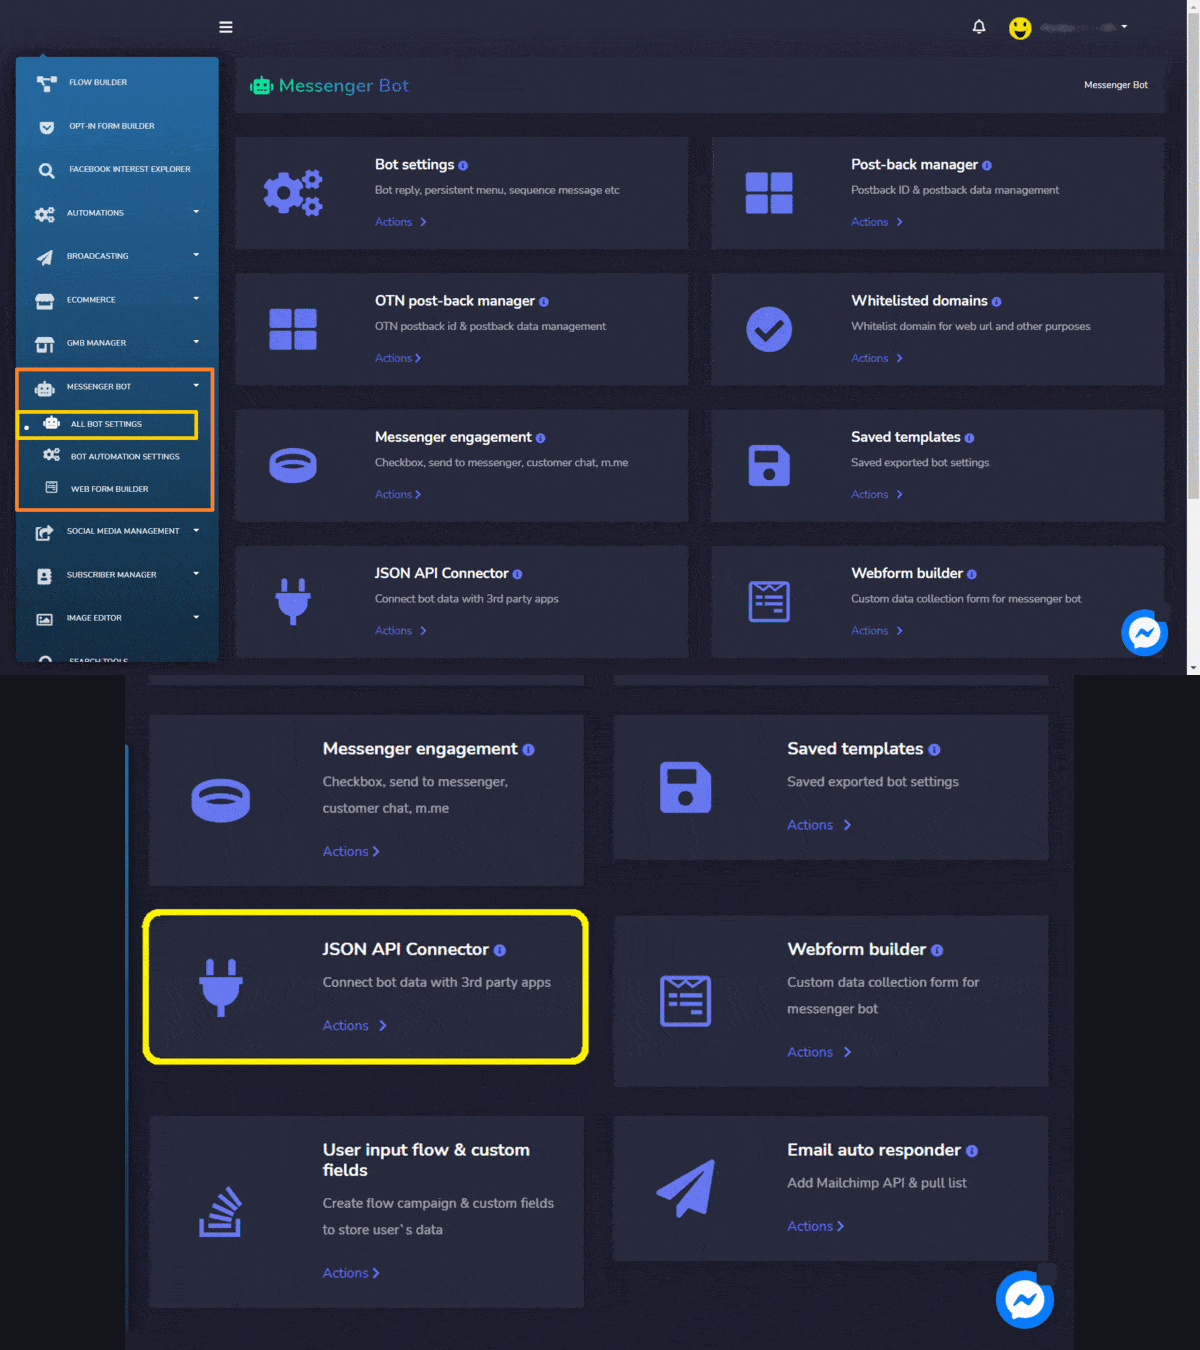
Or in your Dashboard, select Messenger Bot and click All Bot Settings. Choose JSON API Connector and Click Actions.
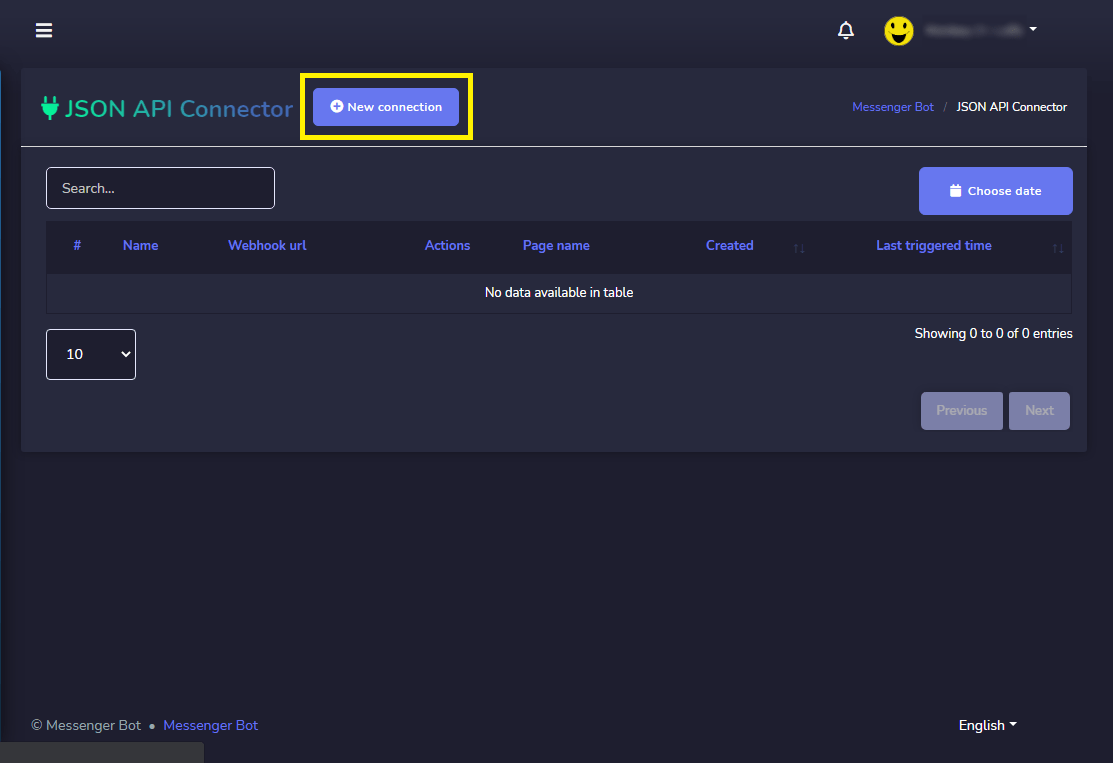
Click, the New Connection.
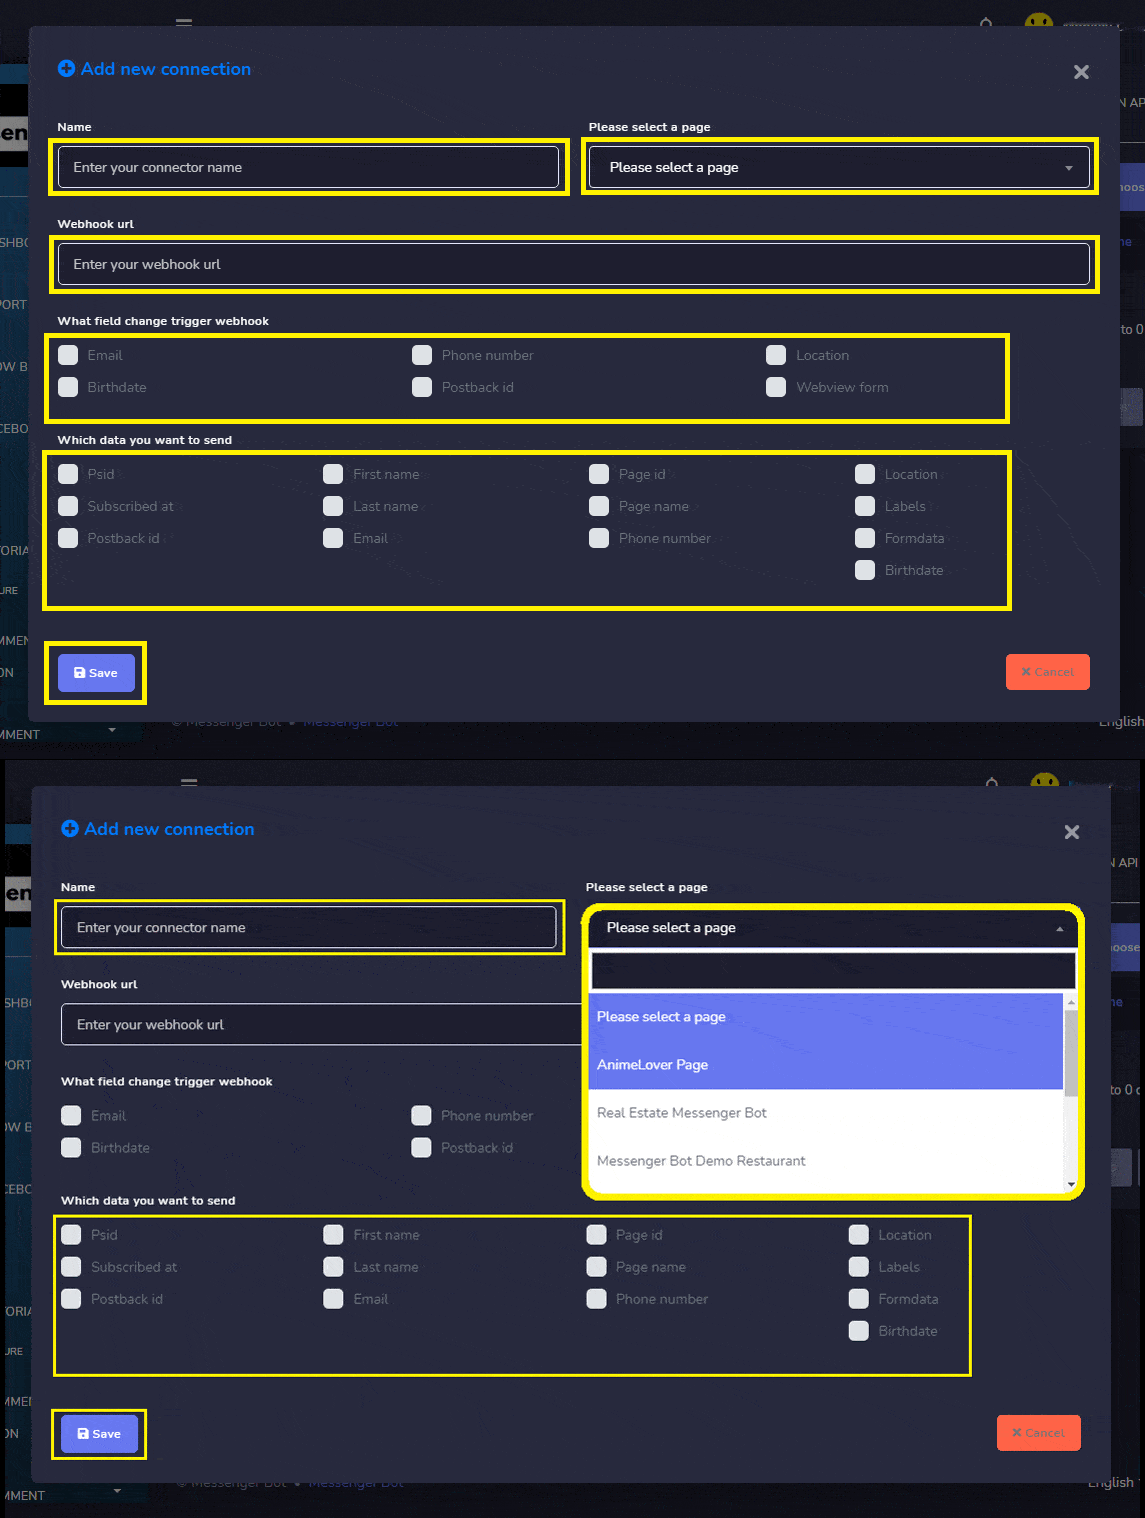
Enter your Connector Name. Then, Select your Page. Put your Webhook URL here, from Zapier. Check what field change trigger webhook. Check, Which data you want to send. Click Save when done.
In your Dashboard, select Messenger Bot and click All Bot Settings. In Messenger Bot Features. Select, Bot Settings, and click Actions.
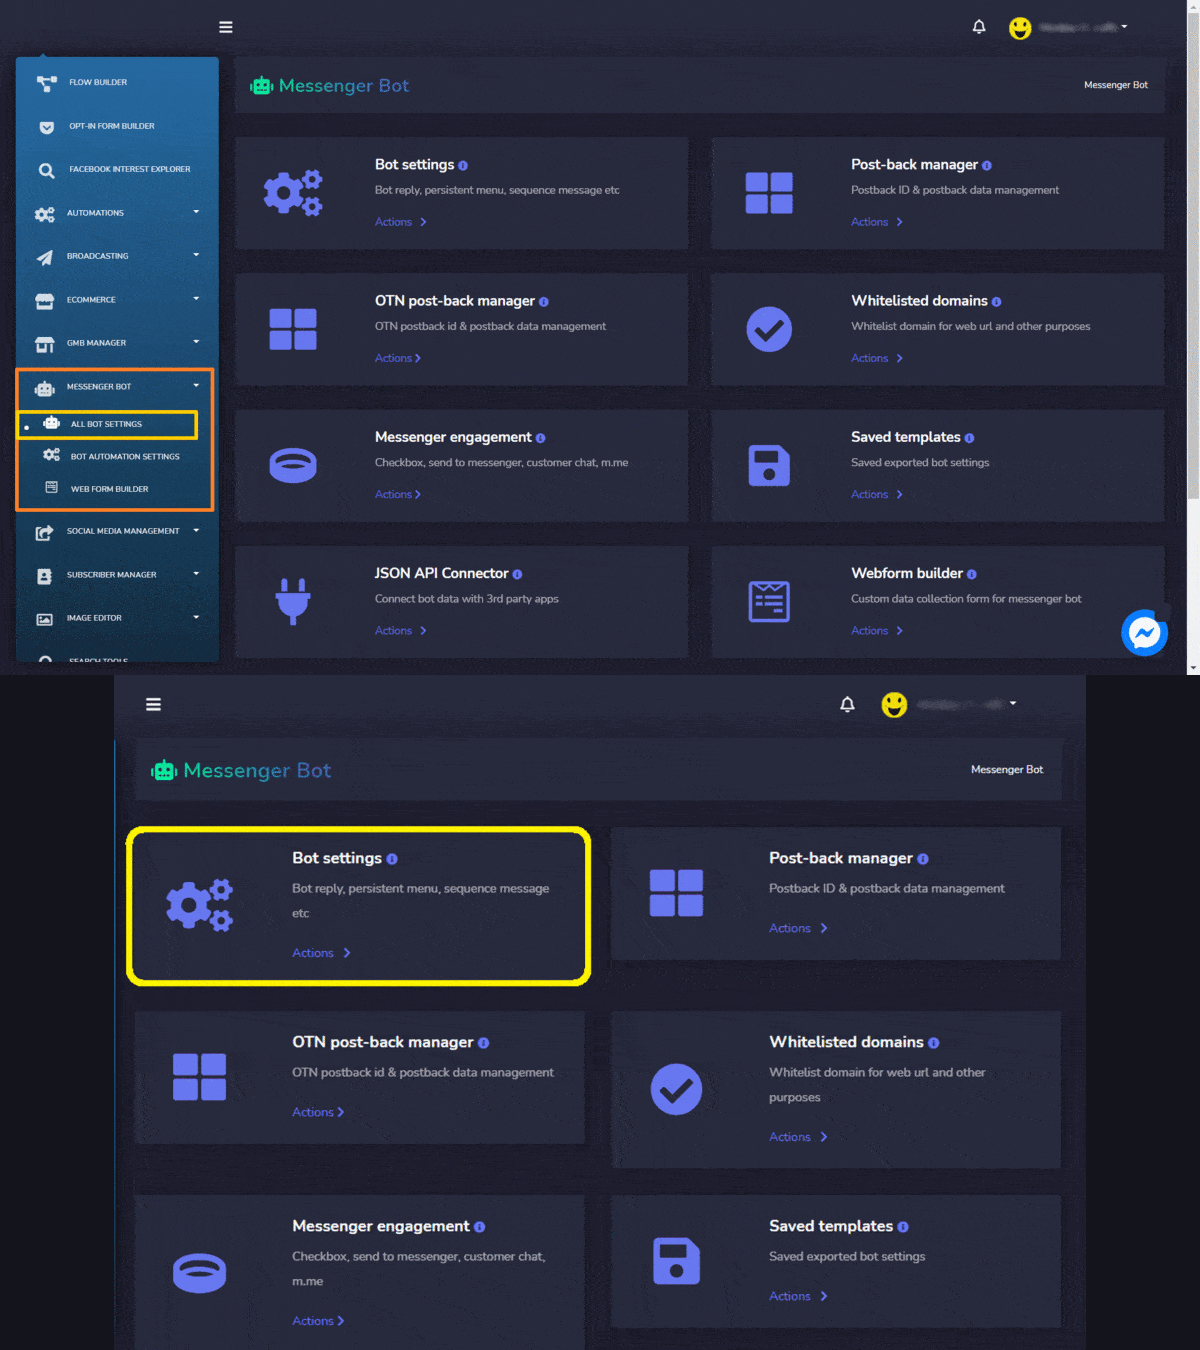
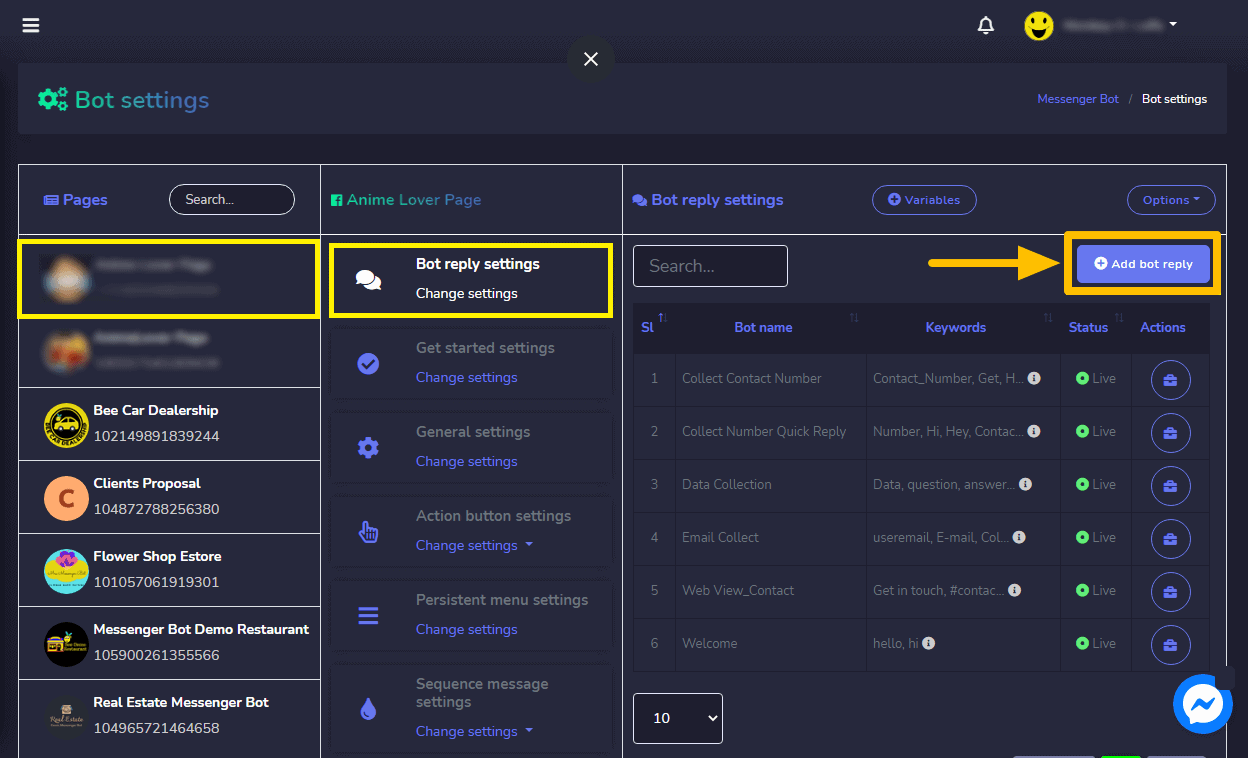
Select your Page, then Bot reply settings, and Click Add Bot Reply.
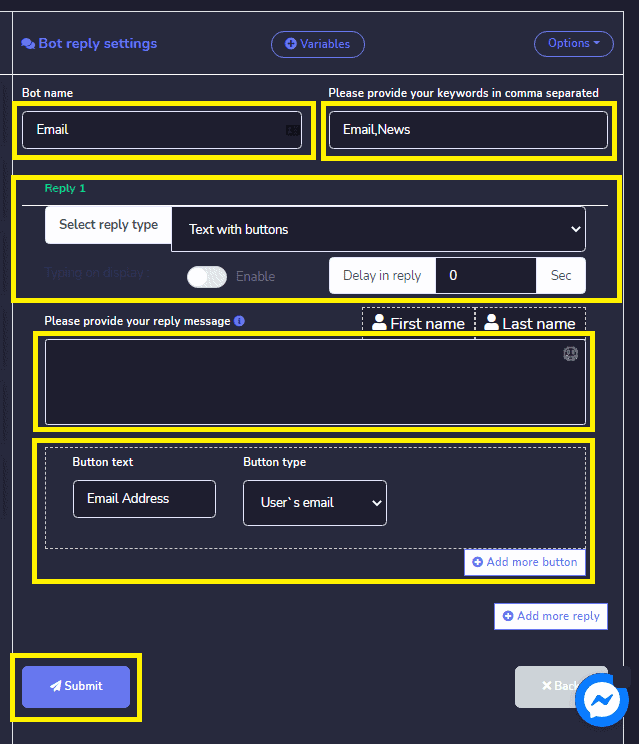
Provide Bot Name and your keywords separated by a comma.
Select your reply type. Choose Text with Buttons. Or any reply type you wanted to perform.
Provide your reply message. Then, choose the Button Type and Name your Button text.
Click Submit when done.
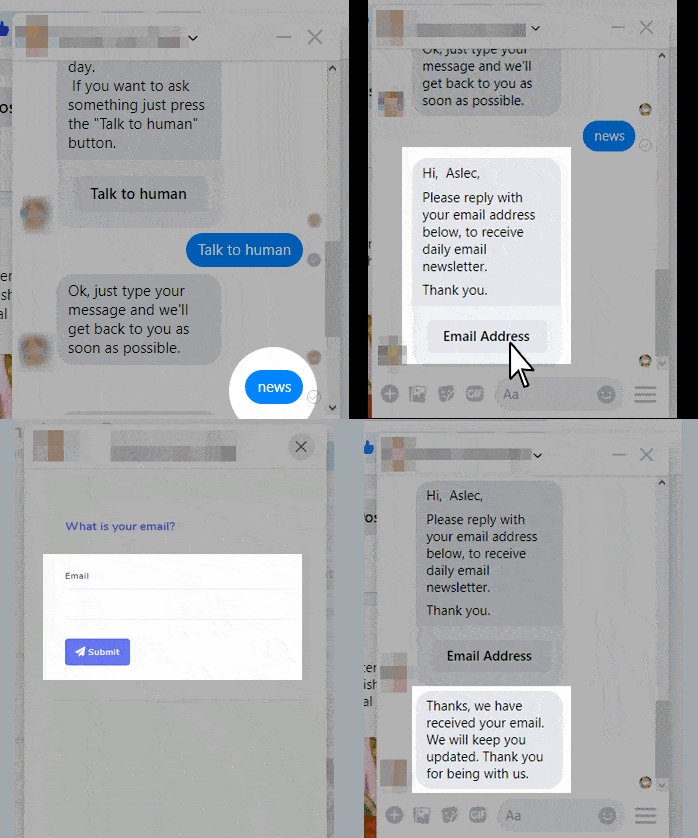
Now, let’s check if the webhook really triggers. Log in to your Facebook Page. And try to message your page news or email. Type News or Email as that was the keyword written in the reply bot. Reply with your “Email Address“. Supply your Email Address. Then, click Submit. The email address was received. Now, check your Zapier if it really triggers.
Webhooks integrations send data to your webhook URL whenever something new is added. So, before going back to Zapier, add something new to your app. Webhooks triggers support sending more than a single trigger event per webhook request. You can send an array of properly formed JSON objects, and Zapier will trigger the Zap once for each object in the array.
Back in Zapier, Click Find Hook. If your hook is found, the step will show it was successful and you can see the data received. This is the data result. Zapier will split out each field from your webhook data so you can then select email addresses, names, project info, and much more in your Zapier action steps. Then, click Continue below your webhook URL.
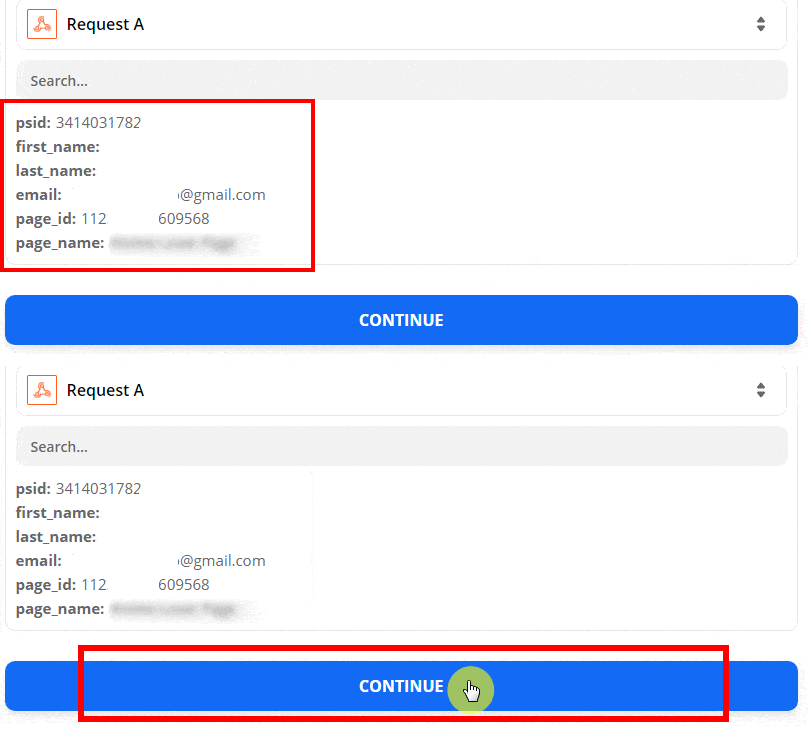
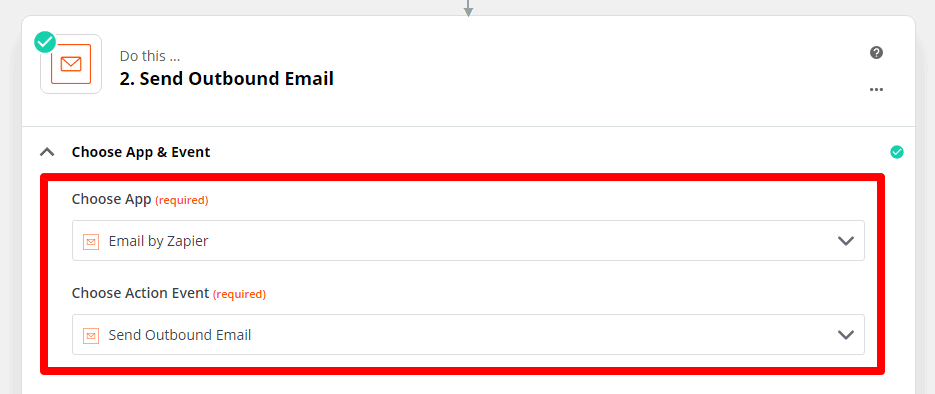
Create Send Outbound Email. Then choose the App and choose an action event.
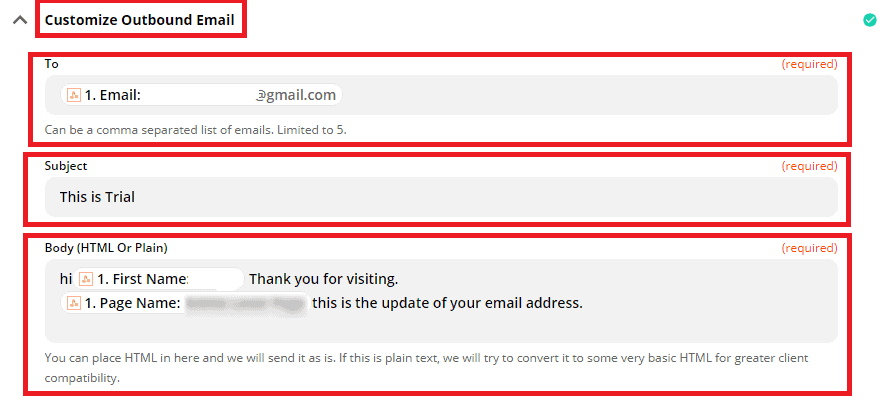
Customize outbound Email. Provide information for sending a reply from your Bot. Like “To whom”. The subject of the Email. Body of the Email.
Click Continue.

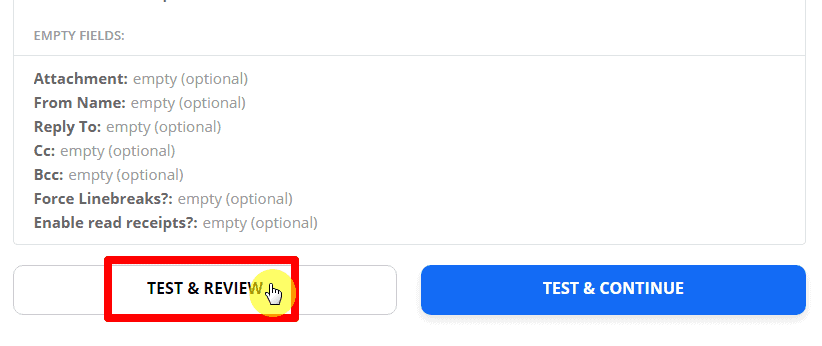
This is the Test Summary by Email with Zapier.
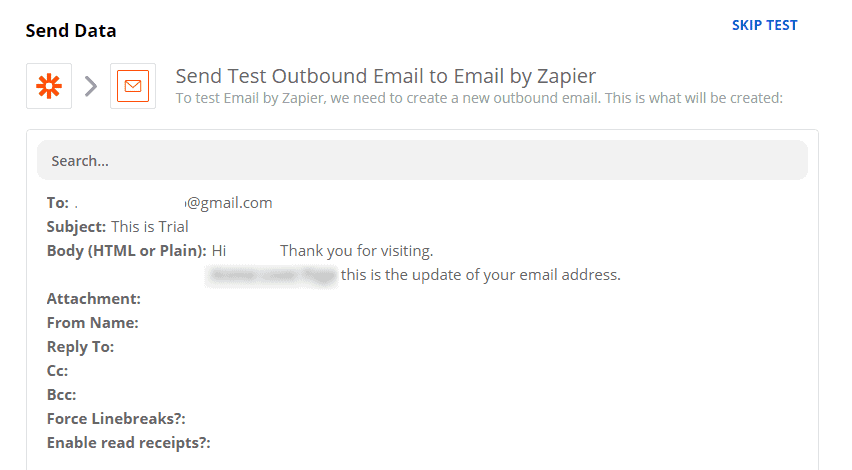
Click, test & review.
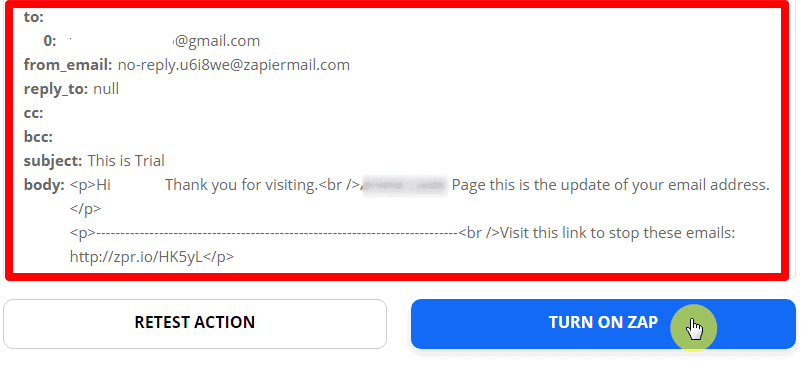
This is the test result. Then, click Turn on Zap.
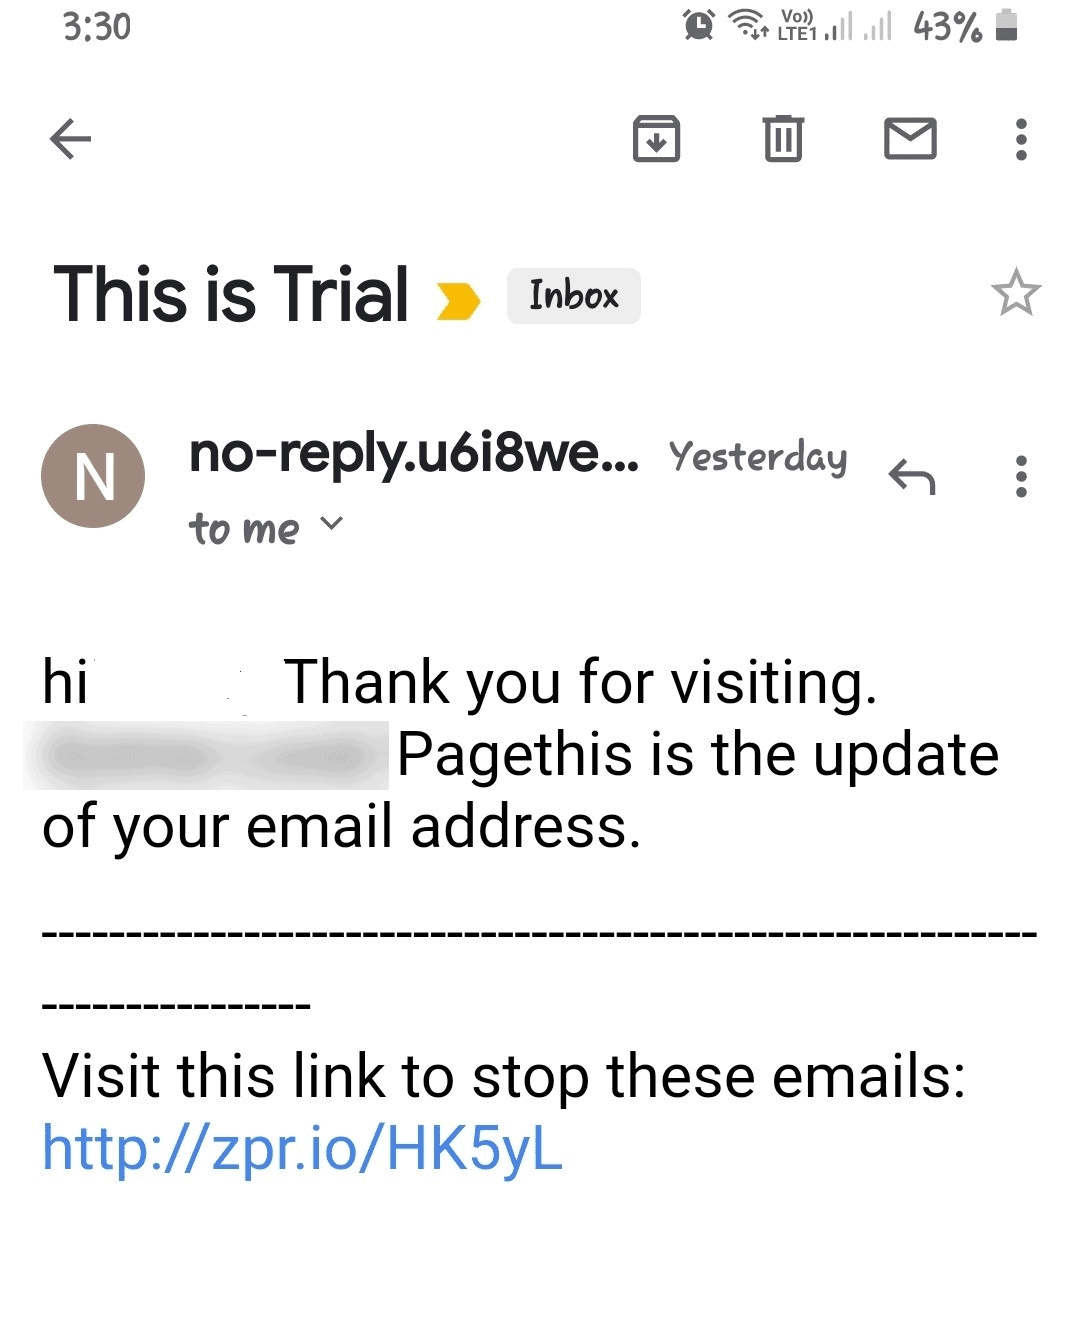
This is the Trial Result sent to one of your subscribers. It was successful and the trigger works with Messenger Bot.
You’re now ready to make your own integration with Zapier. Just follow the step-by-step process in this video.
