Subscriber Manager
Subscriber Manager allows you to get the synchronization of subscribers, view bot subscribers, view labels, and manage the messaging/emailing activities in different contact groups. This view gives a full control messenger subscriber. It allows you to create new contacts and contact groups.
To view this section, navigate to Subscriber Manager from the navigation menu located at the left under Social Media Management section. Tab on Subscriber Manager.

Under Subscriber Manager, we have:
- Bot Subscribers
- Contact Book
- Contact Group
- Google Sheet Integration
- Labels/Tags
- Sync Subscribers
Sync subscribers
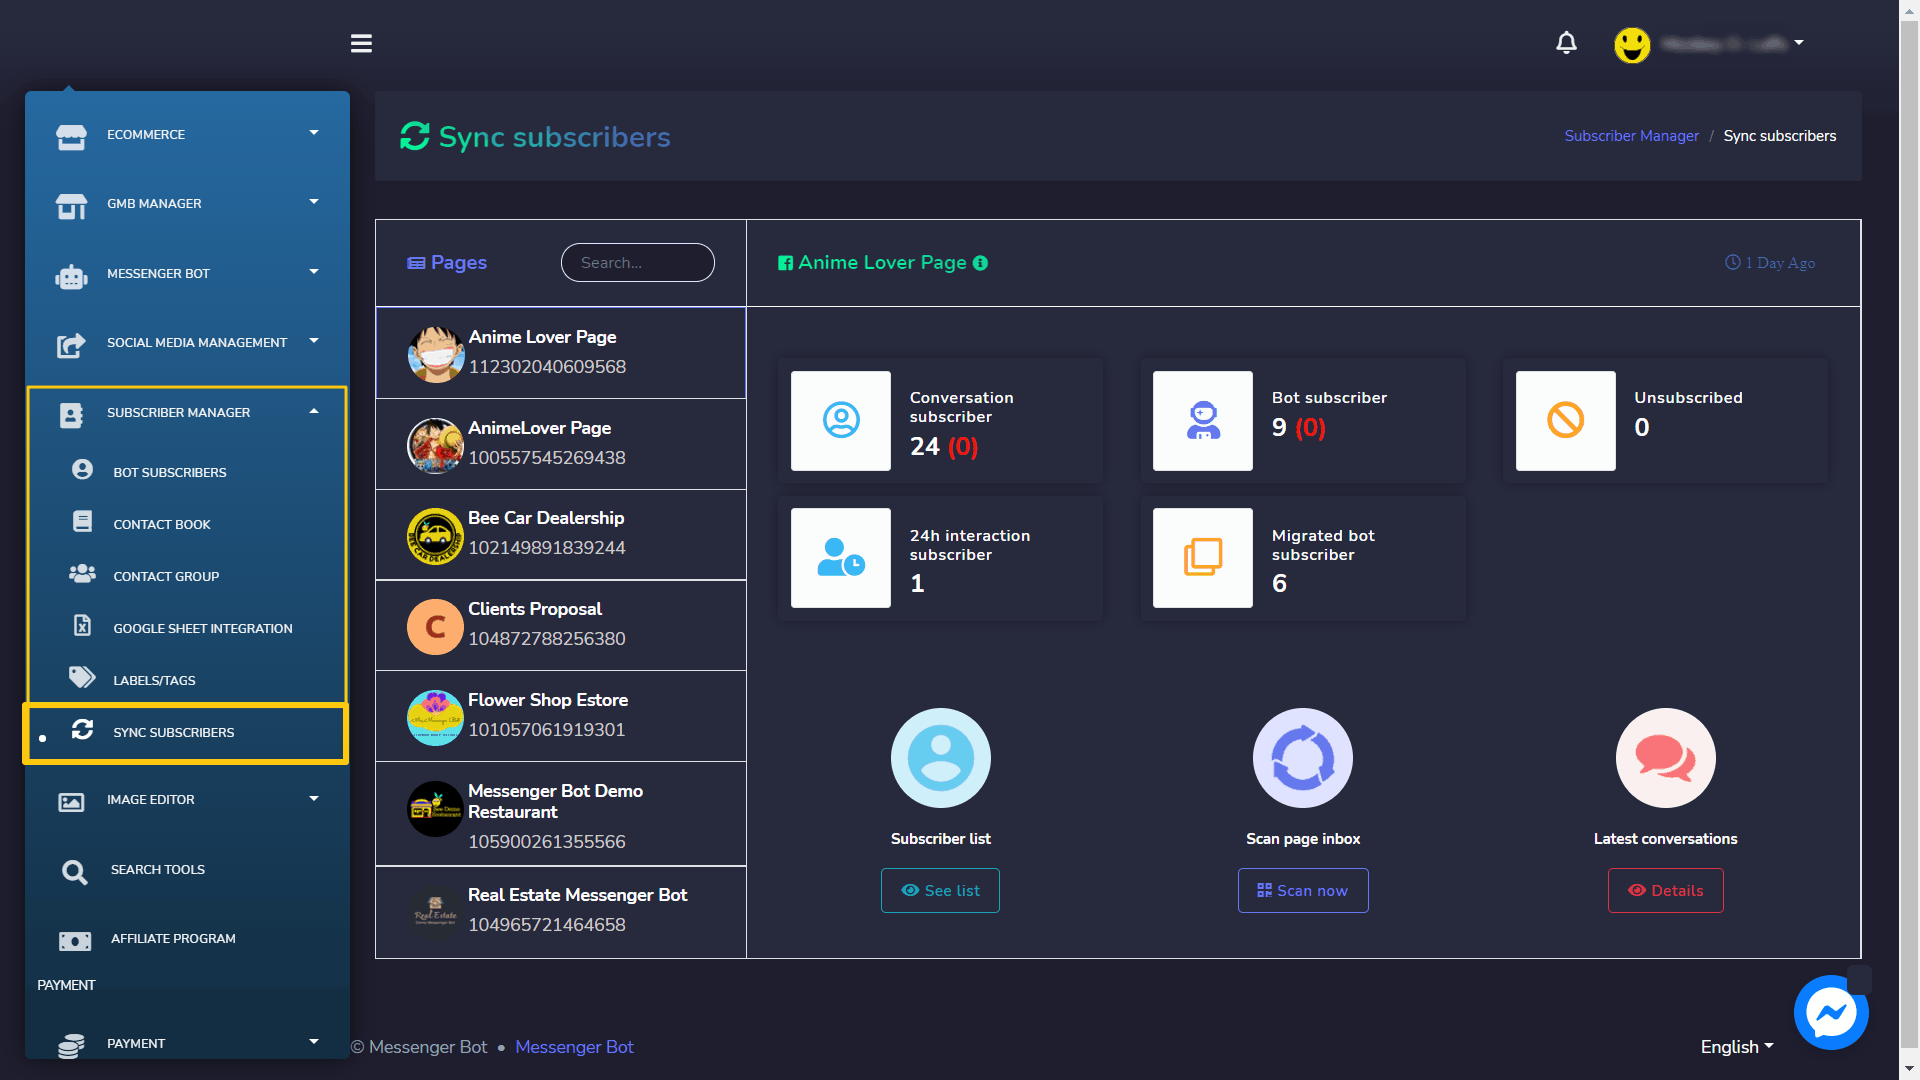
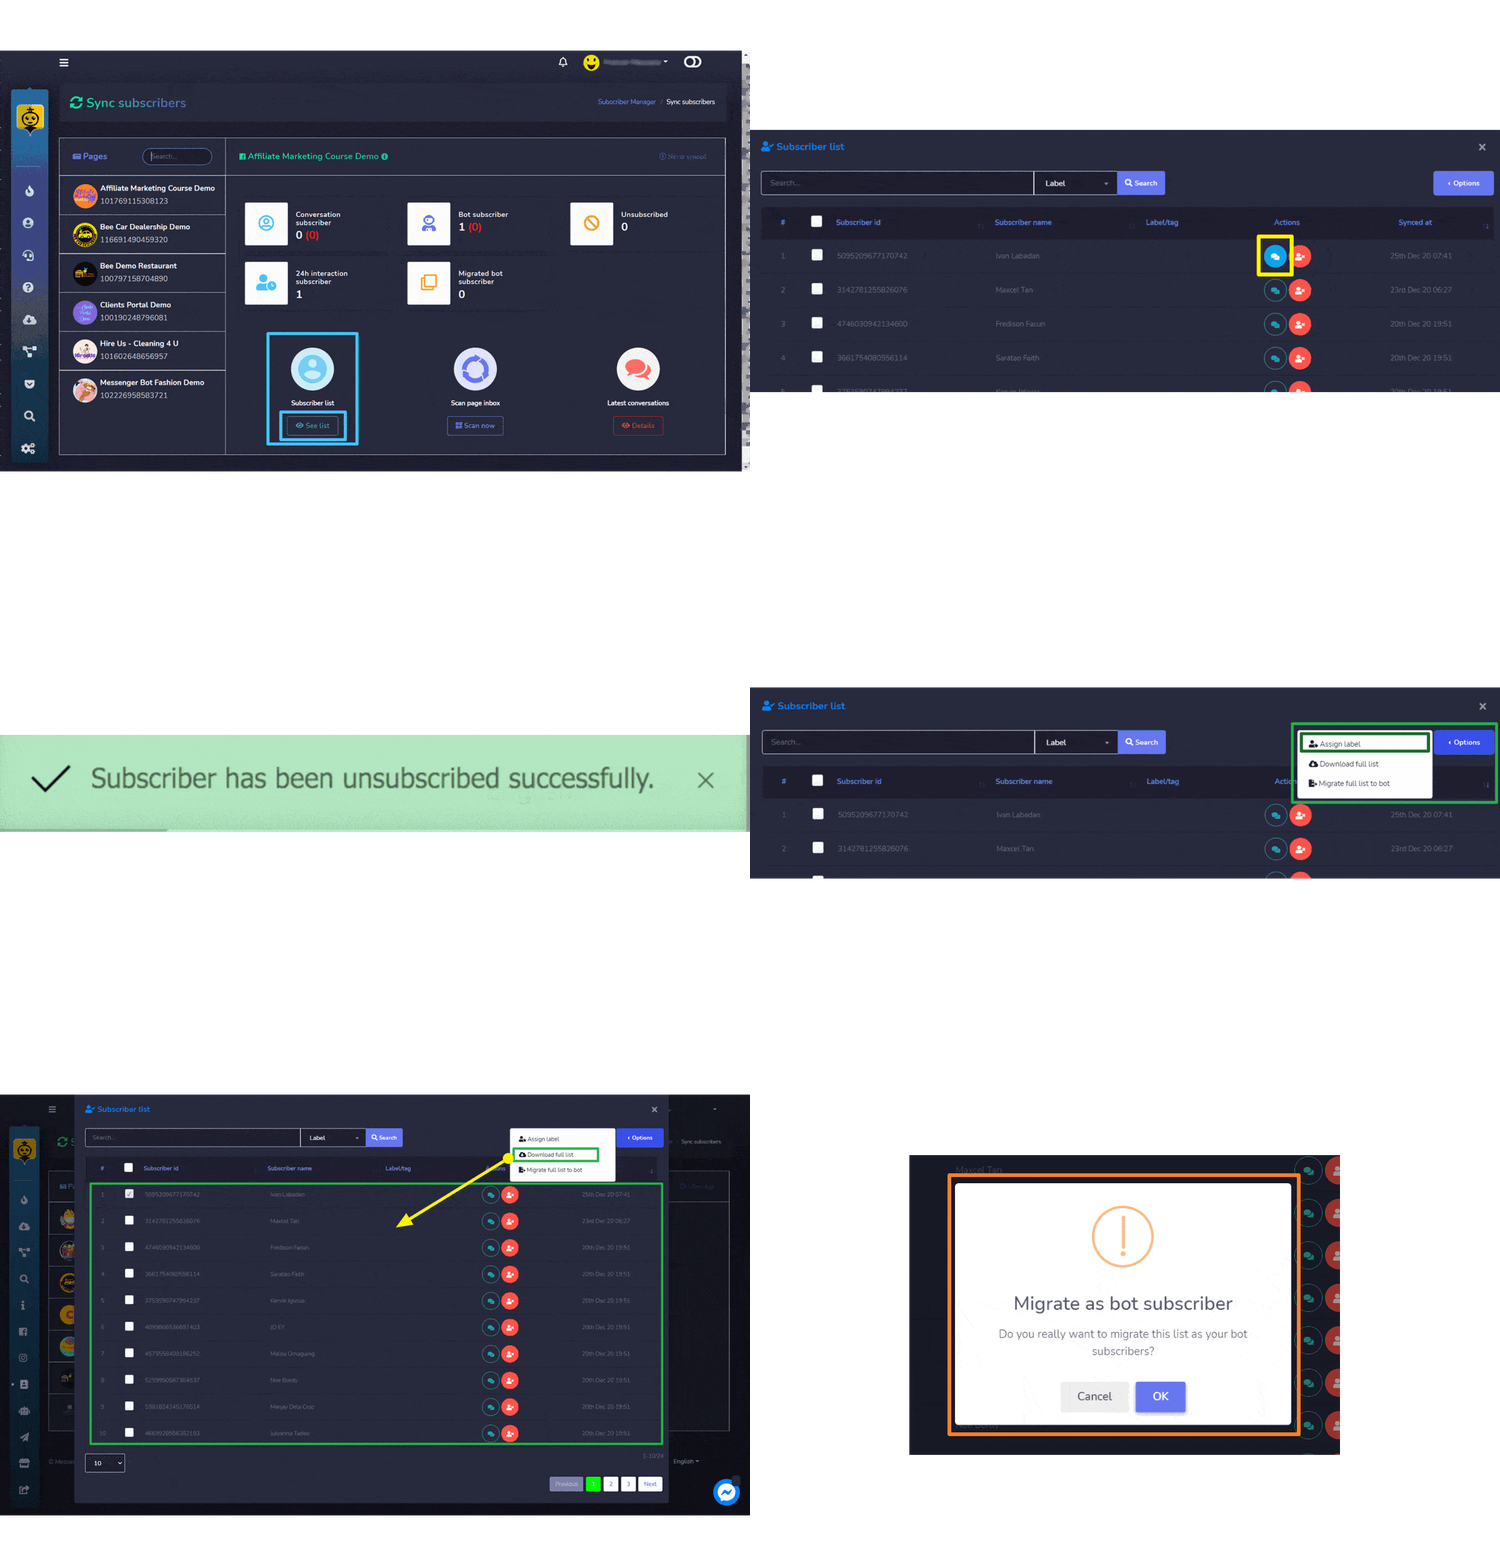
To access the sync subscribers section, select Sync subscribers as shown below.
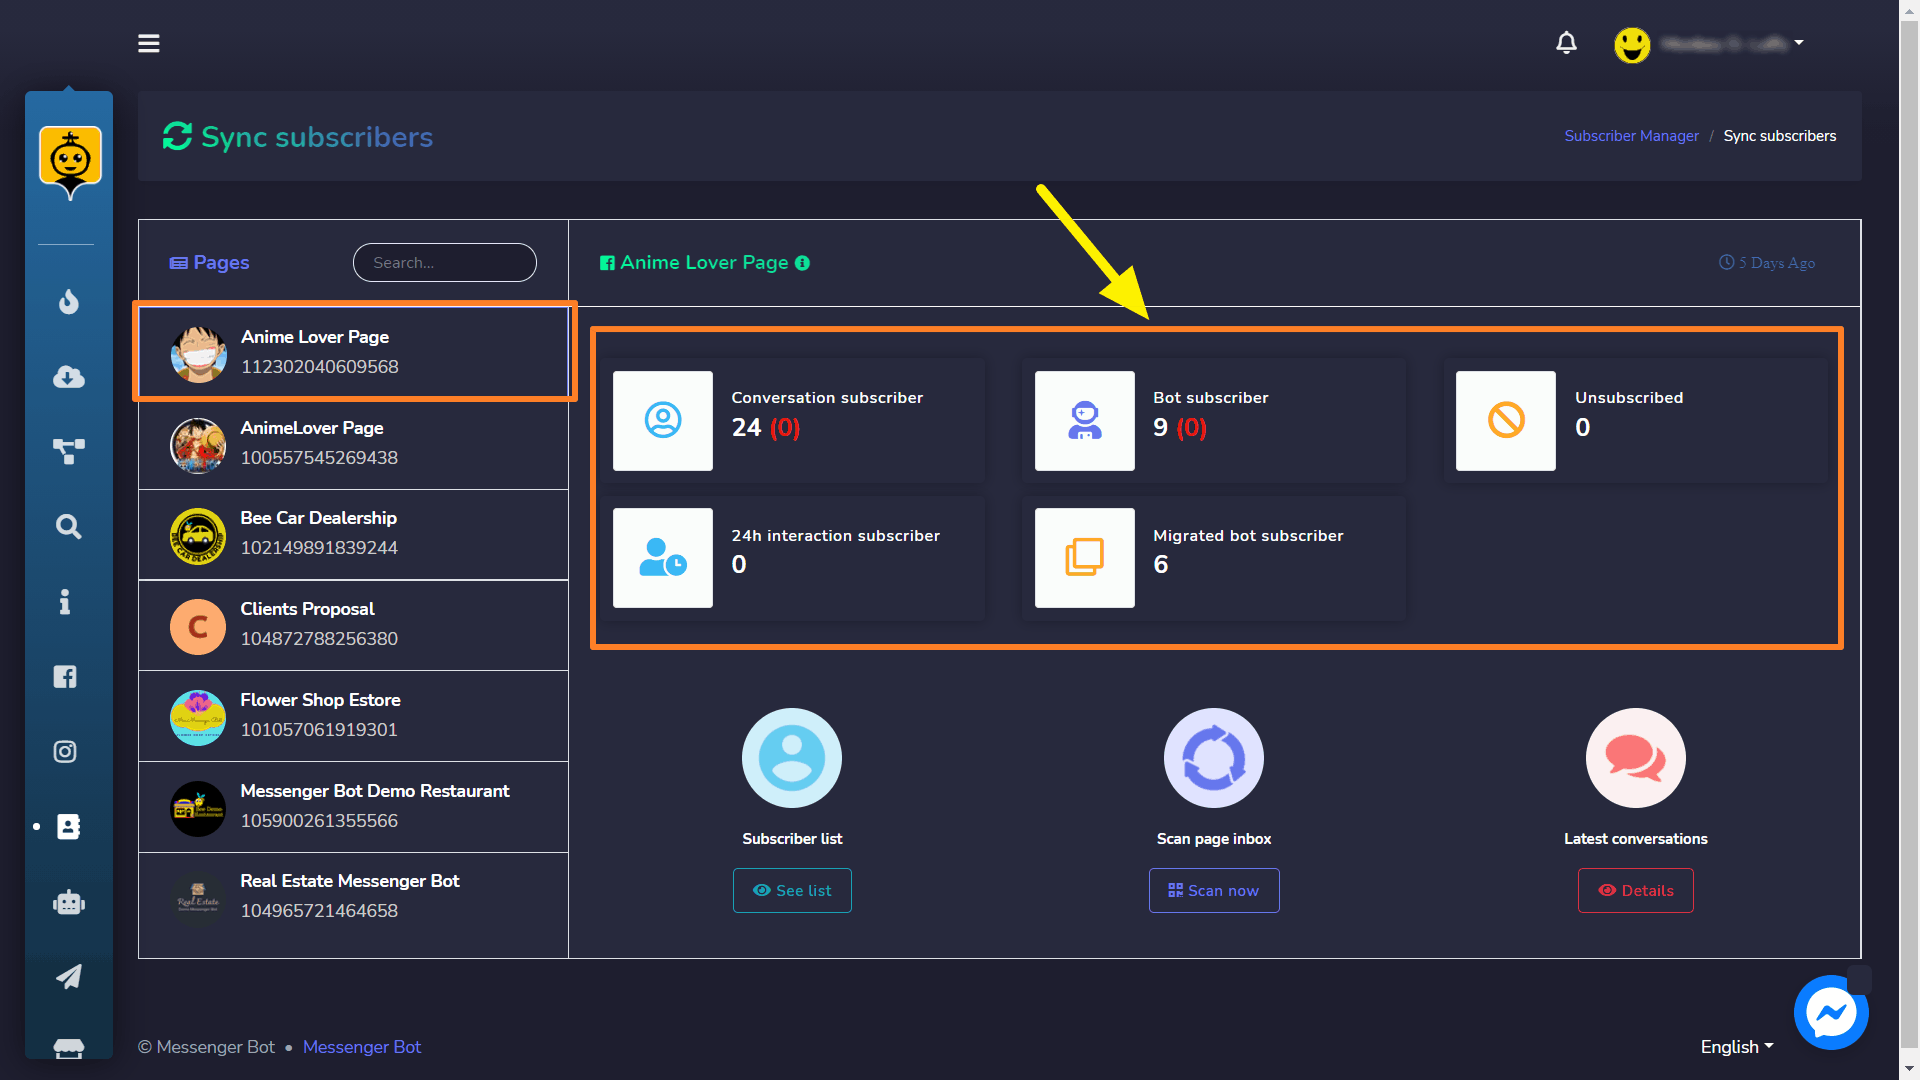
A dashboard will appear containing a number of each of the following subscribers:
- Conversation subscriber
- Bot subscriber
- Unsubscribed
- 24h interaction subscriber
- Migrated bot subscriber
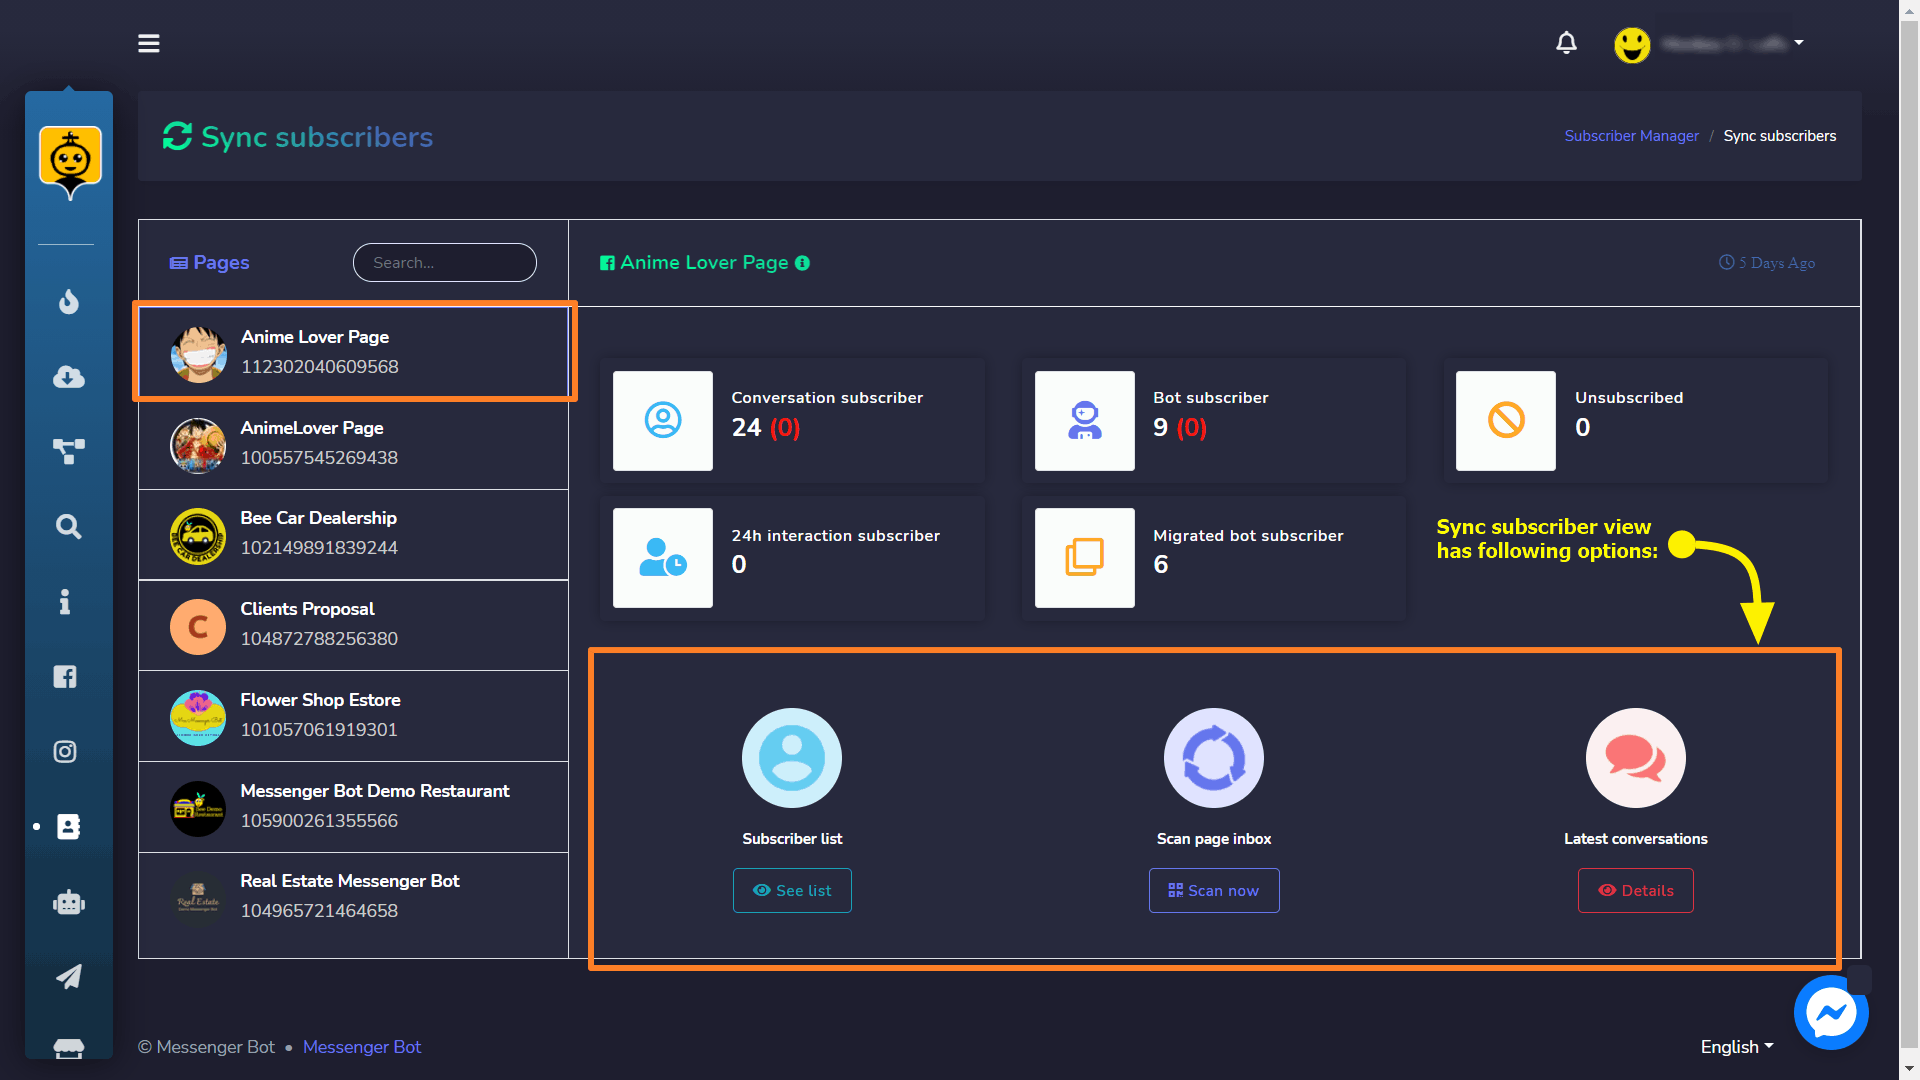
The Sync subscriber view has the following options:
- Subscriber list
- Scan page inbox
- Latest conversation
Subscriber list
You can view the subscriber by following the steps given below:
- Select See list option from the Subscriber List.
- A modal containing a list of all subscriber’s names and IDs will appear on the screen. Users can search for a particular subscriber by using the search bar. Users can also bulk select the subscribers to perform different actions like Assign label, Download list, etc. Users can also search for a particular label for a narrow search.
- To visit the comment, select against the subscriber whose comment you want to view.
- To unsubscribe the subscriber, select against the subscriber you want to unsubscribe. A toast message will appear at the right bottom of your screen.
- To perform different actions on subscriber list, you can either bulk select or select separately the subscribers and perform following actions by selecting Options button:
- Assign label: You can select individually or bulk select the subscribers and then assign the label to selected subscribers.
- Download full list: You download the .CSV file version of the list of subscribers using this option.
- Migrate full list to bot: You can select individually or bulk select the subscribers and then migrate the list to bot subscribers list.
| Note: | |
| · In case if you don’t have selected any subscriber then it will not assign any label or migrate list to bot | |
Scan page inbox
You can import the subscribers and scan the page inbox by following the steps given below:
- Select Scan now option from the Scan page inbox.
- A modal containing Scan latest leads and Folder options will appear. Select the number of subscribers in Scan latest leads field from the dropdown menu. Select the folder which you want to scan from the Folder dropdown menu.
- Select Start scanning.
All selected subscribers will be imported successfully.

Latest Conversations
You can access the latest conversations by following the steps given below:
- Select Details option from Latest Conversations
- A modal will appear containing a list of messages from different subscribers. You can order the list by selecting the arrows in ascending or descending order. You can refresh the list by selecting
 button. You can search for a particular message using the search bar. The table provides a total count of message along with the summary of time, when it was sent and conversation link.
 - You can access the conversation by selecting the conversation option against the comment you want to view.
- You can access the conversation and redirect to the inbox as well from this modal by selecting Go to inbox option against the comment you want to view.

Bot subscribers
To access the bot subscribers section, tab on Subscriber Manager then select Bot Subscribers.
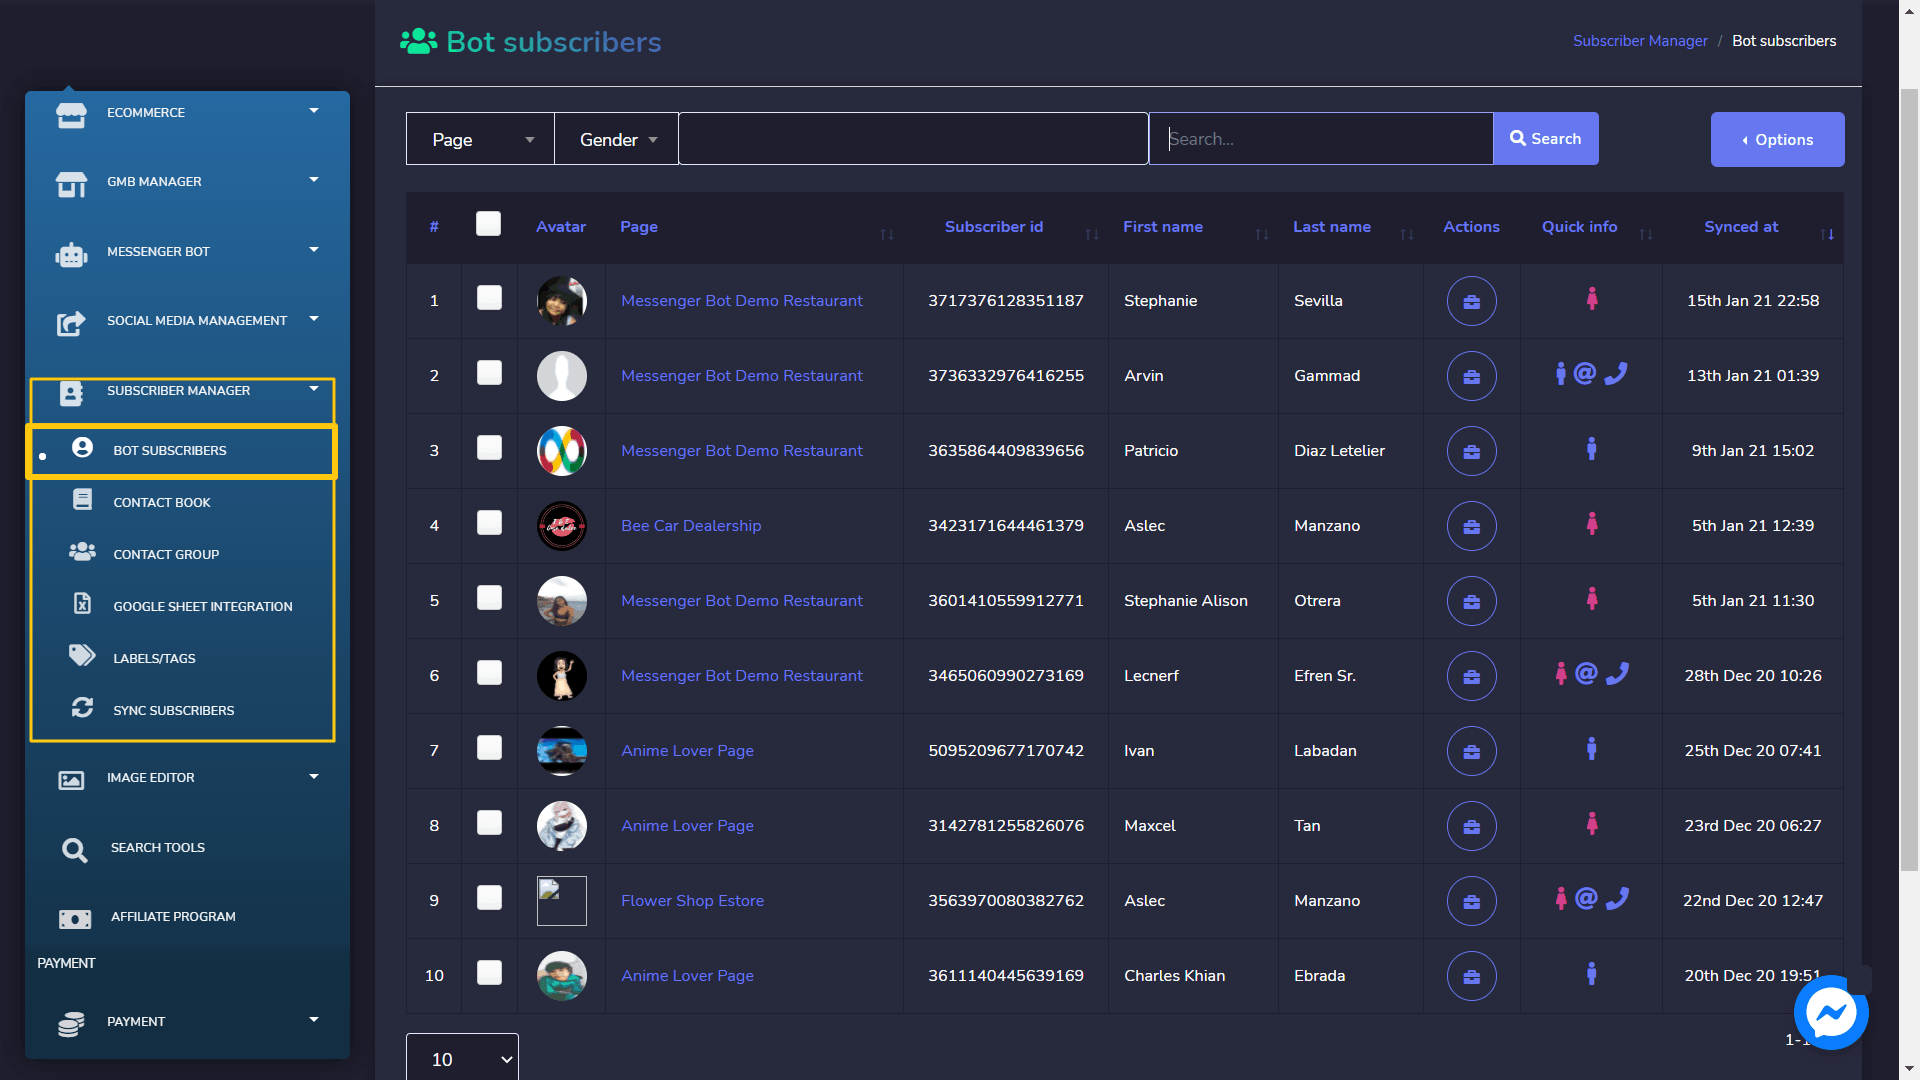
A list of bot subscribers will appear on your screen. It will provide information of your bot subscribers, which includes the avatar, first & last name of the bots, and the time they synced. You can arrange the list in ascending or descending order by selecting the arrows from the table header. You can search for a particular bot by using the search bar. You can limit the number of bots you want to view per page.
Subscriber Actions
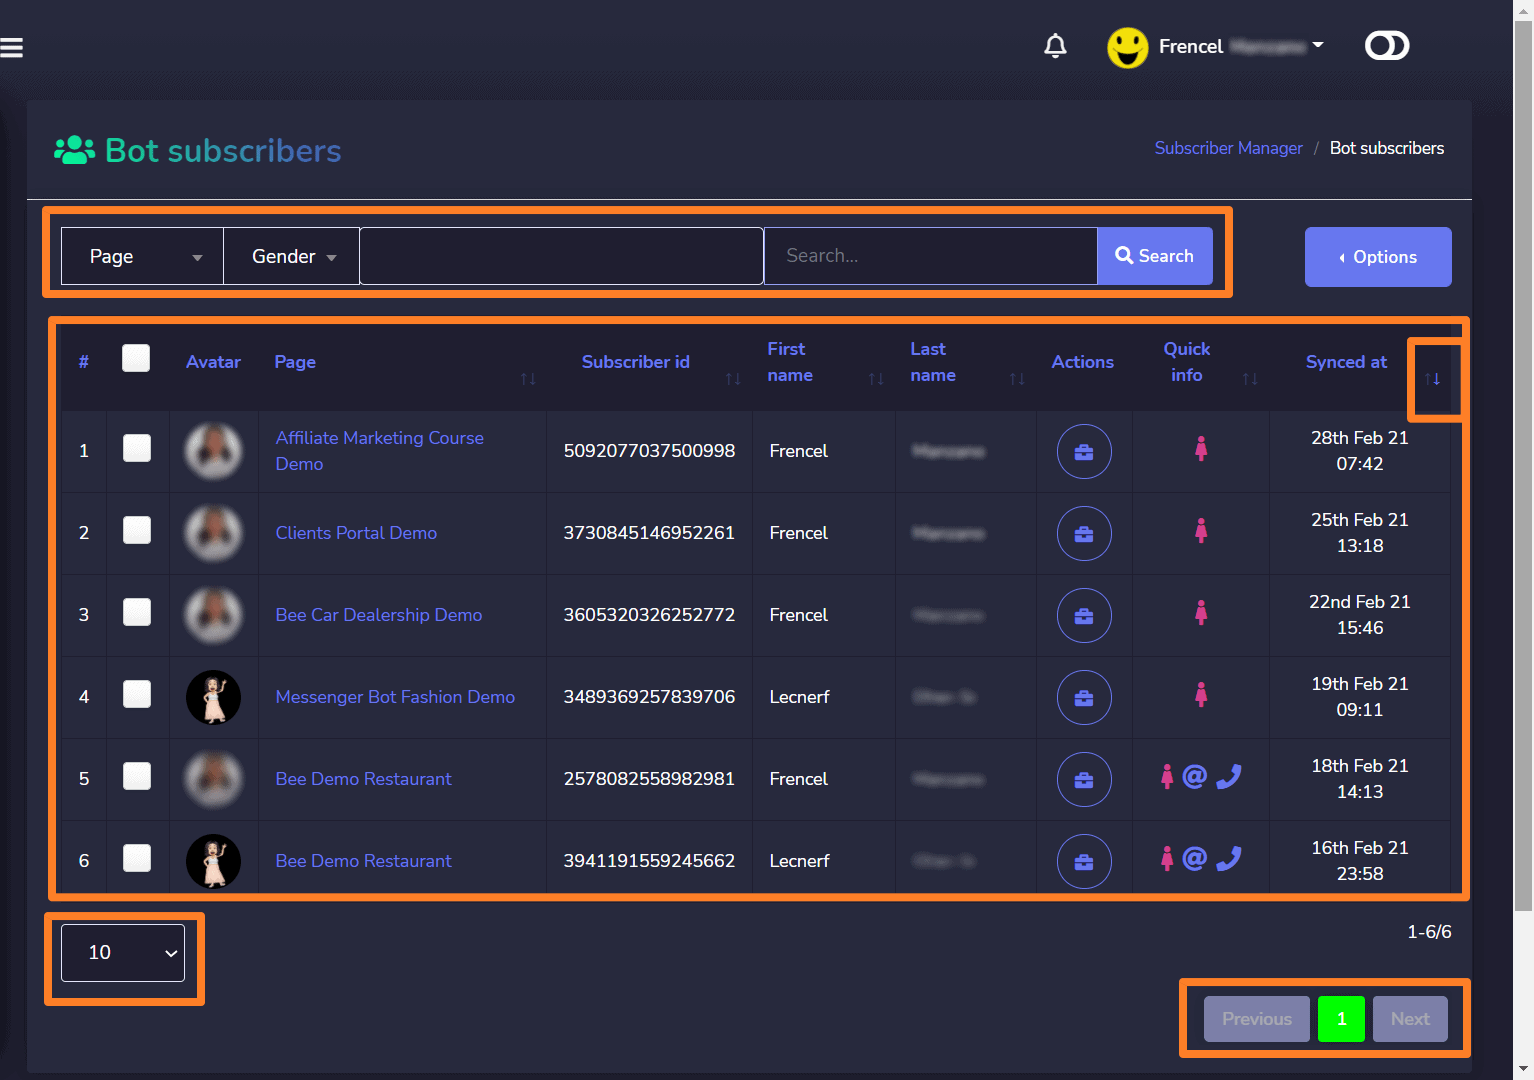
To perform different bot subscriber actions, follow the steps given below:
- Click on
 icon to perform different subscriber actions.
 - A subscribers actions window will appear. Enter the subscribers data in Labels You can also create a new label by selecting create label.
- Choose a sequence for Message sequence field from the dropdown menu.
- To perform further actions, select
 icon against the name of the subscriber. It has three options:
- Pause bot reply: You can pause the bot reply by selecting
 Pause bot reply option from the dropdown menu.
 - Sync subscriber data: You can synchronize the data of your subscriber by using Sync subscriber data option from the dropdown menu.
- Delete subscriber data: You are also allowed to permanently delete the subscriber from the database by selecting
 Delete subscriber data option from the dropdown menu.
- Pause bot reply: You can pause the bot reply by selecting
- Select Save changes option to save your actions in Subscriber data
Labels/tags
You can create new labels/tags and use them in your posts and comment. Each label has a specific ID. These labels can be used throughout multiple features of the Messenger Bot application.
To access this section, select Labels/Tags under the Subscriber Manager tab on the left menu.
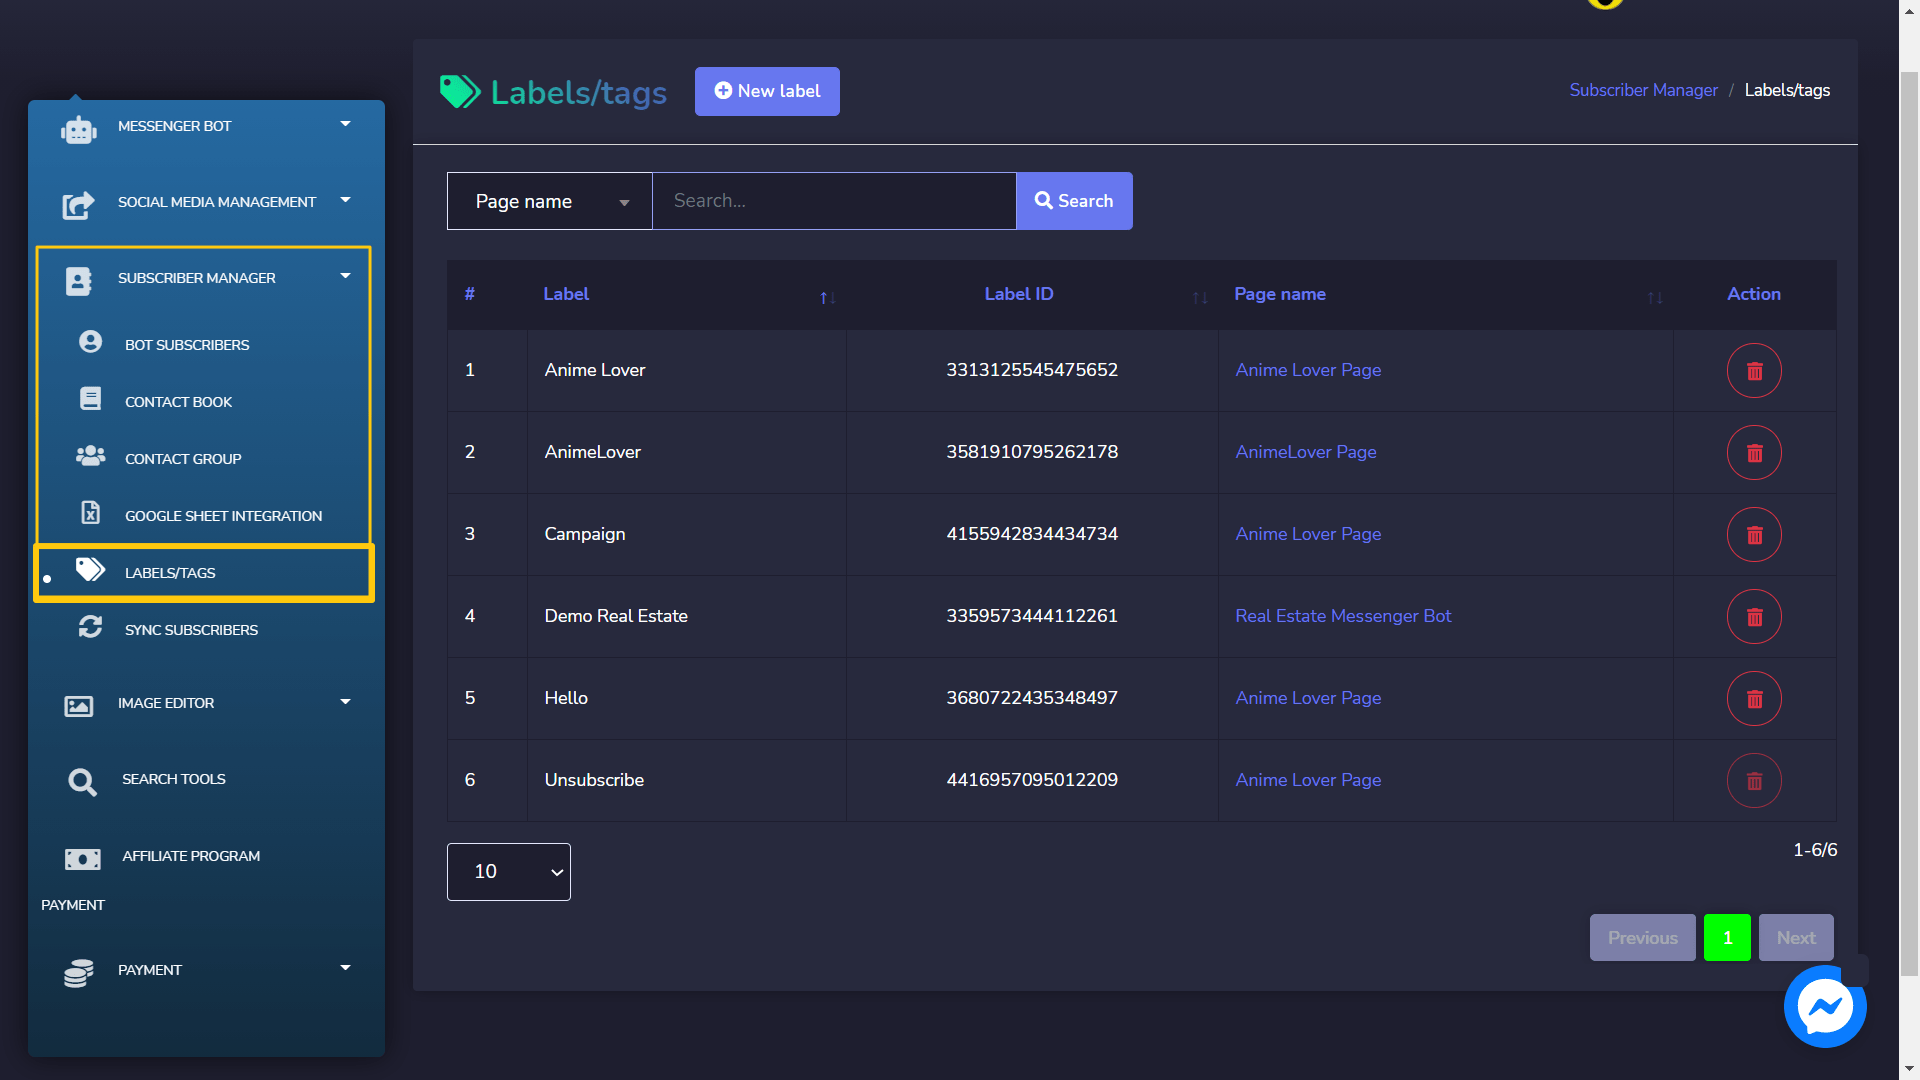
A list of labels/tags will appear on your screen. It will provide information about your created labels along with their IDs.
You can arrange the list in ascending or descending order by selecting the arrows from the table header. You can search for a particular label by using the search bar. You can limit the number of labels you want to view per page. You can select the page for which you want to view the labels.
You can delete the label by selecting the icon against the label you want to delete.

Create New Label
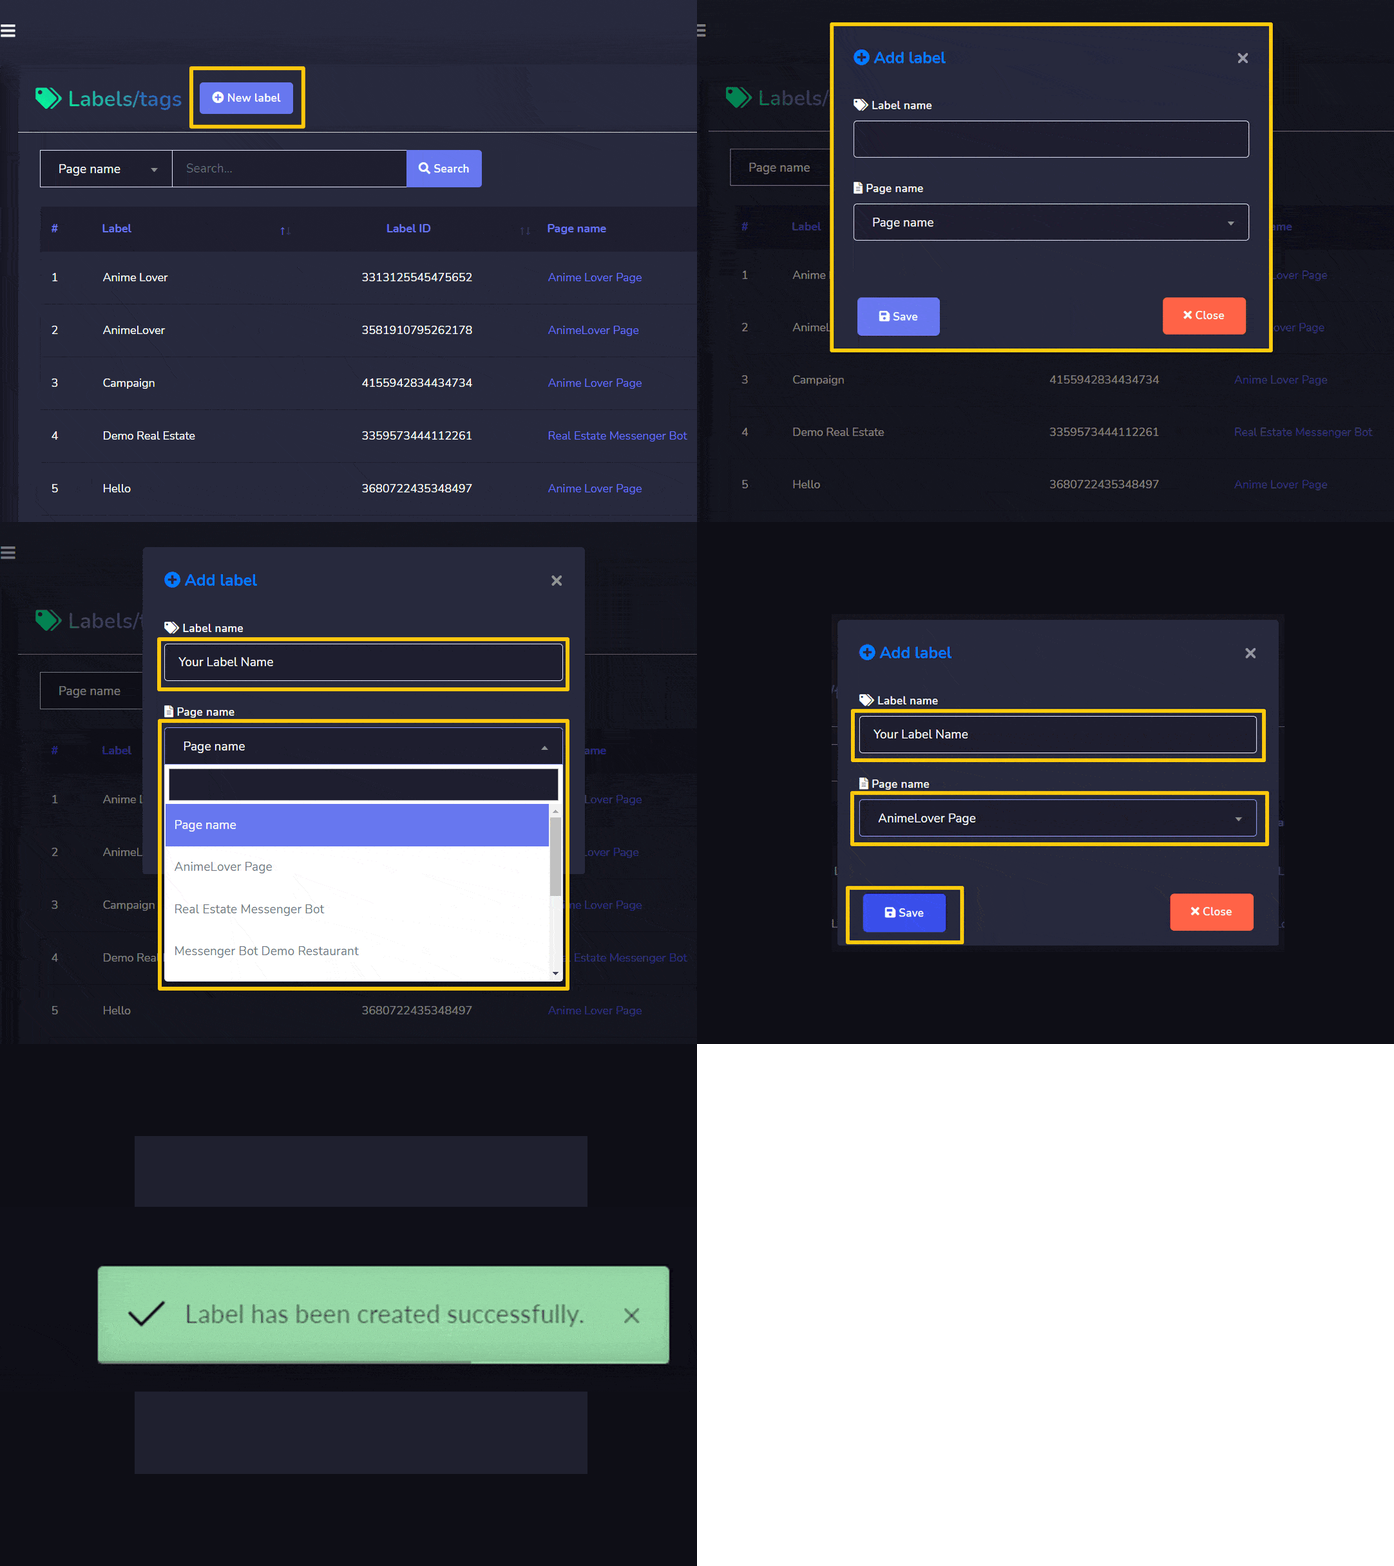
You can create a new label from the Labels/tags screen. Just follow the steps given below:
- Select New label from the top of the Labels/tags screen.
- A modal Add label will appear on the screen. You need to provide:
- Label name: a new label name
- Page name: for which you want to make this label
- Select Save, your new label will be created successfully.
